編輯:關於Android編程
本文實例介紹了Android實現ImageView圖片雙擊放大及縮小的相關技巧,分享給大家供大家參考,具體內容如下
public class DoubleScaleImageView extends ImageView implements OnTouchListener, OnGlobalLayoutListener {
  private boolean isFirst = false;
  private float doubleScale;// 雙擊放大的值
  private Matrix mScaleMatrix;
  private float defaultScale;// 默認的縮放值
  private int mLastPinterCount;// 記錄上一次多點觸控的數量
  private float mLastX;
  private float mLastY;
  private int mTouchSlop;
  private boolean isCanDrag;
  private boolean isCheckLeft;
  private boolean isCheckTop;
  private GestureDetector mGestureDetector;
  public DoubleScaleImageView(Context context) {
    this(context, null);
  }
  public DoubleScaleImageView(Context context, AttributeSet attrs) {
    this(context, attrs, 0);
  }
  @SuppressLint("ClickableViewAccessibility")
  public DoubleScaleImageView(Context context, AttributeSet attrs, int defStyleAttr) {
    super(context, attrs, defStyleAttr);
    mScaleMatrix = new Matrix();
    setScaleType(ScaleType.MATRIX);
    setOnTouchListener(this);
    // getScaledTouchSlop是一個距離,表示滑動的時候,手的移動要大於這個距離才開始移動控件。如果小於這個距離就不觸發移動控件
    mTouchSlop = ViewConfiguration.get(context).getScaledTouchSlop();
    mGestureDetector = new GestureDetector(context, new GestureDetector.SimpleOnGestureListener() {
      @Override
      public boolean onDoubleTap(MotionEvent e) {
        float x = e.getX();
        float y = e.getY();
        if (getScale() < doubleScale) {
          mScaleMatrix.postScale(doubleScale / getScale(), doubleScale / getScale(), x, y);// 放大
        }
        else {
          mScaleMatrix.postScale(defaultScale / getScale(), defaultScale / getScale(), x, y);// 縮小
        }
        setImageMatrix(mScaleMatrix);
        return super.onDoubleTap(e);
      }
    });
  }
  @Override
  protected void onAttachedToWindow() {// view附加到窗體上時調用該方法
    super.onAttachedToWindow();
    getViewTreeObserver().addOnGlobalLayoutListener(this);
  }
  @SuppressWarnings("deprecation")
  @Override
  protected void onDetachedFromWindow() {// 將視圖從窗體上分離的時候調用該方法。
    super.onDetachedFromWindow();
    getViewTreeObserver().removeGlobalOnLayoutListener(this);
  }
  @Override
  public void onGlobalLayout() {// 在這個方法中獲取ImageView加載完成後的圖片
    if (!isFirst) {
      // 獲取控件的寬度和高度
      int width = getWidth();
      int height = getHeight();
      // 得到我們的圖片以及圖片的寬度及高度
      Drawable drawable = getDrawable();
      if (drawable == null) { return; }
      int imageWidth = drawable.getIntrinsicWidth();// 圖片的寬度
      int imageHeight = drawable.getIntrinsicHeight();// 圖片的高度
      float scale = 1.0f;
      // 如果圖片寬度大於控件寬度,但是圖片高度小於控件 高度,我們要縮小圖片
      if (imageWidth > width && imageHeight < height) {
        scale = width * 1.0f / imageWidth;
      }
      // 如果圖片寬度小於控件寬度,但是圖片高度大於控件 高度,我們要縮小圖片
      if (imageWidth < width && imageHeight > height) {
        scale = height * 1.0f / imageHeight;
      }
      // 如果圖片的寬度都 大於或小於控件寬度,我們則要對圖片進行對應縮放,保證圖片占滿控件
      if ((imageWidth > width && imageHeight > height) || (imageWidth < width && imageHeight < height)) {
        scale = Math.min(width * 1.0f / imageWidth, height * 1.0f / imageHeight);
      }
      // 初始化對應的縮放值
      defaultScale = scale;
      doubleScale = defaultScale * 2;
      // 圖片縮放後,將圖片要移動到控件中心
      int dx = width / 2 - imageWidth / 2;
      int dy = height / 2 - imageHeight / 2;
      mScaleMatrix.postTranslate(dx, dy);
      mScaleMatrix.postScale(defaultScale, defaultScale, width / 2, height / 2);
      setImageMatrix(mScaleMatrix);
      isFirst = true;
    }
  }
  @SuppressLint("ClickableViewAccessibility")
  @Override
  public boolean onTouch(View v, MotionEvent event) {
    if (mGestureDetector.onTouchEvent(event)) { return true; }
    float x = 0;
    float y = 0;
    int pointerCount = event.getPointerCount();// 獲取放在屏幕上的手指數量
    for (int i = 0; i < pointerCount; i++) {
      x += event.getX(i);
      y += event.getY(i);
    }
    x /= pointerCount;
    y /= pointerCount;
    if (mLastPinterCount != pointerCount) {
      isCanDrag = false;
      mLastX = x;
      mLastY = y;

    }
    mLastPinterCount = pointerCount;
    switch (event.getAction()) {
      case MotionEvent.ACTION_MOVE:
        float dx = x - mLastX;
        float dy = y - mLastY;
        isCanDrag = isMove(dx, dy);
        if (isCanDrag) {
          RectF rectf = getMatrixRectf();
          if (null != getDrawable()) {
            isCheckLeft = isCheckTop = true;
            if (rectf.width() < getWidth()) {// 如果圖片寬度小於控件寬度(屏幕寬度)不允許橫向移動
              dx = 0;
              isCheckLeft = false;
            }
            if (rectf.height() < getHeight()) {// 如果圖片高度小於控件高度(屏幕高度)不允許縱向移動
              dy = 0;
              isCheckTop = false;
            }
            mScaleMatrix.postTranslate(dx, dy);
            checkTranslateWithBorder();
            setImageMatrix(mScaleMatrix);
          }
        }
        mLastX = x;
        mLastY = y;
        break;
      case MotionEvent.ACTION_UP:
      case MotionEvent.ACTION_CANCEL:
        mLastPinterCount = 0;
        break;
    }
    return true;
  }
  /**
   * 移動圖片時進行邊界檢查
   * @description:
   * @date 2016-1-8 下午4:02:24
   */
  private void checkTranslateWithBorder() {
    RectF rectf = getMatrixRectf();
    float delX = 0;
    float delY = 0;
    int width = getWidth();
    int height = getHeight();
    if (rectf.top > 0 && isCheckTop) {
      delY = -rectf.top;
    }
    if (rectf.bottom < height && isCheckTop) {
      delY = height - rectf.bottom;
    }
    if (rectf.left > 0 && isCheckLeft) {
      delX = -rectf.left;
    }
    if (rectf.right < width && isCheckLeft) {
      delX = width - rectf.right;
    }
    mScaleMatrix.postTranslate(delX, delY);
  }
  // 判斷是否有移動
  private boolean isMove(float x, float y) {
    return Math.sqrt(x * x + y * y) > mTouchSlop;
  }
  /**
   * 獲取圖片的位置
   * @description:
   * @date 2016-1-8 上午9:02:10
   */
  private RectF getMatrixRectf() {
    Matrix matrix = mScaleMatrix;
    RectF recft = new RectF();
    if (getDrawable() != null) {
      recft.set(0, 0, getDrawable().getIntrinsicWidth(), getDrawable().getIntrinsicHeight());
      matrix.mapRect(recft);
    }
    return recft;
  }

  // 獲取當前圖片的縮放值
  private float getScale() {
    float values[] = new float[9];
    mScaleMatrix.getValues(values);
    return values[Matrix.MSCALE_X];
  }
}
以上就是安卓實現ImageView圖片雙擊放大及縮小的全部代碼,希望對大家的學習有所幫助。
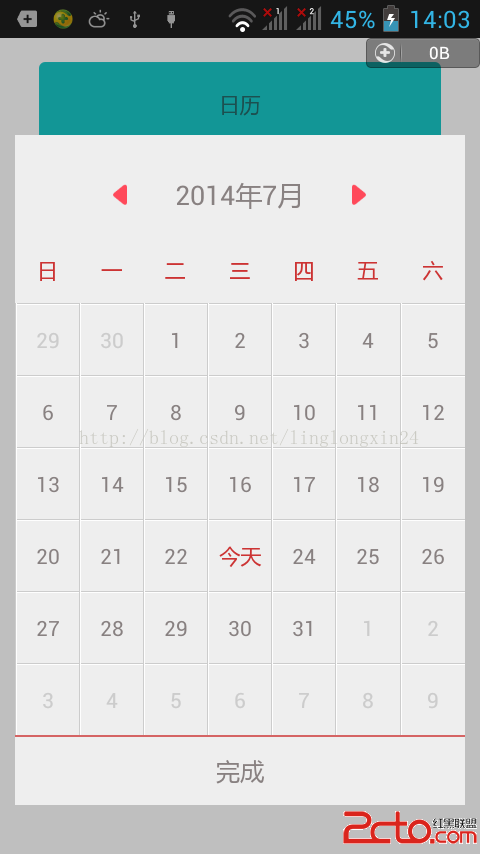 Android又一個超漂亮的日歷控件
※效果 ※使用方法 package com.fancyy.calendarweight; import java.util.ArrayList; import j
 React Native 原生模塊開發筆記 (Android/iOS)
目錄: 環境 : Mac Xcode WebStorm Android Studio node v6.4.0 react-native-cli: 1.0.0 react
 android:強大的圖片下載和緩存庫Picasso
1.Picasso簡介Picasso是Square公司出品的一個強大的圖片下載和緩存圖片庫。官方網址是:http://square.github.io/picasso/只
 Android UI組件進階(2)——仿Windows對話框
Android UI組件進階(2)——仿Windows對話框 在開始本章前先祝大家中秋節快樂哈,相信很多上班的朋友都是放三天假的哈! 有時間的話回家陪陪父母吧!樹欲靜