編輯:關於Android編程
在消息通知時,我們經常用到兩個組件Toast和Notification。特別是重要的和需要長時間顯示的信息,用Notification就最 合適不過了。當有消息通知時,狀態欄會顯示通知的圖標和文字,通過下拉狀態欄,就可以看到通知信息了,Android這一創新性的UI組件贏得了用戶的一 致好評,就連蘋果也開始模仿了。今天我們就結合實例,探討一下Notification具體的使用方法。 首先說明一下我們需要實現的功能是:在程序啟動時,發出一個通知,這個通知在軟件運行過程中一直存在,相當於qq的托盤一樣。
然後再演示一下普通的通知和自定義視圖通知, 那我們就先建立一個安卓項目。
然後編輯/res/layout/main.xml文件,代碼如下:
<LinearLayout xmlns:android="http://schemas.android.com/apk/res/android"
 xmlns:tools="http://schemas.android.com/tools"
 android:layout_width="match_parent"
 android:layout_height="match_parent"
 android:background="@android:color/black"
 android:orientation="vertical" >

 <TextView
  android:layout_width="match_parent"
  android:layout_height="wrap_content"
  android:gravity="center_horizontal"
  android:text="@string/title"
  android:textColor="#0f0"
  android:textSize="20sp"
  android:text />

 <Button
  android:layout_width="match_parent"
  android:layout_height="wrap_content"
  android:layout_marginLeft="50dp"
  android:layout_marginRight="50dp"
  android:layout_marginTop="30dp"
  android:onClick="normal"
  android:text="@string/notification"
  android:textColor="#0f0"
  android:textSize="20sp" />

 <Button
  android:layout_width="match_parent"
  android:layout_height="wrap_content"
  android:layout_marginLeft="50dp"
  android:layout_marginRight="50dp"
  android:layout_marginTop="30dp"
  android:onClick="custom"
  android:text="@string/custom"
  android:textColor="#0f0"
  android:textSize="20sp" />

</LinearLayout>
上面的布局很簡單,有兩個按鈕分別用於啟動普通的notification和自定義的notification。
接下來自定義一個布局用於顯示自定義的通知的。
<?xml version="1.0" encoding="utf-8"?>
<LinearLayout xmlns:android="http://schemas.android.com/apk/res/android"
 android:layout_width="match_parent"
 android:layout_height="match_parent"
 android:background="#000"
 android:orientation="vertical" >

 <ImageView
  android:id="@+id/iv"
  android:layout_width="match_parent"
  android:layout_height="wrap_content"
  android:contentDescription="@string/action_settings"
  android:src="@drawable/ic_launcher" />

 <TextView
  android:id="@+id/tv"
  android:layout_width="match_parent"
  android:layout_height="wrap_content"
  android:gravity="center_horizontal"
  android:textColor="#0f0"
  android:textSize="15sp" />

</LinearLayout>
接下來就是上代碼。
package com.itfom.notification;

import android.app.Activity;
import android.app.Notification;
import android.app.NotificationManager;
import android.app.PendingIntent;
import android.content.Context;
import android.content.Intent;
import android.net.Uri;
import android.os.Bundle;
import android.os.Environment;
import android.view.View;
import android.widget.RemoteViews;

public class MainActivity extends Activity {

 private NotificationManager mNotificationManager;
 private Context context;
 private Notification notification;
 @Override
 protected void onCreate(Bundle savedInstanceState) {
 super.onCreate(savedInstanceState);
 setContentView(R.layout.activity_main);
 }

 //普通的通知
 @SuppressWarnings("deprecation")
 public void normal(View v){
 //創建通知
 createNotification("普通的通知");
 //把通知放在正在運行欄目中
 notification.flags|=Notification.FLAG_ONGOING_EVENT;
 //設定默認聲音
 notification.defaults|=Notification.DEFAULT_SOUND;
 //設定默認震動
 notification.defaults|=Notification.DEFAULT_VIBRATE;
 //設定默認LED燈提醒
 notification.defaults|=Notification.DEFAULT_LIGHTS;
 //設置點擊後通知自動清除
 notification.defaults|=Notification.FLAG_AUTO_CANCEL;

 String textTitle="Notification示例";
 String textContent="程序正在運行,點擊此處跳轉到演示界面";

 Intent it=new Intent(context, MainActivity.class);
 PendingIntent pendintent=PendingIntent.getActivity(context, 0, it, 0);
 notification.setLatestEventInfo(context, textTitle, textContent, pendintent);
 mNotificationManager.notify(0, notification);
 }

 //自定義的通知
 public void custom(View v){
 //創建通知
 createNotification("個性化的通知");
 //自定義通知的聲音
 notification.sound=Uri.parse(Environment.getExternalStorageDirectory()+"/non.mp3");
 //自定義震動參數分別為多長時間開始震動、第一次震動的時間、停止震動的時間
 long[] vibrate={0,100,200,300};
 notification.vibrate=vibrate;
 //自定義閃光燈的方式
 notification.ledARGB=0xff00ff00;
 notification.ledOnMS=500;
 notification.ledOffMS=500;
 notification.flags|=Notification.FLAG_SHOW_LIGHTS;

 RemoteViews contentView=new RemoteViews(this.getPackageName(),R.layout.notify);
 contentView.setTextViewText(R.id.tv, "這是個性化的通知");
 //指定個性化的視圖
 notification.contentView=contentView;
 Intent it=new Intent(context, MainActivity.class);
 PendingIntent pendintent=PendingIntent.getActivity(context, 0, it, 0);
 //指定內容視圖
 notification.contentIntent=pendintent;
 mNotificationManager.notify(1, notification);
 }
 //自定義一個方法創建通知
 @SuppressWarnings("deprecation")
 public Notification createNotification(String text){
 context = this;
 mNotificationManager=(NotificationManager) this.getSystemService(Context.NOTIFICATION_SERVICE);
 int icon=R.drawable.ic_launcher;
 long when=System.currentTimeMillis();
 return notification = new Notification(icon, text, when);
 }

 //重寫onBackpressed事件
 @Override
 public void onBackPressed() {
 super.onBackPressed();
 finish();
 //取消通知
 mNotificationManager.cancel(0);
 android.os.Process.killProcess(android.os.Process.myPid());
 System.exit(0);
 }
}
上面的代碼我們定義了一個方法createNotification(String text).該方法是用於創建一個通知。注意之所以這樣寫是因為。不管是普通的通知還是自定義的通知。前面的創建過程都是一樣的。然後我們實現了兩個按鈕的點擊事件。
運行結果如下所示:

當點擊兩個按鈕時會出現以下的情況:

注 :這裡是有聲音效果的。如果手機支持閃光,還有LED效果。
以上就是關於Android中Notification通知提醒實現的過程詳解,最近更新了許多關於Android中Notification通知提醒的文章,希望對大家的學習有所幫助。
 Android實現藍牙客戶端與服務器端通信示例
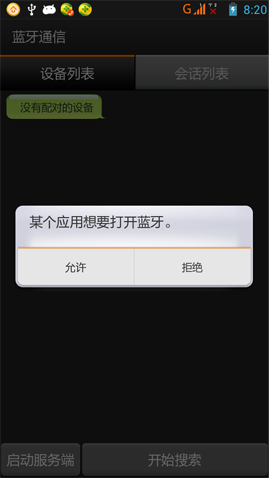
一、首先說明:藍牙通信必須用手機測試,因為avd裡沒有相關的硬件,會報錯! 好了,看看最後的效果圖: 二、概述: 1.判斷是否支持BluetoothBluet
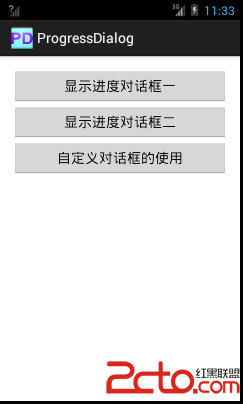 Android對話框(二)ProgressDialog
main.xml custom_dialog.xml package com.example.p
 手機進水怎麼辦?
當你的手機不慎掉進水裡,且你很快就把它撈出來,接下來如何“挽救”你的手機,就可以試試以下的方法。三步“營救”
 Android仿網易客戶端頂部導航欄效果
最近剛寫了一個網易客戶端首頁導航條的動畫效果,現在分享出來給大家學習學習。我說一下這個效果的核心原理。下面是效果圖: &nb