編輯:關於Android編程
最近剛寫了一個網易客戶端首頁導航條的動畫效果,現在分享出來給大家學習學習。我說一下這個效果的核心原理。下面是效果圖:

首先是布局,這個布局是我從網易客戶端反編譯後弄來的。大家看後應該明白,布局文件如下:
<FrameLayout
    android:id="@id/column_navi"
    android:layout_width="fill_parent"
    android:layout_height="wrap_content"
    android:background="@drawable/top_column_bg" >

    <HorizontalScrollView
      android:id="@id/column_scrollview"
      android:layout_width="fill_parent"
      android:layout_height="45.0dip"
      android:layout_gravity="center"
      android:fadingEdge="vertical"
      android:paddingLeft="9.0dip"
      android:paddingRight="9.0dip"
      android:scrollbars="none" >

      <FrameLayout
        android:layout_width="wrap_content"
        android:layout_height="fill_parent" >

        <ImageView
          android:id="@id/column_slide_bar"
          android:layout_width="wrap_content"
          android:layout_height="wrap_content"
          android:layout_gravity="center_vertical"
          android:src="@drawable/slidebar" />

        <LinearLayout
          android:id="@id/column_title_layout"
          android:layout_width="wrap_content"
          android:layout_height="fill_parent"
          android:layout_gravity="center_vertical"
          android:gravity="center_vertical"
          android:paddingLeft="5px"
          android:weightSum="6.0" />
      </FrameLayout>
    </HorizontalScrollView>

    <ImageButton
      android:id="@id/column_to_left"
      android:layout_width="wrap_content"
      android:layout_height="wrap_content"
      android:layout_alignParentLeft="true"
      android:layout_centerVertical="true"
      android:layout_gravity="left|center"
      android:layout_marginLeft="2.0dip"
      android:layout_marginRight="1.0dip"
      android:background="#00000000"
      android:src="@drawable/arr_left"
      android:visibility="visible" />

    <ImageButton
      android:id="@id/column_to_right"
      android:layout_width="wrap_content"
      android:layout_height="wrap_content"
      android:layout_alignParentRight="true"
      android:layout_centerVertical="true"
      android:layout_gravity="right|center"
      android:layout_marginLeft="1.0dip"
      android:layout_marginRight="2.0dip"
      android:background="#00000000"
      android:src="@drawable/arr_right"
      android:visibility="visible" />
  </FrameLayout>
這裡用了HorizontalScrollView橫向滾動視圖主要是為了實現當導航欄個數超出屏幕以後可以實現左右移動的效果,這2個ImageButton則是用來實現左右滾動的操作。HorizontalScrollView裡面用的一個框架布局,大家都知道框架布局是一個疊加式的 布局,所以裡面的ImageView會在LinearLayout布局下面一層,這個ImageView就是實現動態背景效果的。而LinearLayout裡面放的是TextView,這裡是在後台程序裡面動態添加。
那要怎樣實現當我點擊一個TextView 後實現後面的ImageView動態移動到我選中的TextView位置呢?這裡我們需要為每一個TextView添加onTouchEvent()時間,並且監聽ACTION_DOWN時間,也就是手指按下的時候,這時我們就啟動一個TranslateAnimation平移動畫,在動畫結束時,再將ImageView移動到textview的位置。移動textview的位置我這裡是動態調整textview的布局來實現的。
下面是實現的代碼:
private void translateImage(MotionEvent event) {
    float x = event.getX();
    float rx = event.getRawX();
    final float nx = rx - x - 12;
    TranslateAnimation trans = null;
    if (nx > lastX) {
      trans = new TranslateAnimation(0, nx - lastX, 0, 0);
    } else if (nx < lastX) {
      trans = new TranslateAnimation(0, (lastX - nx) * -1, 0, 0);
    } else {
      return;
    }
    trans.setDuration(300);

    trans.setAnimationListener(new AnimationListener() {

      @Override
      public void onAnimationStart(Animation animation) {
        // TODO Auto-generated method stub

      }

      @Override
      public void onAnimationRepeat(Animation animation) {
        // TODO Auto-generated method stub

      }

      @Override
      public void onAnimationEnd(Animation animation) {
        FrameLayout.LayoutParams params = (android.widget.FrameLayout.LayoutParams) column_slide_bar
            .getLayoutParams();
        params.leftMargin = (int) nx;
        column_slide_bar.setLayoutParams(params);
      }
    });
    trans.setFillEnabled(true);
    column_slide_bar.startAnimation(trans);
    lastX = (int) nx;
  }
這個方法的開頭我是取到手指按下的textview的坐標位置,而lastX是上一次手指按下的位置,我這裡做了判斷來確定移動的方向,然後給動畫添加了一個動畫監聽事件,在動畫結束時我就動態的把imageview移動到新的坐標位置。setFillEnabled(true);這裡的作用主要是避免動畫亂跳,這裡具體是什麼原因我也還不太清楚,但是設置以後動畫一切都正常。
下面是textview的onTouchEvent事件的代碼:
@Override
  public boolean onTouch(View v, MotionEvent event) {
    if (event.getAction() == MotionEvent.ACTION_DOWN) {
      if (up_text != null) {
        up_text.setTextColor(Color.BLACK);
      } else {
        TextView text = (TextView) context
            .findViewById(R.id.head_lines);
        text.setTextColor(Color.BLACK);
      }
      translateImage(event);
      TextView tv = (TextView) v;
      tv.setTextColor(Color.WHITE);
      up_text = tv;
    }
    return true;
  }
在這段代碼中我主要是實現了textview的字體顏色的變還,大家應該看得懂,沒什麼好說的吧。
最後就是實現HorizontalScrollView控件通過單機左右的imageButton來實現左右移動,這個就是在ImageButton的OnClick事件中來調用HorizontalScrollView的smoothScrollTo(x,y)方法這裡面是傳入新的坐標。下面是實現代碼:
private void addListener() {
  column_to_left.setOnClickListener(new OnClickListener() {

    @Override
    public void onClick(View v) {
      column_scrollview.smoothScrollTo(
          column_scrollview.getScrollX() - 40, 0);
    }
  });
  column_to_right.setOnClickListener(new View.OnClickListener() {

    @Override
    public void onClick(View v) {
      column_scrollview.smoothScrollTo(
          column_scrollview.getScrollX() + 40, 0);
    }
  });
}
下面是動態添加textview的代碼:
private void initView() {
  column_title_layout = (LinearLayout) findViewById(R.id.column_title_layout);
  column_scrollview = (HorizontalScrollView) findViewById(R.id.column_scrollview);
  column_slide_bar = (ImageView) findViewById(R.id.column_slide_bar);
  column_to_left = (ImageButton) findViewById(R.id.column_to_left);
  column_to_right = (ImageButton) findViewById(R.id.column_to_right);

  LinearLayout.LayoutParams params = new LinearLayout.LayoutParams(65,
      LayoutParams.WRAP_CONTENT);
  params.gravity = Gravity.CENTER_HORIZONTAL | Gravity.CENTER_VERTICAL;
  params.leftMargin = 9;

  TextViewOnTouchListener listener = new TextViewOnTouchListener(
      column_slide_bar, this);
  TextView text = null;
  for (int i = 0; i < 6; i++) {
    text = new TextView(this);
    text.setTextSize(16);
    switch (i) {
    case 0:
      text.setId(R.id.head_lines);
      text.setTextColor(Color.WHITE);
      text.setText("頭條");
      break;
    case 1:
      text.setId(R.id.sport);
      text.setTextColor(Color.BLACK);
      text.setText("體育");
      break;
    case 2:
      text.setId(R.id.entertainment);
      text.setTextColor(Color.BLACK);
      text.setText("娛樂");
      break;
    case 3:
      text.setId(R.id.finance);
      text.setTextColor(Color.BLACK);
      text.setText("財經");
      break;
    case 4:
      text.setId(R.id.technology);
      text.setTextColor(Color.BLACK);
      text.setText("科技");
      break;
    case 5:
      text.setId(R.id.more);
      text.setTextColor(Color.BLACK);
      text.setText("更多");
      break;
    }
    text.setOnTouchListener(listener);
    column_title_layout.addView(text, params);
  }
}
下面是ids.xml文件中定義的動態生成控件的id:
<?xml version="1.0" encoding="utf-8"?>
<resources>

  <item name="column_scrollview" type="id"/>
  <item name="column_slide_bar" type="id"/>
  <item name="column_title_layout" type="id"/>
  <item name="column_navi" type="id"/>
  <item name="column_to_left" type="id"/>
  <item name="column_to_right" type="id"/>
  <item name="scroll_layout" type="id"/>
  <item name="vote" type="id"/>
  <item name="comment" type="id"/>
  <item name="picture" type="id"/>
  <item name="topic" type="id"/>
  <item name="news" type="id"/>
  <item name="head_lines" type="id"/>
  <item name="sport" type="id"/>
  <item name="entertainment" type="id"/>
  <item name="finance" type="id"/>
  <item name="technology" type="id"/>
  <item name="more" type="id"/>

</resources>
源碼下載: Android仿網易客戶端頂部導航欄
以上就是本文的全部內容,希望對大家的學習有所幫助,也希望大家多多支持本站。
 優步電話加密服務什麼時候上線 隱號通話方案如何
優步(UBER)-全球即時用車軟件,現已覆蓋全球68個國家,444個城市。Uber旨在為大家帶來更安全、更舒適的出行方式,為了保證雙方的安全和隱私,優步(U
 Android系統截屏功能提取
Android在4.0版本之後同時按電源鍵和音量鍵可以截取當前屏幕,截圖後會有一個過渡動畫效果,這裡提取了將效果這部分提取出來,可以用於應用截圖分享功能。 截圖功能在源碼
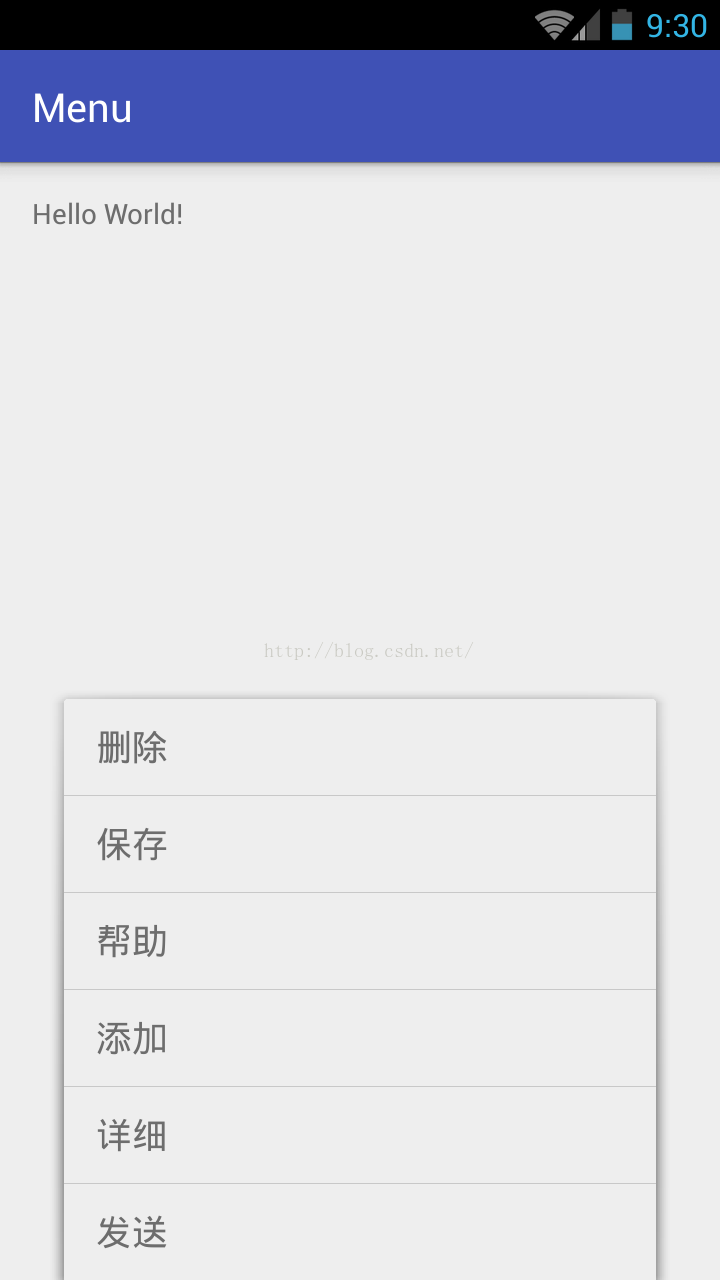 Android Composite(Menu)詳解
目錄:1.Menu概述2.Menu的一些常用屬性3.Menu分類3.1 選項菜單(Option Menu)3.2 上下文菜單(Context Menu)3.3 彈出菜單(
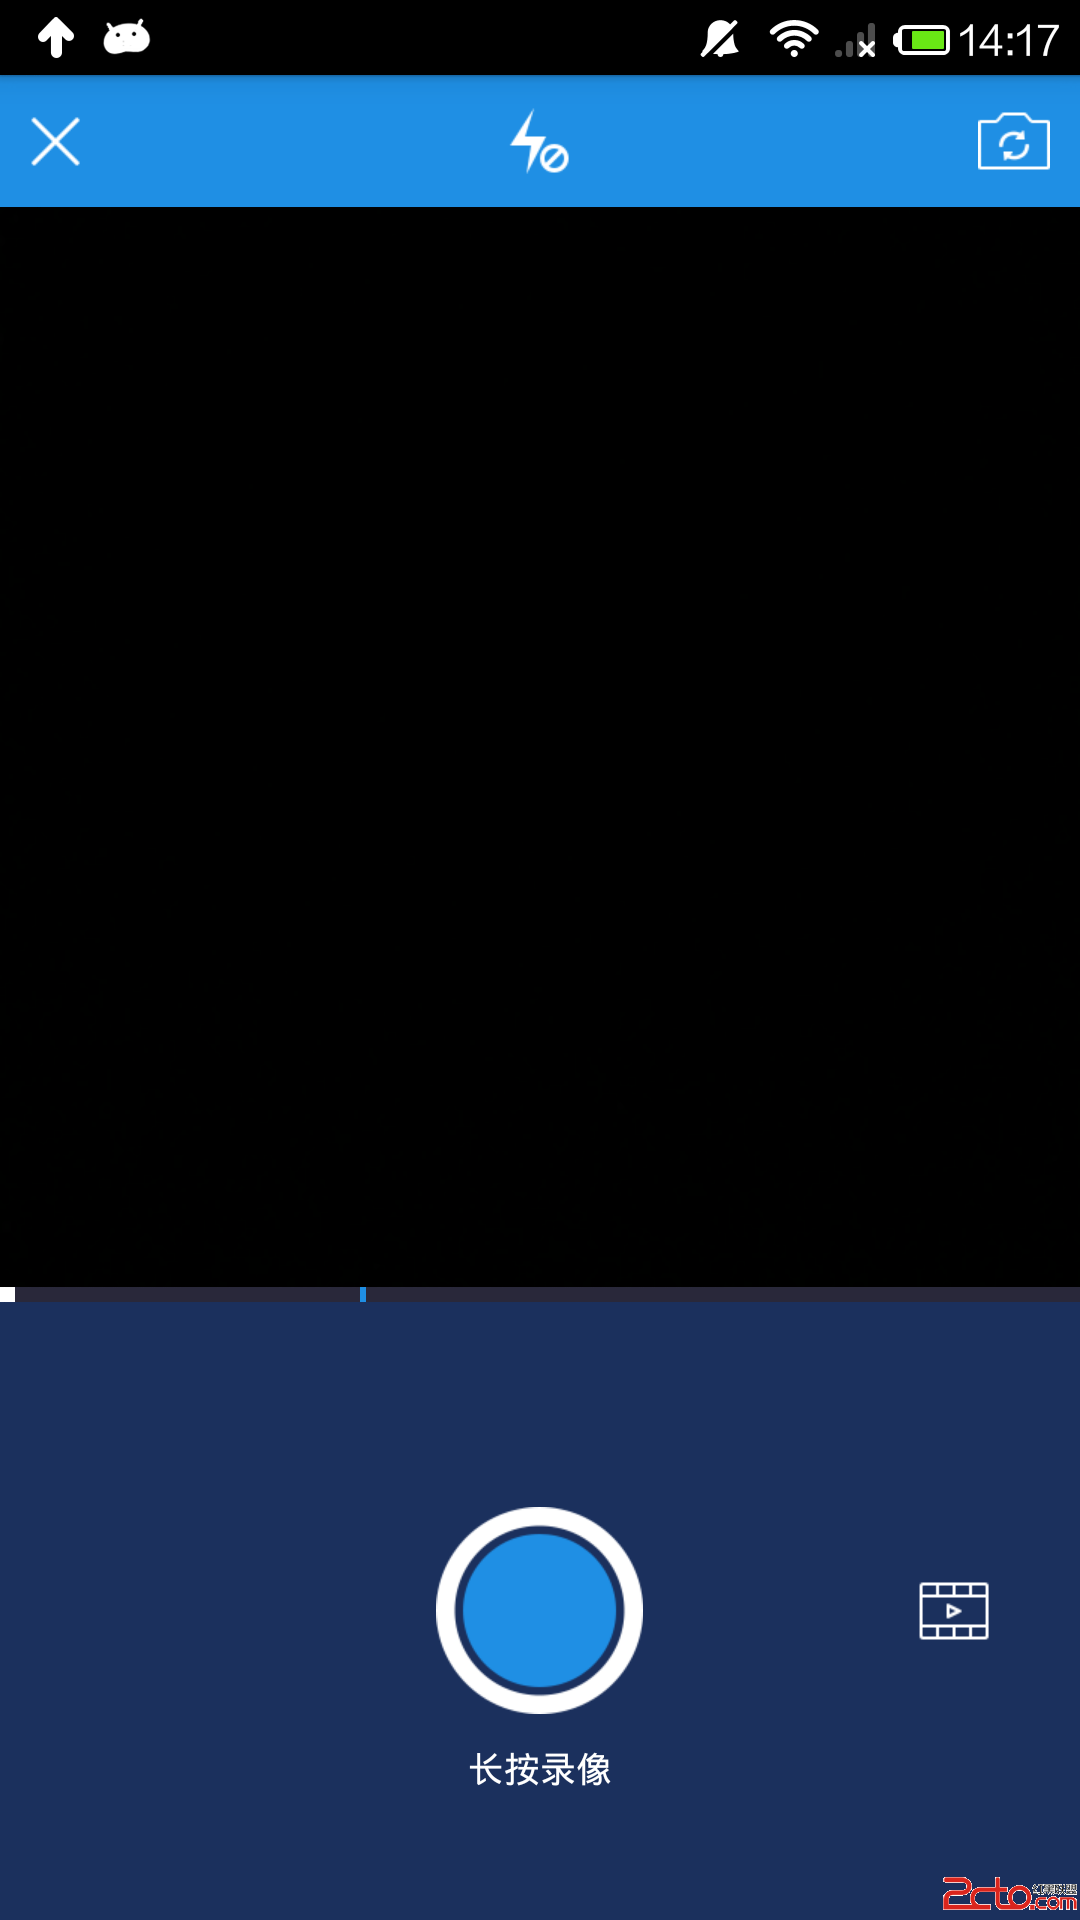 android 視頻開發2分之1(仿美拍,糗百)
最近比較忙,很久沒更新博客,今天我們仿一個美拍或者糗事百科的錄像功能。 首先確認步奏: 1、打開攝像頭; 2、開始錄制; 3、支持分段錄制,並支持分段刪除; 4、把分段