編輯:關於Android編程
Fragment 是什麼
碎片(Fragment)是一種可以嵌入在活動(activity)當中的 UI 片段。
一、碎片的簡單用法
創建兩個布局文件:
<LinearLayout xmlns:android="http://schemas.android.com/apk/res/android"
    android:layout_width="match_parent"
    android:layout_height="match_parent"
    android:orientation="vertical" >
    <Button
      android:id="@+id/button"
      android:layout_width="wrap_content"
      android:layout_height="wrap_content"
      android:layout_gravity="center_horizontal"
      android:text="Button"
      />
  </LinearLayout>
//left_fragment.xml
 <LinearLayout xmlns:android="http://schemas.android.com/apk/res/android"
    android:layout_width="match_parent"
    android:layout_height="match_parent"
    android:background="#00ff00"
    android:orientation="vertical" >
    <TextView
      android:layout_width="wrap_content"
      android:layout_height="wrap_content"
      android:layout_gravity="center_horizontal"
      android:textSize="20sp"
      android:text="This is right fragment"
      />
  </LinearLayout>

//right_fragment.xml
所有的自定義 Fragment 都需要繼承 Fragment 類:
public class LeftFragment extends Fragment {
  @Override
  public View onCreateView(LayoutInflater inflater, ViewGroup container, Bundle savedInstanceState) {
  View view = inflater.inflate(R.layout.left_fragment, container, false); return view;
  }
}
public class RightFragment extends Fragment {
  @Override
  public View onCreateView(LayoutInflater inflater, ViewGroup container, Bundle savedInstanceState) {
  View view = inflater.inflate(R.layout.right_fragment, container, false); return view;
  }
}
最後定義 activity_main.xml
 <LinearLayout xmlns:android="http://schemas.android.com/apk/res/android"
    android:layout_width="match_parent"
    android:layout_height="match_parent" >
    <fragment
      android:id="@+id/left_fragment"
      android:name="com.example.fragmenttest.LeftFragment"
      android:layout_width="0dp"
      android:layout_height="match_parent"
      android:layout_weight="1" />
    <fragment
      android:id="@+id/right_fragment"
      android:name="com.example.fragmenttest.RightFragment"
      android:layout_width="0dp"
      android:layout_height="match_parent"
      android:layout_weight="1" />
  </LinearLayout>
二、動態添加碎片
可以在代碼當中動態添加碎片:
@Override
    public void onClick(View v) {
      switch (v.getId()) {
      case R.id.button:
        AnotherRightFragment fragment = new AnotherRightFragment();
        FragmentManager fragmentManager = getFragmentManager();
        FragmentTransaction transaction = fragmentManager.
  beginTransaction();
        transaction.replace(R.id.right_layout, fragment);
        transaction.commit();
        break;
      default:
        break;
  } }
動態添加碎片主要分為 5 步。
1、創建待添加的碎片實例。
2、獲取到 FragmentManager,在活動中可以直接調用 getFragmentManager()方法得到。
3、開啟一個事務,通過調用 beginTransaction()方法開啟。
4、向容器內加入碎片,一般使用 replace()方法實現,需要傳入容器的 id 和待添加的碎片實例。
5、提交事務,調用 commit()方法來完成。
三、在碎片中模擬返回棧
通過點擊按鈕添加了一個碎片之後,這時按下 Back 鍵程序就會直接退出。
 public class MainActivity extends Activity implements OnClickListener {
......
    @Override
    public void onClick(View v) {
      switch (v.getId()) {
      case R.id.button:
        AnotherRightFragment fragment = new AnotherRightFragment();
        FragmentManager fragmentManager = getFragmentManager();
        FragmentTransaction transaction = fragmentManager.
  beginTransaction();
        transaction.replace(R.id.right_layout, fragment);
        transaction.addToBackStack(null);
        transaction.commit();
        break;
      default:
  break; }
  }
}
四、碎片和活動之間進行通信
為了方便碎片和活動之間進行通信,FragmentManager 提供了一個類似於 findViewById() 的方法,專門用於從布局文件中獲取碎片的實例,代碼如下所示:
  RightFragment rightFragment = (RightFragment) getFragmentManager()
      .findFragmentById(R.id.right_fragment);
在每個碎片中都可以通過調用getActivity() 方法來得到和當前碎片相關聯 的活動實例,代碼如下所示:
MainActivity activity = (MainActivity) getActivity();
五、碎片的生命周期
運行狀態:當一個碎片是可見的,並且它所關聯的活動正處於運行狀態時,該碎片也處於運行狀態。
暫停狀態:當一個活動進入暫停狀態時(由於另一個未占滿屏幕的活動被添加到了棧頂),與它相關聯的可見碎片就會進入到暫停狀態。
停止狀態:當一個活動進入停止狀態時,與它相關聯的碎片就會進入到停止狀態。
銷毀狀態:碎片總是依附於活動而存在的,因此當活動被銷毀時,與它相關聯的碎片就會進入 到銷毀狀態。
下面是碎片的一些回調方法:
以上就是關於Android中碎片Fragment的全部內容,希望對大家的學習有所幫助。
 分享Android仿刮獎效果控件
本文實例為大家分享了Android刮刮卡效果控件,供大家參考,具體內容如下刮刮卡類: package com.reyo.view;import android.conte
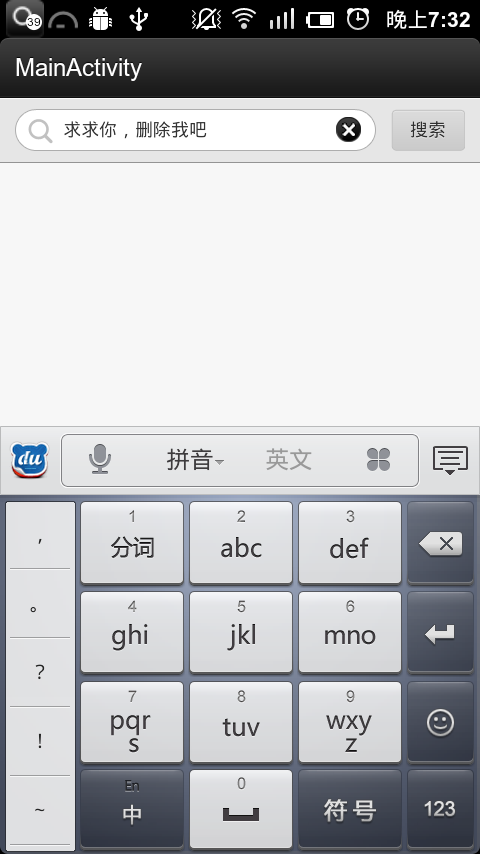 Android中如何實現清空搜索框的文字
需求:項目中的有關搜索的地方,加上清空文字的功能,目的是為了增加用戶體驗,使用戶刪除文本更加快捷解決過程:開始的時候感覺這個東西不太好實現,主要就是布局的問題,可能是開始
 教你如何查看微博誰取消關注自己 新浪微博查看取消關注粉絲使用
近日微博上線了一個新功能“我的粉絲數據統計”,你不僅可以通過它查看到新增的粉絲,還可以通過它看到誰取關了自己,那麼微博查取消關注粉絲
 [Android] 拍照、截圖、保存並顯示在ImageView控件中
最近在做Android的項目,其中部分涉及到圖像處理的內容.這裡先講述如何調用Camera應用程序進行拍照,並截圖和保存顯示在ImageView控件中以及遇到的困難和解決