編輯:關於Android編程
本文實例講述了Android實現手機振動設置的方法。分享給大家供大家參考。具體如下:
main.xml布局文件:
<?xml version="1.0" encoding="utf-8"?>
<LinearLayout xmlns:android="http://schemas.android.com/apk/res/android"
  android:orientation="vertical" android:layout_width="fill_parent"
  android:layout_height="fill_parent">
  <LinearLayout android:orientation="horizontal"
    android:layout_width="fill_parent"
    android:layout_height="wrap_content">
    <ToggleButton android:id="@+id/tb1"
      android:textOn="關閉振動"
      android:textOff="啟動振動"
      android:checked="false"
      android:layout_width="wrap_content"
      android:layout_height="wrap_content" />
    <TextView android:id="@+id/tv1"
      android:text="振動已關閉"
      android:layout_width="wrap_content"
      android:layout_height="wrap_content" />
  </LinearLayout>
  <LinearLayout android:orientation="horizontal"
    android:layout_width="fill_parent"
    android:layout_height="wrap_content">
    <ToggleButton android:id="@+id/tb2"
      android:textOn="關閉振動"
      android:textOff="啟動振動"
      android:checked="false"
      android:layout_width="wrap_content"
      android:layout_height="wrap_content" />
    <TextView android:id="@+id/tv2"
      android:text="振動已關閉"
      android:layout_width="wrap_content"
      android:layout_height="wrap_content" />
  </LinearLayout>
</LinearLayout>
清單文件:
<?xml version="1.0" encoding="utf-8"?>
<manifest xmlns:android="http://schemas.android.com/apk/res/android"
  package="com.ljq.activity" android:versionCode="1"
  android:versionName="1.0">
  <application android:icon="@drawable/icon"
    android:label="@string/app_name">
    <activity android:name=".VibrateActivity"
      android:label="@string/app_name">
      <intent-filter>
        <action android:name="android.intent.action.MAIN" />
        <category
          android:name="android.intent.category.LAUNCHER" />
      </intent-filter>
    </activity>
  </application>
  <uses-sdk android:minSdkVersion="7" />
  <!-- 設置手機震動權限 -->
  <uses-permission android:name="android.permission.VIBRATE" />
</manifest>
VibrateActivity類:
package com.ljq.activity;
import android.app.Activity;
import android.app.Service;
import android.os.Bundle;
import android.os.Vibrator;
import android.widget.CompoundButton;
import android.widget.TextView;
import android.widget.ToggleButton;
import android.widget.CompoundButton.OnCheckedChangeListener;
public class VibrateActivity extends Activity {
  private Vibrator vibrator=null;
  private ToggleButton tb1=null, tb2=null;
  private TextView tv1=null, tv2=null;
  @Override
  public void onCreate(Bundle savedInstanceState) {
    super.onCreate(savedInstanceState);
    setContentView(R.layout.main);
    //注意模擬器是模擬不了震動的,得真機測試哦
    //創建vibrator對象
    vibrator=(Vibrator)getSystemService(Service.VIBRATOR_SERVICE);
    tv1=(TextView)findViewById(R.id.tv1);
    tv2=(TextView)findViewById(R.id.tv2);
    tb1=(ToggleButton)findViewById(R.id.tb1);
    tb2=(ToggleButton)findViewById(R.id.tb2);
    tb1.setOnCheckedChangeListener(listener);
    tb2.setOnCheckedChangeListener(listener);
  }
  OnCheckedChangeListener listener=new OnCheckedChangeListener(){
    public void onCheckedChanged(CompoundButton buttonView, boolean isChecked) {
      ToggleButton toggleButton=(ToggleButton)buttonView;
      switch (toggleButton.getId()) {
      case R.id.tb1:
        if(isChecked){
          //根據指定的模式進行震動
          //第一個參數:該數組中第一個元素是等待多長的時間才啟動震動,
          //之後將會是開啟和關閉震動的持續時間,單位為毫秒
          //第二個參數:重復震動時在pattern中的索引,如果設置為-1則表示不重復震動
          vibrator.vibrate(new long[]{1000,50,50,100,50}, -1);
          tv1.setText("振動已啟動");
        }else {
          //關閉震動
          vibrator.cancel();
          tv1.setText("震動已關閉");
        }
        break;
      case R.id.tb2:
        if(isChecked){
          //啟動震動,並持續指定的時間
          vibrator.vibrate(3500);
          tv2.setText("振動已啟動");
        }else {
          //關閉啟動
          vibrator.cancel();
          tv2.setText("震動已關閉");
        }
        break;
      }
    }
  };
}
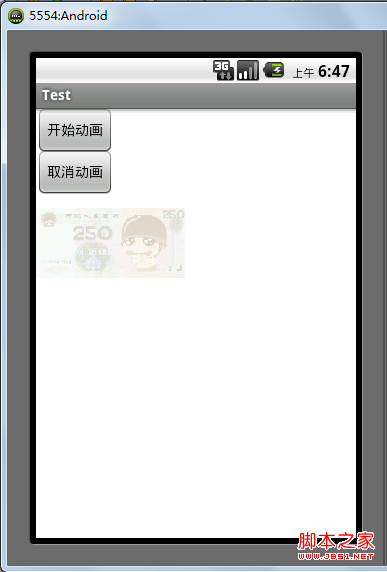
運行結果:

希望本文所述對大家的Android程序設計有所幫助。
 如何用Sencha Touch打包Android的APK
什麼是Sencha Touch前不久基於JavaScript編寫的Ajax框架ExtJS,將現有的ExtJS整合JQTouch、Rapha?l庫,推出適用於最前沿Touc
 Android使用VideoView播放本地視頻和網絡視頻的方法
1、效果展示2、布局文件<?xml version=1.0 encoding=utf-8?><RelativeLayout xmlns:
 Android 四大組件學習之Activity一
Activity是Android四大組件中最基礎也是最常用的組件之一。Activity作為一個應用程序組件,提供了一個與用戶交互的界面。可以這麼說Activity是和用戶
 Android仿京東首頁畫軸效果
記得之前京東首頁有一個效果,有一個畫軸,然後可以滾動畫軸,去打開畫(不知道怎麼去形容這個效果,就叫做畫軸效果吧- -!),然後去做相關操作,剛開始看到這個效果,想法是動態