編輯:關於Android編程
本文實例講述了Android控件之Spinner用法。分享給大家供大家參考。具體如下:
以下模擬下拉列表的用法
布局文件:
<?xml version="1.0" encoding="utf-8"?>
<LinearLayout android:id="@+id/LinearLayout01"
 android:layout_width="fill_parent" android:layout_height="fill_parent"
 android:orientation="vertical"
 xmlns:android="http://schemas.android.com/apk/res/android">
 <TextView android:text="@string/ys"
 android:id="@+id/TextView01"
 android:layout_width="fill_parent"
 android:layout_height="wrap_content"
 android:textSize="28dip" />
 <Spinner android:id="@+id/Spinner01"
 android:layout_width="fill_parent"
 android:layout_height="wrap_content" />
</LinearLayout>
SpinnerActivity類:
package com.ljq.sp;
import android.app.Activity;
import android.os.Bundle;
import android.util.Log;
import android.view.View;
import android.view.ViewGroup;
import android.widget.AdapterView;
import android.widget.BaseAdapter;
import android.widget.ImageView;
import android.widget.LinearLayout;
import android.widget.Spinner;
import android.widget.TextView;
import android.widget.AdapterView.OnItemSelectedListener;
public class SpinnerActivity extends Activity {
 private Spinner sp = null;//下拉列表
 private TextView tv = null;
 // 所有資源圖片的數組
 private int[] drawableIds={R.drawable.football,R.drawable.basketball,R.drawable.volleyball};
 // 所有字符串的數組
 private int[] msgIds={R.string.zq,R.string.lq,R.string.pq};
 @Override
 public void onCreate(Bundle savedInstanceState) {
 super.onCreate(savedInstanceState);
 setContentView(R.layout.main);
 tv = (TextView) findViewById(R.id.TextView01);
 sp=(Spinner)this.findViewById(R.id.Spinner01);//初始化Spinner
 sp.setAdapter(adapter);
 sp.setOnItemSelectedListener(new OnItemSelectedListener() {
  public void onItemSelected(AdapterView<?> parent, View view, int positon, long id) {
  LinearLayout ll = (LinearLayout) view;
  View v=ll.getChildAt(0);//獲取第一個控件ImageView
  Log.i("ljq", v.getClass().getName());
  TextView tvn = (TextView) ll.getChildAt(1);//獲取第二個控件TextView
  StringBuilder sb = new StringBuilder();
  sb.append(getResources().getText(R.string.ys)).append(":").append(tvn.getText());
  tv.setText(sb.toString());
  }
  public void onNothingSelected(AdapterView<?> parent) {
  }
 });
 }
 private BaseAdapter adapter = new BaseAdapter(){
 public int getCount() {
  return drawableIds.length;
 }
 public Object getItem(int position) {
  return drawableIds[position];
 }
 public long getItemId(int position) {
  return position;
 }
 public View getView(int position, View convertView, ViewGroup parent) {
  LinearLayout ll = new LinearLayout(SpinnerActivity.this);
  ll.setOrientation(LinearLayout.HORIZONTAL);
  ImageView iv = new ImageView(SpinnerActivity.this);
  iv.setImageResource(drawableIds[position]);
  ll.addView(iv);
  TextView tv=new TextView(SpinnerActivity.this);
  tv.setText(msgIds[position]);//設置內容
  tv.setTextSize(24);
  tv.setTextColor(R.color.black);
  ll.addView(tv);
  return ll;
 }
 };
}
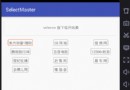
運行結果

希望本文所述對大家的Android序設計有所幫助。
 android 實現自定義狀態欄通知(Status Notification)
在android項目的開發中,有時為了實現和用戶更好的交互,在通知欄這一小小的旮旯裡,我們通常需要將內容豐富起來,這個時候我們就需要去實現自定義的通知欄,例如下面360或
 Android 取得應用程序的啟動次數和運行時間等信息
使用情景:最近有個需求是統計後台應用運行時間,如果一個應用在後台運行超過一定時間就Kill掉進程,達到省電的目的。此時就可以使用PkgUsageStats這個類來實現啦!
 android文件操作——讀取assets和raw文件下的內容
來自Resources和Assets 中的文件只可以讀取而不能進行寫的操作。assets文件夾裡面的文件都是保持原始的文件格式,需要用AssetManager以字節流的形
 AndroidTestTool開發筆記
前言 這段時間在Testerhome上看了一些有關性能測試的帖子,看別人的東西,始終是別人的,只有自己寫一遍才能體會其中的細節,雖然說不要重復造輪子,但是這種基礎的東西
 安卓實戰開發之CardView的selector及GrideView的item按下狀態保留selector(state_activated)的實現
android的selector對於android開發者而言再熟悉不過了