編輯:關於Android編程
前幾天這邊一個小區斷電,黑麻麻的,一只貓闖進寢室,把我嚇哭,然後就果斷寫了個手電筒,下次斷電,再來,我要嚇死它。
我之前看到很多人都是直接調用閃光燈,其實大部分機型都不支持,我這個是用相機功能來實現的,大部分機型都支持。
MainActivity.class
public class MainActivity extends FragmentActivity {

  @Override
  protected void onCreate(Bundle savedInstanceState) {
    super.onCreate(savedInstanceState);
    setContentView(R.layout.activity_main);

    if (isFlashSupported()) {
      if (savedInstanceState == null) {
        getSupportFragmentManager().beginTransaction().add(R.id.container, new FlashlightFragment()).commit();
      }
    } else {
      showNoFlashAlert();
    }
  }

  private void showNoFlashAlert() {
    new AlertDialog.Builder(this)
        .setMessage(R.string.device_not_support_msg)
        .setIcon(android.R.drawable.ic_dialog_alert).setTitle(R.string.device_not_support_title)
        .setPositiveButton(R.string.ok, new DialogInterface.OnClickListener() {

          @Override
          public void onClick(DialogInterface dialog, int which) {
            dialog.dismiss();
            finish();
          }
        }).create().show();
  }

  private boolean isFlashSupported() {
    PackageManager pm = getPackageManager();
    return pm.hasSystemFeature(PackageManager.FEATURE_CAMERA_FLASH);
  }

  public static class FlashlightFragment extends Fragment implements SurfaceHolder.Callback {

    public FlashlightFragment() { }

    ImageButton btnSwitch;
    ImageView bg;
    private boolean isLighOn = false;

    private Camera camera;
    Camera.Parameters params;

    @Override
    public void onStart() {
      super.onStart();
      SurfaceView preview = (SurfaceView) getView().findViewById(R.id.PREVIEW);
      SurfaceHolder mHolder = preview.getHolder();
      mHolder.addCallback(this);
    }

    @Override
    public void onPause() {
      super.onPause();
      turnOffFlash();
    }

    @Override
    public View onCreateView(LayoutInflater inflater, ViewGroup container, Bundle savedInstanceState) {
      View view = inflater.inflate(R.layout.fragment_main_activity, container, false);

      // flash switch button
      btnSwitch = (ImageButton) view.findViewById(R.id.flashlight_button);

      bg = (ImageView) view.findViewById(R.id.flashlight_bg);

      // displaying button image
      toggleBgImage();

      // Switch button click event to toggle flash on/off
      btnSwitch.setOnClickListener(new View.OnClickListener() {

        @Override
        public void onClick(View v) {
          if (isLighOn) {
            turnOffFlash();
          } else {
            turnOnFlash();
          }
        }
      });

      return view;
    }

    // Turning On flash
    private void turnOnFlash() {

      if (!isLighOn) {
        if (camera == null || params == null) {
          return;
        }
        params = camera.getParameters();
        params.setFlashMode(Camera.Parameters.FLASH_MODE_TORCH);
        camera.setParameters(params);
        camera.startPreview();
        isLighOn = true;

        toggleBgImage();
      }

    }

    // Turning Off flash
    private void turnOffFlash() {

      if (isLighOn) {
        if (camera == null || params == null) {
          return;
        }

        params = camera.getParameters();
        params.setFlashMode(Camera.Parameters.FLASH_MODE_OFF);
        camera.setParameters(params);
        camera.stopPreview();
        isLighOn = false;

        toggleBgImage();
      }
    }

    private void toggleBgImage() {
      if (isLighOn) {
        bg.setImageResource(R.mipmap.f_on);
      } else {
        bg.setImageResource(R.mipmap.f_off);
      }
    }

    @Override
    public void surfaceChanged(SurfaceHolder holder, int format, int width, int height) {

    }

    @Override
    public void surfaceDestroyed(SurfaceHolder holder) {
      if (camera != null) {
        camera.stopPreview();
        camera.setPreviewCallback(null);
        camera.release();
        camera = null;
      }
    }

    @Override
    public void surfaceCreated(SurfaceHolder holder) {
      if (camera == null) {
        camera = Camera.open();
        params = camera.getParameters();
        try {
          camera.setPreviewDisplay(holder);
        } catch (IOException e) {
          camera.release();
          camera = null;
        }
      }

      turnOnFlash();
    }

  }


}
fragment_main_activity.xml
<RelativeLayout
  xmlns:android="http://schemas.android.com/apk/res/android"
  android:layout_width="match_parent"
  android:layout_height="match_parent"
  >

  <SurfaceView
    android:id="@+id/PREVIEW"
    android:layout_width="1dp"
    android:layout_height="1dp"/>

  <ImageView
    android:id="@+id/flashlight_bg"
    android:layout_width="match_parent"
    android:layout_height="match_parent"
    android:src="@mipmap/f_on"
    android:scaleType="centerCrop"
    />

  <ImageButton
    android:id="@+id/flashlight_button"
    android:layout_width="100dp"
    android:layout_height="200dp"
    android:layout_centerInParent="true"
    android:background="@android:color/transparent"
    android:text="fuck"/>

</RelativeLayout>
activity_main.xml
<FrameLayout xmlns:android="http://schemas.android.com/apk/res/android"
       android:id="@+id/container"
       android:layout_width="match_parent"
       android:layout_height="match_parent"
       />
AndroidManifest.xml
<?xml version="1.0" encoding="utf-8"?>
<manifest xmlns:android="http://schemas.android.com/apk/res/android"
  package="com.liujinghuiuncleapp.app.tool.flashlight" >

  <uses-permission android:name="android.permission.CAMERA" />
  <uses-permission android:name="android.permission.FLASHLIGHT" />

  <uses-feature android:name="android.hardware.camera" />
  <uses-feature android:name="android.hardware.camera.flash" />

  <application
    android:allowBackup="true"
    android:icon="@mipmap/ic_launcher"
    android:theme="@style/AppTheme"
    android:label="@string/app_name" >
    <activity
      android:name=".MainActivity"
      android:label="@string/app_name" >
      <intent-filter>
        <action android:name="android.intent.action.MAIN" />

        <category android:name="android.intent.category.LAUNCHER" />
      </intent-filter>
    </activity>
  </application>

</manifest>
以上所述就是本文的全部內容了,希望大家能夠喜歡。
 Handler消息傳遞處理機制
Android是消息驅動的,實現消息驅動有幾個要素:消息的表示:Message消息隊列:MessageQueue消息循環,用於循環取出消息進行處理:Looper消息處理,
 基於Android實現仿QQ5.0側滑
本課程將帶領大家通過自定義控件實現QQ5.0側滑菜單,課程將循序漸進,首先實現最普通的側滑菜單,然後引入屬性動畫與拖動菜單效果相結合,最終實現QQ5.0側滑菜單效果。通過
 Android App開發中自定義View和ViewGroup的實例教程
ViewAndroid所有的控件都是View或者View的子類,它其實表示的就是屏幕上的一塊矩形區域,用一個Rect來表示,left,top表示View相對於它的pare
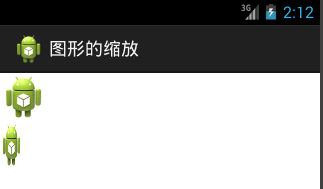 Android 圖片縮放實例詳解
本文實現Android中的圖片的縮放效果首先設計布局:<LinearLayout xmlns:android=http://schemas.android.com/