編輯:關於Android編程
經過前面2篇的鋪墊,終於到正式學習 View 的三大流程:測量、布局、繪制流程了,這一篇就先從學習 measure 過程開始吧。
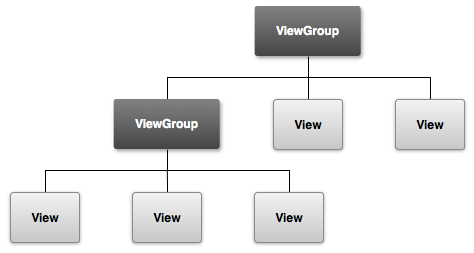
measure 過程要分兩種情況,第一種是 View,第二種是 ViewGroup。如果是 View 的話,那麼只通過 measure 方法就完成其測量過程,但是如果是 ViewGroup 的話,不僅需要完成自己的測量過程,還需要完成它所有子 View 的測量過程。如果子 View 又是一個 ViewGroup,那麼繼續遞歸這個流程。下面先從 View 開始,詳細了解下 View 的 measure 過程。
View 的測量過程是由 View 的 measure 方法來完成的,但是該方法是一個 finall 方法,所以不能被重寫。在 measure 方法中會去調用 onMeasure() 方法,因此我們只需在 View 中重寫 onMeasure() 方法來完成 View 的測量即可。那麼 View 默認的 measure 實現是怎樣的呢? 來看下 View 的 onMeasure() 方法:
protected void onMeasure(int widthMeasureSpec, int heightMeasureSpec) {
    setMeasuredDimension(getDefaultSize(getSuggestedMinimumWidth(), widthMeasureSpec),
            getDefaultSize(getSuggestedMinimumHeight(), heightMeasureSpec));
}
可以看到,該方法的實現很簡單,直接調用了 setMeasuredDimension() 方法來設置測量的尺寸。關鍵就在於 getDefaultSize() 方法上, 繼續跟進,看看 getDefaultSize() 方法的實現::
public static int getDefaultSize(int size, int measureSpec) {
    int result = size;
    int specMode = MeasureSpec.getMode(measureSpec);
    int specSize = MeasureSpec.getSize(measureSpec);

    switch (specMode) {
    case MeasureSpec.UNSPECIFIED:
        result = size;
        break;
    case MeasureSpec.AT_MOST:
    case MeasureSpec.EXACTLY:
        result = specSize;
        break;
    }
    return result;
}
從上述代碼上可以看到,關於我們關心的 AT_MOST 和 EXACTLY 測量模式,其實 getDefaultSize() 方法返回的就是 MeasureSpec 的 specSize。
而這個 MeasureSpec 如果閱讀過上篇文章後,就應該知道是 ViewGroup 傳遞而來的。如果不太了解,建議返回去看下上篇文章,這裡就不重復介紹了。
到這裡也就理解了,為什麼當我們在布局中寫 wrap_content,如果不重寫 onMeasure() 方法,則默認大小是父控件的可用大小了。
當我們在布局中寫 wrap_content 時,那麼測量模式就是: AT_MOST,在該模式下,它的寬高等於 specSize。而 specSize 由 ViewGroup 傳遞過來時就是 parentSize,也就是父控件的可用大小。
當我們在布局中寫 match_parent 時,那麼不用多說,寬高當然也是 parentSize。這時候,我們只需對 AT_MOST 測量模式進行處理:
protected void onMeasure(int widthMeasureSpec, int heightMeasureSpec) {
    int widthMode = MeasureSpec.getMode(widthMeasureSpec);
    int heightMode = MeasureSpec.getMode(heightMeasureSpec);
    int widthSize = MeasureSpec.getSize(widthMeasureSpec);
    int heightSize = MeasureSpec.getSize(heightMeasureSpec);

    int width = 0;
    int height = 0;

    if(widthMode == MeasureSpec.AT_MOST){
        width = ...
    }

    if(heightMode == MeasureSpec.AT_MOST){
        height = ...
    }

    setMeasuredDimension(widthMode != MeasureSpec.AT_MOST ? widthSize : width,
            heightMode != MeasureSpec.AT_MOST? heightSize : height);
}
上述代碼,判斷當測量模式是最大模式時,自己計算 View 的寬高。其他情況,直接使用 specSize。
至於 UNSPECIFIED 這種情況,則是使用的第一個參數的值,也就是:getSuggestedMinimumWidth()和getSuggestedMinimumHeight()方法,一般用於系統內部的測量過程。
這兩個方法的源碼如下:
protected int getSuggestedMinimumHeight() {
    return (mBackground == null) ? mMinHeight : max(mMinHeight, mBackground.getMinimumHeight());

}
protected int getSuggestedMinimumWidth() {
    return (mBackground == null) ? mMinWidth : max(mMinWidth, mBackground.getMinimumWidth());
}
大概意思就是,判斷 View 有沒有背景,沒有背景的話,那麼值就是 View 最小的寬度或高度,也就是對應 xml 中的:android:minWidth、android:minHeight 屬性,如果屬性沒有指定的話,默認為0。
有背景的話,那麼值就是 View 最小的寬度或高度 和 背景的最小寬度或高度,取兩者中最大的一個值。這個值就是當測量模式是 UNSPECIFIED 時 View 的測量寬/高。
到這裡就完成了整個 View 的 measure 過程,完成之後我們就可以通過 getMeasureWidth() 和 getMeasureHeight() 方法獲取 View 正確的測量寬/高了。但是需要注意的時,在某些極端情況下,系統可能需要再多次 measure 過程後才能確定最終的測量寬/高,在這種情況下,直接在 onMeasure() 方法中獲取的測量寬/高可能是不准確的,保險的做法是在 onLayout() 方法中去獲取。
ViewGroup 的 measure 過程 和 View 不同,不僅需要完成自身的 measure 過程,還需要去遍歷所有子 View 的 measure 方法,各個子元素之間再遞歸這個流程。
ViewGroup 提供了一個叫 measureChildren() 的方法:
protected void measureChildren(int widthMeasureSpec, int heightMeasureSpec) {
    final int size = mChildrenCount;
    final View[] children = mChildren;
    for (int i = 0; i < size; ++i) {
        final View child = children[i];
        if ((child.mViewFlags & VISIBILITY_MASK) != GONE) {
            measureChild(child, widthMeasureSpec, heightMeasureSpec);
        }
    }
}
該方法遍歷了所有的子 View,判斷如果子 View 沒有 GONE 掉的時候,就繼續執行 measureChild() 方法:
protected void measureChild(View child, int parentWidthMeasureSpec,
        int parentHeightMeasureSpec) {
    final LayoutParams lp = child.getLayoutParams();

    final int childWidthMeasureSpec = getChildMeasureSpec(parentWidthMeasureSpec,
            mPaddingLeft + mPaddingRight, lp.width);
    final int childHeightMeasureSpec = getChildMeasureSpec(parentHeightMeasureSpec,
            mPaddingTop + mPaddingBottom, lp.height);

    child.measure(childWidthMeasureSpec, childHeightMeasureSpec);
}
該方法獲取了子 View 的 LayoutParams,然後通過 getChildMeasureSpec() 方法創建了子 View 的 MeasureSpec,至於是怎麼生成的,上一篇關於 MeasureSpec 的文章有寫。
創建好子 View 的 MeasureSpec 後,然後將 MeasureSpec 傳給了子 VIew 進行 View 的 measure 過程。
通過上面的代碼我們可以發現,ViewGroup 並沒有定義其具體的測量過程,這是因為 ViewGroup 是一個抽象類,它測量過程的 onMeasure 方法需要它的子類去實現,比如說像 LinearLayout、RelativeLayout等。
它並不像 View 一樣,對 onMeasure 方法做了統一實現,這是因為它的子類都有不同的布局特性,就像 LinearLayout 和 RelativeLayout 一樣,兩者的布局特性截然不同,沒有辦法做統一實現。
由於 View 的 measure 過程和 Activity 的生命周期不是同步的,那麼如果直接在 Activity 的生命周期方法,如:onCreate() 、onStart()、onResumt() 中直接獲取 View 的寬/高是無法正確獲取到的。
因為沒辦法保證當走這些生命周期回調方法前,View 的 measure 過程已經走完。如果沒有走完就直接獲取的話,那麼得到的只會是 0。下面給出幾種解決方法:
@Override
public void onWindowFocusChanged(boolean hasFocus) {
    super.onWindowFocusChanged(hasFocus);
    if(hasFocus){
        int measuredWidth = view.getMeasuredWidth();
        int measuredHeight = view.getMeasuredHeight();
    }
}
該方法會在當前 Activity 的 Window 獲得或失去焦點的時候回調,當回調該方法時,表示 Activtiy 是完全對用戶可見的,這時候 View 已經初始化完畢、寬/高都已經測量好了,這時就能獲取到寬/高了。
方案2:
view.post(new Runnable() {
    @Override
    public void run() {
        int measuredWidth = view.getMeasuredWidth();
        int measuredHeight = view.getMeasuredHeight();
    }
});
該方案,通過 post 方法將一個 runnable 投遞到消息隊列的底部,然後等待 Looper 調用該 runnable 時,View 也已經初始化好了,這時就能獲取到寬/高了。
方案3:
ViewTreeObserver treeObserver = view.getViewTreeObserver();
treeObserver.addOnGlobalLayoutListener(new ViewTreeObserver.OnGlobalLayoutListener() {
    @Override
    public void onGlobalLayout() {
        view.getViewTreeObserver().removeGlobalOnLayoutListener(this);
        int measuredWidth = view.getMeasuredWidth();
        int measuredHeight = view.getMeasuredHeight();
    }
});
該方案,通過監聽 View 樹的狀態發生改變或者 View 樹內部的 View 可見性發生改變時,在 onGlobalLayout 回調中獲取 View 的寬/高。需要注意的時,該回調會被調用多次,所以這裡在第一次回調中,就移除了監聽,避免多次獲取。
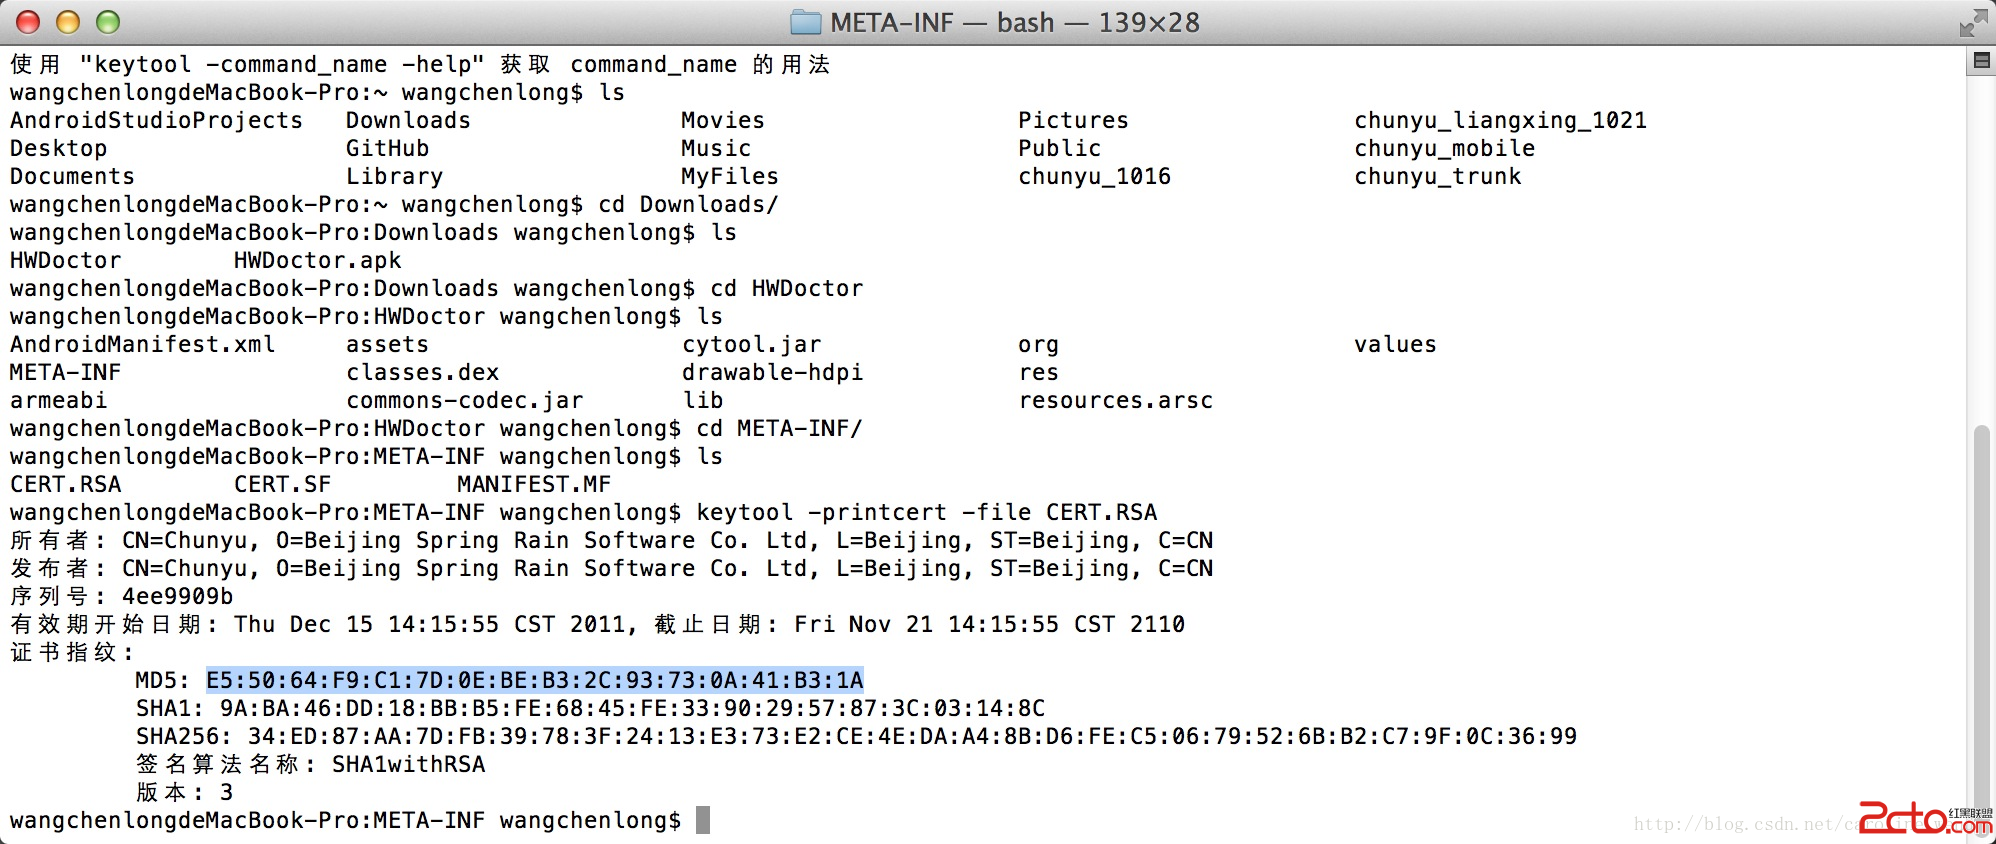 Android - 查看Android應用(apk)簽名
查看Android應用(apk)簽名 在微博、微信開放平台注冊應用時,需要填寫應用(apk)的簽名,可以使用keytool工具找
 android---UI---RecyclerView實現瀑布流
一.包引入dependencies { compile fileTree(dir: 'libs', include: ['*.jar'
 談談Android開發之RecyclerView的使用全解
自Android 5.0之後,谷歌公司推出了RecylerView控件,RecylerView,我想看到一個新名詞後大部分人會首先發出一個疑問,recylerview是什
 Android連接Wifi詳細源碼
因項目需求,做一個有關wifi的Demo,現已經上傳到GitHub 上面地址:https://github.com/git-xuhao/WifiDemo源碼片段packa