編輯:關於Android編程
PathClassLoader classLoader = (PathClassLoader) getApplicationContext().getClassLoader();
Log.d("mytest", "classLoader : " + classLoader + "\n" +
            "parent : " + classLoader.getParent() + "\n" +
            "grandParent : " + classLoader.getParent().getParent() + "\n" +
            "system classloader : " + ClassLoader.getSystemClassLoader() + "\n" +
            "system parent : " + ClassLoader.getSystemClassLoader().getParent());
代碼的執行結果,打印內容如下:
 classLoader : dalvik.system.PathClassLoader[dexPath=/data/app/com.gavin.demo2application-1.apk,libraryPath=/data/app-lib/com.gavin.demo2application-1]
 parent : java.lang.BootClassLoader@41099128
 grandParent : null
 system classloader : dalvik.system.PathClassLoader[dexPath=.,libraryPath=null]
 system parent : java.lang.BootClassLoader@41099128
看到上面的打印的內容,我們了解到在Android的項目中使用的ClassLoader是其自定義的PathClassLoader,最重要的一點是打印的dexPath,這個決定了在項目代碼中要加載的類的位置(後面詳細講解)。 第二點奇怪的地方就是它的parent是 BootClassLoader,這個又是什麼東西,後面詳細講解。 第三點調用ClassLoader.getSystemClassLoader()返回的是PathClassLoader,並且dexPath為. ,我們了解的java中的ClassLoader.getSystemClassLoader()返回的是加載classpath裡面的class的ClassLoader,也就是java中的第三級ClassLoader,它是調用sun.misc.Launcher的getClassLoader()方法獲取的,詳細解析請自行查閱。 第四點它的parent也是BootClassLoader,看來這個必須要分析一下下,畢竟出鏡率這麼高。
public class PathClassLoader extends BaseDexClassLoader {

37    public PathClassLoader(String dexPath, ClassLoader parent) {
38        super(dexPath, null, null, parent);
39    }
40

63    public PathClassLoader(String dexPath, String libraryPath,
64            ClassLoader parent) {
65        super(dexPath, null, libraryPath, parent);
66    }
67}
68
DexClassLoader源碼如下:
public class DexClassLoader extends BaseDexClassLoader {

55    public DexClassLoader(String dexPath, String optimizedDirectory,
56            String libraryPath, ClassLoader parent) {
57        super(dexPath, new File(optimizedDirectory), libraryPath, parent);
58    }
59}
可以看出他們僅僅是重寫了構造函數,所以所有的實現都是在BaseDexClassLoader裡面。
public BaseDexClassLoader(String dexPath, File optimizedDirectory,
            String libraryPath, ClassLoader parent) {
        super(parent);
        this.pathList = new DexPathList(this, dexPath, libraryPath, optimizedDirectory);
    }
super()走的是ClassLoader的設置parent的ClassLoader的方式,重點是下面的PathList,他存儲的是dex的集合,因為apk是可以dex分包,它裡面含有一個DexElement的集合,每一個Element就對應一個dex文件。
DexPathList的構造函數的核心代碼如下:
this.dexElements = makeDexElements(splitDexPath(dexPath), optimizedDirectory,
                                           suppressedExceptions);
makeDexElements()就是解析dex文件成對應的DexElement,代碼如下:
private static Element[] makeDexElements(ArrayList上面的代碼是遍歷所有的dex文件,然後調用的DexFile的loadDex()方法,內部就是創建一個DexFile對象,這個構造函數中會調用openDexFile()解析dex文件,這是一個native()方法,使用c代碼實現的,這裡就不分析了,如果想要學習,推薦一篇博客:DexClassLoader源碼解析files, File optimizedDirectory, ArrayList suppressedExceptions) { ArrayList elements = new ArrayList (); 209 /* 210 * Open all files and load the (direct or contained) dex files 211 * up front. 212 */ 213 for (File file : files) {//遍歷所有的dex文件 214 File zip = null; 215 DexFile dex = null;//這是核心的類,處理將dex文件轉化成對應的DexFile對象 216 String name = file.getName(); 217 218 if (name.endsWith(DEX_SUFFIX)) {//.dex結尾(針對PathClassLoader處理) 219 // Raw dex file (not inside a zip/jar). 220 try { 221 dex = loadDexFile(file, optimizedDirectory);//核心方法,內部是調用的DexFile的loadDex()方法 222 } catch (IOException ex) { 223 System.logE("Unable to load dex file: " + file, ex); 224 } 225 } else if (name.endsWith(APK_SUFFIX) || name.endsWith(JAR_SUFFIX) 226 || name.endsWith(ZIP_SUFFIX)) {//.dex .jar .apk 結尾 (針對DexClassLoader處理) 227 zip = file; 228 229 try { 230 dex = loadDexFile(file, optimizedDirectory); 231 } catch (IOException suppressed) { 232 /* 233 * IOException might get thrown "legitimately" by the DexFile constructor if the 234 * zip file turns out to be resource-only (that is, no classes.dex file in it). 235 * Let dex == null and hang on to the exception to add to the tea-leaves for 236 * when findClass returns null. 237 */ 238 suppressedExceptions.add(suppressed); 239 } 240 } else if (file.isDirectory()) { 241 // We support directories for looking up resources. 242 // This is only useful for running libcore tests. 243 elements.add(new Element(file, true, null, null));//創建Element對象 244 } else { 245 System.logW("Unknown file type for: " + file); 246 } 247 248 if ((zip != null) || (dex != null)) { 249 elements.add(new Element(file, false, zip, dex)); 250 } 251 } 252 253 return elements.toArray(new Element[elements.size()]); 254 }
public ClassLoader getClassLoader() {
        return mPackageInfo != null ?
                mPackageInfo.getClassLoader() : ClassLoader.getSystemClassLoader();
}
我們看到如果mPackageInfo不為null,就調用它的getClassLoader()方法,否則調用ClassLoader.getSystemClassLoader(),這裡我們看到了ClassLoader的getSystemClassLoader()方法,但是這裡還不是重點,重點是mPackageInfo這個對象,這是什麼呢,它是一個LoadedAPK對象。它又是什麼呢?
官方文檔說明如下:
Local state maintained about a currently loaded .apk.LoaderAPK對象是apk在內存中的表示。通過這個LoaderApk對象可以拿到apk中代碼和資源,甚至裡面Activity和Service等信息。 那麼它又是哪裡創建的,又是什麼時候創建的呢,如果你了解Activity的啟動過程,你就明白了(如果想了解,推薦老羅的文章),這裡就不贅述了。在ActivityThread裡面有一個mPackages的map類型的成員變量,根據鍵值(packageName)存儲對應的LoadedApk對象。啟動Activity的時候要調用LoadedApk的getClassLoader(),來加載對應的Activity class文件,然後通過反射創建這個activity的實例;那麼獲取這個對象,會先去mPackages中去查找有沒有緩存,如果沒有就創建一個新的LoadedAPK對象。 下面代碼截取自ActivityThread中啟動Activity的過程中創建LoadedApk的代碼:
public final LoadedApk getPackageInfoNoCheck(ApplicationInfo ai,
        CompatibilityInfo compatInfo) {
    return getPackageInfo(ai, compatInfo, null, false, true, false);
}
private LoadedApk getPackageInfo(ApplicationInfo aInfo, CompatibilityInfo compatInfo,
        ClassLoader baseLoader, boolean securityViolation, boolean includeCode,
        boolean registerPackage) {
        // 獲取userid信息
    final boolean differentUser = (UserHandle.myUserId() != UserHandle.getUserId(aInfo.uid));
    synchronized (mResourcesManager) {
    // 嘗試獲取緩存信息
        WeakReference ref;
        if (differentUser) {
            // Caching not supported across users
            ref = null;
        } else if (includeCode) {
            ref = mPackages.get(aInfo.packageName);
        } else {
            ref = mResourcePackages.get(aInfo.packageName);
        }

        LoadedApk packageInfo = ref != null ? ref.get() : null;
        if (packageInfo == null || (packageInfo.mResources != null
                && !packageInfo.mResources.getAssets().isUpToDate())) {
                // 緩存沒有命中,直接new
            packageInfo =
                new LoadedApk(this, aInfo, compatInfo, baseLoader,
                        securityViolation, includeCode &&
                        (aInfo.flags&ApplicationInfo.FLAG_HAS_CODE) != 0, registerPackage);

        // 省略。。更新緩存
        return packageInfo;
    }
}
下面看上面使用到的LoadedApk的構造函數,其實LoadedApk還有一個構造函數,在ContextImpl創建自己的實例的同時創建其LoadedApk的成員變量的時候使用了。
108    public LoadedApk(ActivityThread activityThread, ApplicationInfo aInfo,
109            CompatibilityInfo compatInfo,
110            ActivityThread mainThread, ClassLoader baseLoader,
111            boolean securityViolation, boolean includeCode) {
	   .......(省略)
126
127        if (mAppDir == null) {
128            if (ActivityThread.mSystemContext == null) {//這個context很重要,一個ActivityThread只有這一個,是靜態全局的
129                ActivityThread.mSystemContext =
130                    ContextImpl.createSystemContext(mainThread);
131                ActivityThread.mSystemContext.getResources().updateConfiguration(
132                         mainThread.getConfiguration(),
133                         mainThread.getDisplayMetricsLocked(compatInfo, false),
134                         compatInfo);
135                //Slog.i(TAG, "Created system resources "
136                //        + mSystemContext.getResources() + ": "
137                //        + mSystemContext.getResources().getConfiguration());
138            }
139            mClassLoader = ActivityThread.mSystemContext.getClassLoader();//這個ClassLoader就是最後返回的那個ClassLoader
140            mResources = ActivityThread.mSystemContext.getResources();
141        }
142    }
143
看到這裡,我們只要最終這個CLassLoader的來源是從Context那裡後去的,也就是ActivityThread的mSystemContext裡面的ClassLoader,我們來看一下這個mSystemContext的創建過程,代碼如下:
1458    static ContextImpl createSystemContext(ActivityThread mainThread) {
1459        ContextImpl context = new ContextImpl();
1460        context.init(Resources.getSystem(), mainThread);//這個init操作也沒有創建他裡面LoadedApk成員變量
1461        return context;
1462    }
所以最終調用的代碼,就是最開始的ContextImpl的getClassLoader()方法,並且mPackageInfo(LoadedAPK對象)為null,所以最終調用的是ClassLoader.getSystemClassLoader(),所以最終結論就是系統ClassLoader是通過ClassLoader.getSystemClassLoader()創建。
public static ClassLoader getSystemClassLoader() {
     return SystemClassLoader.loader;
}
static private class SystemClassLoader {
        public static ClassLoader loader = ClassLoader.createSystemClassLoader();
}
    private static ClassLoader createSystemClassLoader() {
        String classPath = System.getProperty("java.class.path", ".");
        return new PathClassLoader(classPath, BootClassLoader.getInstance());
    }
對於最有一個核心方法createSystemClassLoader(),官方說明如下:
Create the system class loader. Note this is NOT the bootstrap class
loader (which is managed by the VM). We use a null value for the parent
to indicate that the bootstrap loader is our parent.
創建系統的ClassLoader。注釋:這不是bootstrap ClassLoader(被虛擬機管理的ClassLoader)。我們使用null作為我們系統ClassLoader的parent來表明bootstrap就是我們的系統ClassLoader的parent。這裡也就是充分說明了Android系統不是使用的java原生的bootstrap來加載,而是使用自己的創建的套機制。取代bootstrap的是用null(bootstrap不是一個ClassLoader對象,所以他的子級ClassLoader調用getParent()返回的是null),而取代java中第二級的ClassLoader使用Android中創建的最基層的BootClassLoader(也就是上面的PathClassLoader的parent)。 這個BootClassLoader是單例的,所以全局只有一個,我們也可以得出,系統所有執行裝載類的操作,都會執行到這個對象。代碼如下:
public BootClassLoader() {
     super(null, true);//他的parent為null(模擬它的parent是bootstrap)
}
還有我們看到上面PathClassLoader構造函數中傳遞的第一個參數classPath,這個就是我們之前打印出來的dexPath。為什麼系統的ClassLoader.getSystemClassLoader()返回的PathClassLoader 的dexPath指向的是當前apk的安裝路徑;但是我們自己創建的返回的PathClassLoader的dexPath卻是. 我們發現是由上面的System.getProperty("java.class.path",".");決定的,看到get操作,相對的也就會有set操作,那麼這個值是什麼時候設置的呢。這我們就要追溯到Android framwork中System中的initSystemProperty()方法中,調用VMRuntime.getRuntime().classPath()的值,這個值應該就是當前apk的安裝路徑。
代碼如下: 路徑:/libcore/luni/src/main/java/java/lang/System.java(4.0.4)
private static void initSystemProperties() {
        VMRuntime runtime = VMRuntime.getRuntime();
        Properties p = new Properties();

        String projectUrl = "http://www.android.com/";
        String projectName = "The Android Project";

        p.put("java.boot.class.path", runtime.bootClassPath());
        p.put("java.class.path", runtime.classPath());
}
但是,為什麼我們自己調用,獲取這個值就是. 我的猜想就是 系統創建完對應的ClassLoader之後,就將這個值修改成了.(當然這僅僅是我個人的猜想,希望了解的大神能幫我解答一下,因為我實在是找不到原因,困惑好久了)。
 Android系統開發(4)——Autotools
Autotools工具的構成1、autoscanautoscan是用來掃描源代碼目錄生成configure.san文件的,configure.san包含了系統配置的基本選
 Android數據存儲(三)----- SQLite數據庫存儲
SQLite是Android系統內置的數據庫,是一種輕量級的關系型數據庫,它運算速度快,占用資源少,非常適合在移動設備上使用。同時,它不僅支持標准的SQL語法,還遵循了
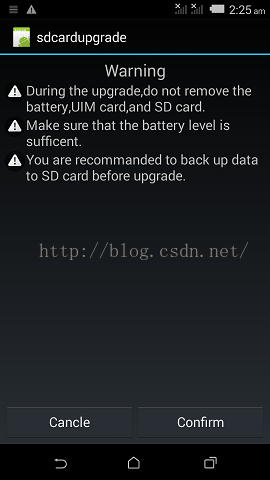 Android系統SD卡升級
一般在本地進行OTA升級時,將升級包拷貝到SD卡,然後進入recovery模式選擇升級包進行升級,但不是很方便,於是做了一個小應用,通過調用RecoverySystem類
 Android View繪制和顯示原理簡介
現在越來越多的應用開始重視流暢度方面的測試,了解Android應用程序是如何在屏幕上顯示的則是基礎中的基礎,就讓我們一起看看小小屏幕中大大的學問。這也是我下篇文章&mda