編輯:關於Android編程
由於業務關系,經常需要寫一些表單頁面,基本也就是簡單的增刪改查然後上傳,做過幾個頁面之後就有點想偷懶了,這麼低水平重復性的體力勞動,能不能用什麼辦法自動生成呢,查閱相關資料,發現android studio插件正好可以滿足需求,在Github上搜了一下,找到BorePlugin這個幫助自動生成布局代碼的插件挺不錯的,在此基礎上修改為符合自己需求的插件,整體效果還不錯。
發現了android studio插件的魅力,自己也總結一下,也給小伙伴們提供一點參考,今天就以實現自動生成findviewbyid代碼插件的方式來個簡單的總結。這裡就不寫行文思路了,一切從0開始,一步一步搭建起這個插件項目吧。效果如下:
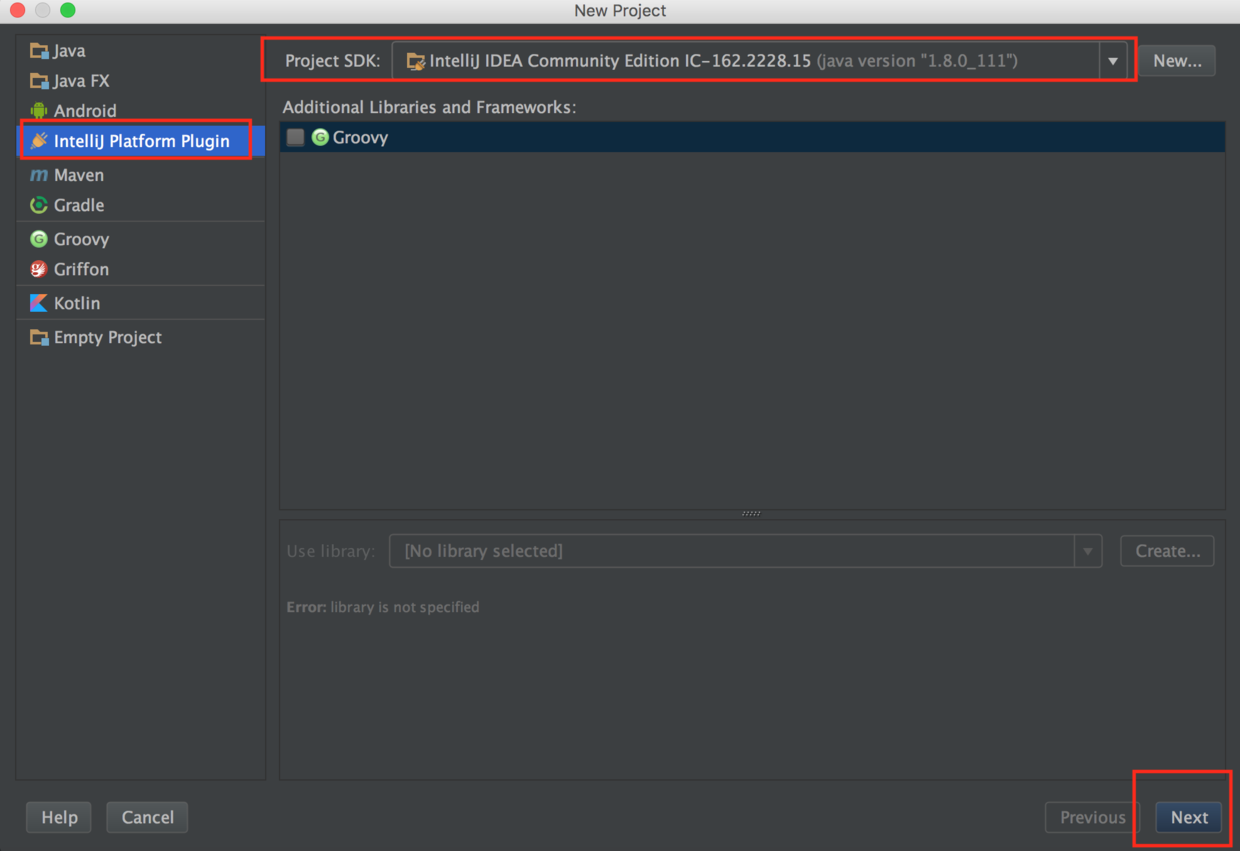
由於android studio是基於Intellij IDEA開發的,但Android Studio自身不具備開發插件的功能,所以插件開發需要在IntelliJ IDEA上開發。
好了,說了這麼多,開始去官網下載吧,下載地址:https://www.jetbrains.com/idea/
安裝運行後我們就可以開始開發了。
創建項目
創建成功之後的文件夾是這個樣子的:
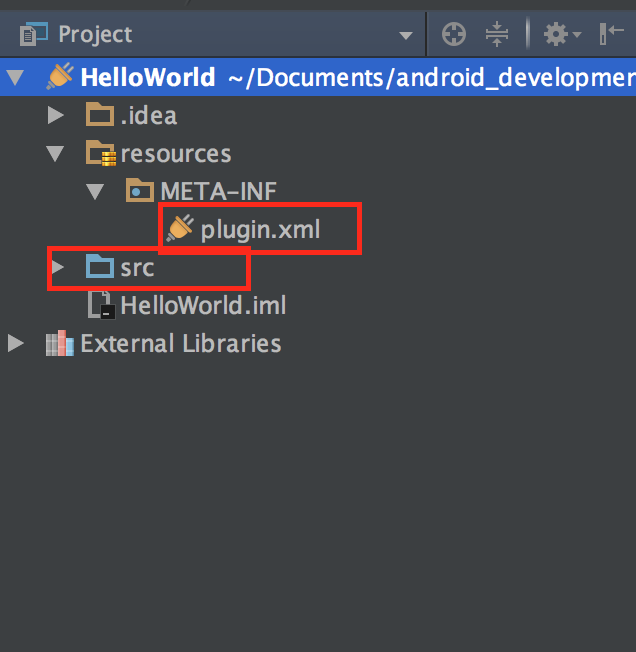
我們重點關注plugin.xml和src,plugin.xml是我們這個插件項目的配置說明,類似於android開發中的AndroidManifest.xml文件,用於配置信息的注冊和聲明。
  com.your.company.unique.plugin.id
  Plugin display name here
  1.0
  YourCompany


      most HTML tags may be used
    ]]>


      most HTML tags may be used
    ]]>
來簡單介紹下這個XML配置文件:
id:插件的ID,保證插件的唯一性,如果上傳倉庫的話。
name:插件名稱。
version:版本號。
description:插件的簡介。
change-notes:版本更新信息。
extensions:擴展組件注冊 。
actions:Action注冊,比如在某個菜單下增加一個按鈕就要在這注冊。

好了,現在我們要用到很關鍵的一個類:AnAction,選擇new->Action就可以創建:
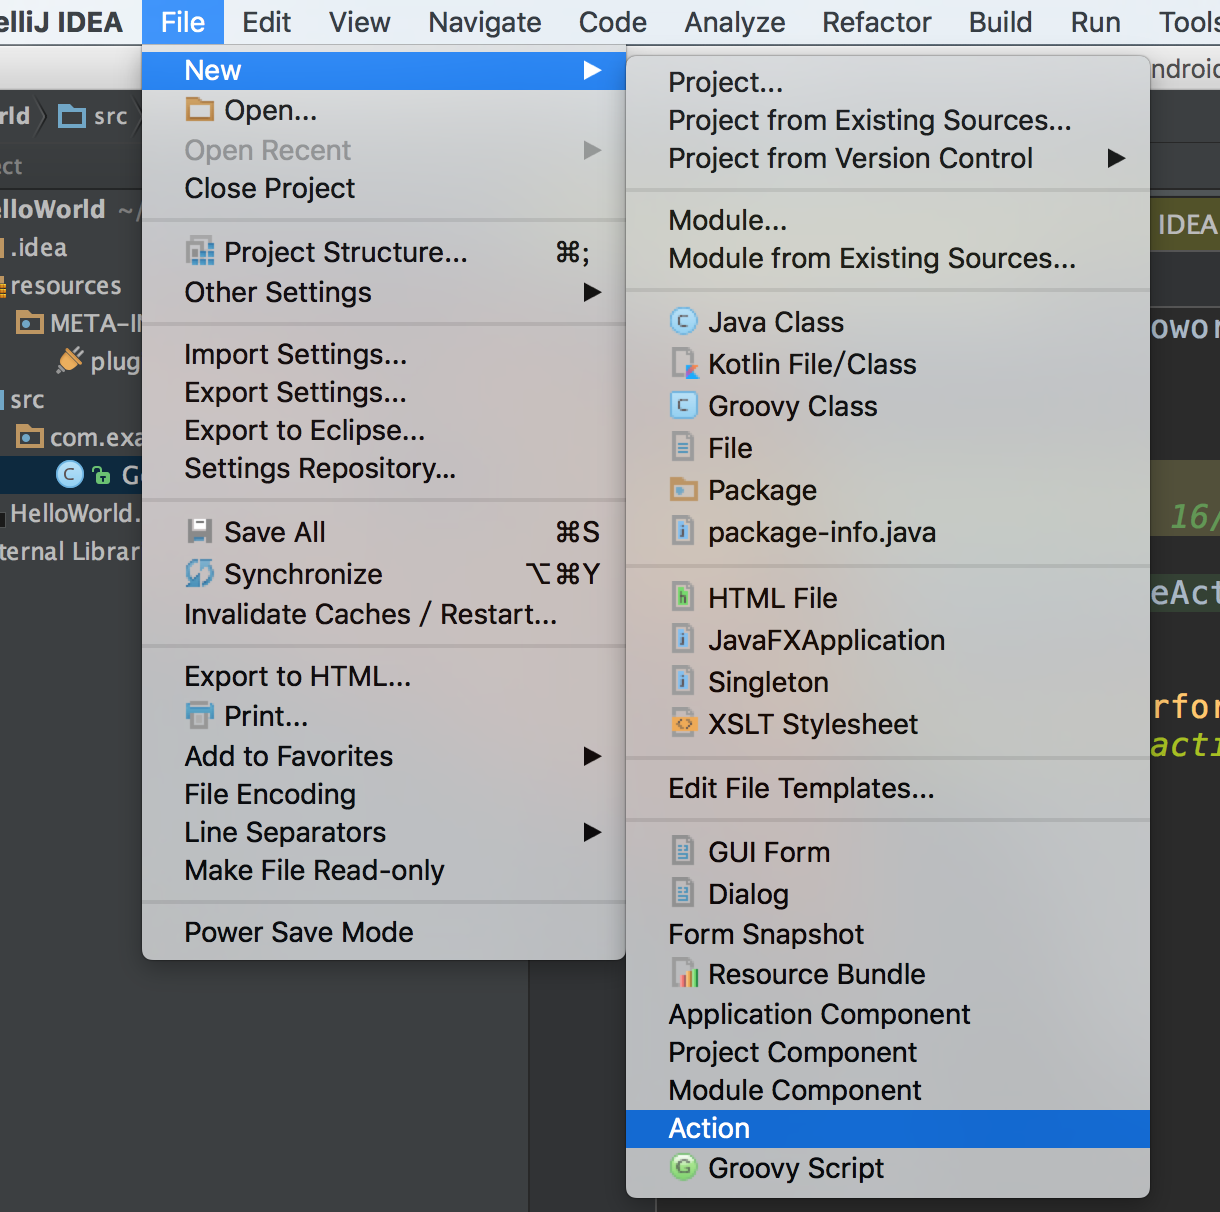
ActionID:代表該Action的唯一的ID
ClassName:類名
Name:插件在菜單上的名稱
Description:對這個Action的描述信息
Groups:定義這個菜單選項出現的位置,比如圖中設置當點擊菜單欄Edit時,第一項會出現GenerateCode的選項,右邊的Anchor是選擇該選項出現的位置,默認First即最頂部。
之後會出現我們創建的GenerateCodeAction類:
public class GenerateCodeAction extends AnAction {??
@Override?
 public void actionPerformed(AnActionEvent e) {?
 // TODO: insert action logic here?
  }?
}
而plugin.xml中也多了一段代碼:
這樣,一個菜單選項就完成了,接下來就該實現當用戶點擊GenerateCode菜單或者按快捷鍵Command+ M後的功能代碼了。
在實現功能邏輯之前,我們要先理清需求,首先我們是想在選中布局文件的時候,自動解析布局文件並生成findviewbyid代碼。那我們主要關注三個點就可以了。
1、如何獲取布局文件
2、如何解析布局文件
3、如何根據將代碼寫入文件
1、如何獲取布局文件
為簡單起見,我們這裡通過讓用戶自己輸入布局文件的方式通過FilenameIndex.getFilesByName方法來查找布局文件。
查找文件我們要用到PsiFile類,官方文檔給我們的提供了幾種方式:
From an action:
    e.getData(LangDataKeys.PSI_FILE).
From a VirtualFile:
    PsiManager.getInstance(project).findFile()
From a Document:
    PsiDocumentManager.getInstance(project).getPsiFile()
From an element inside the file:
     psiElement.getContainingFile()
To find files with a specific name anywhere in the project, use :
    FilenameIndex.getFilesByName(project, name, scope)
這裡使用最後一種方式來獲取圖片,獲取用戶選中的布局文件,如果用戶沒有選中內容,通過在狀態欄彈窗提示:
 public static void showNotification(Project project, MessageType type, String text) {
        StatusBar statusBar = WindowManager.getInstance().getStatusBar(project);

        JBPopupFactory.getInstance()
                .createHtmlTextBalloonBuilder(text, type, null)
                .setFadeoutTime(7500)
                .createBalloon()
                .show(RelativePoint.getCenterOf(statusBar.getComponent()), Balloon.Position.atRight);
    }
獲取用戶選中內容:
@Override
public void actionPerformed(AnActionEvent e) {
Project project = e.getProject();
Editor editor = e.getData(PlatformDataKeys.EDITOR);
if (null == editor) {
return;
}
SelectionModel model = editor.getSelectionModel();
//獲取選中內容
final String selectedText = model.getSelectedText();
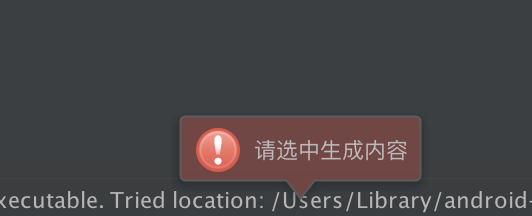
if (TextUtils.isEmpty(selectedText)) {
Utils.showNotification(project,MessageType.ERROR,"請選中生成內容");
return;
}
}
獲取XML文件:
PsiFile[] mPsiFiles = FilenameIndex.getFilesByName(project, selectedText+".xml", GlobalSearchScope.allScope(project));
        if (mPsiFiles.length<=0){
            Utils.showNotification(project,MessageType.INFO,"所輸入的布局文件沒有找到!");
            return;
        }
        XmlFile xmlFile =  (XmlFile) mPsiFiles[0];
至此,布局文件獲取到了,我們開始下一步,解析布局文件啦。
2、如何解析布局文件
關於文件操作,官方文檔是這樣寫的:
Most interesting modification operations are performed on the level of individual PSI elements, not files as a whole.
To iterate over the elements in a file, use
psiFile.accept(new PsiRecursiveElementWalkingVisitor()…);
我們這裡通過file.accept(new XmlRecursiveElementVisitor())方法對XML文件進行解析:
public static ArrayListgetIDsFromLayout(final PsiFile file, final ArrayList elements) { file.accept(new XmlRecursiveElementVisitor() { @Override public void visitElement(final PsiElement element) { super.visitElement(element); //解析XML標簽 if (element instanceof XmlTag) { XmlTag tag = (XmlTag) element; //解析include標簽 if (tag.getName().equalsIgnoreCase("include")) { XmlAttribute layout = tag.getAttribute("layout", null); if (layout != null) { Project project = file.getProject(); // PsiFile include = findLayoutResource(file, project, getLayoutName(layout.getValue())); PsiFile include = null; PsiFile[] mPsiFiles = FilenameIndex.getFilesByName(project, getLayoutName(layout.getValue())+".xml", GlobalSearchScope.allScope(project)); if (mPsiFiles.length>0){ include = mPsiFiles[0]; } if (include != null) { getIDsFromLayout(include, elements); return; } } } // get element ID XmlAttribute id = tag.getAttribute("android:id", null); if (id == null) { return; // missing android:id attribute } String value = id.getValue(); if (value == null) { return; // empty value } // check if there is defined custom class String name = tag.getName(); XmlAttribute clazz = tag.getAttribute("class", null); if (clazz != null) { name = clazz.getValue(); } try { Element e = new Element(name, value, tag); elements.add(e); } catch (IllegalArgumentException e) { // TODO log } } } }); return elements; } public static String getLayoutName(String layout) { if (layout == null || !layout.startsWith("@") || !layout.contains("/")) { return null; // it's not layout identifier } String[] parts = layout.split("/"); if (parts.length != 2) { return null; // not enough parts } return parts[1]; }
以及實體類Element:
package com.example.helloworld.entity;

import com.intellij.psi.xml.XmlAttribute;
import com.intellij.psi.xml.XmlTag;

import java.util.Locale;
import java.util.regex.Matcher;
import java.util.regex.Pattern;

public class Element {

    // constants
    private static final Pattern sIdPattern = Pattern.compile("@\\+?(android:)?id/([^$]+)$", Pattern.CASE_INSENSITIVE);
    private static final Pattern sValidityPattern = Pattern.compile("^([a-zA-Z_\\$][\\w\\$]*)$", Pattern.CASE_INSENSITIVE);
    public String id;
    public boolean isAndroidNS = false;
    public String nameFull; // element mClassName with package
    public String name; // element mClassName
    public int fieldNameType = 1; // 1 aa_bb_cc; 2 aaBbCc 3 mAaBbCc
    public boolean isValid = false;
    public boolean used = true;
    public boolean isClickable = false; // Button, view_having_clickable_attr etc.
    public boolean isItemClickable = false; // ListView, GridView etc.
    public boolean isEditText = false; // EditText
    public XmlTag xml;

    //GET SET mClassName
    public String strGetMethodName;
    public String strSetMethodName;

    /**
     * Constructs new element
     *
     * @param name Class mClassName of the view
     * @param id   Value in android:id attribute
     * @throws IllegalArgumentException When the arguments are invalid
     */
    public Element(String name, String id, XmlTag xml) {
        // id
        final Matcher matcher = sIdPattern.matcher(id);
        if (matcher.find() && matcher.groupCount() > 1) {
            this.id = matcher.group(2);

            String androidNS = matcher.group(1);
            this.isAndroidNS = !(androidNS == null || androidNS.length() == 0);
        }

        if (this.id == null) {
            throw new IllegalArgumentException("Invalid format of view id");
        }

        // mClassName
        String[] packages = name.split("\\.");
        if (packages.length > 1) {
            this.nameFull = name;
            this.name = packages[packages.length - 1];
        } else {
            this.nameFull = null;
            this.name = name;
        }

        this.xml = xml;

        // clickable
        XmlAttribute clickable = xml.getAttribute("android:clickable", null);
        boolean hasClickable = clickable != null &&
                clickable.getValue() != null &&
                clickable.getValue().equals("true");
        String xmlName = xml.getName();
        if (xmlName.contains("RadioButton")) {
            // TODO check
        } else {
            if ((xmlName.contains("ListView") || xmlName.contains("GridView")) && hasClickable) {
                isItemClickable = true;
            } else if (xmlName.contains("Button") || hasClickable) {
                isClickable = true;
            }
        }

        // isEditText
        isEditText = xmlName.contains("EditText");
    }

    /**
     * Create full ID for using in layout XML files
     *
     * @return
     */
    public String getFullID() {
        StringBuilder fullID = new StringBuilder();
        String rPrefix;

        if (isAndroidNS) {
            rPrefix = "android.R.id.";
        } else {
            rPrefix = "R.id.";
        }

        fullID.append(rPrefix);
        fullID.append(id);

        return fullID.toString();
    }

    /**
     * Generate field mClassName if it's not done yet
     *
     * @return
     */
    public String getFieldName() {
        String fieldName = id;
        String[] names = id.split("_");
        if (fieldNameType == 2) {
            // aaBbCc
            StringBuilder sb = new StringBuilder();
            for (int i = 0; i < names.length; i++) {
                if (i == 0) {
                    sb.append(names[i]);
                } else {
                    sb.append(firstToUpperCase(names[i]));
                }
            }
            fieldName = sb.toString();
        } else if (fieldNameType == 3) {
            // mAaBbCc
            StringBuilder sb = new StringBuilder();
            for (int i = 0; i < names.length; i++) {
                if (i == 0) {
                    sb.append("m");
                }
                sb.append(firstToUpperCase(names[i]));
            }
            fieldName = sb.toString();
        }
        return fieldName;
    }

    /**
     * Check validity of field mClassName
     *
     * @return
     */
    public boolean checkValidity() {
        Matcher matcher = sValidityPattern.matcher(getFieldName());
        isValid = matcher.find();

        return isValid;
    }
    public static String firstToUpperCase(String key) {
        return key.substring(0, 1).toUpperCase(Locale.CHINA) + key.substring(1);
    }
}
一些有用的方法
通用方法
FilenameIndex.getFilesByName()通過給定名稱(不包含具體路徑)搜索對應文件
ReferencesSearch.search()類似於IDE中的Find Usages操作
RefactoringFactory.createRename()重命名
FileContentUtil.reparseFiles()通過VirtualFile重建PSIJava專用方法
ClassInheritorsSearch.search()搜索一個類的所有子類
JavaPsiFacade.findClass()通過類名查找類
PsiShortNamesCache.getInstance().getClassesByName()通過一個短名稱(例如LogUtil)查找類
PsiClass.getSuperClass()查找一個類的直接父類
JavaPsiFacade.getInstance().findPackage()獲取Java類所在的Package
OverridingMethodsSearch.search()查找被特定方法重寫的方法
3、如何根據將代碼寫入文件
如Android不允許在UI線程中進行耗時操作一樣,Intellij Platform也不允許在主線程中進行實時的文件寫入,而需要通過一個異步任務來進行。
  new WriteCommandAction(project) {
            @Override
            protected void run(@NotNull Result result) throws Throwable {
                //writing to file
            }
       }.execute();
也可以繼承自WriteCommandAction.Simple來執行寫操作。
 @Override
    public void run() throws Throwable {

        generateFields();
        generateFindViewById();
        // reformat class
        JavaCodeStyleManager styleManager = JavaCodeStyleManager.getInstance(mProject);
        styleManager.optimizeImports(mFile);
        styleManager.shortenClassReferences(mClass);
        new ReformatCodeProcessor(mProject, mClass.getContainingFile(), null, false).runWithoutProgress();
    }
主要使用psiclass.add(JavaPsiFacade.getElementFactory(mProject).createMethodFromText(sbInitView.toString(), psiclass))方法為類創建方法;用mFactory.createFieldFromText方法添加字段;用mClass.findMethodsByName方法查找方法,用onCreate.getBody().addAfter(mFactory.createStatementFromText("initView();", mClass), setContentViewStatement);方法為方法體添加內容。
protected void generateFields() {
        for (Iterator iterator = mElements.iterator(); iterator.hasNext(); ) {
            Element element = iterator.next();

            if (!element.used) {
                iterator.remove();
                continue;
            }

            // remove duplicate field
            PsiField[] fields = mClass.getFields();
            boolean duplicateField = false;
            for (PsiField field : fields) {
                String name = field.getName();
                if (name != null && name.equals(element.getFieldName())) {
                    duplicateField = true;
                    break;
                }
            }

            if (duplicateField) {
                iterator.remove();
                continue;
            }
            String hint = element.xml.getAttributeValue("android:hint");
            mClass.add(mFactory.createFieldFromText("/** "+hint+" */\nprivate " + element.name + " " + element.getFieldName() + ";", mClass));
        }
    }

    protected void generateFindViewById() {
        PsiClass activityClass = JavaPsiFacade.getInstance(mProject).findClass(
                "android.app.Activity", new EverythingGlobalScope(mProject));
        PsiClass compatActivityClass = JavaPsiFacade.getInstance(mProject).findClass(
                "android.support.v7.app.AppCompatActivity", new EverythingGlobalScope(mProject));

        // Check for Activity class
        if ((activityClass != null && mClass.isInheritor(activityClass, true))
                || (compatActivityClass != null && mClass.isInheritor(compatActivityClass, true))
                || mClass.getName().contains("Activity")) {
            if (mClass.findMethodsByName("onCreate", false).length == 0) {
                // Add an empty stub of onCreate()
                StringBuilder method = new StringBuilder();
                method.append("@Override protected void onCreate(android.os.Bundle savedInstanceState) {\n");
                method.append("super.onCreate(savedInstanceState);\n");
                method.append("\t// TODO: add setContentView(...) and run LayoutCreator again\n");
                method.append("}");

                mClass.add(mFactory.createMethodFromText(method.toString(), mClass));
            } else {
                PsiStatement setContentViewStatement = null;
                boolean hasInitViewStatement = false;

                PsiMethod onCreate = mClass.findMethodsByName("onCreate", false)[0];
                for (PsiStatement statement : onCreate.getBody().getStatements()) {
                    // Search for setContentView()
                    if (statement.getFirstChild() instanceof PsiMethodCallExpression) {
                        PsiReferenceExpression methodExpression = ((PsiMethodCallExpression) statement.getFirstChild()).getMethodExpression();
                        if (methodExpression.getText().equals("setContentView")) {
                            setContentViewStatement = statement;
                        } else if (methodExpression.getText().equals("initView")) {
                            hasInitViewStatement = true;
                        }
                    }
                }

                if(!hasInitViewStatement && setContentViewStatement != null) {
                    // Insert initView() after setContentView()
                    onCreate.getBody().addAfter(mFactory.createStatementFromText("initView();", mClass), setContentViewStatement);
                }
                generatorLayoutCode();
            }
        }
    }
    private void generatorLayoutCode() {
        // generator findViewById code in initView() method
        StringBuilder initView = new StringBuilder();
            initView.append("private void initView() {\n");

        for (Element element : mElements) {
            initView.append(element.getFieldName() + " = (" + element.name + ")findViewById(" + element.getFullID() + ");\n");
        }
        initView.append("}\n");
      mClass.add(mFactory.createMethodFromText(initView.toString(), mClass));

    }
至此,我們之前的目標已經完成了,編碼階段告一段落。
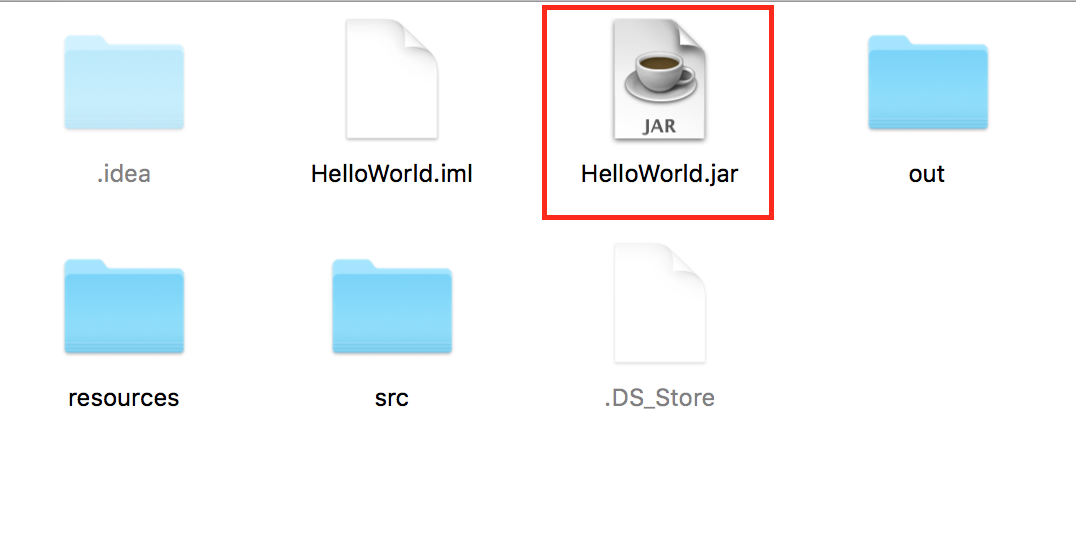
我們的插件實現完了,填寫下plugin.xml文件相關內容,我們就可以導出需要安裝的jar文件了:
打開android studio,進入setting頁面,安裝插件:
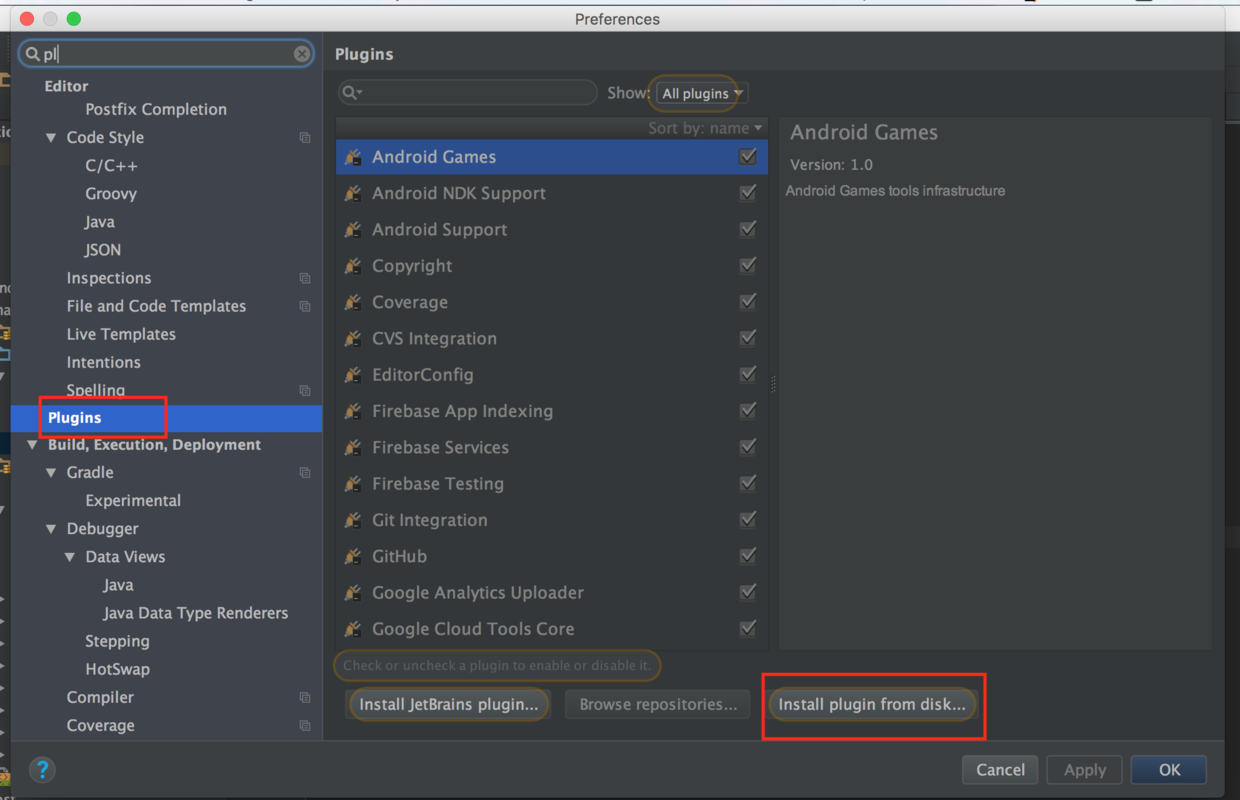
到這裡,重啟android studio就可以使用我們的插件了。
當然,還可以把我們的插件發布到倉庫,支持在plugin中搜索安裝,可以參考官方給的文檔:
http://www.jetbrains.org/intellij/sdk/docs/basics/getting_started/publishing_plugin.html
我們的插件這樣就完成了,本文很多地方實現都參考了BorePlugin的實現,如果對實現細節感興趣,可以查看這個開源項目的源碼,再次也對作者表示感謝。文章簡化版本的源碼相對簡單,方便理解,可以點此下載。
 Android通過RemoteViews實現跨進程更新UI示例
一、概述前面一篇文章Android通過AIDL實現跨進程更新UI我們學習了aidl跨進程更新ui,這種傳統方式實現跨進程更新UI是可行的,但有以下弊端: View中的方
 Android利用Get、Post 獲取網絡數據
首先是Get: 布局很簡單,就一個按鈕,主要看一下MainActivity吧: package com.francis.httpget; import android
 直接拿來用的Android刮獎控件
直接上效果圖 功能特色: 1、可以設置刮開後顯示文字或圖片 2、可以統計已刮開區域所占百分比 Demo下載地址:RubberDem
 實現滑動的七種方法
當了解了Android坐標系和觸控事件後,我們再來看看如何使用系統提供的API來實現動態地修改一個View的坐標,即實現滑動效果。而不管采用哪一種方式,其實現的思想基本是