編輯:關於Android編程
研究增量更新的熱情被激發了,通過幾天的資料查找和學習,搞懂增量更新之余,也順便練習了下NDK開發。
效果圖預覽
開發環境
Android Studio 2.2.1 For Windows CMake Cygwin最新的Android Studio 2.2集成了CMake構建工具,並支持在C++打斷點,聽說在NDK開發上比以前更方便快捷,在創建工程時就可以選擇C++支持。

在Android Studio界面點擊Tools–>Android–>SDN Manager–>點擊SDK Tools標簽–>勾選CMake、LLDB、NDK–>確認即可安裝NDK環境
創建一個工程,勾選Include C++ Support,Android Studio會在main目錄創建cpp文件夾,裡邊有個native-lib.cpp的C++文件;在app目錄還有個CMakeLists.txt文件,這個文件類似過去的Android.mk;在module的build.gradle中標示了采用CMake構建方式,並設置CMakeLists.txt路徑。
下載bsdiff工具,以及依賴的bzip2工具
bsdiff官網:http://www.daemonology.net/bsdiff/
bsdiff 4.3下載地址:http://www.daemonology.net/bsdiff/bsdiff-4.3.tar.gz
bzip2官網:http://www.bzip.org/downloads.html
bzip2-1.0.6下載地址:http://www.bzip.org/1.0.6/bzip2-1.0.6.tar.gz
//定義工程名稱
PROJECT(bzip2)
將app目錄下的CMakeLists.txt文件移動到cpp目錄,並將其修改為:
# Sets the minimum version of CMake required to build the native
# library. You should either keep the default value or only pass a
# value of 3.4.0 or lower.

#CMake版本信息
cmake_minimum_required(VERSION 3.4.1)

#支持-std=gnu++11
set(CMAKE_VERBOSE_MAKEFILE on)
set(CMAKE_CXX_FLAGS "${CMAKE_CXX_FLAGS} -std=gnu++11 -Wall -DGLM_FORCE_SIZE_T_LENGTH")
set(CMAKE_CXX_FLAGS "${CMAKE_CXX_FLAGS} -DGLM_FORCE_RADIANS")

#添加bzip2目錄,為構建添加一個子路徑
set(bzip2_src_DIR ${CMAKE_SOURCE_DIR})
add_subdirectory(${bzip2_src_DIR}/bzip2)

#cpp目錄下待編譯的bspatch.c文件
add_library( # Sets the name of the library.
             bspatch

             # Sets the library as a shared library.
             SHARED

             # Provides a relative path to your source file(s).
             # Associated headers in the same location as their source
             # file are automatically included.
             bspatch.c )

# Searches for a specified prebuilt library and stores the path as a
# variable. Because system libraries are included in the search path by
# default, you only need to specify the name of the public NDK library
# you want to add. CMake verifies that the library exists before
# completing its build.

find_library( # Sets the name of the path variable.
              log-lib

              # Specifies the name of the NDK library that
              # you want CMake to locate.
              log )

# Specifies libraries CMake should link to your target library. You
# can link multiple libraries, such as libraries you define in the
# build script, prebuilt third-party libraries, or system libraries.

target_link_libraries( # Specifies the target library.
                       bspatch

                       # Links the target library to the log library
                       # included in the NDK.
                       ${log-lib} )
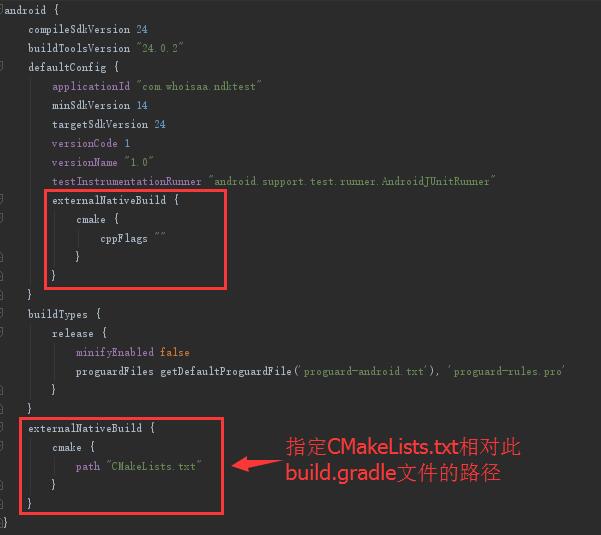
將module的build.gradle中的CMakeLists.txt路徑改為:
externalNativeBuild {
        cmake {
            path "src/main/cpp/CMakeLists.txt"
        }
    }
修改cpp/bspatch.c文件,加入bzip2的頭文件包含,修改main函數名為patch_main,添加JNI函數
………… #include#include // bzip2 #include "bzip2/bzlib.h" #include "bzip2/bzlib.c" #include "bzip2/crctable.c" #include "bzip2/compress.c" #include "bzip2/decompress.c" #include "bzip2/randtable.c" #include "bzip2/blocksort.c" #include "bzip2/huffman.c" ………… int bspatch_main(int argc,char * argv[]) { ………… } JNIEXPORT jint JNICALL Java_com_whoisaa_apkpatchdemo_BsPatchJNI_patch(JNIEnv *env, jclass type, jstring oldApkPath_, jstring newApkPath_, jstring patchPath_) { const char *oldApkPath = (*env)->GetStringUTFChars(env, oldApkPath_, 0); const char *newApkPath = (*env)->GetStringUTFChars(env, newApkPath_, 0); const char *patchPath = (*env)->GetStringUTFChars(env, patchPath_, 0); // TODO int argc = 4; char* argv[4]; argv[0] = "bspatch"; argv[1] = oldApkPath; argv[2] = newApkPath; argv[3] = patchPath; int ret = bspatch_main(argc, argv); (*env)->ReleaseStringUTFChars(env, oldApkPath_, oldApkPath); (*env)->ReleaseStringUTFChars(env, newApkPath_, newApkPath); (*env)->ReleaseStringUTFChars(env, patchPath_, patchPath); return ret; }
注意:Java_com_whoisaa_apkpatchdemo_BsPatchJNI_patch(JNIEnv *env, jclass type, jstring oldApkPath_,jstring newApkPath_, jstring patchPath_)是下面我們要創建的BsPatchJNI類的JNI函數名,com_whoisaa_apkpatchdemo為包名請對應地修改
(1)第一個參數表示JNI環境本身
(2)第二個參數,當方法靜態時為jclass,否則為jobject類型
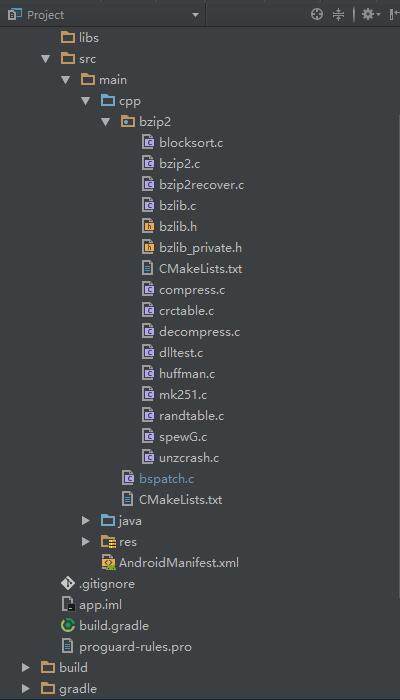
最後的cpp目錄是這樣子的:
public class BsPatchJNI {

    static {
        System.loadLibrary("bspatch");
    }

    /**
     * 將增量文件合成為新的Apk
     * @param oldApkPath 當前Apk路徑
     * @param newApkPath 合成後的Apk保存路徑
     * @param patchPath 增量文件路徑
     * @return
     */
    public static native int patch(String oldApkPath, String newApkPath, String patchPath);
}
在MainActivity中使用:
public class MainActivity extends AppCompatActivity {

    public static final String SDCARD_PATH = Environment.getExternalStorageDirectory() + File.separator;
    public static final String PATCH_FILE = "old-to-new.patch";
    public static final String NEW_APK_FILE = "new.apk";


    @Override
    protected void onCreate(Bundle savedInstanceState) {
        super.onCreate(savedInstanceState);
        setContentView(R.layout.activity_main);

        findViewById(R.id.btn_main).setOnClickListener(new View.OnClickListener() {
            @Override
            public void onClick(View v) {
                //並行任務
                new ApkUpdateTask().executeOnExecutor(AsyncTask.THREAD_POOL_EXECUTOR);
            }
        });
    }

    /**
     * 合並增量文件任務
     */
    private class ApkUpdateTask extends AsyncTask {

        @Override
        protected Boolean doInBackground(Void... params) {
            String oldApkPath = ApkUtils.getCurApkPath(MainActivity.this);
            File oldApkFile = new File(oldApkPath);
            File patchFile = new File(getPatchFilePath());
            if(oldApkFile.exists() && patchFile.exists()) {
                Log("正在合並增量文件...");
                String newApkPath = getNewApkFilePath();
                BsPatchJNI.patch(oldApkPath, newApkPath, getPatchFilePath());
//                //檢驗文件MD5值
//                return Signtils.checkMd5(oldApkFile, MD5);

                Log("增量文件的MD5值為:" + SignUtils.getMd5ByFile(patchFile));
                Log("新文件的MD5值為:" + SignUtils.getMd5ByFile(new File(newApkPath)));

                return true;
            }
            return false;
        }

        @Override
        protected void onPostExecute(Boolean result) {
            super.onPostExecute(result);
            if(result) {
                Log("合並成功,開始安裝");
                ApkUtils.installApk(MainActivity.this, getNewApkFilePath());
            } else {
                Log("合並失敗");
            }
        }
    }

    private String getPatchFilePath() {
        return SDCARD_PATH + PATCH_FILE;
    }

    private String getNewApkFilePath() {
        return SDCARD_PATH + NEW_APK_FILE;
    }

    /**
     * 打印日志
     * @param log
     */
    private void Log(String log) {
        Log.e("MainActivity", log);
    }

}
創建ApkUtils.java,用來獲取當前Apk路徑和安裝新的Apk文件
public class ApkUtils {

    /**
     * 獲取當前應用的Apk路徑
     * @param context 上下文
     * @return
     */
    public static String getCurApkPath(Context context) {
        context = context.getApplicationContext();
        ApplicationInfo applicationInfo = context.getApplicationInfo();
        String apkPath = applicationInfo.sourceDir;
        return apkPath;
    }

    /**
     * 安裝Apk
     * @param context 上下文
     * @param apkPath Apk路徑
     */
    public static void installApk(Context context, String apkPath) {
        File file = new File(apkPath);
        if(file.exists()) {
            Intent intent = new Intent(Intent.ACTION_VIEW);
            intent.setFlags(Intent.FLAG_ACTIVITY_NEW_TASK);
            intent.setDataAndType(Uri.fromFile(file), "application/vnd.android.package-archive");
            context.startActivity(intent);
        }
    }
}
創建SignUtils.java,用來校驗增量文件和合成的新Apk文件MD5值是否與服務器給的值相同
public class SignUtils {

    /**
     * 判斷文件的MD5值是否為指定值
     * @param file1
     * @param md5
     * @return
     */
    public static boolean checkMd5(File file1, String md5) {
        if(TextUtils.isEmpty(md5)) {
            throw new RuntimeException("md5 cannot be empty");
        }

        if(file1 != null && file1.exists()) {
            String file1Md5 = getMd5ByFile(file1);
            return file1Md5.equals(md5);
        }
        return false;
    }

    /**
     * 獲取文件的MD5值
     * @param file
     * @return
     */
    public static String getMd5ByFile(File file) {
        String value = null;
        FileInputStream in = null;
        try {
            in = new FileInputStream(file);

            MessageDigest digester = MessageDigest.getInstance("MD5");
            byte[] bytes = new byte[8192];
            int byteCount;
            while ((byteCount = in.read(bytes)) > 0) {
                digester.update(bytes, 0, byteCount);
            }
            value = bytes2Hex(digester.digest());
        } catch (Exception e) {
            e.printStackTrace();
        } finally {
            if (null != in) {
                try {
                    in.close();
                } catch (IOException e) {
                    e.printStackTrace();
                }
            }
        }
        return value;
    }

    private static String bytes2Hex(byte[] src) {
        char[] res = new char[src.length * 2];
        final char hexDigits[] = {'0', '1', '2', '3', '4', '5', '6', '7', '8', '9', 'a', 'b', 'c', 'd', 'e', 'f'};
        for (int i = 0, j = 0; i < src.length; i++) {
            res[j++] = hexDigits[src[i] >>> 4 & 0x0f];
            res[j++] = hexDigits[src[i] & 0x0f];
        }

        return new String(res);
    }
}
最後在AndroidManifest.xml中加入SD卡操作權限和網絡權限
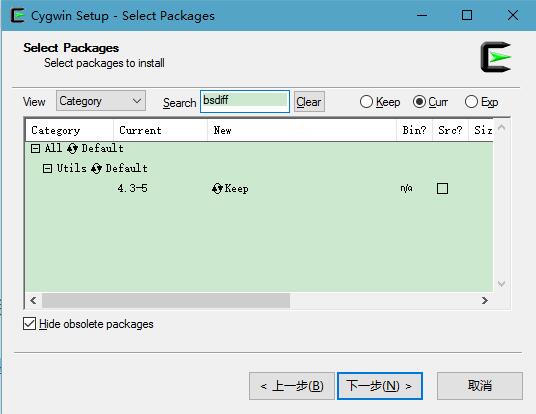
一開始我用的是鴻洋文章說的方法,在Cygwin中使用make生成bsdiff和bspatch文件,可惜失敗了,修改Makefile文件中的縮進也還是報錯。最後我在Cygwin中下載了bsdiff組件,順利運行bsdiff命令。
在這裡使用的Cygwin下載源是:http://mirrors.163.com/cygwin/x86_64/
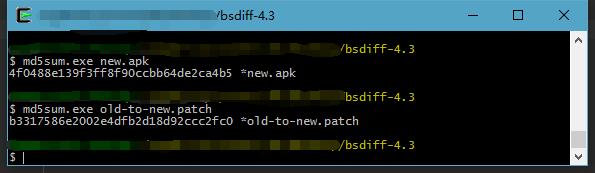
然後使用命令生成增量文件:
bsdiff old.apk new.apk old-to-new.patch把這個增量文件放在服務器或SD卡中(測試),我們可以在Cygwin中查看patch文件和新Apk包的MD5值,然後運行App合成新Apk,對比下兩個MD5是一致的,表示這次合成增量文件是OK的!

為了搞定這個增量更新,花了好幾天時間,現在終於把很多東西都理清楚了,原先不太熟悉的NDK也有了小進步,一切都是值得的。
之前失敗過很多次,都是因為CMake語法的不熟悉,這裡有一個很贊很贊的CMake文檔(中文):http://pan.baidu.com/s/1jI2RWqE,寫這篇文章時我也還沒看完,接下來會花時間好好研究。 曾經試過直接loadLibrary別人Demo中的so文件,最後失敗了。就是因為JNI函數包名與當前工程包名不同,找不到對應JNI函數導致的。很想知道百度地圖這些so文件如何讓別人調用的,知道的朋友可以說下,謝謝! 在一個悠閒的公司有利有弊,只希望自己在技術上不止步,繼續向前!Github源碼:https://github.com/WhoIsAA/ApkPatchDemo
 淺談Android自定義鎖屏頁
一、為什麼需要自定義鎖屏頁鎖屏作為一種黑白屏時代就存在的手機功能,至今仍發揮著巨大作用,特別是觸屏時代的到來,鎖屏的功用被發揮到了極致。多少人曾經在無聊的時候每隔幾分鐘劃
 Android Fragment——詳解
1.Fragment概述 在一個Activity中, Fragment代表UI的一個部分或者一個行為。一個Activity可以結合多個Fragment對象,
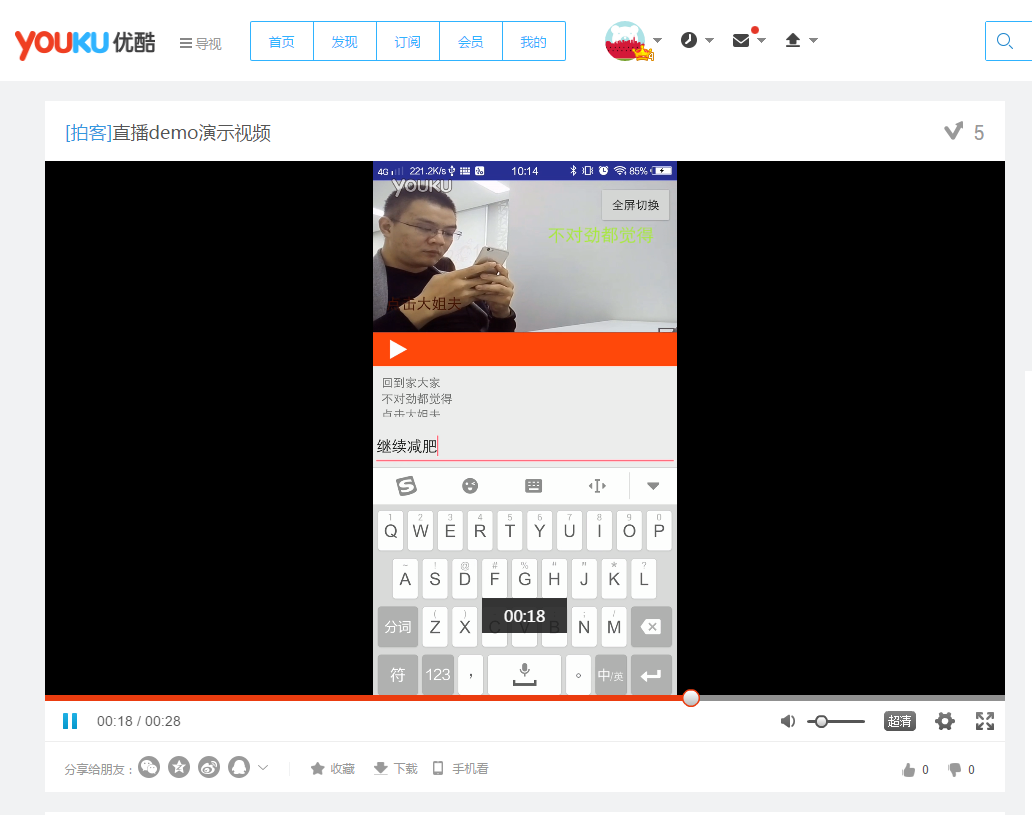 一步一步實現直播和彈幕
序言最近在研究直播的彈幕,東西有點多,准備記錄一下免得自己忘了又要重新研究,也幫助有這方面需要的同學少走點彎路。關於直播的技術細節其實就是兩個方面一個是推流一個是拉流,而
 Android項目之九圖靈機器人
要實現一個圖靈機器人,首先需要在 http://www.tuling123.com/ 中注冊,然後創建一個應用,便可通過應用的API key使用圖靈機器人。圖靈機器人非常