編輯:關於Android編程
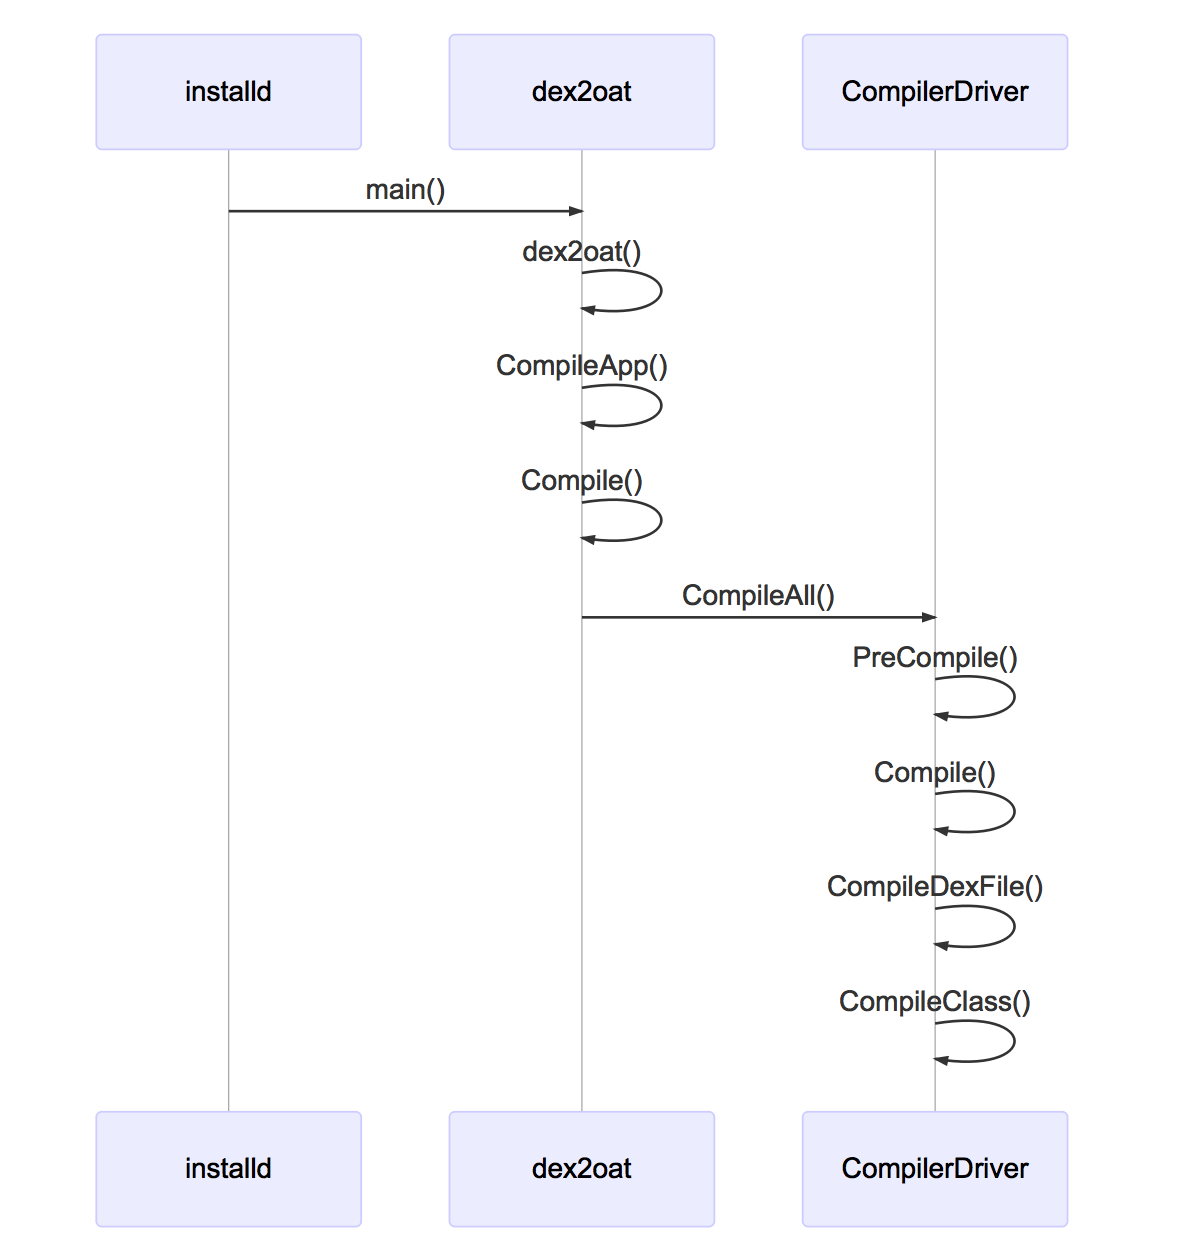
進入整個流程之前,我們先看一下地圖,大致熟悉一下我們下一步要去哪裡:

dex2oat的main函數,直接是dex2oat工廠函數的封裝。
int main(int argc, char** argv) {
  int result = art::dex2oat(argc, argv);
  // Everything was done, do an explicit exit here to avoid running Runtime destructors that take
  // time (bug 10645725) unless we're a debug build or running on valgrind. Note: The Dex2Oat class
  // should not destruct the runtime in this case.
  if (!art::kIsDebugBuild && (RUNNING_ON_VALGRIND == 0)) {
    exit(result);
  }
  return result;
}
我們先看一下流程圖,然後對照到代碼看。

dex2oat的整個邏輯是很清晰的:
首先是不得不做一個arm上的wZ喎?/kf/ware/vc/" target="_blank" class="keylink">vcmthcm91bmSjrNXiuPbT687Sw8e31s72tcTW98/f1N3Ksc7eudijrMHLveLSu8/Cvs2/ydLUwcuhozxiciAvPg0KyLu688v51/a1xMrCx+mjujxiciAvPg0KMS4gubnU7ERleDJvYXS21M/zPGJyIC8+DQoyLiC0psDtw/zB7tDQss7K/TxiciAvPg0KMy4gz8jQ0MXQts+21NPazsS8/srHt/HT0NC0tcTIqM/ePGJyIC8+DQo0LiC08tOhw/zB7tDQss7K/TxiciAvPg0KNS4gxdC2z2RleDJvYXS1xHNldHVwyse38c3qs8k8YnIgLz4NCjYuILj5vt3Kx7fxaW1hZ2W31rHwtffTw0NvbXBpbGVJbWFnZbvyQ29tcGlsZUFwcLXEtKbA7TwvcD4NCjxwPrT6wuvA78Pm16LKzbrcz+rPuKOsv8m2wdDUuty6w6OsztLDx7+00rvPwqO6PC9wPg0KPHByZSBjbGFzcz0="brush:java;">
static int dex2oat(int argc, char** argv) {
b13564922();
TimingLogger timings("compiler", false, false);
Dex2Oat dex2oat(&timings);
// Parse arguments. Argument mistakes will lead to exit(EXIT_FAILURE) in UsageError.
dex2oat.ParseArgs(argc, argv);
// Check early that the result of compilation can be written
if (!dex2oat.OpenFile()) {
return EXIT_FAILURE;
}
// Print the complete line when any of the following is true:
// 1) Debug build
// 2) Compiling an image
// 3) Compiling with --host
// 4) Compiling on the host (not a target build)
// Otherwise, print a stripped command line.
if (kIsDebugBuild || dex2oat.IsImage() || dex2oat.IsHost() || !kIsTargetBuild) {
LOG(INFO) << CommandLine();
} else {
LOG(INFO) << StrippedCommandLine();
}
if (!dex2oat.Setup()) {
dex2oat.EraseOatFile();
return EXIT_FAILURE;
}
if (dex2oat.IsImage()) {
return CompileImage(dex2oat);
} else {
return CompileApp(dex2oat);
}
}
} // namespace art
處理命令行參數等細節我們後面再補,我們先躍進到核心邏輯CompileApp中。
我們可以看到,基本上還是對於dex2oat.Compile的封裝,後面都是對寫文件和計時的處理。
static int CompileApp(Dex2Oat& dex2oat) {
  dex2oat.Compile();

  // Create the app oat.
  if (!dex2oat.CreateOatFile()) {
    dex2oat.EraseOatFile();
    return EXIT_FAILURE;
  }

  // Do not close the oat file here. We might haven gotten the output file by file descriptor,
  // which we would lose.
  if (!dex2oat.FlushOatFile()) {
    return EXIT_FAILURE;
  }

  // When given --host, finish early without stripping.
  if (dex2oat.IsHost()) {
    if (!dex2oat.FlushCloseOatFile()) {
      return EXIT_FAILURE;
    }

    dex2oat.DumpTiming();
    return EXIT_SUCCESS;
  }

  // Copy unstripped to stripped location, if necessary. This will implicitly flush & close the
  // unstripped version. If this is given, we expect to be able to open writable files by name.
  if (!dex2oat.CopyUnstrippedToStripped()) {
    return EXIT_FAILURE;
  }

  // Flush and close the file.
  if (!dex2oat.FlushCloseOatFile()) {
    return EXIT_FAILURE;
  }

  dex2oat.DumpTiming();
  return EXIT_SUCCESS;
}
然後我們再看一下完全是一個模子裡面出來的CompileImage.
static int CompileImage(Dex2Oat& dex2oat) {
  dex2oat.Compile();

  // Create the boot.oat.
  if (!dex2oat.CreateOatFile()) {
    dex2oat.EraseOatFile();
    return EXIT_FAILURE;
  }

  // Flush and close the boot.oat. We always expect the output file by name, and it will be
  // re-opened from the unstripped name.
  if (!dex2oat.FlushCloseOatFile()) {
    return EXIT_FAILURE;
  }

  // Creates the boot.art and patches the boot.oat.
  if (!dex2oat.HandleImage()) {
    return EXIT_FAILURE;
  }

  // When given --host, finish early without stripping.
  if (dex2oat.IsHost()) {
    dex2oat.DumpTiming();
    return EXIT_SUCCESS;
  }

  // Copy unstripped to stripped location, if necessary.
  if (!dex2oat.CopyUnstrippedToStripped()) {
    return EXIT_FAILURE;
  }

  // FlushClose again, as stripping might have re-opened the oat file.
  if (!dex2oat.FlushCloseOatFile()) {
    return EXIT_FAILURE;
  }

  dex2oat.DumpTiming();
  return EXIT_SUCCESS;
}
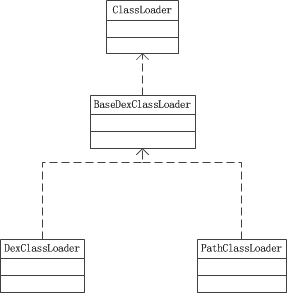
Java不同於其它很多編譯型語言的一點是在於它有ClassLoader。在做編譯之前,先要對ClassLoader進行預處理。
然後,就創建一個CompilerDriver對象,並調用driver的ComileAll來完成編譯。
  // Create and invoke the compiler driver. This will compile all the dex files.
  void Compile() {
    TimingLogger::ScopedTiming t("dex2oat Compile", timings_);
    compiler_phases_timings_.reset(new CumulativeLogger("compilation times"));

    // Handle and ClassLoader creation needs to come after Runtime::Create
    jobject class_loader = nullptr;
    Thread* self = Thread::Current();
    if (!boot_image_option_.empty()) {
      ClassLinker* class_linker = Runtime::Current()->GetClassLinker();
      OpenClassPathFiles(runtime_->GetClassPathString(), dex_files_, &class_path_files_);
      ScopedObjectAccess soa(self);

      // Classpath: first the class-path given.
      std::vector class_path_files;
      for (auto& class_path_file : class_path_files_) {
        class_path_files.push_back(class_path_file.get());
      }

      // Store the classpath we have right now.
      key_value_store_->Put(OatHeader::kClassPathKey,
                            OatFile::EncodeDexFileDependencies(class_path_files));

      // Then the dex files we'll compile. Thus we'll resolve the class-path first.
      class_path_files.insert(class_path_files.end(), dex_files_.begin(), dex_files_.end());

      class_loader = class_linker->CreatePathClassLoader(self, class_path_files);
    }

    driver_ = new CompilerDriver(compiler_options_.get(),
                                 verification_results_,
                                 &method_inliner_map_,
                                 compiler_kind_,
                                 instruction_set_,
                                 instruction_set_features_.get(),
                                 image_,
                                 image_classes_.release(),
                                 compiled_classes_.release(),
                                 nullptr,
                                 thread_count_,
                                 dump_stats_,
                                 dump_passes_,
                                 dump_cfg_file_name_,
                                 compiler_phases_timings_.get(),
                                 swap_fd_,
                                 profile_file_);

    driver_->CompileAll(class_loader, dex_files_, timings_);
  }
核心邏輯還是compiler_的初始化。
看到構造需要這麼多參數,我們需要對於dex2oat的命令行參數進行一個復習了,我們在前面的《細說dex2oat(1)》中曾經有過對於所有參數的介紹。
CompilerDriver::CompilerDriver(const CompilerOptions* compiler_options,
                               VerificationResults* verification_results,
                               DexFileToMethodInlinerMap* method_inliner_map,
                               Compiler::Kind compiler_kind,
                               InstructionSet instruction_set,
                               const InstructionSetFeatures* instruction_set_features,
                               bool image, std::unordered_set* image_classes,
                               std::unordered_set* compiled_classes,
                               std::unordered_set* compiled_methods,
                               size_t thread_count, bool dump_stats, bool dump_passes,
                               const std::string& dump_cfg_file_name, CumulativeLogger* timer,
                               int swap_fd, const std::string& profile_file)
    : swap_space_(swap_fd == -1 ? nullptr : new SwapSpace(swap_fd, 10 * MB)),
      swap_space_allocator_(new SwapAllocator(swap_space_.get())),
      profile_present_(false), compiler_options_(compiler_options),
      verification_results_(verification_results),
      method_inliner_map_(method_inliner_map),
      compiler_(Compiler::Create(this, compiler_kind)),
      compiler_kind_(compiler_kind),
      instruction_set_(instruction_set),
      instruction_set_features_(instruction_set_features),
      freezing_constructor_lock_("freezing constructor lock"),
      compiled_classes_lock_("compiled classes lock"),
      compiled_methods_lock_("compiled method lock"),
      compiled_methods_(MethodTable::key_compare()),
      non_relative_linker_patch_count_(0u),
      image_(image),
      image_classes_(image_classes),
      classes_to_compile_(compiled_classes),
      methods_to_compile_(compiled_methods),
      had_hard_verifier_failure_(false),
      thread_count_(thread_count),
      stats_(new AOTCompilationStats),
      dedupe_enabled_(true),
      dump_stats_(dump_stats),
      dump_passes_(dump_passes),
      dump_cfg_file_name_(dump_cfg_file_name),
      timings_logger_(timer),
      compiler_context_(nullptr),
      support_boot_image_fixup_(instruction_set != kMips && instruction_set != kMips64),
      dedupe_code_("dedupe code", *swap_space_allocator_),
      dedupe_src_mapping_table_("dedupe source mapping table", *swap_space_allocator_),
      dedupe_mapping_table_("dedupe mapping table", *swap_space_allocator_),
      dedupe_vmap_table_("dedupe vmap table", *swap_space_allocator_),
      dedupe_gc_map_("dedupe gc map", *swap_space_allocator_),
      dedupe_cfi_info_("dedupe cfi info", *swap_space_allocator_) {
  DCHECK(compiler_options_ != nullptr);
  DCHECK(verification_results_ != nullptr);
  DCHECK(method_inliner_map_ != nullptr);

  dex_to_dex_compiler_ = reinterpret_cast(ArtCompileDEX);

  compiler_->Init();

  CHECK_EQ(image_, image_classes_.get() != nullptr);
...
}
首先,CompilerDriver展現了一個值得我們學習的好習慣,為編譯線程構造了一個線程池。
在CompilerDriver進行編譯的時候,分成了兩個步驟:
* PreCompile
* Compile
void CompilerDriver::CompileAll(jobject class_loader,
                                const std::vector& dex_files,
                                TimingLogger* timings) {
  DCHECK(!Runtime::Current()->IsStarted());
  std::unique_ptr thread_pool(
      new ThreadPool("Compiler driver thread pool", thread_count_ - 1));
...
  PreCompile(class_loader, dex_files, thread_pool.get(), timings);
  Compile(class_loader, dex_files, thread_pool.get(), timings);
...
}
PreCompile的步驟主要就是兩個:
* 做校驗
* 做類的初始化
我們將前面判斷是否要做校驗的部分先略過,這個PreCompile的邏輯看起來就清晰得多。
void CompilerDriver::PreCompile(jobject class_loader, const std::vector& dex_files,
                                ThreadPool* thread_pool, TimingLogger* timings) {
...

  Verify(class_loader, dex_files, thread_pool, timings);
...
  if (had_hard_verifier_failure_ && GetCompilerOptions().AbortOnHardVerifierFailure()) {
    LOG(FATAL) << "Had a hard failure verifying all classes, and was asked to abort in such "
               << "situations. Please check the log.";
  }

  InitializeClasses(class_loader, dex_files, thread_pool, timings);
...
}
針對每一個dex,調用CompileDexFile去編譯。
void CompilerDriver::Compile(jobject class_loader, const std::vector& dex_files,
                             ThreadPool* thread_pool, TimingLogger* timings) {
  for (size_t i = 0; i != dex_files.size(); ++i) {
    const DexFile* dex_file = dex_files[i];
    CHECK(dex_file != nullptr);
    CompileDexFile(class_loader, *dex_file, dex_files, thread_pool, timings);
  }
...
}
上面的Compile函數是將多個dex拆成每一個dex文件的料度,而CompileDexFile再將其拆成每個類的粒度,針對每個類再調用CompileClass來進行編譯。
void CompilerDriver::CompileDexFile(jobject class_loader, const DexFile& dex_file,
                                    const std::vector& dex_files,
                                    ThreadPool* thread_pool, TimingLogger* timings) {
  TimingLogger::ScopedTiming t("Compile Dex File", timings);
  ParallelCompilationManager context(Runtime::Current()->GetClassLinker(), class_loader, this,
                                     &dex_file, dex_files, thread_pool);
  context.ForAll(0, dex_file.NumClassDefs(), CompilerDriver::CompileClass, thread_count_);
}
最後,我們再次復習一下到目前為止學習的過程:
 Android的AdapterViewFlipper和Stackview-android學習之旅(三十)
AdapterViewFlipper簡介AdapterViewFlipper繼承了AdapterViewAnimater。每次只能顯示一個組件,用showPrevious
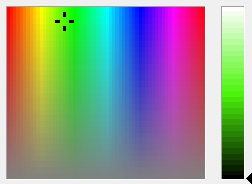 Android中顏色選擇器和改變字體顏色的實例教程
1.構建一張七彩圖:我們經常看到這種樣子的顏色選擇器吧..然後其實右邊的亮度選擇是:這樣我們的代碼就可以進行啦... // 創建七彩圖片 private voi
 Android實現ListView左右滑動刪除和編輯
有時候,為了實現項目中的需求,完成設計好的用戶交互體驗,不的不把這些View重新改造成自己想要的效果。Android原生的ListView是不支持左右滑動的,但是看到微信
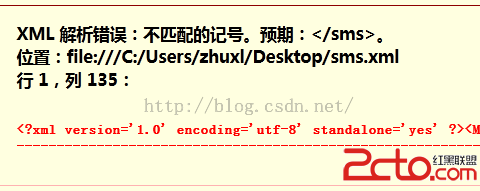 Android 存儲學習之保存系統短信到SD卡(使用XML序列化器)
上節中我們是手動拼接xml文件,但是上節中那樣的做法會有一個問題,比如: //插入消息的內容sBuffer.append(); sBuffer.append(s