編輯:關於Android編程
android之利用surfaceView實現自定義水印相機
知識點
1、自定義相機+預覽相機
2、截屏拍照加水印
3、關於不使用intent來傳輸圖片
俗話說,有圖有真相。很多人都是喜歡直接看圖,不像我,比較喜歡文字多點,經常看看散文什麼的陶冶一下情操。
好了,說到這裡,就引出我們今天要做的這個功能,那就是水印相機。水印相機說白了,就是在拍照的圖片上面加上自己想要的各種信息,包括文字,圖片或者其它你想要的信息。
在這裡,我自己定義了一個類WaterCameraActivity,是自定義的相機的,然後還有一個類ViewPhoto,是用來查看你拍照後的圖片的,有使用圖片和取消/重新拍照功能。
3、關於不使用intent來傳輸圖片
因為intent最大的傳輸數據為1m,一張圖片隨便都有3,4m,再加之讀取到內存中,就可能變成2倍3倍大了,很容易造成oom。所以我們還是利用本地儲存來進行,只要傳輸一個路徑就OK了,這樣做的問題就是,老是要讀取本地圖片,性能不是很好呢。關於這個,如果各位有好的建議可以提出來一起探討。
下面我們直接上代碼,畢竟還是代碼說事比較清楚,代碼裡面都注釋好了,各位可以認真去看。
WaterCameraActivity的布局:布局很簡單,就是一個SurfaceView+需要加入的水印信息,如下圖

布局
WaterCameraActivity類
/**
 * 啟動自定義水印相機
 *
 * Created by tanksu on 16/6/28.
 */
public class WaterCameraActivity extends BaseActivity implements SurfaceHolder.Callback {

    private Context mContext;
    private SurfaceView mSurfaceView;
    private ImageButton imgvBtn_takePic, imgvBtn_switchFlash, imgvBtn_switchCamera;
    private Button btn_back;
    private TextView tv_time, tv_username, tv_address, tv_date, tv_operation;
    private SurfaceHolder mSurfaceHolder;
    private Camera mCamera;
    private String curDate = "", curTime = "", curAddress = "", userName = "", userOperation = "";
    private final int REQUEST_CODE = 1001;
    private Camera.CameraInfo cameraInfo = new Camera.CameraInfo();
    private int mCameraId;
    private long currentTimeMillis = 0;
    private Intent waterIntent;

    /**
     * 這是點擊surfaceview聚焦所調用的方法
     */
    private Camera.AutoFocusCallback autoFocusCallback = new Camera.AutoFocusCallback(){
        @Override
        public void onAutoFocus(boolean success, Camera camera) {
            //success = true,聚焦成功,否則聚焦失敗
            //在這裡我們可以在點擊相機後是否聚焦成功,然後做我們的一些操作,這裡我就省略了,大家自行根據需要添加
        }
    };


    @Override
    protected void onCreate(Bundle savedInstanceState) {
        super.onCreate(savedInstanceState);
        setContentView(R.layout.watercamera_layout);
        initViews();
        initData();
        initListener();
    }

    /**
     * 初始化控件
     */
    private void initViews() {
        mSurfaceView = (SurfaceView) findViewById(R.id.sfv_camera);
        imgvBtn_takePic = (ImageButton) findViewById(R.id.btn_takePic);
        tv_time = (TextView) findViewById(R.id.tv_time);
        tv_username = (TextView) findViewById(R.id.tv_username);
        tv_address = (TextView) findViewById(R.id.tv_address);
        tv_date = (TextView) findViewById(R.id.tv_date);
        tv_operation = (TextView) findViewById(R.id.tv_operation);
        imgvBtn_switchFlash = (ImageButton) findViewById(R.id.imgvBtn_switchFlash);
        imgvBtn_switchFlash.setImageResource(R.drawable.camera_setting_flash_off_normal);
        imgvBtn_switchCamera = (ImageButton) findViewById(R.id.imgvBtn_switchCamera);
        imgvBtn_switchCamera.setImageResource(R.drawable.changing_camera_normal);
        btn_back = (Button) findViewById(R.id.imgvBtn_back);
        mContext = this;
    }

    /**
     * 初始化數據
     */
    private void initData() {
        mSurfaceView.setFocusable(true);
        mSurfaceHolder = mSurfaceView.getHolder();
        mSurfaceHolder.setType(SurfaceHolder.SURFACE_TYPE_PUSH_BUFFERS);
        mSurfaceHolder.setKeepScreenOn(true);
        mSurfaceHolder.setFormat(PixelFormat.TRANSPARENT);
        mSurfaceHolder.addCallback(this);
        SimpleDateFormat formatter = new SimpleDateFormat("yyyy/MM/dd"); //獲取當前時間,作為圖片的命名,再轉換為常用時間格式
        currentTimeMillis = System.currentTimeMillis();
        curDate = formatter.format(currentTimeMillis);
        tv_date.setText(curDate);
        SimpleDateFormat format = new SimpleDateFormat("HH:mm", Locale.getDefault()); //獲取24小時制的時間
        curTime = format.format(currentTimeMillis);
        tv_time.setText(curTime);
        Intent intent = getIntent(); //我寫的這個類,是要用startActivityForResult來啟動的,傳入的參數可以根據自己需求來定,我這裡傳過來的信息有
        //地址CUR_ADDRESS,用戶名USER_NAME,用戶操作USER_OPERATION,然後把信息設置到空間裡面去,同時還要保存intent。
        //而時間和日期,則是在本類中自己獲取,同樣設置入控件裡面去
        if (intent != null) {
            waterIntent = intent;
            curAddress = intent.getStringExtra(StaticParam.CUR_ADDRESS);
            userName = intent.getStringExtra(StaticParam.USER_NAME);
            userOperation = intent.getStringExtra(StaticParam.USER_OPERATION);
            tv_operation.setText(userOperation);
            tv_address.setText(curAddress);
            tv_username.setText(userName);
        }else {
            toast("intent equals null,please try again!");
        }
        mCameraId = Camera.CameraInfo.CAMERA_FACING_BACK;
    }

    /**
     * 初始化監聽器
     */
    private void initListener() {
        //這個方法是點擊拍照的方法
        imgvBtn_takePic.setOnClickListener(new View.OnClickListener() {
            @Override
            public void onClick(View v) {
                mCamera.takePicture(null, null, new PicCallBacKImpl(WaterCameraActivity.this));
            }
        });
        //設置閃光燈的模式,有禁止,自動和打開閃光燈三種模式
        imgvBtn_switchFlash.setOnClickListener(new View.OnClickListener() {
            @Override
            public void onClick(View v) {
                CameraUtil.setFlashMode(mCamera, imgvBtn_switchFlash);
            }
        });
        //這個是切換前後攝像頭的操作,因為時間關系沒有做
        imgvBtn_switchCamera.setOnClickListener(new View.OnClickListener() {
            @Override
            public void onClick(View v) {
            }
        });
        //取消按鈕,finish本頁面
        btn_back.setOnClickListener(new View.OnClickListener() {
            @Override
            public void onClick(View v) {
                WaterCameraActivity.this.finish();
            }
        });
        mSurfaceView.setOnTouchListener(new View.OnTouchListener() {
            @Override
            public boolean onTouch(View v, MotionEvent event) {
                mCamera.autoFocus(autoFocusCallback); //設置相機為自動對焦模式,就不用認為去點擊了
                return false;
            }
        });
    }


    /**
     * 我們在此周期方法裡面打開攝像頭
     */
    @Override
    protected void onStart() {
        if (this.checkCameraHardware(this) && (mCamera == null)) {
            openCamera();//打開後置攝像頭
        }
        super.onStart();
    }

    /**
     * 拍照回調類
     */
    class PicCallBacKImpl implements Camera.PictureCallback {
        private Activity mActivity;

        public PicCallBacKImpl(Activity activity) {
            this.mActivity = activity;
        }

        @Override
        public void onPictureTaken(byte[] data, Camera camera) {
            Bitmap bitmap = BitmapFactory.decodeByteArray(data, 0, data.length);
            bitmap = ImageUtil.matrixImageView(bitmap, 90);
            String path = ImageUtil.saveBitmap(null, String.valueOf(currentTimeMillis), bitmap);
            if (path != null && path.length() > 0) {
                waterIntent.setClass(mActivity, ViewPhoto.class);
                waterIntent.putExtra(StaticParam.PIC_PATH, path);
                waterIntent.putExtra(StaticParam.CUR_DATE, curDate);
                waterIntent.putExtra(StaticParam.CUR_TIME, curTime);
                waterIntent.putExtra(StaticParam.CUR_TIME_MILLIS, currentTimeMillis);
                mActivity.startActivityForResult(waterIntent, REQUEST_CODE);
            } else {
                toast("can't save the picture");
                camera.stopPreview();
                camera.release();
                camera = null;
            }

        }
    }

    @Override
    protected void onActivityResult(int requestCode, int resultCode, Intent data) {
        if(RESULT_OK == resultCode){
            switch (requestCode){
                case REQUEST_CODE: //處理返回結果
                    setResult(RESULT_OK, data); //將結果直接給設置為,啟動水印相機的返回結果
                    break;
                default:
                    break;
            }
            WaterCameraActivity.this.finish();//結束本頁面,就會將結果返回到調用本頁的那個activity了
        }
        super.onActivityResult(requestCode, resultCode, data);
    }


    @Override
    public void surfaceCreated(SurfaceHolder holder) {
        try {
            mCamera = Camera.open(mCameraId);
            Camera.getCameraInfo(mCameraId, cameraInfo);
        } catch (Exception e) {
            e.printStackTrace();
        }

    }

    @Override
    public void surfaceChanged(SurfaceHolder holder, int format, int width, int height) {
        startPreview(mCamera, mSurfaceHolder);
    }

    @Override
    public void surfaceDestroyed(SurfaceHolder holder) {
        if (mCamera != null) {
            mCamera.stopPreview();
            mCamera.release();
            mCamera = null;
        }
    }

    /**
     * 檢查設備是否有攝像頭
     *
     * @param context context
     * @return boolean
     */
    private boolean checkCameraHardware(Context context) {
        if (context.getPackageManager().hasSystemFeature(PackageManager.FEATURE_CAMERA)) {
            return true;
        }
        return false;
    }

    /**
     * 打開後置攝像頭
     */
    private void openCamera() {
        Camera.CameraInfo cameraInfo = new Camera.CameraInfo();
        Camera.getCameraInfo(mCameraId, cameraInfo);
        this.cameraInfo = cameraInfo;
        if (mCameraId == Camera.CameraInfo.CAMERA_FACING_BACK) { //後置攝像頭 CAMERA_FACING_FRONT
            mCamera = Camera.open();
            mCamera.startPreview();//開始預覽相機
        }
    }

    /**
     * 開始預覽相機
     *
     * @param camera        camera
     * @param surfaceHolder surfaceHolder
     */
    private void startPreview(Camera camera, SurfaceHolder surfaceHolder) {
        camera.setDisplayOrientation(CameraUtil.getPreviewDegree(WaterCameraActivity.this));
        try {
            camera.setPreviewDisplay(surfaceHolder);
        } catch (IOException e) {
            e.printStackTrace();
        } finally {

        }
        camera.startPreview();//調用此方法,然後真正的預覽相機
    }

    /**
     * 停止相機預覽
     */
    private void stopPreview() {
        if (mCamera != null) {
            mCamera.release();
            mCamera.release();
            mCamera = null;
        }
    }

    @Override
    protected void onDestroy() {
        if (mCamera != null) {
            mCamera.stopPreview();
            mCamera.release();
            mCamera = null;
        }
        super.onDestroy();
    }

}
ViewPhoto類的布局,布局入下圖所示

ViewPhoto類代碼
<span style="font-size:12px;">/**
 * 查看拍照的類
 * <p/>
 * Created by tanksu on 16/6/29.
 */
public class ViewPhoto extends BaseActivity {
    private ImageView imgv_photo;
    private TextView tv_cancel, tv_ok;
    private int width, height;
    private RelativeLayout rl_layout;
    private String picPath = "", curDate = "", curTime = "", curAddress = "", userName = "", userOperation = "";
    private TextView tv_time, tv_date, tv_userName, tv_address, tv_operation;
    private CheckBox cb_savePic;
    private long currentTimeMillis;
    private String signal;

    @Override
    protected void onCreate(Bundle savedInstanceState) {
        super.onCreate(savedInstanceState);
        requestWindowFeature(Window.FEATURE_NO_TITLE);//去掉標題欄
        setContentView(R.layout.viewphoto_layout);
        initViews();
        initData();
        initListener();
    }

    /**
     * 初始化控件
     */
    private void initViews() {
        imgv_photo = (ImageView) findViewById(R.id.imgv_photo);
        tv_cancel = (TextView) findViewById(R.id.tv_cancel);
        tv_ok = (TextView) findViewById(R.id.tv_ok);
        rl_layout = (RelativeLayout) findViewById(R.id.rl_layout);
        tv_time = (TextView) findViewById(R.id.tv_time);
        tv_date = (TextView) findViewById(R.id.tv_date);
        tv_userName = (TextView) findViewById(R.id.tv_userName);
        tv_address = (TextView) findViewById(R.id.tv_address);
        cb_savePic = (CheckBox) findViewById(R.id.cb_savePic);
        tv_operation = (TextView) findViewById(R.id.tv_operation);
    }

    /**
     * 初始化數據
     */
    private void initData() {
        WindowManager windowManager = getWindowManager();
        Display display = windowManager.getDefaultDisplay();
        width = display.getWidth();
        height = display.getHeight();
        Intent intent = getIntent();
        if (intent != null) {
            //這裡的目標是,將所有傳過來的的信息都去取出來,設置到每個相應的空間裡面去
            //有人會問我為什麼要這樣做,其實我在拍照的時候,還沒有真正的拿到一張具有水印的照片
            //我這裡采用的是截屏的方式,所以呢,就要重新吧信息展現出來
            //其實還有很多的方法可以做水印相機,例如用位圖來“畫”信息等,但是有簡單的方法,為什麼不用呢,非要去弄一些很復雜的方法?!
            picPath = intent.getStringExtra(StaticParam.PIC_PATH);
            curDate = intent.getStringExtra(StaticParam.CUR_DATE);
            curTime = intent.getStringExtra(StaticParam.CUR_TIME);
            userName = intent.getStringExtra(StaticParam.USER_NAME);
            curAddress = intent.getStringExtra(StaticParam.CUR_ADDRESS);
            userOperation = intent.getStringExtra(StaticParam.USER_OPERATION);
            signal = intent.getStringExtra(StaticParam.TS_HUB_OP_SIGNAL);
            currentTimeMillis = intent.getLongExtra(StaticParam.CUR_TIME_MILLIS, System.currentTimeMillis());
            tv_time.setText(curTime);
            tv_date.setText(curDate);
            tv_userName.setText(userName);
            tv_address.setText(curAddress);
            tv_operation.setText(userOperation);
            BitmapFactory.Options options = new BitmapFactory.Options();
            options.outWidth = width;
            options.outHeight = height;
            Bitmap bitmap = ImageUtil.getPressedBitmap(picPath, width, height);//方法在下面,根據路徑,獲取第一步拍照存本地的圖片
            /**
             *
             *
             * 根據圖片路徑,得到壓縮過的位圖
             *
             * @param path
             * @param width
             * @param height
             * @return returnBitmap
            public static Bitmap getPressedBitmap(String path, int width, int height) {
                BitmapFactory.Options options = new BitmapFactory.Options();
                options.inJustDecodeBounds = true;
                Bitmap bitmap = BitmapFactory.decodeFile(path, options);
                options.inSampleSize = getBitmapSampleSize(options, width, height);//getBitmapSampleSize(options, width, height)
                options.inJustDecodeBounds = false;
                Bitmap returnBitmap = BitmapFactory.decodeFile(path, options);
                return returnBitmap;
            }
             * 根據要去的寬高,壓縮圖片
             *
             * @param options   options
             * @param reqWidth  reqWidth
             * @param reqHeight reqHeight
             * @return inSimpleSize
            public static int getBitmapSampleSize(BitmapFactory.Options options, int reqWidth, int reqHeight) {
                int imgWidth = options.outWidth;
                int imgHeight = options.outHeight;
                int inSimpleSize = 1;
                if (imgWidth > imgHeight || imgWidth < imgHeight) {
                    final int heightRatio = imgWidth / reqWidth;
                    final int widthRatio = imgHeight / reqHeight;
                    inSimpleSize = widthRatio < heightRatio ? widthRatio : heightRatio;
                }
                return inSimpleSize;
            }
             */
            imgv_photo.setImageBitmap(bitmap);
        } else {
            toast("intent equals null,please try again!");
        }
    }

    /**
     * 初始化監聽器
     */
    private void initListener() {
        //點擊使用圖片按鈕,就可以在啟動水印相機的onactivityresult回調裡面,獲取到圖片的路徑,然後獲取圖片即可使用了
        tv_ok.setOnClickListener(new View.OnClickListener() {
            @Override
            public void onClick(View v) {
                final Bitmap bitmap = getScreenPhoto(rl_layout);
                ImageUtil.saveBitmap(picPath, String.valueOf(currentTimeMillis), bitmap);//根據路徑保存圖片
                /**
                 * 根據路徑和名字保存圖片
                 *
                 * @param path    path
                 * @param imgName imgName
                 * @param bitmap  bitmap
                 * @return createPath
                public static String saveBitmap(String path, String imgName, Bitmap bitmap) {
                    String savePath = null;
                    if (path == null) { //if path is null
                        File fileSDCardDir = Environment.getExternalStoragePublicDirectory(Environment.DIRECTORY_DCIM);
                        String imgPath = fileSDCardDir.getAbsolutePath() + "/s/waterCamera/";
                        File fileDir = new File(imgPath);
                        if (!fileDir.exists()) {
                            fileDir.mkdirs();
                        }
                        String photoName = imgName + ".JPG";
                        imgPath = imgPath + photoName;
                        File fileIphoto = new File(imgPath);
                        if (!fileIphoto.exists()) {
                            try {
                                fileIphoto.createNewFile();
                            } catch (IOException e) {
                                e.printStackTrace();
                            }
                        }
                        savePath = fileIphoto.getPath();
                        saveBitmap(bitmap, fileIphoto);
                        return savePath;
                    } else { //if path isn't null, override the photo
                        File oldFile = new File(path);
                        if (oldFile.exists()) {
                            oldFile.delete();
                        }
                        File newFile = new File(path);
                        if (!newFile.exists()) {
                            try {
                                newFile.createNewFile();
                            } catch (IOException e) {
                                e.printStackTrace();
                            }
                        }
                        saveBitmap(bitmap, newFile);
                        savePath = newFile.getPath();
                        return savePath;
                    }
                }
                 */
                Intent intent = new Intent(ViewPhoto.this, TsDrActivity.class);
                intent.putExtra(StaticParam.PIC_PATH, picPath);//這裡最主要的,就是將儲存在本地的圖片的路徑作為結果返回
                intent.putExtra(StaticParam.IS_SAVE_PIC, cb_savePic.isChecked());//這裡就是是否用戶要保存這張圖片的選項
                intent.putExtra(StaticParam.TS_HUB_OP_SIGNAL, signal);
                setResult(RESULT_OK, intent); //如果是OK,就設置為OK結果
                ViewPhoto.this.finish();
            }
        });
        tv_cancel.setOnClickListener(new View.OnClickListener() {
            @Override
            public void onClick(View v) {
                new Thread(new Runnable() {
                    @Override
                    public void run() {
                        ImageUtil.deleteImageFromSDCard(picPath);//重新拍照,就將本地的圖片給刪除掉,然後重新拍照
                    }
                }).start();
                ViewPhoto.this.finish();
            }
        });
    }

    /**
     * 截屏,這裡就是截屏的地方了,我這裡是截屏RelativeLayout,
     * 只要你將需要的信息放到這個RelativeLayout裡面去就可以截取下來了
     *
     * @param waterPhoto waterPhoto
     * @return Bitmap
     */
    public Bitmap getScreenPhoto(RelativeLayout waterPhoto) {
        View view = waterPhoto;
        view.setDrawingCacheEnabled(true);
        view.buildDrawingCache();
        Bitmap bitmap = view.getDrawingCache();
        int width = view.getWidth();
        int height = view.getHeight();
        Bitmap bitmap1 = Bitmap.createBitmap(bitmap, 0, 0, width, height);
        view.destroyDrawingCache();
        bitmap = null;
        return bitmap1;
    }
</span>
使用
//例如:啟動水印相機的代碼
Intent intent = new Intent(TsHubActivity.this, WaterCameraActivity.class);
                        intent.putExtra(StaticParam.CUR_ADDRESS, curAddress);
                        intent.putExtra(StaticParam.USER_NAME, stationName);
                        Button btn_recv = (Button) findViewById(R.id.batchRecv);
                        intent.putExtra(StaticParam.USER_OPERATION, btn_recv.getText().toString());
                        startActivityForResult(intent, JustOneOrder);
回調
//拍照回調方法
@Override
    public void onActivityResult(int requestCode, int resultCode, Intent data) {
		//以下是需要拍照的圖片參數
                        final String imgPath = data.getStringExtra(StaticParam.PIC_PATH);//圖片路徑
                        Bitmap bitmap = BitmapFactory.decodeFile(imgPath);//獲取到圖片了
}
上面這兩個類,直接復制來就可以用了,可以根據你的需求進行修改,不難,很簡單。關於前後攝像頭切換的,因為時間緊任務重,就沒有時間去做了。
如有任何問題,請及時與我聯系,謝謝。
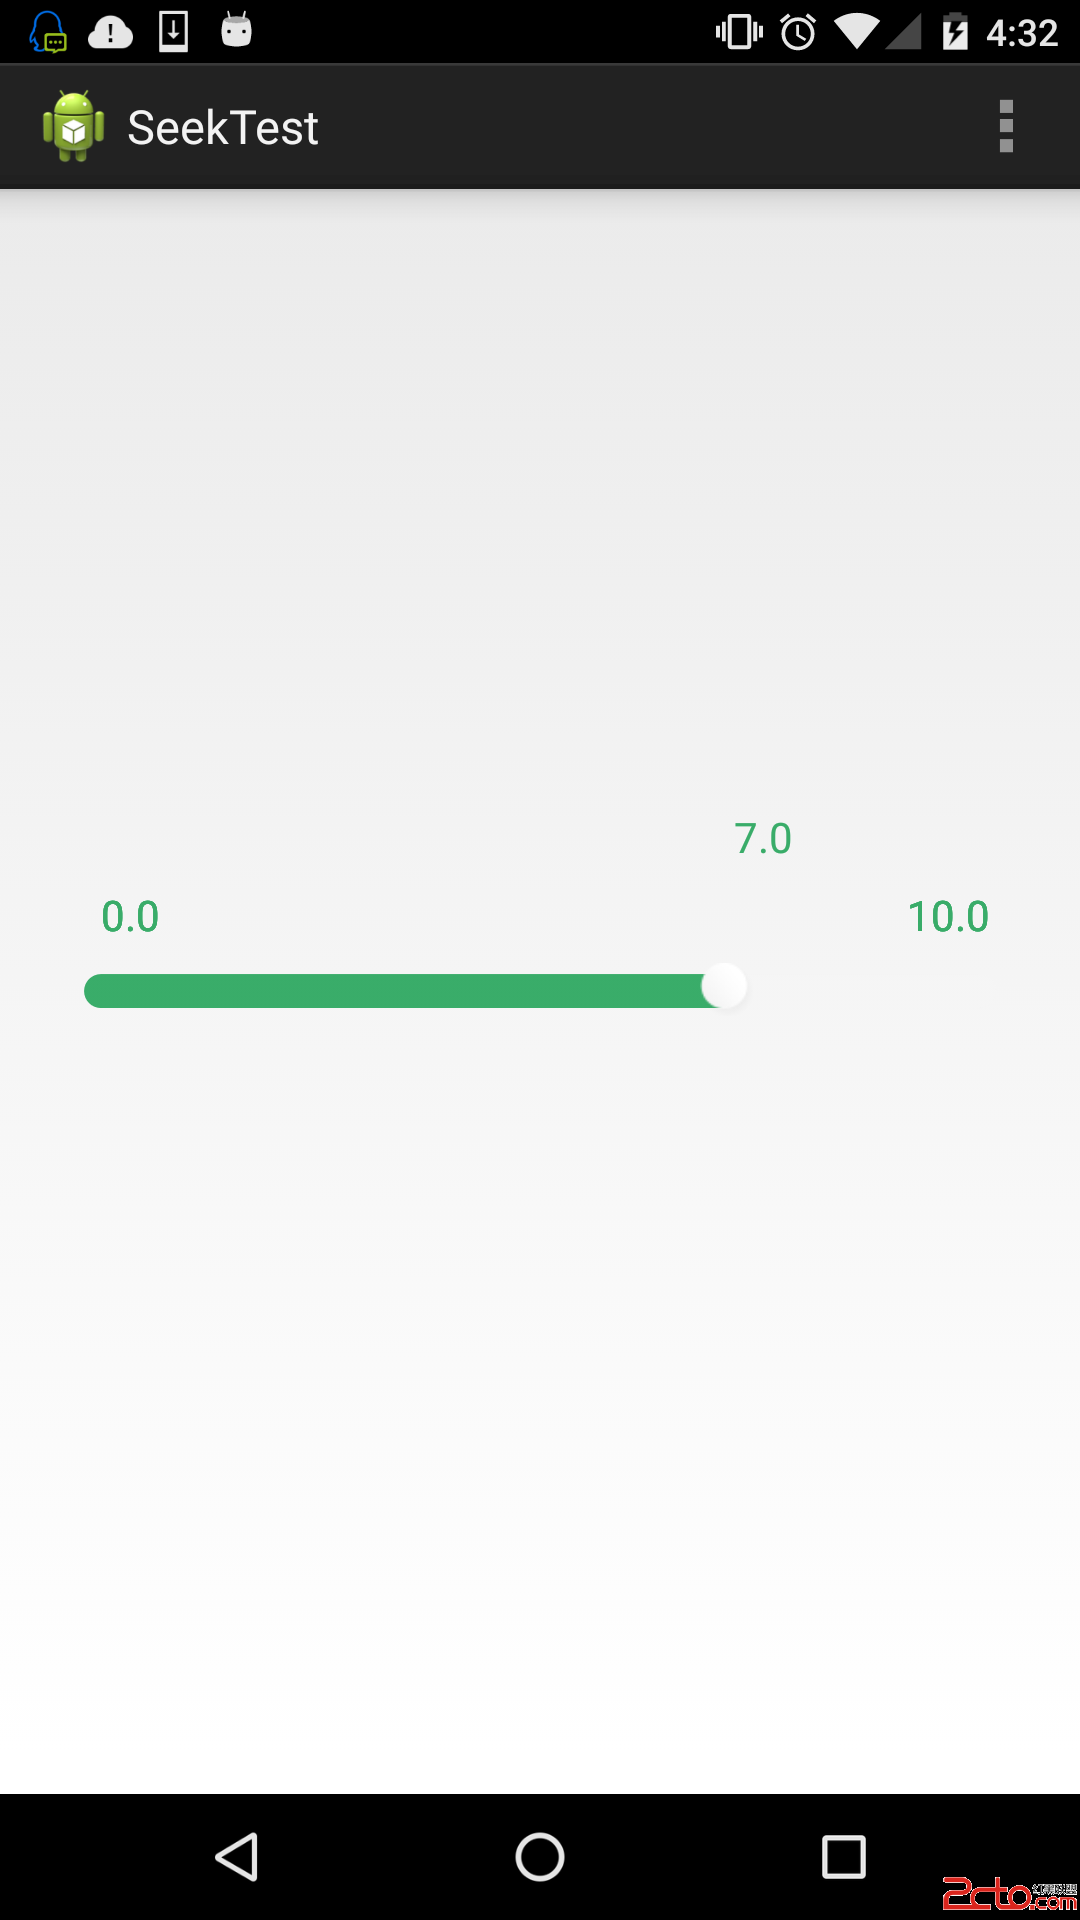 android自定義進度值可拖動的seekbar
最近忙找實習,加上實驗室在推新項目,需要學習新知識。所以很長一段時間沒去整理了官博客了,github也蠻久沒更新,很慚愧。接下來還是要堅持寫。今天就簡單的寫一下我在項目中
 Android數據庫之創建和升級數據庫(中)
上一篇文章中,簡單介紹了一下android數據庫的一些基本概念,那麼從本節開始,就實戰一下Android數據庫的創建和升級。 上文中,也介紹了,SQLiteOpenHel
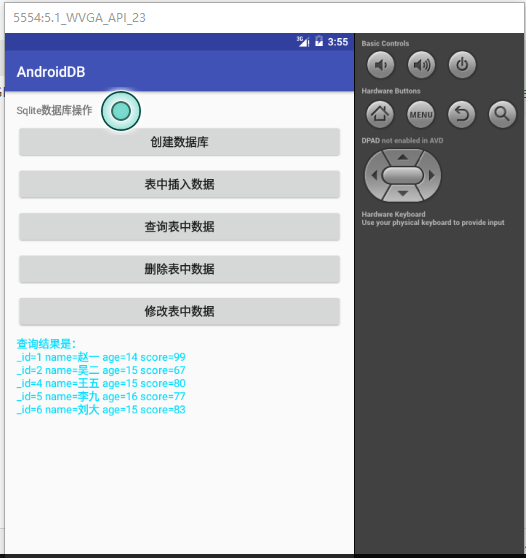 Android Sqlite數據庫常用操作
很久前也寫過一篇Android數據庫操作相關內容。在正式項目中,我們通常會使用數據庫開源框架如GreenDao來對數據庫進行操作。感覺很久沒有直接使用Sql語句了,這幾天
 Android 基於AOP監控之——AspectJ使用指南
如何使用在Eclipse中已經有AJDT插件集成了AspectJ編譯器的使用和關鍵字的聲明。但是在Android Studio中沒有這樣的官方插件。因此,這裡講一下如何在
 我的Android進階之旅------)Android Activity的singleTask加載模式和onActivityResult方法之間的沖突
今天調試一個bug的時候,情景如下:一個Activity A,需要用st