編輯:關於Android編程

代碼:https://github.com/ldb-github/Layout_Tab
1、布局:使用LinearLayout布置標簽;再使用FrameLayout來布置Fragment。


fragment_fragmentmanager.xml<framelayout android:id="@+id/content_layout" android:layout_height="match_parent" android:layout_width="match_parent"> </framelayout>
1、方法replaceFragment()實現切換Fragment的功能:通過FragmentTransaction的replace方法來替換FrameLayout中的Fragment。
2、改變標簽的背景色,來區分選中的Tab與其他Tab。
public class FragmentAndFManagerActivity extends FragmentActivity
        implements View.OnClickListener {
    private static final String LOG_TAG = FragmentAndFManagerActivity.class.getSimpleName();

    // 三個選項卡
    private LinearLayout tab1Layout, tab2Layout, tab3Layout;
    // 默認選中第一個
    private int index = 1;
    // fragment管理類
    private FragmentManager fragmentManager;
    // 三個fragment
    private Fragment tab1Fragment, tab2Fragment, tab3Fragment;

    @Override
    protected void onCreate(@Nullable Bundle savedInstanceState) {
        super.onCreate(savedInstanceState);
        setContentView(R.layout.fragment_fragmentmanager);
        fragmentManager = getSupportFragmentManager();
        init();
    }

    /**
     * 初始化控件
     */
    private void init(){
        tab1Layout = (LinearLayout) findViewById(R.id.tab1_layout);
        tab2Layout = (LinearLayout) findViewById(R.id.tab2_layout);
        tab3Layout = (LinearLayout) findViewById(R.id.tab3_layout);

        tab1Layout.setOnClickListener(this);
        tab2Layout.setOnClickListener(this);
        tab3Layout.setOnClickListener(this);

        setDefaultFragment();

    }

    /**
     * 設置默認顯示的fragment
     */
    private void setDefaultFragment(){
        FragmentTransaction transaction = fragmentManager.beginTransaction();
        tab1Fragment = new FragmentAndFManager_Fragment1();
        transaction.replace(R.id.content_layout, tab1Fragment);
        transaction.commit();
    }

    /**
     * 切換fragment
     * @param newFragment
     */
    private void replaceFragment(Fragment newFragment){
        FragmentTransaction transaction = fragmentManager.beginTransaction();
        if(!newFragment.isAdded()) {
            Log.d(LOG_TAG, "In replaceFragment -- replace");
            transaction.replace(R.id.content_layout, newFragment);
            transaction.commit();
        }else{
            Log.d(LOG_TAG, "In replaceFragment -- show");
            transaction.show(newFragment);
        }
    }

    /**
     * 改變選項卡的選中狀態
     */
    private void clearStatus(){
        if(index == 1){
            tab1Layout.setBackgroundColor(getResources().getColor(R.color.tab));
        }else if(index == 2){
            tab2Layout.setBackgroundColor(getResources().getColor(R.color.tab));
        }else if(index == 3){
            tab3Layout.setBackgroundColor(getResources().getColor(R.color.tab));
        }
    }

    @Override
    public void onClick(View v) {
        clearStatus();
        switch(v.getId()){
            case R.id.tab1_layout:
                if(tab1Fragment == null){
                    tab1Fragment = new FragmentAndFManager_Fragment1();
                }
                replaceFragment(tab1Fragment);
                tab1Layout.setBackgroundColor(getResources().getColor(R.color.tab_down));
                index = 1;
                break;
            case R.id.tab2_layout:
                if(tab2Fragment == null){
                    tab2Fragment = new FragmentAndFManager_Fragment2();
                }
                replaceFragment(tab2Fragment);
                tab2Layout.setBackgroundColor(getResources().getColor(R.color.tab_down));
                index = 2;
                break;
            case R.id.tab3_layout:
                if(tab3Fragment == null){
                    tab3Fragment = new FragmentAndFManager_Fragment3();
                }
                replaceFragment(tab3Fragment);
                tab3Layout.setBackgroundColor(getResources().getColor(R.color.tab_down));
                index = 3;
                break;
        }
    }
}
FragmentAndFManagerActivity.java
 android圖像圖像處理——自定義組件的屬性
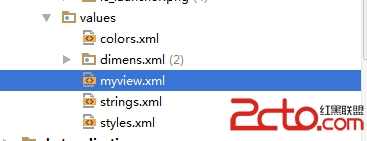
自定義組件的屬性步驟如下【1】在Values資源文件下新建myview.xml 自定義兩個屬性背景圖、畫筆筆觸大小;【2】在
 android 沉浸式狀態欄(像ios那樣的狀態欄與應用統一顏色樣式)
這個特性是andorid4.4支持的,最少要api19才可以使用。下面介紹一下使用的方法,非常得簡單: public class MainActivity ex
 一加手機3和樂視max2哪個好 一加手機3和樂MAX2對比評測
一加3手機,這款手機搭載了骁龍820處理器和氫OS系統,並且采用了金屬材質機身,該機售價2499元,6月16日上午10:00在京東和一加官方商城同步開始發售
 Android自學筆記-15-Activity的生命周期
很長時間沒有寫博客了,懶了,感慨一下。 Activity的生命周期主要就是一張下面的圖: 下面通過代碼簡單的介紹一下,具體的一些內容看代碼的注釋: package c