編輯:關於Android編程
本文講的是自定義View的第二種方式-----創建復合控件
創建復合(組合)可以很好的創建出具有重用功能的控件集合。這種方式通常需要繼承一個ViewGroup,再給它添加指定功能的控件,從而組合成新的復合控件。通過這種方式創建的控件,我們一般會給它指定一些可配置的屬性,讓它具有更強的擴展性。本文參考《Android群英傳》中的例子,算是筆記吧。通過這個例子,熟悉了自定義屬性的配置以及接口回調的方式。
有時程序為了風格的統一,很多應用程序都有一些共同的UI界面,比如常見的標題TopBar,一般左上角為返回按鈕,中間為文字說明,右上角為其他功能(或沒有)。
通常情況下,這些界面都會被抽象出來,形成一個共通的UI組件。所有需要添加標題的界面都會引用這樣的一個TopBar,而不是每個界面都在布局文件中寫這樣一個TopBar.同時設計者還可以給TopBar增加相應的接口,讓調用者能夠更加靈活地控制TopBar,這樣可以提高界面的復用率,更能在需要修改UI時,做到快速修改,而不用對每個頁面的標題去進行修改。
1.設置自定義的屬性
為一個View提供可自定義的屬性很簡單,在res/values文件下,新建一個atts.xml文件,並在文件中通過代碼來定義屬性即可。
atts.xml
<?xml version="1.0" encoding="utf-8"?>
<resources>
    <declare-styleable name="Topbar">
        <attr name="MyTitle" format="string"/><!--format表示以後在xml文件中所引用的資源類型-->
        <attr name="titleTextSize" format="dimension"/>
        <attr name="titleTextColor" format="color"/>
        <attr name="leftTextColor" format="color"/>
        <attr name="leftBackground" format="reference|color"/>
        <attr name="leftText" format="string"/>
        <attr name="rightTextColor" format="color"/>
        <attr name="rightBackground" format="reference|color"/>
        <attr name="rightText" format="string"/>
    </declare-styleable>
</resources>
其中
在確定好屬性後,就可以創建一個自定義控件----TopBar,並讓它繼承自ViewGroup,從而組合一些需要的控件。這裡為了簡單,我們繼承RelativeLayout。在構造方法中,通過如下所示的代碼來獲取在xml布局文件中自定義的那些屬性,即與我們使用系統提供的那些屬性一樣。
TypedArray ta = context.obtainStyledAttributes(attrs,R.styleable.Topbar);其中R.styleble.Topbar中的Topbar即為atts文件中聲明的名字。系統提供了TypedArray這樣的數據結構來獲取自定義屬性集,通過一系列的get方法,就可以獲取這些自定義的屬性值,代碼如下所示:
在構造方法中去獲取屬性
import android.content.Context;
import android.content.res.TypedArray;
import android.graphics.drawable.Drawable;
import android.util.AttributeSet;
import android.view.Gravity;
import android.view.View;
import android.view.ViewGroup;
import android.widget.Button;
import android.widget.RelativeLayout;
import android.widget.TextView;
import android.widget.Toast;

public class TopBar extends RelativeLayout {

	private int leftTextColor;
	private Drawable leftBackground;
	private String leftText;

	private int rightTextColor;
	private Drawable rightBackground;
	private String rightText;

	private float titleTextSize;
	private int titleTextColor;
	private String MyTitle;


	public TopBar(final Context context, AttributeSet attrs) {
		super(context, attrs);

		TypedArray ta = context.obtainStyledAttributes(attrs,
				R.styleable.Topbar);
		leftTextColor = ta.getColor(R.styleable.Topbar_leftTextColor, 0);
		leftBackground = ta.getDrawable(R.styleable.Topbar_leftBackground);
		leftText = ta.getString(R.styleable.Topbar_leftText);

		rightTextColor = ta.getColor(R.styleable.Topbar_rightTextColor, 0);
		rightBackground = ta.getDrawable(R.styleable.Topbar_rightBackground);
		rightText = ta.getString(R.styleable.Topbar_rightText);

		titleTextSize = ta.getDimension(R.styleable.Topbar_titleTextSize, 0);
		titleTextColor = ta.getColor(R.styleable.Topbar_titleTextColor, 0);
		MyTitle = ta.getString(R.styleable.Topbar_MyTitle);

		ta.recycle();}
}
我們在兩個參數的構造方法中去獲取這些自定義的屬性,接下來是初始化和組合這些控件。
2.組合控件 整個TopBar實際上由3個控件組成,左邊點擊的按鈕leftButton,rightButton,中間的標題欄tvTitle。通過動態添加控件的方式,使用addView()方法將這3個控件假如到定義的TopBar模版中,並給它們設置我們前面獲取到的具體的屬性值。這些同樣是寫在先前的構造函數中。
                leftButton = new Button(context);
		rightButton = new Button(context);
		tvTitle = new TextView(context);

		leftButton.setTextColor(leftTextColor);
		leftButton.setBackground(leftBackground);
		leftButton.setText(leftText);

		rightButton.setTextColor(rightTextColor);
		rightButton.setBackground(rightBackground);
		rightButton.setText(rightText);

		tvTitle.setText(MyTitle);
		tvTitle.setTextColor(titleTextColor);
		tvTitle.setTextSize(titleTextSize);
		tvTitle.setGravity(Gravity.CENTER);

		setBackgroundColor(0xFFF59563);

		leftParams = new LayoutParams(ViewGroup.LayoutParams.WRAP_CONTENT,
				ViewGroup.LayoutParams.WRAP_CONTENT);
		leftParams.addRule(RelativeLayout.ALIGN_PARENT_LEFT, TRUE);
		addView(leftButton, leftParams);

		rightParams = new LayoutParams(ViewGroup.LayoutParams.WRAP_CONTENT,
				ViewGroup.LayoutParams.WRAP_CONTENT);
		rightParams.addRule(RelativeLayout.ALIGN_PARENT_RIGHT, TRUE);
		addView(rightButton, rightParams);

		titleParams = new LayoutParams(ViewGroup.LayoutParams.WRAP_CONTENT,
				ViewGroup.LayoutParams.MATCH_PARENT);
		titleParams.addRule(RelativeLayout.CENTER_IN_PARENT, TRUE);
		addView(tvTitle, titleParams);
既然是模版,怎麼樣給左右的按鈕設置點擊事件呢?因為每個調用者所處的環境不同,不可能直接在UI模版中添加具體的實現邏輯,這裡就要用到的就是接口回調的思想了,將具體的實現邏輯交給調用者。
       //使用了接口的回調機制,這樣具體的實現邏輯,交給調用者
	public interface TopBarClickListener {
		public void leftClick();

		public void rightClick();
	}
(2)暴露接口給調用者
在模版方法中,為左右按鈕增加點擊事件,但不去實現具體的邏輯,而是調用接口中響應的點擊方法,相應代碼如下:
leftButton.setOnClickListener(new OnClickListener() {

			@Override
			public void onClick(View v) {

				// Toast.makeText(context, "左邊bt", 0).show();
				topBarClickListener.leftClick();
			}
		});
		rightButton.setOnClickListener(new OnClickListener() {

			@Override
			public void onClick(View v) {

				// Toast.makeText(context, "右邊bt", 0).show();
				topBarClickListener.rightClick();
			}
		});
暴露調用的接口方法
//暴露一個方法給其他地方調用
	public void setTopBarClickListener(TopBarClickListener listener) {
		this.topBarClickListener = listener;

	}
TopBar topBar = (TopBar) findViewById(R.id.topbar);
		topBar.setTopBarClickListener(new TopBarClickListener() {

			@Override
			public void rightClick() {
				// TODO 自動生成的方法存根
				Toast.makeText(MainActivity.this, "獲取更多", 0).show();
			}

			@Override
			public void leftClick() {
				// TODO 自動生成的方法存根

				Toast.makeText(MainActivity.this, "點擊取消", 0).show();
			}
		});

	}
當然,可以使用公共方法來動態地修改UI模版中的UI,這樣就進一步的提高了模版的可擴展性。實現如下:
//當然可以設置更多控件的屬性      這裡是以方法的形式設置控件的屬性
     public void setLeftButtonVisible(boolean b) {
		if (b) {
			leftButton.setVisibility(View.VISIBLE);
		}else {
			leftButton.setVisibility(View.GONE);
		}
	}
topBar.setLeftButtonVisible(false);通過方法可以設置更多自定義屬性
xmlns:custom="http://schemas.android.com/apk/res/com.example.myview"如果你使用的是Android Studio的IDE,後面不用詳細的寫清楚包名,可以寫成 ......apk/res/res-auto
上面的代碼指定了引用的名字xmlns(xml name space)。這裡指定了名字的空間為custom,這個名字你可以隨便取,後面在引用控件的地方會用到這個名字。
整體效果如下:

完整源碼如下:
atts.xml文件上面有,就不貼了
MainActivity.java
package com.example.myview;

import com.example.myview.TopBar.TopBarClickListener;

import android.app.Activity;
import android.os.Bundle;
import android.view.Menu;
import android.view.MenuItem;
import android.view.View;
import android.view.View.OnClickListener;
import android.widget.Toast;

public class MainActivity extends Activity {

	@Override
	protected void onCreate(Bundle savedInstanceState) {
		super.onCreate(savedInstanceState);
		setContentView(R.layout.activity_main);

		TopBar topBar = (TopBar) findViewById(R.id.topbar);
		topBar.setTopBarClickListener(new TopBarClickListener() {

			@Override
			public void rightClick() {
				// TODO 自動生成的方法存根
				Toast.makeText(MainActivity.this, "獲取更多", 0).show();
			}

			@Override
			public void leftClick() {
				// TODO 自動生成的方法存根

				Toast.makeText(MainActivity.this, "點擊取消", 0).show();
			}
		});
		//topBar.setLeftButtonVisible(false);通過方法可以設置更多自定義屬性
	}

}
package com.example.myview;

import android.content.Context;
import android.content.res.TypedArray;
import android.graphics.drawable.Drawable;
import android.util.AttributeSet;
import android.view.Gravity;
import android.view.View;
import android.view.ViewGroup;
import android.widget.Button;
import android.widget.RelativeLayout;
import android.widget.TextView;
import android.widget.Toast;

/**
 * Created by Administrator on 2015/12/28.
 */
public class TopBar extends RelativeLayout {

	private Button leftButton, rightButton;
	private TextView tvTitle;

	private int leftTextColor;
	private Drawable leftBackground;
	private String leftText;

	private int rightTextColor;
	private Drawable rightBackground;
	private String rightText;

	private float titleTextSize;
	private int titleTextColor;
	private String MyTitle;

	private LayoutParams leftParams, rightParams, titleParams;

	TopBarClickListener topBarClickListener;

	public TopBar(final Context context, AttributeSet attrs) {
		super(context, attrs);

		TypedArray ta = context.obtainStyledAttributes(attrs,
				R.styleable.Topbar);
		leftTextColor = ta.getColor(R.styleable.Topbar_leftTextColor, 0);
		leftBackground = ta.getDrawable(R.styleable.Topbar_leftBackground);
		leftText = ta.getString(R.styleable.Topbar_leftText);

		rightTextColor = ta.getColor(R.styleable.Topbar_rightTextColor, 0);
		rightBackground = ta.getDrawable(R.styleable.Topbar_rightBackground);
		rightText = ta.getString(R.styleable.Topbar_rightText);

		titleTextSize = ta.getDimension(R.styleable.Topbar_titleTextSize, 0);
		titleTextColor = ta.getColor(R.styleable.Topbar_titleTextColor, 0);
		MyTitle = ta.getString(R.styleable.Topbar_MyTitle);

		ta.recycle();

		leftButton = new Button(context);
		rightButton = new Button(context);
		tvTitle = new TextView(context);

		leftButton.setTextColor(leftTextColor);
		leftButton.setBackground(leftBackground);
		leftButton.setText(leftText);

		rightButton.setTextColor(rightTextColor);
		rightButton.setBackground(rightBackground);
		rightButton.setText(rightText);

		tvTitle.setText(MyTitle);
		tvTitle.setTextColor(titleTextColor);
		tvTitle.setTextSize(titleTextSize);
		tvTitle.setGravity(Gravity.CENTER);

		setBackgroundColor(0xFFF59563);

		leftParams = new LayoutParams(ViewGroup.LayoutParams.WRAP_CONTENT,
				ViewGroup.LayoutParams.WRAP_CONTENT);
		leftParams.addRule(RelativeLayout.ALIGN_PARENT_LEFT, TRUE);
		addView(leftButton, leftParams);

		rightParams = new LayoutParams(ViewGroup.LayoutParams.WRAP_CONTENT,
				ViewGroup.LayoutParams.WRAP_CONTENT);
		rightParams.addRule(RelativeLayout.ALIGN_PARENT_RIGHT, TRUE);
		addView(rightButton, rightParams);

		titleParams = new LayoutParams(ViewGroup.LayoutParams.WRAP_CONTENT,
				ViewGroup.LayoutParams.MATCH_PARENT);
		titleParams.addRule(RelativeLayout.CENTER_IN_PARENT, TRUE);
		addView(tvTitle, titleParams);

		leftButton.setOnClickListener(new OnClickListener() {

			@Override
			public void onClick(View v) {

				// Toast.makeText(context, "左邊bt", 0).show();
				topBarClickListener.leftClick();
			}
		});
		rightButton.setOnClickListener(new OnClickListener() {

			@Override
			public void onClick(View v) {

				// Toast.makeText(context, "右邊bt", 0).show();
				topBarClickListener.rightClick();
			}
		});

	}

	//使用了接口的回調機制
	public interface TopBarClickListener {
		public void leftClick();

		public void rightClick();
	}

	//暴露一個方法給其他地方調用
	public void setTopBarClickListener(TopBarClickListener listener) {
		this.topBarClickListener = listener;

	}

	//當然可以設置更多控件的屬性      這裡是以方法的形式設置控件的屬性
     public void setLeftButtonVisible(boolean b) {
		if (b) {
			leftButton.setVisibility(View.VISIBLE);
		}else {
			leftButton.setVisibility(View.GONE);
		}
	}
}
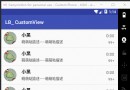 Android開發中模仿qq列表信息滑動刪除功能
這個效果的完成主要分為兩個部分自定義view作為listview的列表項 一個view裡面包括 顯示頭像,名字,消息內容等的contentView和滑動才能顯示出來的刪除
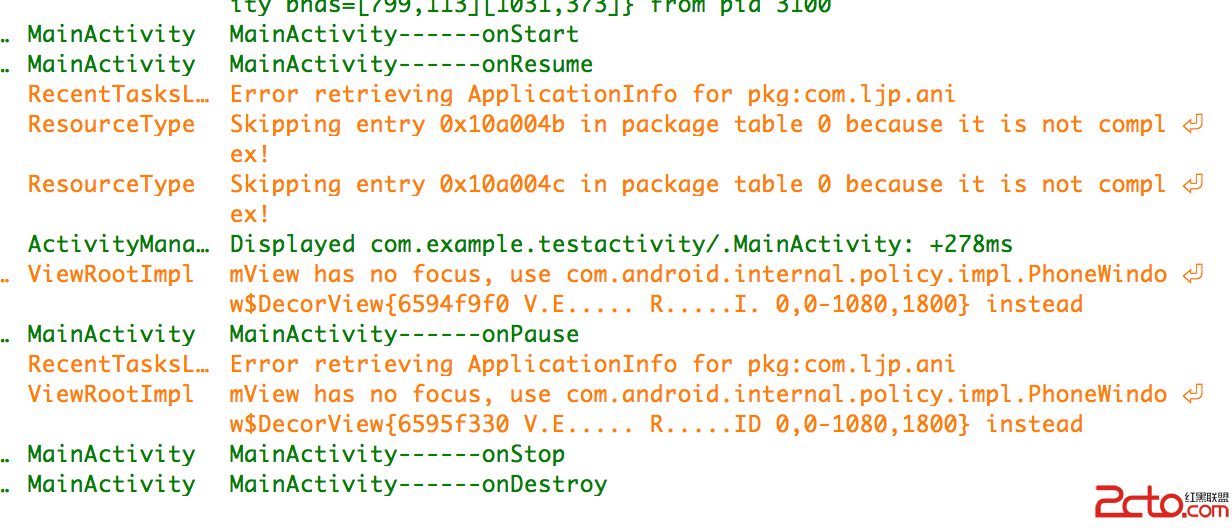 android --Activity生命周期詳解
一. 再探Activity生命周期 為了研究activity的生命周期,簡單測試代碼如下。 package com.example.testactivity; impo
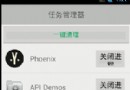
 小米2S技巧-小米2S兩種快捷截屏方法
小米手機如何快速截屏:在這裡總結了兩種小米手機快速截屏的方法,不知道或者要用的童鞋還不快點收藏起來試試看!1、下拉通知欄,點擊截屏,2秒後直接進入截屏截取當
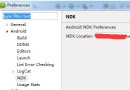
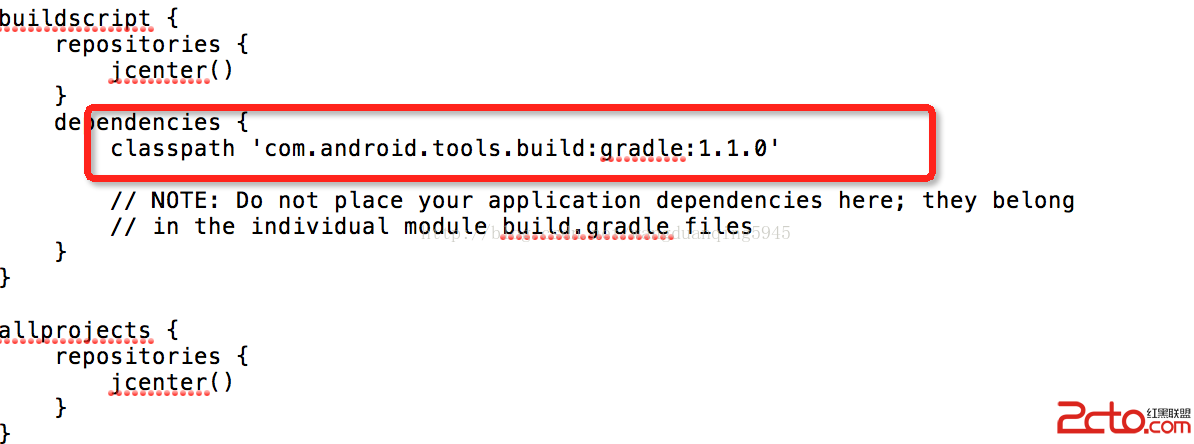 AndroidStudio使用問題匯總——導入(import)工程時常見錯誤
一、第一種錯誤:錯誤日志大體是這樣:The project is using an unsupported version of the Android Gradle p