編輯:關於Android編程
移動設備不斷發展的今天,有的人認為內存已經足夠大了,不用再管什麼內存優化,Java是虛擬機可以幫我維護內存。其實內存空間資源還是很寶貴的,不管手機內存有多大,系統分配給單個應用的內存空間還是很有限的大致有16M,64M,128M等。在Android中加載大圖會非常消耗系統資源,16M的圖片大致可以存儲3張1024X1536質量為ARGB_8888的圖片,這裡邊還不包含其它Object所占的資源。軟件在系統上運行,環境是很復雜的,可能測試的時候有限的測試次數上沒有發現內存洩漏問題,但是在成千上萬的用戶使用過程中,總會有各種內存洩露問題。
大圖加載首先要清楚圖片的質量與所占內存的計算規則:Bitmap.Config
Bitmap.Config
介紹(每個像素點的構成)
1pix所占空間
1byte = 8位
1024*1024圖片大小
(分辨率)
ALPHA_8
只有透明度,沒有顏色,那麼一個像素點占8位。
1byte
1M
RGB_565
即R=5,G=6,B=5,沒有透明度,那麼一個像素點占5+6+5=16位
2byte
2M
ARGB_8888
由4個8位組成,即A=8,R=8,G=8,B=8,那麼一個像素點占8+8+8+8=32位
4byte
4M
ARGB_4444
由4個4位組成,即A=4,R=4,G=4,B=4,那麼一個像素點占4+4+4+4=16位
2byte
2M
解碼的時候設置Bitmap.inPreferredConfig ,嘗試加載不同質量的位圖到內存;
就是先獲取將要加載的圖片的大小,預計算內存的占用和是否我們需要這樣分辨率的圖片。
采用BitmapFactory加載圖片,它提供了decodeResource 和decodeFile兩個方法給我們解碼Resource目錄和本地SDCard目錄下的圖片,提供了強大的BitmapFactory.Options 給我在解碼圖片的過程中的配置。
圖片分辨率為:8176 x 2368 顏色模型是:ARGB_8888, 完全加載到內存所需資源是:73.6M左右,意味著巨大多數的Android手機都會瞬間內存洩漏。
加載圖片時先獲取圖片的大小和圖片的格式:將inJustDecodeBounds設置為true,不解碼圖片到內存,只讀取圖片的基本信息。
BitmapFactory.Options options = new BitmapFactory.Options();
options.inJustDecodeBounds = true;
BitmapFactory.decodeResource(getResources(), R.id.myimage, options);
int imageHeight = options.outHeight;
int imageWidth = options.outWidth;
String imageType = options.outMimeType;
這時候可以獲取到圖片的大小和格式,然後根據需要加載的模型計算所占內存空間的大小:
/**
 * A helper function to return the byte usage per pixel of a bitmap based on its configuration.
 */
public static int getBytesPerPixel(Bitmap.Config config) {
    if (config == Bitmap.Config.ARGB_8888) {
        return 4;
    } else if (config == Bitmap.Config.RGB_565) {
        return 2;
    } else if (config == Bitmap.Config.ARGB_4444) {
        return 2;
    } else if (config == Bitmap.Config.ALPHA_8) {
        return 1;
    }
    return 1;
}
/**
 * get the image size in the RAM
 *
 * @param imageW
 * @param imageH
 * @return
 */
public static long getBitmapSizeInMemory(int imageW, int imageH) {
    return imageH * imageW * getBytesPerPixel(Bitmap.Config.ARGB_8888);
}
/**
 * Load bitmap from resources
 *
 * @param res        resource
 * @param drawableId resource image id
 * @param imgH       destination image height
 * @param imgW       destination image width
 * @return
 */
public static Bitmap loadHugeBitmapFromDrawable(Resources resources, int drawableId, int imgH, int imgW) {
    Log.d(TAG, imgH: + imgH +  imgW: + imgW);

    BitmapFactory.Options options = new BitmapFactory.Options();

    //preload set inJustDecodeBounds true, this will load bitmap into memory
    options.inJustDecodeBounds = true;
    //options.inPreferredConfig = Bitmap.Config.ARGB_8888;//default is Bitmap.Config.ARGB_8888
    BitmapFactory.decodeResource(resources, drawableId, options);

    //get the image information include: height and width
    int height = options.outHeight;
    int width = options.outWidth;
    String mimeType = options.outMimeType;

    Log.d(TAG, width: + width +  height: + height +  mimeType: + mimeType);

    //get sample size
    int sampleSize = getScaleInSampleSize(width, height, imgW, imgH);
    options.inSampleSize = sampleSize;
    // Decode bitmap with inSampleSize set
    options.inJustDecodeBounds = false;

    Log.d(TAG, memory size: + getBitmapSizeInMemory(width / sampleSize, height / sampleSize));
    Bitmap bitmap = BitmapFactory.decodeResource(resources, drawableId, options);
    Log.d(TAG, w= + bitmap.getWidth() +  h= + bitmap.getHeight() +  bitmap size: + bitmap.getRowBytes() * bitmap.getHeight());
    return bitmap;
}
/**
 * load the bitmap from SDCard with the imgW and imgH
 *
 * @param imgPath  resource path
 * @param imgH     result image height
 * @param imgW     result image width
 * @return result bitmap
 */
public static Bitmap loadHugeBitmapFromSDCard(String imgPath, int imgH, int imgW) {
    Log.d(TAG, imgH: + imgH +  imgW: + imgW);

    BitmapFactory.Options options = new BitmapFactory.Options();

    //preload set inJustDecodeBounds true, this will load bitmap into memory
    options.inJustDecodeBounds = true;
    //options.inPreferredConfig = Bitmap.Config.ARGB_8888;//default is Bitmap.Config.ARGB_8888
    BitmapFactory.decodeFile(imgPath, options);

    //get the image information include: height and width
    int height = options.outHeight;
    int width = options.outWidth;
    String mimeType = options.outMimeType;

    Log.d(TAG, width: + width +  height: + height +  mimeType: + mimeType);

    //get sample size
    int sampleSize = getScaleInSampleSize(width, height, imgW, imgH);
    options.inSampleSize = sampleSize;
    // Decode bitmap with inSampleSize set
    options.inJustDecodeBounds = false;

    Log.d(TAG, memory size: + getBitmapSizeInMemory(width / sampleSize, height / sampleSize));
    Bitmap bitmap = BitmapFactory.decodeFile(imgPath, options);
    Log.d(TAG, w= + bitmap.getWidth() +  h= + bitmap.getHeight() +  bitmap size: + bitmap.getRowBytes() * bitmap.getHeight());

    return bitmap;
}
兩種方式的原理完全一樣。
根據官方文檔我們可以了解到,inSampleSize必須是2的指數倍,如果不是2的指數倍會自動轉位教下的2的指數倍的數,下邊我提供一個計算方法:
/**
     * get the scale sample size
     *
     * @param resW resource width
     * @param resH resource height
     * @param desW result width
     * @param desH result height
     * @return
     */
    public static int getScaleInSampleSize(int resW, int resH, int desW, int desH) {
        int scaleW = resW / desW;
        int scaleH = resH / desH;
        int largeScale = scaleH > scaleW ? scaleH : scaleW;

        int sampleSize = 1;
        while (sampleSize < largeScale) {
            sampleSize *= 2;
        }

        Log.d(TAG, sampleSize: + sampleSize);

        return sampleSize;
    }
 Android基礎入門教程——2.4.7 構建一個可復用的自定義BaseAdapter
Android基礎入門教程——2.4.7 構建一個可復用的自定義BaseAdapter標簽(空格分隔): Android基礎入門教程本節引言: 如
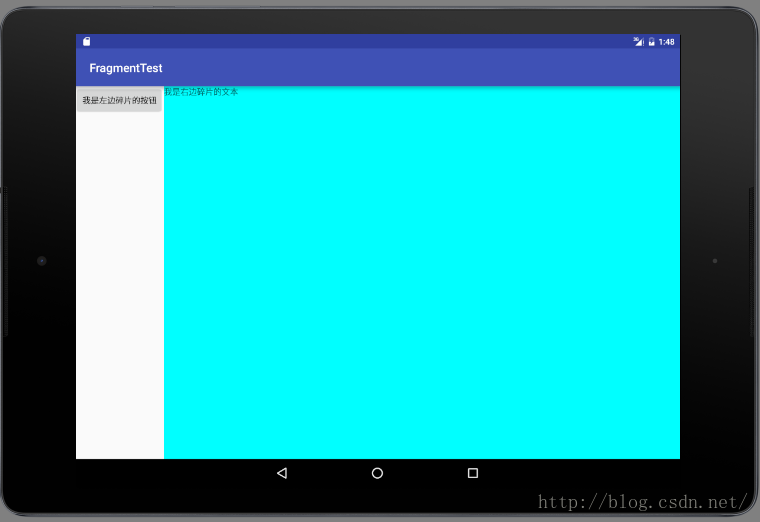 Android 學習之 Fragment(一)
Android為什麼引入碎片Fragment?現在形形色色的Android設備,屏幕尺寸各有不同,同樣的布局,可能在不同的設備上有著不同的效果,比如在手機上顯示很完美,到
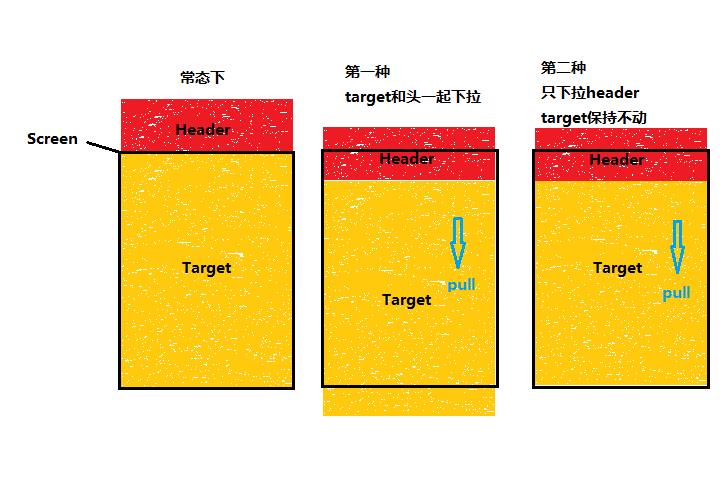 Android實現支持所有View的通用的下拉刷新控件
下拉刷新對於一個app來說是必不可少的一個功能,在早期大多數使用的是chrisbanes的PullToRefresh,或是修改自該框架的其他庫。而到現在已經有了更多的選擇
 Android 支付寶以及微信支付快速接入流程
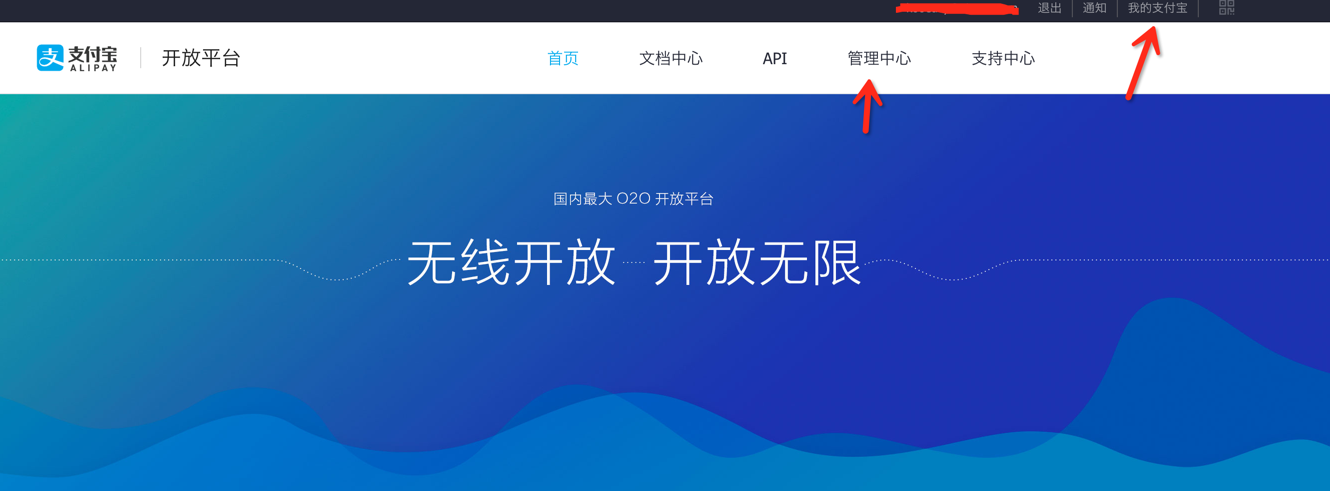
隨著移動支付的普及,越來越多的App采用第三發支付,在這裡我們以支付寶為例,做一個快速集成!一、Android快速實現支付寶支付1、首先,我們需要前往支付寶開放平台,申請