編輯:關於Android編程
這段時間學習別人的源碼,需要AndroidAnnotations這個開源的框架,學習下,他的地在:https://github.com/excilys/androidannotations文檔的地址在:https://github.com/excilys/androidannotations/wiki 正如在github上他的主頁上所說:Fast Android Development. Easy maintenance.它具有快速Android開發,易於維護的優點。
特點:
@EActivity(R.layout.translate) // Sets content view to R.layout.translate
public class TranslateActivity extends Activity {

    @ViewById // Injects R.id.textInput
    EditText textInput;

    @ViewById(R.id.myTextView) // Injects R.id.myTextView
    TextView result;

    @AnimationRes // Injects android.R.anim.fade_in
    Animation fadeIn;

    @Click // When R.id.doTranslate button is clicked
    void doTranslate() {
         translateInBackground(textInput.getText().toString());
    }

    @Background // Executed in a background thread
    void translateInBackground(String textToTranslate) {
         String translatedText = callGoogleTranslate(textToTranslate);
         showResult(translatedText);
    }

    @UiThread // Executed in the ui thread
    void showResult(String translatedText) {
         result.setText(translatedText);
         result.startAnimation(fadeIn);
    }

    // [...]
}
//===================================================================
AndroidAnnotations works in a very simple way. It automatically adds an extra compilation step that generates source code, using the standard Java Annotation Processing Tool.
What source code ? For each enhanced class, for example each @EActivity annotated activity, a subclass of
this activity is generated, with the same name plus an underscore appended at the end.(會生成一個子類)
For instance, the following class:
package com.some.company;
@EActivity
public class MyActivity extends Activity {
  // ...
}
Will generate the following subclass, in the same package but in another source folder:(生成一個MyActivity_的子類)
package com.some.company;
public final class MyActivity_ extends MyActivity {
  // ...
}
This subclass adds behavior to your activity by overriding some methods (for instanceonCreate()), yet delegating
the calls to super.
That is the reason why you must add _ to your activity names in AndroidManifest.xml:(清單文件中這樣配置生成的子類)
In Android, you usually start an activity this way:
startActivity(this, MyListActivity.class);
However, with AndroidAnnotations, the real activity that must be started isMyListActivity_:
startActivity(this, MyListActivity_.class);
Since AndroidAnnotations 2.4
We provide a static helper to let you start the generated activity:
// Starting the activity
MyListActivity_.intent(context).start();

// Building an intent from the activity
Intent intent = MyListActivity_.intent(context).get();

// You can provide flags
MyListActivity_.intent(context).flags(FLAG_ACTIVITY_CLEAR_TOP).start();

// You can even provide extras defined with @Extra in the activity
MyListActivity_.intent(context).myDateExtra(someDate).start();
Since AndroidAnnotations 2.7
You can also use the startActivityForResult() equivalent:
MyListActivity_.intent(context).startForResult();
In Android, you usually start a service this way:
startService(this, MyService.class);
However, with AndroidAnnotations, the real Service that must be started is MyService_:
startService(this, MyService_.class);
Since AndroidAnnotations 2.7
We provide a static helper to let you start the generated service:
// Starting the service
MyService_.intent(context).start();

// Building an intent from the activity
Intent intent = MyService_.intent(context).build();

// You can provide flags
MyService_.intent(context).flags(Intent.FLAG_GRANT_READ_URI_PERMISSION).start(
 打造一個Android 3D立體旋轉容器
1.概述回到正題,這次帶來的效果,是一個Android 的3D立體旋轉的效果。當然靈感的來源,來自早些時間微博上看到的效果圖。非常酷有木有!作為程序猿我當然要把它加入我的
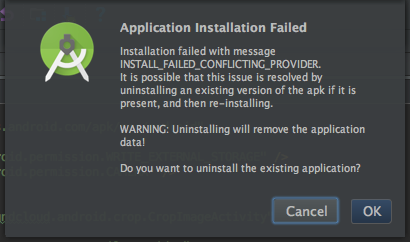 解決 INSTALL FAILED CONFLICTING PROVIDER的問題方法
解決 INSTALL FAILED CONFLICTING PROVIDER的問題方法 在安裝Android應用時出現INSTALL FAILED
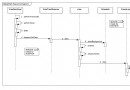 Android View框架總結(六)View布局流程之Draw過程
View的Draw時序圖前面幾篇通過對View樹的measure和layout過程分析事,接下來將結合前兩步得到的測量值及在視圖中的位位置,開始進行繪制操作,一步比一步復
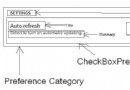 Android學習筆記之Shared Preference
如果沒有特殊要求,我們可以使用Android提供的框架來創建系統樣式的Preference Screen,在其內部可以包含PreferenceCategory和Prefe