編輯:關於Android編程
1、通過startservice方法啟動一個服務,service不能自己啟動自己。若在一個服務中啟動一個activity則,必須是申明一個全新的activity任務TASK。通過startservice方法啟動的服務不會隨著啟動組件的消亡而消亡,而是一直運行著。
Service生命周期 onCreate()-------->onStartCommand()----------->onDestroy()
startService()啟動一個服務後,若在該服務做耗時操作且沒有寫線程,則會導致主線程阻塞!
服務啟動運行後會一直運行onStartCommand()方法。
2、用bindService啟動一個服務,該服務和activity是綁定在一起的:啟動時,先調用onCreate()------>onBind()--------->onServiceConnected(),啟動服務的組件消亡,服務也就消亡了。
3、AIDL服務調用方式
demo下載地址:http://download.csdn.net/detail/u014600432/8175529
1)服務端代碼:
首先定義一個接口描述語言的接口:
package com.example.service;
interface DataService{
double getData(String arg);

}/**
*Version:
*author:YangQuanqing
*Data:
*/
package com.example.android_aidl_service;
import com.example.service.DataService;
import android.app.Service;
import android.content.Intent;
import android.os.Binder;
import android.os.IBinder;
import android.os.RemoteException;
/**
* @author YangQuanqing yqq
*
*/
public class MyService extends Service {
@Override
public IBinder onBind(Intent arg0) {
//返回binder由didl文件生成
return binder;
}
//定義給客戶端調用的方法 (aidl文件)
Binder binder=new DataService.Stub() {
@Override
public double getData(String arg) throws RemoteException {
if(arg=="a"){
return 1;
}
if(arg=="b"){
return 2;
}
return 0;
}
};
}
把aidl文件包拷貝到客戶端,客戶端代碼如下:
package com.example.android_aidl_client;

import android.app.Activity;
import android.content.ComponentName;
import android.content.Intent;
import android.content.ServiceConnection;
import android.os.Bundle;
import android.os.IBinder;
import android.os.RemoteException;
import android.view.Menu;
import android.view.View;
import android.view.View.OnClickListener;
import android.widget.Button;
import android.widget.TextView;

import com.example.service.DataService;

public class MainActivity extends Activity {
	private Button btn1,btn2;
	//定義一個AIDL實例
	private DataService dataService;
	private TextView tv;

	@Override
	protected void onCreate(Bundle savedInstanceState) {
		super.onCreate(savedInstanceState);
		setContentView(R.layout.activity_main);
		btn1=(Button)this.findViewById(R.id.button1);
		btn2=(Button)this.findViewById(R.id.button2);
		tv=(TextView)this.findViewById(R.id.textView1);
		//綁定服務
		btn1.setOnClickListener(new OnClickListener() {

			@Override
			public void onClick(View v) {
				Intent intent=new Intent(DataService.class.getName());
				//啟動服務
				bindService(intent, conn, BIND_AUTO_CREATE);
			}
		});
		//調用服務的方法
		btn2.setOnClickListener(new OnClickListener() {

			@Override
			public void onClick(View v) {
			try {
				int result=(int) dataService.getData("a");
				tv.setText(result+"");
			} catch (RemoteException e) {
				// TODO Auto-generated catch block
				e.printStackTrace();
			}

			}
		});
	}
//客戶端與服務交互
	private ServiceConnection conn=new ServiceConnection() {

		@Override
		public void onServiceDisconnected(ComponentName name) {


		}

		@Override
		public void onServiceConnected(ComponentName name, IBinder service) {
			//傳入service
			dataService=DataService.Stub.asInterface(service);
		}
	};
	@Override
	public boolean onCreateOptionsMenu(Menu menu) {
		// Inflate the menu; this adds items to the action bar if it is present.
		getMenuInflater().inflate(R.menu.main, menu);
		return true;
	}

}
訪問界面代碼:
package com.example.android_service_binder;

import android.app.Activity;
import android.content.ComponentName;
import android.content.Context;
import android.content.Intent;
import android.content.ServiceConnection;
import android.os.Bundle;
import android.os.IBinder;
import android.view.Menu;
import android.view.View;
import android.view.View.OnClickListener;
import android.widget.Button;
import android.widget.TextView;

import com.example.android_service_binder.MyService.LocalBinder;

public class MainActivity extends Activity {
	//銷毀綁定
	@Override
	protected void onStop() {
		super.onStop();
		if(flag)
		{
			//解除綁定
			unbindService(serviceConnection);
			flag=false;
		}

	}


	//綁定Service
	@Override
	protected void onStart() {
		// TODO Auto-generated method stub
		super.onStart();
		/*Intent intent=new Intent(MainActivity.this,MyService.class);
		//啟動service
		bindService(intent, serviceConnection, Context.BIND_AUTO_CREATE);*/
	}


	private Button btnBinder=null;
	private Button btnCall=null;
	private TextView tv=null;
	private MyService myService;//service實例
	private boolean flag=false;//默認不綁定

	@Override
	protected void onCreate(Bundle savedInstanceState) {
		super.onCreate(savedInstanceState);
		setContentView(R.layout.activity_main);
		btnBinder=(Button)this.findViewById(R.id.button1);
		btnCall=(Button)this.findViewById(R.id.button2);
		tv=(TextView)this.findViewById(R.id.textView1);
		btnBinder.setOnClickListener(new OnClickListener() {

			@Override
			public void onClick(View v) {
				Intent intent=new Intent(MainActivity.this,MyService.class);
				//啟動service
				bindService(intent, serviceConnection, Context.BIND_AUTO_CREATE);
			}
		});
		//調用service方法
		btnCall.setOnClickListener(new OnClickListener() {

			@Override
			public void onClick(View v) {
				//處於綁定狀態
				if(flag)
				{
					int result=myService.getRandom();
					tv.setText("<<<<<"+result);
				}
			}
		});

	}


	private ServiceConnection serviceConnection= new ServiceConnection(){
		//連接
		@Override
		public void onServiceConnected(ComponentName arg0, IBinder iBinder) {
//獲得服務的The IBinder of the Service's communication channel, which you can now make calls on.
			LocalBinder binder=(LocalBinder) iBinder;
			//獲得服務
			myService=binder.getService();

			flag=true;

		}
		//不連接
		@Override
		public void onServiceDisconnected(ComponentName arg0) {
			flag=false;

		}

	};


	@Override
	public boolean onCreateOptionsMenu(Menu menu) {
		// Inflate the menu; this adds items to the action bar if it is present.
		getMenuInflater().inflate(R.menu.main, menu);
		return true;
	}

}
/**
 *Version:
 *author:YangQuanqing
 *Data:
 */
package com.example.android_service_binder;

import java.util.Random;

import android.app.Service;
import android.content.Intent;
import android.os.Binder;
import android.os.IBinder;

/**
 * @author YangQuanqing yqq
 *
 */
public class MyService extends Service {

	private final LocalBinder lb=new LocalBinder();
	private final Random num=new Random();

	@Override
	public IBinder onBind(Intent arg0) {
		// 返回本地Binder的子類實例
		return  lb;
	}
	//定義一個本地Binder類繼承Binder
	public class LocalBinder extends Binder{
		//獲得Servie子類當前實例給客戶端
		public MyService getService(){
		return MyService.this;
		}

	}
	public int getRandom(){

		return num.nextInt(98);
	}

}
demo下載地址:http://download.csdn.net/detail/u014600432/8175633
5、IntentService
本質是開啟一個線程來完成耗時操作。
IntentService生命周期:
onCreate()------->onStartCommand()--------->onHandleIntent()--------->onDestroy()
/**
 *Version:
 *author:YangQuanqing
 *Data:
 */
package com.example.android_intentservice;

import java.io.File;
import java.io.FileOutputStream;
import java.io.IOException;

import org.apache.http.HttpEntity;
import org.apache.http.HttpResponse;
import org.apache.http.client.ClientProtocolException;
import org.apache.http.client.HttpClient;
import org.apache.http.client.methods.HttpPost;
import org.apache.http.impl.client.DefaultHttpClient;
import org.apache.http.util.EntityUtils;

import android.app.IntentService;
import android.content.Intent;
import android.os.Environment;
import android.widget.Toast;

/**
 * @author YangQuanqing  不需要開啟線程(看源碼知道是自己封裝了開啟線程),不需要關閉服務,自己關閉,單線程下載數據
 *
 * 一定要記得實例化!!!
 */
public class DownLoadService extends IntentService {

	@Override
	public void onCreate() {
		// TODO Auto-generated method stub
		super.onCreate();
	}

	public DownLoadService() {
		super("DownLoadService");

	}

	// 只需復寫如下方法

	// 在該方法中執行操作
	@Override
	protected void onHandleIntent(Intent intent) {
		// 獲得提取網絡資源的實例
		HttpClient httpClient = new DefaultHttpClient();
		// 設置請求方式
		HttpPost httpPost = new HttpPost(intent.getStringExtra("url"));
		// 設置存儲路徑
		File file = new File(Environment.getExternalStorageDirectory(),
				"IntentService.gif");
		// 定義輸出流用於寫
		FileOutputStream fileOutputStream = null;
		byte[] data = null;// 網絡數據

		try {
			// 執行請求獲得響應
			HttpResponse httpResponse = httpClient.execute(httpPost);
			// 判斷響應狀態碼
			if (httpResponse.getStatusLine().getStatusCode() == 200) {
				// 獲得響應實體
				HttpEntity httpEntity = httpResponse.getEntity();
				// 獲得網絡數據
				data = EntityUtils.toByteArray(httpEntity);
				// 判斷SD卡是否可用
				if (Environment.getExternalStorageState().equals(
						Environment.MEDIA_MOUNTED)) {
					// 寫入SD卡
					fileOutputStream=new FileOutputStream(file);
					fileOutputStream.write(data, 0, data.length);
					//Toast.makeText( DownLoadService.this,"下載完成", Toast.LENGTH_LONG).show();
					Toast.makeText( getApplicationContext(),"下載完成", Toast.LENGTH_LONG).show();
				}
			}
		} catch (ClientProtocolException e) {
			// TODO Auto-generated catch block
			e.printStackTrace();
		} catch (IOException e) {
			// TODO Auto-generated catch block
			e.printStackTrace();
		} finally {

			if (fileOutputStream != null) {
				try {
					fileOutputStream.close();
				} catch (IOException e) {
					// TODO Auto-generated catch block
					e.printStackTrace();
				}
			}
		}

	}

}
package com.example.android_intentservice;

import android.app.Activity;
import android.content.Intent;
import android.os.Bundle;
import android.view.Menu;
import android.view.View;
import android.view.View.OnClickListener;
import android.widget.Button;

public class MainActivity extends Activity {

	private Button btn_intent=null;
	private String url="http://www.baidu.com/img/bdlogo.gif";
	@Override
	protected void onCreate(Bundle savedInstanceState) {
		super.onCreate(savedInstanceState);
		setContentView(R.layout.activity_main);
		btn_intent=(Button)this.findViewById(R.id.button1);
		btn_intent.setOnClickListener(new OnClickListener(){

			@Override
			public void onClick(View arg0) {
				Intent intent=new Intent(MainActivity.this,DownLoadService.class);
				intent.putExtra("url", url);
				startService(intent);


			}


		});
	}

	@Override
	public boolean onCreateOptionsMenu(Menu menu) {
		// Inflate the menu; this adds items to the action bar if it is present.
		getMenuInflater().inflate(R.menu.main, menu);
		return true;
	}

}
 Android 滑動監聽RecyclerView線性流+左右劃刪除+上下移動
廢話不多說了,直接給大家貼代碼了。具體代碼如下所示:<?xml version=1.0 encoding=utf-8?><Relativ
 Android:使用ZXing生成二維碼(支持添加Logo圖案)
ZXing是谷歌的一個開源庫,可以用來生成二維碼、掃描二維碼。本文所介紹的是第一部分。首先上效果圖:ZXing相關各種文件官方下載地址:https://github.co
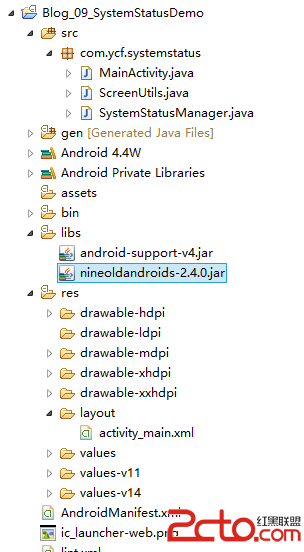 Android 系統狀態欄一體化
Android4.4新特性,系統狀態欄一體化。 實現的步驟主要有以下幾點: 1.android4.4 以上版本 2.設置app全屏: 方法:在AndroidManifes
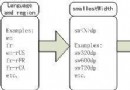 Android屏幕適配規則
要適配不同的屏幕,首要需要的是要能夠將不同的屏幕分辨出來,android提供了若干不同的維度來進行限定(qualifier,有的翻譯為限定詞)上圖所示為常用的一些維度,不