編輯:關於Android編程
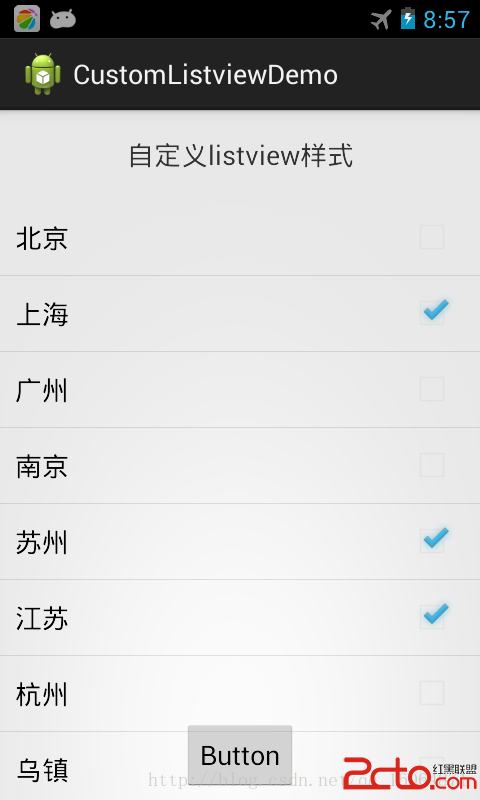
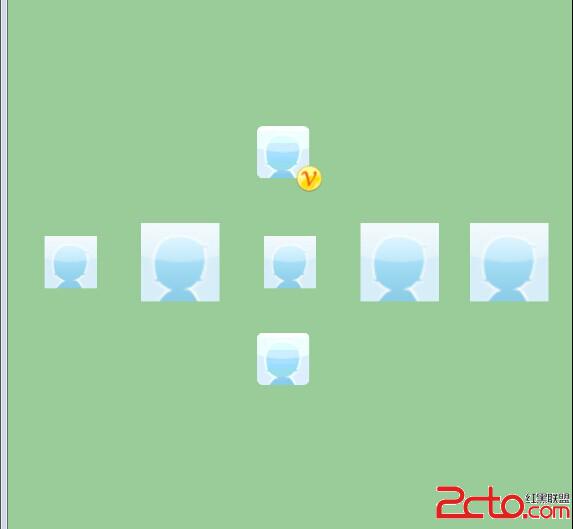
先上效果圖:
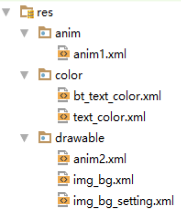
Layout文件:
首先介紹兩種把資源裡的drawable轉成bitmap的方式
第一種:
Bitmap bmp=BitmapFactory.decodeResource(this.getResources(), R.drawable.portrait);第二種:
	Drawable d = this.getResources().getDrawable(R.drawable.portrait);
		Bitmap bmp = drawableToBitmap(d);
	public static Bitmap drawableToBitmap(Drawable drawable) {
        Bitmap bitmap = Bitmap.createBitmap(
                                        drawable.getIntrinsicWidth(),
                                        drawable.getIntrinsicHeight(),
                                        Bitmap.Config.ARGB_8888
                                                        );

        Canvas canvas = new Canvas(bitmap);
        //canvas.setBitmap(bitmap);
        drawable.setBounds(0, 0, drawable.getIntrinsicWidth(), drawable.getIntrinsicHeight());
        drawable.draw(canvas);
        return bitmap;
}
private static RectF rrbRectf = new RectF();
	private static Path rrbRath = new Path();
	private static final int RRB_DEFAULT_SIZE = 10;

	public static Bitmap outputBmp(Context ctx, Bitmap src, boolean isCover) {
		Bitmap v = null;
		if (isCover) {
			v = BitmapFactory.decodeResource(ctx.getResources(), R.drawable.v);
		}else{
			v = BitmapFactory.decodeResource(ctx.getResources(), R.drawable.tv);
		}
		Bitmap bmp = null;
		int arcLength = RRB_DEFAULT_SIZE;
		if (src != null && arcLength > 0) {
			int width = src.getWidth();
			int height = src.getHeight();
			// Utils.loge(width: + width + height: + height);
			Bitmap newBitmap = Bitmap.createBitmap(width, height,
					Bitmap.Config.ARGB_4444);
			Canvas canvas = new Canvas(newBitmap);
			rrbRath.reset();
			rrbRectf.set(0, 0, width, height);
			rrbRath.addRoundRect(rrbRectf, arcLength, arcLength,
					Path.Direction.CW);  //這裡是加上圓角
			canvas.clipPath(rrbRath);
			canvas.drawBitmap(src, 0, 0, new Paint(Paint.ANTI_ALIAS_FLAG));
			if (newBitmap != null && v != null) {
				int width1 = newBitmap.getWidth();
				int height1 = newBitmap.getHeight();
				int width2 = v.getWidth();
				int height2 = v.getHeight();
				bmp = Bitmap.createBitmap(width1 + (width2 / 2), height1
						+ (height2 / 2), Bitmap.Config.ARGB_4444);
				bmp.eraseColor(Color.TRANSPARENT);
				Canvas canvas2 = new Canvas(bmp);
				canvas2.drawBitmap(newBitmap, 0, 0, new Paint(
						Paint.ANTI_ALIAS_FLAG));
				canvas2.drawBitmap(v, width1 - (width2 / 2), height1
						- (height2 / 2), new Paint(Paint.ANTI_ALIAS_FLAG));  //這裡是在圖片右下角加上v
				newBitmap.recycle();
				v.recycle();
				return bmp;
			}
			src.recycle();
		}
		return bmp;

	}
scaletype的種類分為三類matrix(默認)、fit-X類、和center類。matrix就不多說。fit-X類中, fitStart、fitCenter和fitEnd之間的都是根據需要使原圖改變對ImgView進行適應,不剪裁,按matrix進行繪制,但它們 的區別在於基准不同。fitStart的基准為最上角的點(即matrix方式開始的點)fitCenter的基准點為中間的點 (matrix方式中可以使圖片居中的點),而fitEnd的基准點為右下角的點(即matrix方式最後繪制點)。center類 中,center、centerCrop、centerInside都是以原圖的幾何中心點和ImagView的幾何中心點為基准,且只繪制 ImagView大小的圖像,不同的是是否保持原圖大小和繪圖的目標不同、采取的手段不同
CENTER /center  按圖片的原來size居中顯示,當圖片長/寬超過View的長/寬,則截取圖片的居中部分顯示
CENTER_CROP / centerCrop  按比例擴大圖片的size居中顯示,使得圖片長(寬)等於或大於View的長(寬)
CENTER_INSIDE / centerInside  將圖片的內容完整居中顯示,通過按比例縮小或原來的size使得圖片長/寬等於或小於View的長/寬
FIT_CENTER / fitCenter  把圖片按比例擴大/縮小到View的寬度,居中顯示
FIT_END / fitEnd   把圖片按比例擴大/縮小到View的寬度,顯示在View的下部分位置
FIT_START / fitStart  把圖片按比例擴大/縮小到View的寬度,顯示在View的上部分位置
FIT_XY / fitXY  把圖片不按比例擴大/縮小到View的大小顯示
MATRIX / matrix 用矩陣來繪制,動態縮小放大圖片來顯示。
 Android動畫效果——1.幀動畫2.補間動畫3.跳轉畫面(三)
插值器類 xml屬性值 說明 LinearInterpolator @android:anim/linear_interpolatorr 動畫以均勻的速度改
 Android中Property Animation屬性動畫編寫的實例教程
1、概述Android提供了幾種動畫類型:View Animation 、Drawable Animation 、Property Animation 。View Ani
 Android TextView顯示html樣式的文字
先給大家說下項目需求:TextView顯示一段文字,格式為:白雪公主(姓名,字數不確定)向您發來了2(消息個數,不確定)條消息這段文字中名字和數字的長度是不確定的,還要求
 Android項目中包名的修改
通常修改包名時會造成R文件錯誤,並且有時帶有原因不明的Manifest文件中多處文本混亂。 所以,將目前認為最為簡潔方便的修改包名流程記錄如下: 假設我們目前的包名為co