編輯:關於Android編程
Android提示版本更新操作流程
2014年5月8日:
andorid的app應用中都會有版本更新的操作,今天空閒的時候就花了點心思弄了一下,主要技術方面用到了AsyncTask異步加載、http協議、json解析、獲取版本號等。。。
下面就來介紹一下大概的流程吧,首先呢:
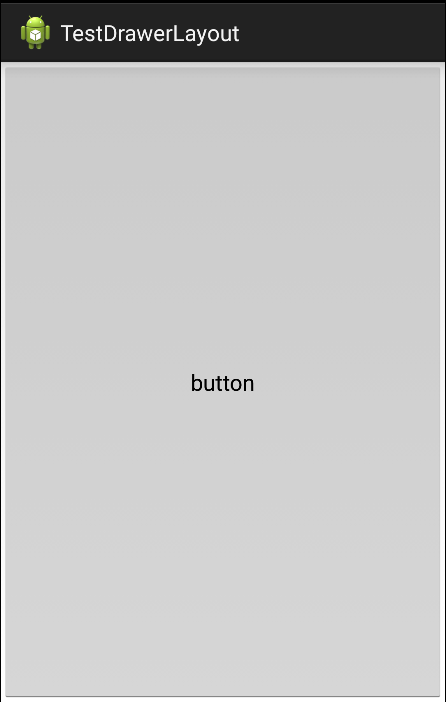
activity_main.xml:
這裡我就只用了一個按鈕了!
接下來mainactivity代碼:
啟動了異步加載來處理的,如果舊版本小於新版本號,就開始執行下載操作,否則就不更新!
一步步看吧!
public class MainActivity extends Activity {

	Button m_btnCheckNewestVersion;
	long m_newVerCode; //最新版的版本號
	String m_newVerName; //最新版的版本名
	String m_appNameStr; //下載到本地要給這個APP命的名字

	Handler m_mainHandler;
	ProgressDialog m_progressDlg;
	@Override
	protected void onCreate(Bundle savedInstanceState) {
		super.onCreate(savedInstanceState);
		setContentView(R.layout.activity_main);

		//初始化相關變量
		initVariable();

		m_btnCheckNewestVersion.setOnClickListener(btnClickListener);
	}
	private void initVariable()
	{
		m_btnCheckNewestVersion = (Button)findViewById(R.id.chek_newest_version);
		m_mainHandler = new Handler();
		m_progressDlg =  new ProgressDialog(this);
		m_progressDlg.setProgressStyle(ProgressDialog.STYLE_HORIZONTAL);
		 // 設置ProgressDialog 的進度條是否不明確 false 就是不設置為不明確
		m_progressDlg.setIndeterminate(false);
		m_appNameStr = "haha.apk";
	}

	OnClickListener btnClickListener = new View.OnClickListener() {

		@Override
		public void onClick(View v) {
			// TODO Auto-generated method stub
			new checkNewestVersionAsyncTask().execute();
		}
	};

	class checkNewestVersionAsyncTask extends AsyncTask
	{

		@Override
		protected Boolean doInBackground(Void... params) {
			// TODO Auto-generated method stub
			if(postCheckNewestVersionCommand2Server())
			{
				int vercode = Common.getVerCode(getApplicationContext()); // 用到前面第一節寫的方法
		         if (m_newVerCode > vercode) {
		             return true;
		         } else {
		             return false;
		         }
			}
			return false;
		}

		@Override
		protected void onPostExecute(Boolean result) {
			// TODO Auto-generated method stub
			if (result) {//如果有最新版本
				doNewVersionUpdate(); // 更新新版本
			}else {
				notNewVersionDlgShow(); // 提示當前為最新版本
			}
			super.onPostExecute(result);
		}

		@Override
		protected void onPreExecute() {
			// TODO Auto-generated method stub
			super.onPreExecute();
		}
	}

	/**
	 * 從服務器獲取當前最新版本號,如果成功返回TURE,如果失敗,返回FALSE
	 * @return
	 */
	private Boolean postCheckNewestVersionCommand2Server()
	{
		StringBuilder builder = new StringBuilder();
		JSONArray jsonArray = null;
		try {
			// 構造POST方法的{name:value} 參數對
			List vps = new ArrayList();
			// 將參數傳入post方法中
			vps.add(new BasicNameValuePair("action", "checkNewestVersion"));
			builder = Common.post_to_server(vps);
			Log.e("msg", builder.toString());
			jsonArray = new JSONArray(builder.toString());
			if (jsonArray.length()>0) {
				if (jsonArray.getJSONObject(0).getInt("id") == 1) {
					m_newVerName = jsonArray.getJSONObject(0).getString("verName");
					m_newVerCode = jsonArray.getJSONObject(0).getLong("verCode");

					return true;
				}
			}

			return false;
		} catch (Exception e) {
			Log.e("msg",e.getMessage());
			m_newVerName="";
			m_newVerCode=-1;
			return false;
		}
	}

	/**
	 * 提示更新新版本
	 */
	private void doNewVersionUpdate() {
		int verCode = Common.getVerCode(getApplicationContext());
	    String verName = Common.getVerName(getApplicationContext());

	    String str= "當前版本:"+verName+" Code:"+verCode+" ,發現新版本:"+m_newVerName+
	    		" Code:"+m_newVerCode+" ,是否更新?";
	    Dialog dialog = new AlertDialog.Builder(this).setTitle("軟件更新").setMessage(str)
	            // 設置內容
	            .setPositiveButton("更新",// 設置確定按鈕
	                    new DialogInterface.OnClickListener() {
	                        @Override
	                        public void onClick(DialogInterface dialog,
	                                int which) {
	                            m_progressDlg.setTitle("正在下載");
	                            m_progressDlg.setMessage("請稍候...");
	                            downFile(Common.UPDATESOFTADDRESS);  //開始下載
	                        }
	                    })
	            .setNegativeButton("暫不更新",
	                    new DialogInterface.OnClickListener() {
	                        public void onClick(DialogInterface dialog,
	                                int whichButton) {
	                            // 點擊"取消"按鈕之後退出程序
	                            finish();
	                        }
	                    }).create();// 創建
	    // 顯示對話框
	    dialog.show();
	}
		/**
		 *  提示當前為最新版本
		 */
		private void notNewVersionDlgShow()
		{
			int verCode = Common.getVerCode(this);
		    String verName = Common.getVerName(this);
		    String str="當前版本:"+verName+" Code:"+verCode+",/n已是最新版,無需更新!";
		    Dialog dialog = new AlertDialog.Builder(this).setTitle("軟件更新")
		            .setMessage(str)// 設置內容
		            .setPositiveButton("確定",// 設置確定按鈕
		                    new DialogInterface.OnClickListener() {
		                        @Override
		                        public void onClick(DialogInterface dialog,
		                                int which) {
		                            finish();
		                        }
		                    }).create();// 創建
		    // 顯示對話框
		    dialog.show();
		}
		private void downFile(final String url)
		{
			m_progressDlg.show();
		    new Thread() {
		        public void run() {
		            HttpClient client = new DefaultHttpClient();
		            HttpGet get = new HttpGet(url);
		            HttpResponse response;
		            try {
		                response = client.execute(get);
		                HttpEntity entity = response.getEntity();
		                long length = entity.getContentLength();

		                m_progressDlg.setMax((int)length);//設置進度條的最大值

		                InputStream is = entity.getContent();
		                FileOutputStream fileOutputStream = null;
		                if (is != null) {
		                    File file = new File(
		                            Environment.getExternalStorageDirectory(),
		                            m_appNameStr);
		                    fileOutputStream = new FileOutputStream(file);
		                    byte[] buf = new byte[1024];
		                    int ch = -1;
		                    int count = 0;
		                    while ((ch = is.read(buf)) != -1) {
		                        fileOutputStream.write(buf, 0, ch);
		                        count += ch;
		                        if (length > 0) {
		                        	 m_progressDlg.setProgress(count);
		                        }
		                    }
		                }
		                fileOutputStream.flush();
		                if (fileOutputStream != null) {
		                    fileOutputStream.close();
		                }
		                down();  //告訴HANDER已經下載完成了,可以安裝了
		            } catch (ClientProtocolException e) {
		                e.printStackTrace();
		            } catch (IOException e) {
		                e.printStackTrace();
		            }
		        }
		    }.start();
		}
		/**
		 * 告訴HANDER已經下載完成了,可以安裝了
		 */
		private void down() {
	        m_mainHandler.post(new Runnable() {
	            public void run() {
	                m_progressDlg.cancel();
	                update();
	            }
	        });
	}
		/**
		 * 安裝程序
		 */
	    void update() {
	        Intent intent = new Intent(Intent.ACTION_VIEW);
	        intent.setDataAndType(Uri.fromFile(new File(Environment
	                .getExternalStorageDirectory(), m_appNameStr)),
	                "application/vnd.android.package-archive");
	        startActivity(intent);
	    }


}
最後是Common.java類:
類似一個工具類,很多方法都寫在這裡面,下載完成後,開始執行安裝的操作!
public class Common {
	public static final String SERVER_IP="http://192.168.1.105/";
	public static final String SERVER_ADDRESS=SERVER_IP+"try_downloadFile_progress_server/index.php";//軟件更新包地址
	public static final String UPDATESOFTADDRESS=SERVER_IP+"try_downloadFile_progress_server/update_pakage/baidu.apk";//軟件更新包地址

	/**
	 * 向服務器發送查詢請求,返回查到的StringBuilder類型數據
	 *
	 * @param ArrayList
	 *             vps POST進來的參值對
	 * @return StringBuilder builder 返回查到的結果
	 * @throws Exception
	 */
	public static StringBuilder post_to_server(List vps) {
		DefaultHttpClient httpclient = new DefaultHttpClient();
		try {
			HttpResponse response = null;
			// 創建httpost.訪問本地服務器網址
			HttpPost httpost = new HttpPost(SERVER_ADDRESS);
			StringBuilder builder = new StringBuilder();

			httpost.setEntity(new UrlEncodedFormEntity(vps, HTTP.UTF_8));
			response = httpclient.execute(httpost); // 執行

			if (response.getEntity() != null) {
				// 如果服務器端JSON沒寫對,這句是會出異常,是執行不過去的
				BufferedReader reader = new BufferedReader(
						new InputStreamReader(response.getEntity().getContent()));
				String s = reader.readLine();
				for (; s != null; s = reader.readLine()) {
					builder.append(s);
				}
			}
			return builder;

		} catch (Exception e) {
			// TODO: handle exception
			Log.e("msg",e.getMessage());
			return null;
		} finally {
			try {
				httpclient.getConnectionManager().shutdown();// 關閉連接
				// 這兩種釋放連接的方法都可以
			} catch (Exception e) {
				// TODO Auto-generated catch block
				Log.e("msg",e.getMessage());
			}
		}
	}

	/**
	 * 獲取軟件版本號
	 * @param context
	 * @return
	 */
	public static int getVerCode(Context context) {
        int verCode = -1;
        try {
        	//注意:"com.example.try_downloadfile_progress"對應AndroidManifest.xml裡的package="……"部分
            verCode = context.getPackageManager().getPackageInfo(
                    "com.example.try_downloadfile_progress", 0).versionCode;
        } catch (NameNotFoundException e) {
        	Log.e("msg",e.getMessage());
        }
        return verCode;
    }
   /**
    * 獲取版本名稱
    * @param context
    * @return
    */
    public static String getVerName(Context context) {
        String verName = "";
        try {
            verName = context.getPackageManager().getPackageInfo(
                    "com.example.try_downloadfile_progress", 0).versionName;
        } catch (NameNotFoundException e) {
        	Log.e("msg",e.getMessage());
        }
        return verName;
}
已經貼完畢!
 Android 5.0新特性
Android 5.0 是 Google 於 2014 年 10 月 15 日(美國太平洋時間)發布的全新 Android 操作系統,英文名為Lollipop,翻譯過來就
 android 通知Notification詳解及實例代碼
android Notification實例詳解1.使用Builder模式來創建2.必須要設置一個smallIcon,還可以設置setTicker3.可以設置 setCo
 詳述Canvas(五)/繪制圓角矩形
Canvas並沒有提供繪制圓角矩形的方法,但是通過觀察,我們可以發現,其實我們可以將圓角矩形分為四段,可以通過使用arcTo來實現。現在再看下第二段曲線:因此我們直接使用
 android自學之第一個HelloWorld程序
話不多說開弄:打開eclipse,左上角File=》New=》Android Application Projicet,如圖: Next,Next,Next,N