編輯:關於Android編程
上周對Android中的事件派發機制進行了分析,這次博主要對消息隊列和Looper的源碼進行簡單的分析。大家耐心看下去,其實消息隊列的邏輯比事件派發機制簡單多了,所以大家肯定會很容易看懂的。
消息隊列在android中對應MessageQueue這個類,顧名思義,消息隊列中存放了大量的消息(Message)
消息(Message)代表一個行為(what)或者一串動作(Runnable),有兩處會用到Message:Handler和Messenger
Handler大家都知道,主要用來在線程中發消息通知ui線程更新ui。Messenger可以翻譯為信使,可以實現進程間通信(IPC),Messenger采用一個單線程來處理所有的消息,而且進程間的通信都是通過發消息來完成的,感覺不能像AIDL那樣直接調用對方的接口方法(具體有待考證),這是其和AIDL的主要區別,也就是說Messenger無法處理多線程,所有的調用都是在一個線程中串行執行的。Messenger的典型代碼是這樣的:new Messenger(service).send(msg),它的本質還是調用了Handler的sendMessage方法
Looper是循環的意思,它負責從消息隊列中循環的取出消息然後把消息交給目標處理
線程如果沒有Looper,就沒有消息隊列,就無法處理消息,線程內部就無法使用Handler。這就是為什麼在子線程內部創建Handler會報錯:Can't create handler inside thread that has not called Looper.prepare(),具體原因下面再分析。
在線程的run方法中加入如下兩句:
Looper.prepare();
Looper.loop();
這一切不用我們來做,有現成的,HandlerThread就是帶有Looper的線程。
想用線程的Looper來創建Handler,很簡單,Handler handler = new Handler(thread.getLooper()),有了上面這幾步,你就可以在子線程中創建Handler了,好吧,其實android早就為我們想到這一點了,也不用自己寫,IntentService把我們該做的都做了,我們只要用就好了,具體怎麼用後面再說。
一個Handler會有一個Looper,一個Looper會有一個消息隊列,Looper的作用就是循環的遍歷消息隊列,如果有新消息,就把新消息交給它的目標處理。每當我們用Handler來發送消息,消息就會被放入消息隊列中,然後Looper就會取出消息發送給它的目標target。一般情況,一個消息的target是發送這個消息的Handler,這麼一來,Looper就會把消息交給Handler處理,這個時候Handler的dispatchMessage方法就會被調用,一般情況最終會調用Handler的handleMessage來處理消息,用handleMessage來處理消息是我們常用的方式。
源碼分析
    public final boolean sendMessage(Message msg)
    {
        return sendMessageDelayed(msg, 0);
    }

	public final boolean sendMessageDelayed(Message msg, long delayMillis)
    {
        if (delayMillis < 0) {
            delayMillis = 0;
        }
        return sendMessageAtTime(msg, SystemClock.uptimeMillis() + delayMillis);
    }

	public boolean sendMessageAtTime(Message msg, long uptimeMillis) {
		MessageQueue queue = mQueue;
		if (queue == null) {
			RuntimeException e = new RuntimeException(
					this +  sendMessageAtTime() called with no mQueue);
			Log.w(Looper, e.getMessage(), e);
			return false;
		}
		return enqueueMessage(queue, msg, uptimeMillis);
	}

	private boolean enqueueMessage(MessageQueue queue, Message msg, long uptimeMillis) {
        msg.target = this;
        if (mAsynchronous) {
            msg.setAsynchronous(true);
        }
        //這裡msg被加入消息隊列queue
        return queue.enqueueMessage(msg, uptimeMillis);
    }
   public static void loop() {
        final Looper me = myLooper();
        if (me == null) {
            throw new RuntimeException(No Looper; Looper.prepare() wasn't called on this thread.);
        }
        //從Looper中取出消息隊列
        final MessageQueue queue = me.mQueue;

        // Make sure the identity of this thread is that of the local process,
        // and keep track of what that identity token actually is.
        Binder.clearCallingIdentity();
        final long ident = Binder.clearCallingIdentity();

        //死循環,循環的取消息,沒有新消息就會阻塞
        for (;;) {
            Message msg = queue.next(); // might block 這裡會被阻塞,如果沒有新消息
            if (msg == null) {
                // No message indicates that the message queue is quitting.
                return;
            }

            // This must be in a local variable, in case a UI event sets the logger
            Printer logging = me.mLogging;
            if (logging != null) {
                logging.println(>>>>> Dispatching to  + msg.target +   +
                        msg.callback + :  + msg.what);
            }

            //將消息交給target處理,這個target就是Handler類型
            msg.target.dispatchMessage(msg);

            if (logging != null) {
                logging.println(<<<<< Finished to  + msg.target +   + msg.callback);
            }

            // Make sure that during the course of dispatching the
            // identity of the thread wasn't corrupted.
            final long newIdent = Binder.clearCallingIdentity();
            if (ident != newIdent) {
                Log.wtf(TAG, Thread identity changed from 0x
                        + Long.toHexString(ident) +  to 0x
                        + Long.toHexString(newIdent) +  while dispatching to
                        + msg.target.getClass().getName() +
                        + msg.callback +  what= + msg.what);
            }

            msg.recycle();
        }
    }
    /**
     * Subclasses must implement this to receive messages.
     */
    public void handleMessage(Message msg) {
    }

    /**
     * Handle system messages here.
     */
    public void dispatchMessage(Message msg) {
        if (msg.callback != null) {
            //這個方法很簡單,直接調用msg.callback.run();
            handleCallback(msg);
        } else {
            //如果我們設置了callback會由callback來處理消息
            if (mCallback != null) {
                if (mCallback.handleMessage(msg)) {
                    return;
                }
            }
            //否則消息就由這裡來處理,這是我們最常用的處理方式
            handleMessage(msg);
        }
    }
我們再看看msg.callback和mCallback是啥東西
/*package*/ Runnable callback;
現在已經很明確了,msg.callback是個Runnable,什麼時候會設置這個callback:handler.post(runnable),相信大家都常用這個方法吧
 /**
 * Callback interface you can use when instantiating a Handler to avoid
 * having to implement your own subclass of Handler.
 *
 * @param msg A {@link android.os.Message Message} object
 * @return True if no further handling is desired
 */
public interface Callback {
	public boolean handleMessage(Message msg);
}

final Callback mCallback;
而mCallback是個接口,可以這樣來設置 Handler handler = new Handler(callback),這個callback的意義是什麼呢,代碼裡面的注釋已經說了,可以讓你不用創建Handler的子類但是還能照樣處理消息,恐怕大家常用的方式都是新new一個Handler然後override其handleMessage方法來處理消息吧,從現在開始,我們知道,不創建Handler的子類也可以處理消息。多說一句,為什麼創建Handler的子類不好?這是因為,類也是占空間的,一個應用class太多,其占用空間會變大,也就是應用會更耗內存。
    @Override
    public void run() {
        mTid = Process.myTid();
        Looper.prepare();
        synchronized (this) {
            mLooper = Looper.myLooper();
            notifyAll();
        }
        Process.setThreadPriority(mPriority);
        onLooperPrepared();
        Looper.loop();
        mTid = -1;
    }
HandlerThread繼承自Thread,其在run方法內部為自己創建了一個Looper,使用上HandlerThread和普通的Thread不一樣,無法執行常見的後台操作,只能用來處理新消息,這是因為Looper.loop()是死循環,你的code根本執行不了,不過貌似你可以把你的code放在super.run()之前執行,但是這好像不是主流玩法,所以不建議這麼做。
    public void onCreate() {
        // TODO: It would be nice to have an option to hold a partial wakelock
        // during processing, and to have a static startService(Context, Intent)
        // method that would launch the service & hand off a wakelock.

        super.onCreate();
        HandlerThread thread = new HandlerThread(IntentService[ + mName + ]);
        thread.start();

        mServiceLooper = thread.getLooper();
        mServiceHandler = new ServiceHandler(mServiceLooper);
    }
IntentService繼承自Service,它是一個抽象類,其被創建的時候就new了一個HandlerThread和ServiceHandler,有了它,就可以利用IntentService做一些優先級較高的task,IntentService不會被系統輕易殺掉。使用IntentService也是很簡單,首先startService(intent),然後IntentService會把你的intent封裝成Message然後通過ServiceHandler進行發送,接著ServiceHandler會調用onHandleIntent(Intent intent)來處理這個Message,onHandleIntent(Intent intent)中的intent就是你startService(intent)中的intent,ok,現在你需要做的是從IntentService派生一個子類並重寫onHandleIntent方法,然後你只要針對不同的intent做不同的事情即可,事情完成後IntentService會自動停止。所以,IntentService是除了Thread和AsyncTask外又一執行耗時操作的方式,而且其不容易被系統干掉,建議關鍵操作采用IntentService。
    public Handler(Callback callback, boolean async) {
        if (FIND_POTENTIAL_LEAKS) {
            final Class klass = getClass();
            if ((klass.isAnonymousClass() || klass.isMemberClass() || klass.isLocalClass()) &&
                    (klass.getModifiers() & Modifier.STATIC) == 0) {
                Log.w(TAG, The following Handler class should be static or leaks might occur:  +
                    klass.getCanonicalName());
            }
        }
        //獲取當前線程的Looper
        mLooper = Looper.myLooper();
        //報錯的根本原因是:當前線程沒有Looper
        if (mLooper == null) {
            throw new RuntimeException(
                Can't create handler inside thread that has not called Looper.prepare());
        }
        mQueue = mLooper.mQueue;
        mCallback = callback;
        mAsynchronous = async;
    }
如何避免這種錯誤:在ui線程使用Handler或者給子線程加上Looper。
 android形狀drawable
1、在res文件夾下新建drawable文件夾。 2、新建一個xml文件。 3、采用drawable來定義資源。 st
 Android Activity啟動模式全面解析
在android裡,有4種activity的啟動模式,分別為:“standard” (默認)“singleTop”“singleTask”“singleInstance”
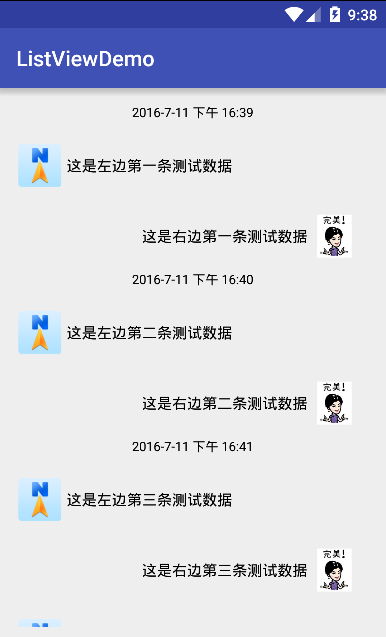 Android學習筆記二十五之ListView多布局實現
Android學習筆記二十五之ListView多布局實現 這一節是介紹ListView這個控件的最後一節,實現一個Item的多布局。像我們經常在用的各種即時通訊工具,Q
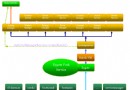 android開機啟動過程
Linux內核啟動之後就到Android Init進程,進而啟動Android相關的服務和應用。啟動的過程如下圖所示: 下面將從Android4.0源碼中,和