編輯:關於Android編程
因為公司需要接入Google的應用內支付(即Google的in-app Billing V3),接入過程中查閱了很多的文章,也遇到很多的問題。故此想和大家分享及交流一下心得,好了廢話不多說了下面我們開始接入google的應用內支付。
第一步:准備工作
首先想要使用google的支付,首先必須要有一部安裝了google play服務的測試機,在這裡提供了三個方法:
1)如果有小米的測試機最好因為小米的系統完整的保留了google play服務.
2)如果沒有可以看下此處附上的連接:http://zhidao.baidu.com/link?url=qDozAoR_-mlZrVAp6oxLdcyR6uscgdDTsN2Z8PWvdLVF1USqKuAEIjw_QI_9eA5tKbZWIfvhMDhVhLEPjd5AEq 安裝Google play的服務.
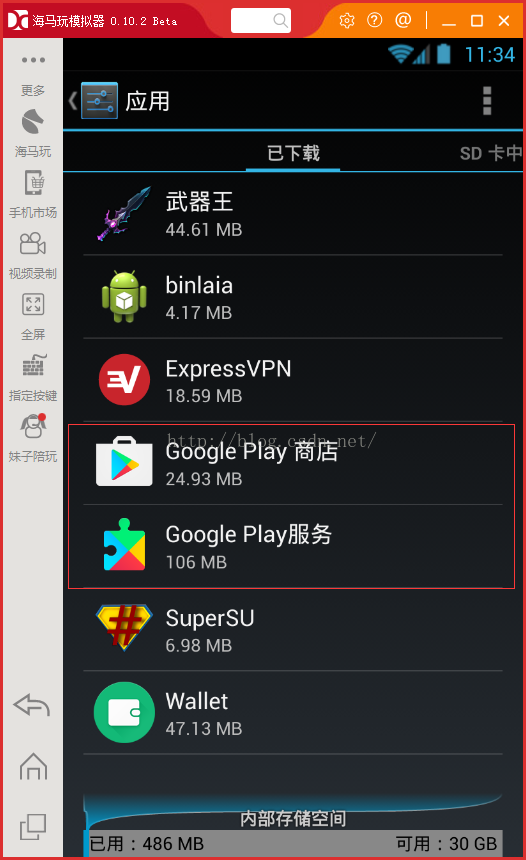
3)如果以上兩種方式你都失敗了,不要沮喪下面這種方法可能會更好,點擊鏈接:http://www.droid4x.cn/ 下載海馬玩模擬器,它可以一步解決問題。
Google play服務安裝完成後如下圖所示:
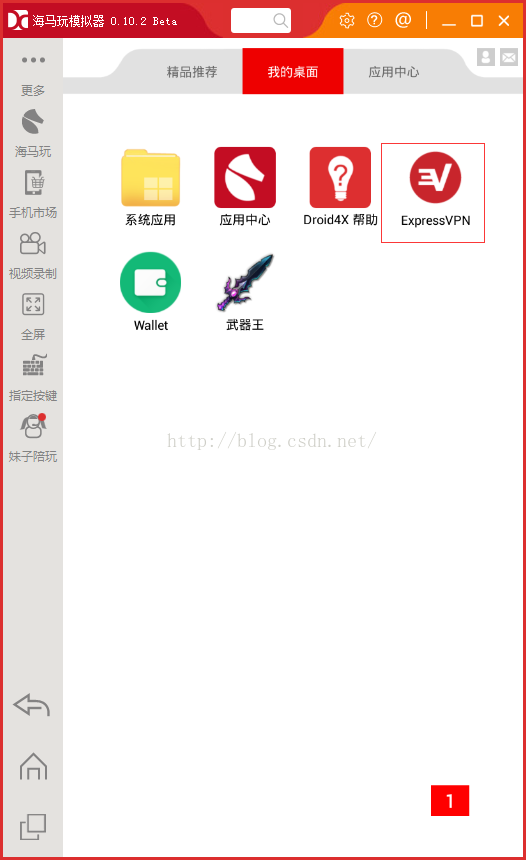
其次你還需要一個VPN賬號(美國的最好),推薦一下我使用的VPN(如下圖)可以隨心所欲的選擇地點。

最後需要下載開發包,打開Android SDK Manager下載Android SDK的extras部分(如下圖),其中有我們支付所用到的包,開發用到的說明文檔,例子等等。

下載完成後在SDK目錄下可以找到這個文件夾android-sdk-windows\extras\google\play_billing
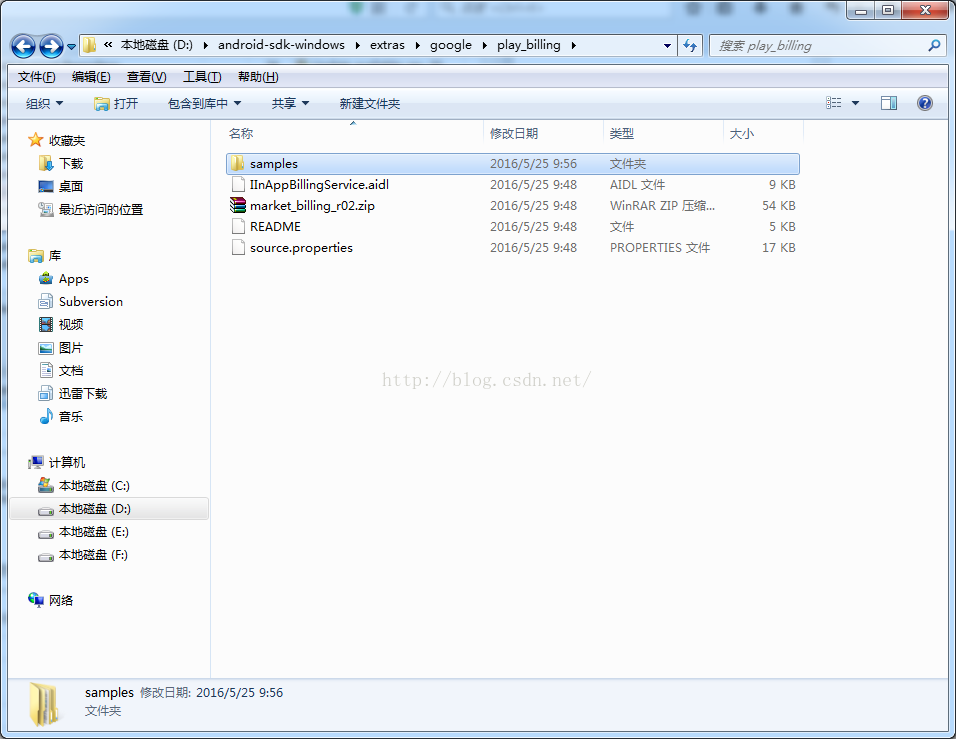
其中samples是google支付接入的demo,可以根據例子進行google支付的接入。同時在SDK目錄下可以找到這個文件夾android-sdk-windows\docs\google\play\billing這個是google支付的官方說明文檔可以對支付工程及原理有一個了解。
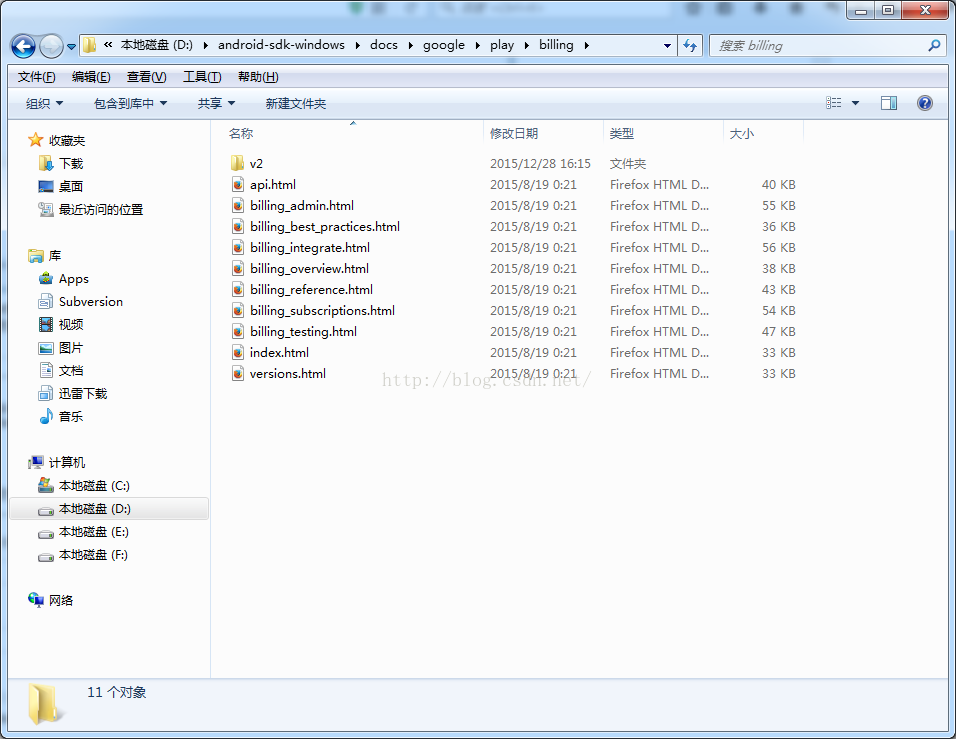
說明文檔裡講的很詳細,建議把文檔完整的看一遍,相信如果你看懂了這幾個文檔,google支付也就很容易搞定了
第二步:代碼接入
准備工作做完了,接下來就是代碼接入過程了,首先你需要將之前下載的IInAppBillingService.aidl文件添加到你的工程中,添加方法就是在你的工程裡新建一個com.android.vending.billing文件夾,將IInAppBillingService.aidl這個 文件拷貝到其中刷新工程即可(具體的可以參考下載的demo)。
其次把之前下載的google支付庫中的demo simple例子中的代碼粘貼到你的工程文件中(如下圖),可以新建一個包放到裡面。
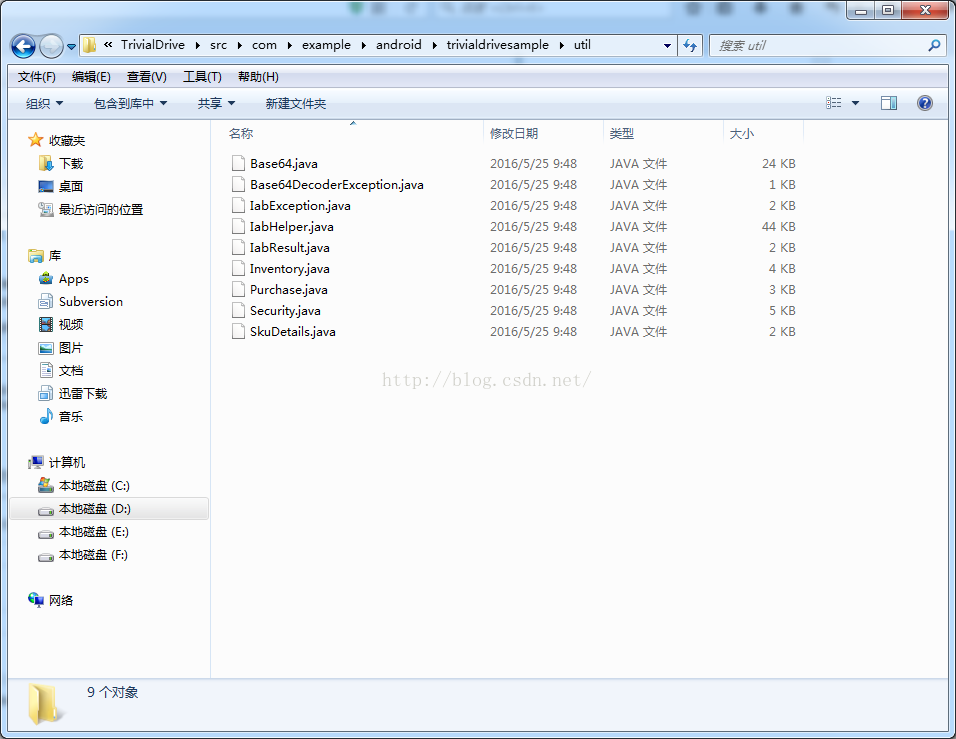
在這裡說明一下,如果你是和我一樣的初學者,可以打著拿來主義的旗號直接使用,但要注意修改一下類名和變量名,畢竟這個代碼是公開的大家都可以看到;如果你是大神覺得這個代碼寫的太low了,也可以自己修改成你想要的那個范。
1.添加權限
接入之前需要在AndroidManifest.xml 文件中添加支付的權限:
2.初始化IabHelper:
// Create the helper, passing it our context and the public key to verify signatures with
        Log.d(TAG, "Creating IAB helper.");
        mHelper = new IabHelper(this, base64EncodedPublicKey);

        // enable debug logging (for a production application, you should set this to false).
        mHelper.enableDebugLogging(true);

        // Start setup. This is asynchronous and the specified listener
        // will be called once setup completes.
        Log.d(TAG, "Starting setup.");
        mHelper.startSetup(new IabHelper.OnIabSetupFinishedListener() {
            public void onIabSetupFinished(IabResult result) {
                Log.d(TAG, "Setup finished.");

                if (!result.isSuccess()) {
                    // Oh noes, there was a problem.
                    complain("Problem setting up in-app billing: " + result);
                    return;
                }

                // Have we been disposed of in the meantime? If so, quit.
                if (mHelper == null) return;

                // IAB is fully set up. Now, let's get an inventory of stuff we own.
                Log.d(TAG, "Setup successful. Querying inventory.");
                mHelper.queryInventoryAsync(mGotInventoryListener);
            }
        });
是用來購買商品的方法:
mHelper.launchPurchaseFlow(this, SKU_GAS, RC_REQUEST,
                mPurchaseFinishedListener, payload);
購買方法的回調:
// Callback for when a purchase is finished
    IabHelper.OnIabPurchaseFinishedListener mPurchaseFinishedListener = new IabHelper.OnIabPurchaseFinishedListener() {
        public void onIabPurchaseFinished(IabResult result, Purchase purchase) {
            Log.d(TAG, "Purchase finished: " + result + ", purchase: " + purchase);

            // if we were disposed of in the meantime, quit.
            if (mHelper == null) return;

            if (result.isFailure()) {
                complain("Error purchasing: " + result);
                setWaitScreen(false);
                return;
            }
            if (!verifyDeveloperPayload(purchase)) {
                complain("Error purchasing. Authenticity verification failed.");
                setWaitScreen(false);
                return;
            }

            Log.d(TAG, "Purchase successful.");

            if (purchase.getSku().equals(SKU_GAS)) {
                // bought 1/4 tank of gas. So consume it.
                Log.d(TAG, "Purchase is gas. Starting gas consumption.");
                mHelper.consumeAsync(purchase, mConsumeFinishedListener);
            }
            else if (purchase.getSku().equals(SKU_PREMIUM)) {
                // bought the premium upgrade!
                Log.d(TAG, "Purchase is premium upgrade. Congratulating user.");
                alert("Thank you for upgrading to premium!");
                mIsPremium = true;
                updateUi();
                setWaitScreen(false);
            }
            else if (purchase.getSku().equals(SKU_INFINITE_GAS)) {
                // bought the infinite gas subscription
                Log.d(TAG, "Infinite gas subscription purchased.");
                alert("Thank you for subscribing to infinite gas!");
                mSubscribedToInfiniteGas = true;
                mTank = TANK_MAX;
                updateUi();
                setWaitScreen(false);
            }
        }
    };

    // Called when consumption is complete
    IabHelper.OnConsumeFinishedListener mConsumeFinishedListener = new IabHelper.OnConsumeFinishedListener() {
        public void onConsumeFinished(Purchase purchase, IabResult result) {
            Log.d(TAG, "Consumption finished. Purchase: " + purchase + ", result: " + result);

            // if we were disposed of in the meantime, quit.
            if (mHelper == null) return;

            // We know this is the "gas" sku because it's the only one we consume,
            // so we don't check which sku was consumed. If you have more than one
            // sku, you probably should check...
            if (result.isSuccess()) {
                // successfully consumed, so we apply the effects of the item in our
                // game world's logic, which in our case means filling the gas tank a bit
                Log.d(TAG, "Consumption successful. Provisioning.");
                mTank = mTank == TANK_MAX ? TANK_MAX : mTank + 1;
                saveData();
                alert("You filled 1/4 tank. Your tank is now " + String.valueOf(mTank) + "/4 full!");
            }
            else {
                complain("Error while consuming: " + result);
            }
            updateUi();
            setWaitScreen(false);
            Log.d(TAG, "End consumption flow.");
        }
    };
4.調用查詢接口:
是用來查詢你當前購買的的商品
mHelper.queryInventoryAsync(mGotInventoryListener);查詢方法的回調:
// Listener that's called when we finish querying the items and subscriptions we own
    IabHelper.QueryInventoryFinishedListener mGotInventoryListener = new IabHelper.QueryInventoryFinishedListener() {
        public void onQueryInventoryFinished(IabResult result, Inventory inventory) {
            Log.d(TAG, "Query inventory finished.");

            // Have we been disposed of in the meantime? If so, quit.
            if (mHelper == null) return;

            // Is it a failure?
            if (result.isFailure()) {
                complain("Failed to query inventory: " + result);
                return;
            }

            Log.d(TAG, "Query inventory was successful.");

            /*
             * Check for items we own. Notice that for each purchase, we check
             * the developer payload to see if it's correct! See
             * verifyDeveloperPayload().
             */

            // Do we have the premium upgrade?
            Purchase premiumPurchase = inventory.getPurchase(SKU_PREMIUM);
            mIsPremium = (premiumPurchase != null && verifyDeveloperPayload(premiumPurchase));
            Log.d(TAG, "User is " + (mIsPremium ? "PREMIUM" : "NOT PREMIUM"));

            // Do we have the infinite gas plan?
            Purchase infiniteGasPurchase = inventory.getPurchase(SKU_INFINITE_GAS);
            mSubscribedToInfiniteGas = (infiniteGasPurchase != null &&
                    verifyDeveloperPayload(infiniteGasPurchase));
            Log.d(TAG, "User " + (mSubscribedToInfiniteGas ? "HAS" : "DOES NOT HAVE")
                        + " infinite gas subscription.");
            if (mSubscribedToInfiniteGas) mTank = TANK_MAX;

            // Check for gas delivery -- if we own gas, we should fill up the tank immediately
            Purchase gasPurchase = inventory.getPurchase(SKU_GAS);
            if (gasPurchase != null && verifyDeveloperPayload(gasPurchase)) {
                Log.d(TAG, "We have gas. Consuming it.");
                mHelper.consumeAsync(inventory.getPurchase(SKU_GAS), mConsumeFinishedListener);
                return;
            }

            updateUi();
            setWaitScreen(false);
            Log.d(TAG, "Initial inventory query finished; enabling main UI.");
        }
    };
因為我們的內購商品是可以重復購買的,但是每次購買之後需要消耗商品,注意這個消耗的意思不是要使用已經購買的商品,而是消除google對改購買商品施加的一個標記,以表示本次購買已成功,之後才可以進行下一次的購買以避免發生重復購買而產生的多次扣款而商品數目不一致的問題。
mHelper.consumeAsync(purchase, mConsumeFinishedListener);
// Called when consumption is complete
    IabHelper.OnConsumeFinishedListener mConsumeFinishedListener = new IabHelper.OnConsumeFinishedListener() {
        public void onConsumeFinished(Purchase purchase, IabResult result) {
            Log.d(TAG, "Consumption finished. Purchase: " + purchase + ", result: " + result);

            // if we were disposed of in the meantime, quit.
            if (mHelper == null) return;

            // We know this is the "gas" sku because it's the only one we consume,
            // so we don't check which sku was consumed. If you have more than one
            // sku, you probably should check...
            if (result.isSuccess()) {
                // successfully consumed, so we apply the effects of the item in our
                // game world's logic, which in our case means filling the gas tank a bit
                Log.d(TAG, "Consumption successful. Provisioning.");
                mTank = mTank == TANK_MAX ? TANK_MAX : mTank + 1;
                saveData();
                alert("You filled 1/4 tank. Your tank is now " + String.valueOf(mTank) + "/4 full!");
            }
            else {
                complain("Error while consuming: " + result);
            }
            updateUi();
            setWaitScreen(false);
            Log.d(TAG, "End consumption flow.");
        }
    };
在購買時不要忘記添加下面這個方法,它是用來出來返回的數據。
@Override
    protected void onActivityResult(int requestCode, int resultCode, Intent data) {
        Log.d(TAG, "onActivityResult(" + requestCode + "," + resultCode + "," + data);
        if (mHelper == null) return;

        // Pass on the activity result to the helper for handling
        if (!mHelper.handleActivityResult(requestCode, resultCode, data)) {
            // not handled, so handle it ourselves (here's where you'd
            // perform any handling of activity results not related to in-app
            // billing...
            super.onActivityResult(requestCode, resultCode, data);
        }
        else {
            Log.d(TAG, "onActivityResult handled by IABUtil.");
        }
    }
7.退出後銷毀IabHelper:
在退出時需要銷毀IabHelper:
// We're being destroyed. It's important to dispose of the helper here!
    @Override
    public void onDestroy() {
        super.onDestroy();

        // very important:
        Log.d(TAG, "Destroying helper.");
        if (mHelper != null) {
            mHelper.dispose();
            mHelper = null;
        }
    }
第三步:打包上傳
首先你需要有一個google開發者賬號,登錄到google開發者後台添加一個應用,同時添加商品的相關部分。
其次google的支付可不是寫完代碼編譯下就可以支付的,所以完成代碼的部分後就需要將工程打包上傳到google開發者後台,打包的過程相信不需要我多說什麼了吧,不會的可以看下這個連接:http://jingyan.baidu.com/article/7908e85c8dea30af491ad24f.html,上傳到Bate版或者ALPHA版,如果是公司開發那應該會有妹子或者漢子幫你完成這個步驟,如果是自己的話那就。。。呵呵。
google的審核過程還是很快的大約半個小時就出爐了,這個時候還需要添加測試賬號在 這個文檔中詳細介紹了如何添加測試賬號,當然添加測試賬號並不意味著你就可以測試了,在審核結束時在google開發者後台的apk界面有一個測試連接,打開後輸入測試的賬號成為測試人員,這個時候就可以進行google支付的測試了
第四步:測試中的問題
首先測試賬號需要有一個綁定的信用卡而且是VISA信用卡賬戶,點擊支付按鈕,如果你已經成為測試人員,但是google提示“需要驗證身份,需要登錄Google賬號”這個問題的話很可能是你的商品id有問題,你可以檢查下商品id是否正確後重新測試。
關於如何添加商品id google支付的說明文檔 中會有詳細的說明。
如果測試中遇到“無法購買你想要買的商品”這個提示,那可能是你還未成為測試人員或者你用開發者賬號進行測試的原因。
1.當前應用程序不支持購買此商品:確定你手機上裝的程序包名和簽名和後台上傳的一致。p.s.上傳後台後APK需要等一段時間才能生效。
2.購買的商品不存在 :確保你代碼裡的商品名字和後台的一致,如果一致,則可能需要等一兩個小時再測試,Google後台的問題。
3.loading了很長時間,最後給你提示未知錯誤:這個不管它,Google後台的問題,等會再測。
最後國內開發者確保是在vpn下進行測試,有什麼疑惑的地方可以和我私聊!!!!
源碼下載:https://github.com/guojunhua/GooglePay.git
 Android學習筆記——Activity的啟動和創建
Android Activity學習筆記——Activity的啟動和創建 最近學習Android相關知識,感覺僅僅了解Activity幾個生命周期函數基本上沒有任
 Android用PopupWindow實現自定義Dailog
Android的PopupWindow是個很有用的widget,利用它可以實現懸浮窗體的效果,比如實現一個懸浮的菜單,最常見的應用就是在視頻播放界面裡,做一個工具欄,用來
 Android資源之圖像資源(1)
以前看別人的程序的drawable文件夾裡有xml資源,說實話第一次見到這樣的xml圖像資源時,我真心不知道是干什麼的。抽空學習了一下圖像資源,才了解了這類圖像資源的妙用
 Android動畫----Translate
引言關於動畫的學習,這是第四篇啦,都是最基礎的幾種動畫,梳理一番,對知識的了解就更加清晰啦,轉入正題,介紹今天的主角Translate。Translate動畫顧名思義,T
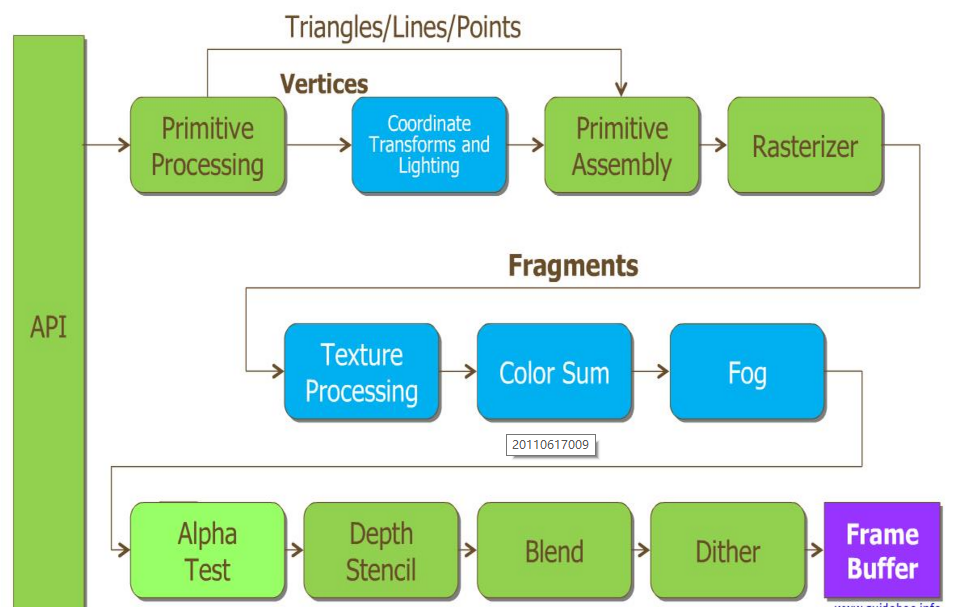 Android OpenGL ES零基礎系列(三):OpenGL ES的渲染管道及VertexShader與FragmentShader
前言在前2篇文章中,我們都說到著色器,且在第二篇中正式說到,這著色器只能