編輯:Android技術基礎
又是一個深坑,初學者慎入...本節將從普通的單線程下載 -> 普通多線程下載 -> -> 以及一個很實用的例子:利用Android那只DownloadManager更新apk 並覆蓋安裝的實現代碼!好的,這樣看上去,本節還是蠻有趣的,開始本節內容! PS:我們把整個完整的多線程斷點續傳放到下一節中!
直接使用URLConnection.openStream()打開網絡輸入流,然後將流寫入到文件中!
核心方法:
public static void downLoad(String path,Context context)throws Exception
{
  URL url = new URL(path);
  InputStream is = url.openStream();
  //截取最後的文件名
  String end = path.substring(path.lastIndexOf("."));
  //打開手機對應的輸出流,輸出到文件中
  OutputStream os = context.openFileOutput("Cache_"+System.currentTimeMillis()+end, Context.MODE_PRIVATE);
  byte[] buffer = new byte[1024];
  int len = 0;
  //從輸入六中讀取數據,讀到緩沖區中
  while((len = is.read(buffer)) > 0)
  {
    os.write(buffer,0,len);
  }
  //關閉輸入輸出流
  is.close();
  os.close();
}
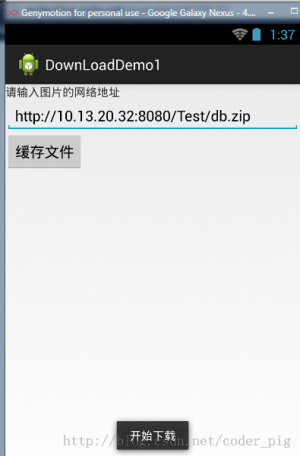
運行結果:

我們都知道使用多線程下載文件可以更快地完成文件的下載,但是為什麼呢?
答:因為搶占的服務器資源多,假設服務器最多服務100個用戶,服務器中的一個線程 對應一個用戶100條線程在計算機中並發執行,由CPU劃分時間片輪流執行,加入a有99條線程 下載文件,那麼相當於占用了99個用戶資源,自然就有用較快的下載速度
PS:當然不是線程越多就越好,開啟過多線程的話,app需要維護和同步每條線程的開銷, 這些開銷反而會導致下載速度的降低,另外還和你的網速有關!
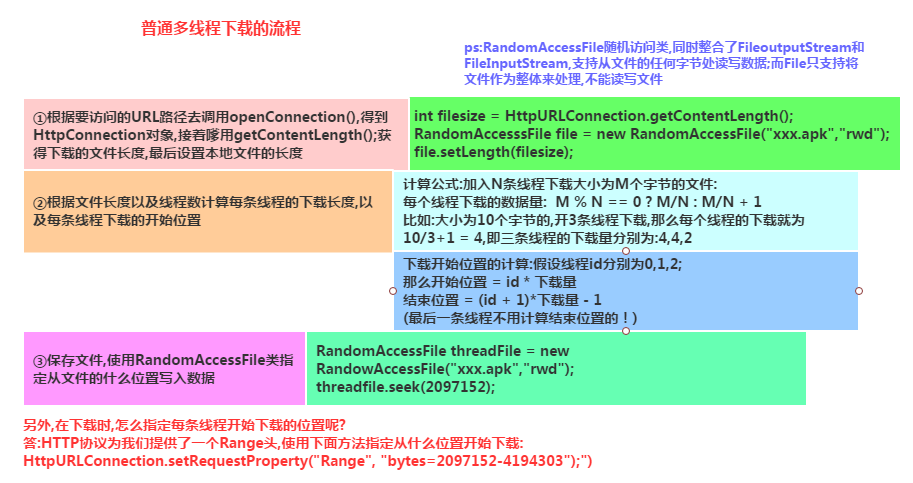
多線程下載的流程:
- 獲取網絡連接
- 本地磁盤創建相同大小的空文件
- 計算每條線程需從文件哪個部分開始下載,結束
- 依次創建,啟動多條線程來下載網絡資源的指定部分
PS:這裡直接創建一個Java項目,然後在JUnit裡運行指定方法即可,
核心代碼如下:
public class Downloader {
  //添加@Test標記是表示該方法是Junit測試的方法,就可以直接運行該方法了
    @Test
    public void download() throws Exception
    {
      //設置URL的地址和下載後的文件名
      String filename = "meitu.exe";
      String path = "http://10.13.20.32:8080/Test/XiuXiu_Green.exe";
      URL url = new URL(path);
      HttpURLConnection conn = (HttpURLConnection) url.openConnection();
      conn.setConnectTimeout(5000);
      conn.setRequestMethod("GET");
      //獲得需要下載的文件的長度(大小)
      int filelength = conn.getContentLength();
      System.out.println("要下載的文件長度"+filelength);
      //生成一個大小相同的本地文件
      RandomAccessFile file = new RandomAccessFile(filename, "rwd");
      file.setLength(filelength);
      file.close();
      conn.disconnect();
      //設置有多少條線程下載
      int threadsize = 3;
      //計算每個線程下載的量
      int threadlength = filelength % 3 == 0 ? filelength/3:filelength+1;
      for(int i = 0;i < threadsize;i++)
      {
        //設置每條線程從哪個位置開始下載
        int startposition = i * threadlength;
        //從文件的什麼位置開始寫入數據
        RandomAccessFile threadfile = new RandomAccessFile(filename, "rwd");
        threadfile.seek(startposition);
        //啟動三條線程分別從startposition位置開始下載文件
        new DownLoadThread(i,startposition,threadfile,threadlength,path).start();
      }
      int quit = System.in.read();
      while('q' != quit)
      {
        Thread.sleep(2000);
      }
    }


  private class DownLoadThread extends Thread {
    private int threadid;
    private int startposition;
    private RandomAccessFile threadfile;
    private int threadlength;
    private String path;
    public DownLoadThread(int threadid, int startposition,
        RandomAccessFile threadfile, int threadlength, String path) {
      this.threadid = threadid;
      this.startposition = startposition;
      this.threadfile = threadfile;
      this.threadlength = threadlength;
      this.path = path;
    }
    public DownLoadThread() {}
    @Override
    public void run() {
      try
      {
        URL url = new URL(path);
        HttpURLConnection conn = (HttpURLConnection) url.openConnection();
        conn.setConnectTimeout(5000);
        conn.setRequestMethod("GET");
        //指定從什麼位置開始下載
        conn.setRequestProperty("Range", "bytes="+startposition+"-");
        //System.out.println(conn.getResponseCode());
        if(conn.getResponseCode() == 206)
        {
          InputStream is = conn.getInputStream();
          byte[] buffer = new byte[1024];
          int len = -1;
          int length = 0;
          while(length < threadlength && (len = is.read(buffer)) != -1)
          {
            threadfile.write(buffer,0,len);
            //計算累計下載的長度
            length += len;
          }
          threadfile.close();
          is.close();
          System.out.println("線程"+(threadid+1) + "已下載完成");
        }
      }catch(Exception ex){System.out.println("線程"+(threadid+1) + "下載出錯"+ ex);}
    }

  }
}
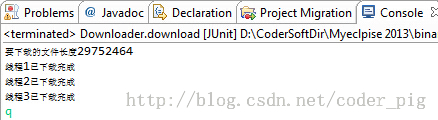
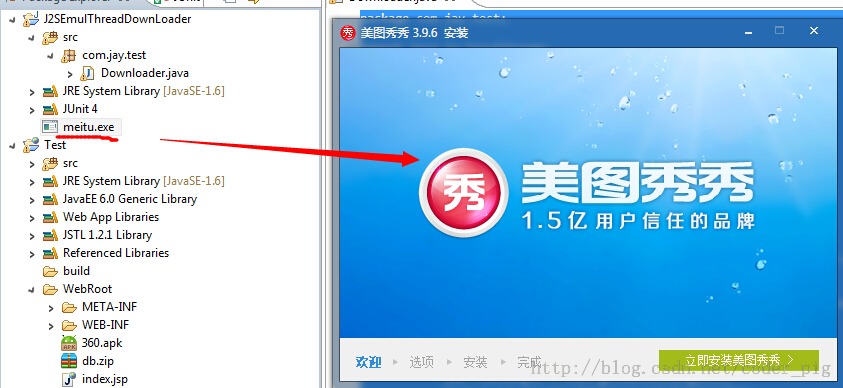
運行截圖:
如圖,使用多線程完成了對文件的下載!雙擊exe文件可運行,說明文件並沒有損壞!
注意事項:
- int filelength = conn.getContentLength(); //獲得下載文件的長度(大小)
- RandomAccessFile file = new RandomAccessFile(filename, "rwd"); //該類運行對文件進行讀寫,是多線程下載的核心
- nt threadlength = filelength % 3 == 0 ? filelength/3:filelength+1; //計算每個線程要下載的量
- conn.setRequestProperty("Range", "bytes="+startposition+"-"); //指定從哪個位置開始讀寫,這個是URLConnection提供的方法
- //System.out.println(conn.getResponseCode()); //這個注釋了的代碼是用來查看conn的返回碼的,我們前面用的都是200, 而針對多線程的話,通常是206,必要時我們可以通過調用該方法查看返回碼!
- int quit = System.in.read();while('q' != quit){Thread.sleep(2000);} //這段代碼是做延時操作的,因為我們用的是本地下載,可能該方法運行完了,而我們的 線程還沒有開啟,這樣會引發異常,這裡的話,讓用戶輸入一個字符,如果是'q'的話就退出
下面的代碼可以直接用,加入到項目後,記得為這個內部廣播注冊一個過濾器:
AndroidManifest.xml
:
import android.app.DownloadManager;
import android.content.BroadcastReceiver;
import android.content.Context;
import android.content.Intent;
import android.content.pm.ApplicationInfo;
import android.content.pm.PackageManager;
import android.database.Cursor;
import android.net.Uri;
import android.os.Bundle;
import android.os.Environment;
import android.support.v7.app.AppCompatActivity;

/**
 * Created by Jay on 2015/9/9 0009.
 */
public class UpdateAct extends AppCompatActivity {
    //這個更新的APK的版本部分,我們是這樣命名的:xxx_v1.0.0_xxxxxxxxx.apk
    //這裡我們用的是git提交版本的前九位作為表示
    private static final String FILE_NAME = "ABCDEFGHI";

    @Override
    public void onCreate(Bundle savedInstanceState) {
        super.onCreate(savedInstanceState);
        String endpoint = "";
        try {
            //這部分是獲取AndroidManifest.xml裡的配置信息的,包名,以及Meta_data裡保存的東西
            ApplicationInfo info = getPackageManager().getApplicationInfo(
                    getPackageName(), PackageManager.GET_META_DATA);
            //我們在meta_data保存了xxx.xxx這樣一個數據,是https開頭的一個鏈接,這裡替換成http
            endpoint = info.metaData.getString("xxxx.xxxx").replace("https",
                    "http");
        } catch (PackageManager.NameNotFoundException e) {
            e.printStackTrace();
        }
        //下面的都是拼接apk更新下載url的,path是保存的文件夾路徑
        final String _Path = this.getIntent().getStringExtra("path");
        final String _Url = endpoint + _Path;
        final DownloadManager _DownloadManager = (DownloadManager) getSystemService(DOWNLOAD_SERVICE);
        DownloadManager.Request _Request = new DownloadManager.Request(
                Uri.parse(_Url));
        _Request.setDestinationInExternalPublicDir(
                Environment.DIRECTORY_DOWNLOADS, FILE_NAME + ".apk");
        _Request.setTitle(this.getString(R.string.app_name));
        //是否顯示下載對話框
        _Request.setShowRunningNotification(true);
        _Request.setMimeType("application/com.trinea.download.file");
        //將下載請求放入隊列
        _DownloadManager.enqueue(_Request);
        this.finish();
    }


    //注冊一個廣播接收器,當下載完畢後會收到一個android.intent.action.DOWNLOAD_COMPLETE
    //的廣播,在這裡取出隊列裡下載任務,進行安裝
    public static class Receiver extends BroadcastReceiver {
        public void onReceive(Context context, Intent intent) {
            final DownloadManager _DownloadManager = (DownloadManager) context
                    .getSystemService(Context.DOWNLOAD_SERVICE);
            final long _DownloadId = intent.getLongExtra(
                    DownloadManager.EXTRA_DOWNLOAD_ID, 0);
            final DownloadManager.Query _Query = new DownloadManager.Query();
            _Query.setFilterById(_DownloadId);
            final Cursor _Cursor = _DownloadManager.query(_Query);
            if (_Cursor.moveToFirst()) {
                final int _Status = _Cursor.getInt(_Cursor
                        .getColumnIndexOrThrow(DownloadManager.COLUMN_STATUS));
                final String _Name = _Cursor.getString(_Cursor
                        .getColumnIndexOrThrow("local_filename"));
                if (_Status == DownloadManager.STATUS_SUCCESSFUL
                        && _Name.indexOf(FILE_NAME) != 0) {

                    Intent _Intent = new Intent(Intent.ACTION_VIEW);
                    _Intent.setDataAndType(
                            Uri.parse(_Cursor.getString(_Cursor
                                    .getColumnIndexOrThrow(DownloadManager.COLUMN_LOCAL_URI))),
                            "application/vnd.android.package-archive");
                    _Intent.addFlags(Intent.FLAG_ACTIVITY_NEW_TASK);
                    context.startActivity(_Intent);
                }
            }
            _Cursor.close();
        }
    }
}
普通單線程下載文件:DownLoadDemo1.zip 普通多線程下載文件:J2SEMulDownLoader.zip
好的,本節給大家介紹了普通單線程以及多線程下載文件,還有利用Android自帶DownManager來 下載更新APK,然後覆蓋的實現!相信會對大家的實際開發帶來便利,好的,就說這麼多,謝謝~
 第59章、SharedPreferences存儲(從零開始學Android)
SharedPreferences是一種輕型的數據存儲方式,它的本質是基於XML文件存儲key-value鍵值對數據,通常用來存儲一些簡單的配置信息。其存儲位置在/dat
 2.3.2 EditText(輸入框)詳解
本節引言:上一節中我們學習了第一個 UI控件TextView(文本框),文中給出了很多實際開發中可能遇到的一些需求的解決方法,應該會為你的開發帶來便
 第82章、異步處理工具類:AsyncTask(從零開始學Android)
(一) AsyncTask,是android提供的輕量級的異步類。可以直接繼承AsyncTask,在類中實現異步操作,可以通過接口實現UI進度更新,最後反饋執行的結果給
 8.3.4 Paint API之—— Xfermode與PorterDuff詳解(一)
本節引言:不知道標題這兩個玩意你熟不熟悉啦,如果自己實現過圓角或者圓形圖片,相信對這兩個名詞並不模式,一時半伙沒想起來?沒關系,下面這個圖你可曾見過