編輯:關於android開發
在android中有自帶的對話框,為了美觀,很多開發者會使用自定義對話框,如下圖:
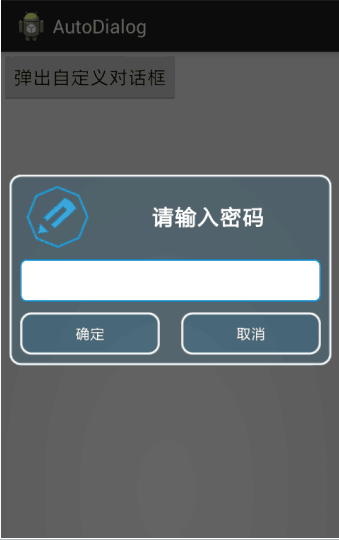
點擊“彈出自定義對話框按鈕後”顯示如圖效果。
首先要自己定義一個xml文件定義自己對話框的樣式:
<?xml version="1.0" encoding="utf-8"?>
<LinearLayout xmlns:android="http://schemas.android.com/apk/res/android"
    android:layout_width="match_parent"
    android:layout_height="match_parent"
    android:background="@drawable/background"
    android:orientation="vertical" >

    <LinearLayout
        android:layout_width="match_parent"
        android:layout_height="wrap_content"
        android:layout_marginLeft="10dp"
        android:layout_marginRight="10dp"
        android:orientation="horizontal" >

        <ImageView
            android:layout_width="0dp"
            android:layout_height="wrap_content"
            android:layout_weight="1"
            android:src="@drawable/airsign" />

        <TextView
            android:layout_width="0dp"
            android:layout_height="wrap_content"
            android:layout_gravity="center"
            android:layout_weight="3"
            android:gravity="center"
            android:text="請輸入密碼"
            android:textColor="#FFFFFFFF"
            android:textSize="32px"
            android:text />
    </LinearLayout>

    <EditText
       android:id="@+id/et_pass"
        android:layout_width="match_parent"
        android:layout_height="40dp"
        android:layout_marginLeft="10dp"
        android:layout_marginRight="10dp"
        android:background="@drawable/tv_background"
        android:paddingLeft="10dp"/>

    <LinearLayout
         android:layout_marginTop="10dp"
         android:layout_marginBottom="10dp"
        android:layout_marginLeft="10dp"
        android:layout_marginRight="10dp"
        android:layout_width="match_parent"
        android:layout_height="wrap_content"
        android:orientation="horizontal" >
        <Button
            android:id="@+id/btn_ok"
            android:layout_width="wrap_content"
            android:layout_height="40dp"

            android:layout_weight="1"
            android:background="@drawable/background"
            android:textColor="#FFFFFFFF"
            android:text="確定"/>
        <Button
            android:id="@+id/btn_delete"
            android:layout_marginLeft="20dp"
            android:layout_width="wrap_content"
            android:layout_height="40dp"

            android:layout_weight="1"
            android:textColor="#FFFFFFFF"
            android:background="@drawable/background"
            android:text="取消"/>
    </LinearLayout>
</LinearLayout>
mainActivity中:
public class MainActivity extends Activity {
    private Context context = MainActivity.this;

    @Override
    protected void onCreate(Bundle savedInstanceState) {
        super.onCreate(savedInstanceState);
        setContentView(R.layout.activity_main);
    }

    public void clickView(View v) {
        AlertDialog.Builder builder = new AlertDialog.Builder(this);
        // 創建對話框
        AlertDialog dialog = builder.create();
        // 沒有下面這句代碼會導致自定義對話框還存在原有的背景
        builder.setView(View.inflate(this, R.layout.auto_dialog, null));
        // 彈出對話框
        dialog.show();
        // 以下兩行代碼是對話框的EditText點擊後不能顯示輸入法的
        dialog.getWindow().clearFlags(
                WindowManager.LayoutParams.FLAG_NOT_FOCUSABLE
                        | WindowManager.LayoutParams.FLAG_ALT_FOCUSABLE_IM);
        dialog.getWindow().setSoftInputMode(
                WindowManager.LayoutParams.SOFT_INPUT_STATE_VISIBLE);
        // *** 主要就是在這裡實現這種效果的.
        // 設置窗口的內容頁面,shrew_exit_dialog.xml文件中定義view內容
        Window window = dialog.getWindow();
        window.setContentView(R.layout.auto_dialog);
        EditText et_pass = (EditText) window.findViewById(R.id.et_pass);
        final Button btn_ok = (Button) window.findViewById(R.id.btn_ok);
        final Button btn_delete = (Button) window.findViewById(R.id.btn_delete);
        // 為兩個button按鈕添加點擊的監聽事件
        btn_ok.setOnClickListener(new OnClickListener() {

            @Override
            public void onClick(View arg0) {
                // TODO Auto-generated method stub
                Toast.makeText(context, btn_ok.getText(), 0).show();
            }
        });
        btn_delete.setOnClickListener(new OnClickListener() {

            @Override
            public void onClick(View arg0) {
                // TODO Auto-generated method stub
                Toast.makeText(context, btn_delete.getText(), 0).show();
            }
        });
    }
}
 Fragment配合RadioGroup實現點擊切換布局,fragmentradiogroup
Fragment配合RadioGroup實現點擊切換布局,fragmentradiogroup 這裡用了 compile com.jakewharton:butter
 Android中Activity處理返回結果的實現方式,androidactivity
Android中Activity處理返回結果的實現方式,androidactivity大家在網上購物時都有這樣一個體驗,在確認訂單選擇收貨人以及地址時,會跳轉頁面到我們存
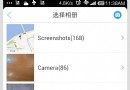 Android:支持多選的本地相冊
Android:支持多選的本地相冊 前段時間在做一個動態發布功能,需要用到圖片上傳。一開始直接調用的系統相冊和相機,由於系統相機不支持多選,就花點時間做了個本地相冊,
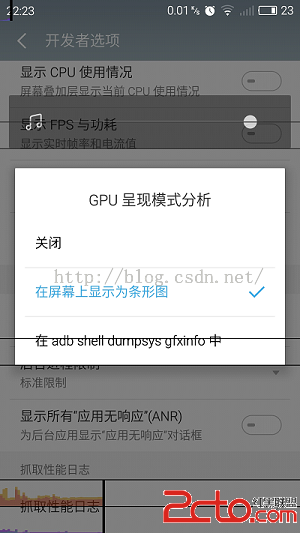 Android客戶端性能優化(魅族資深工程師毫無保留奉獻)
Android客戶端性能優化(魅族資深工程師毫無保留奉獻) 本文由魅族科技有限公司資深Android開發工程師degao(嵌入式企鵝圈原創團隊成員)撰寫,是degao