編輯:關於android開發
RecyclerView這個控件也出來很久了,相信大家也學習的差不多了,如果還沒學習的,或許我可以帶領大家體驗一把這個藝術般的控件。
據官方介紹,該控件是屬於之間用的非常多的ListView和GridView的替代品,既然能替代用的如此普遍的它們,這自然有其該有的優勢。
1)相對於ListView而言RecyclerView的優勢體現在:
①封裝了之前ListView的優化,封裝了之前ViewHolder的復用,這樣在自定義適配器的時候我們面向的不再是View,而是一個ViewHolder.
②提供了插板式的體驗,高度解耦,異常靈活,針對每一項的顯示抽取出了相應的類來控制每一個item的顯示。若想實現網格視圖或者瀑布流或者橫向的ListView都可以通過制定不一樣的LayoutManager來實現高大上的效果,這樣就可以針對自己的業務邏輯隨意發揮了。
③現在的RecyclerView對增刪也有了動畫的加入,並且你還可以自定義這些動畫。
④對於Adaper適配器,現在刷新也增加了相應的方法,雖然之前的notifyDataSetChanged()同樣可以實現這樣的效果,但是每次刷新整個界面在數據多的時候必然會大大影響用戶體驗。所以Adapter增加了更新數據的方法notifyItemInserted和notifyItemRemoved,這樣就可以在增刪數據的時候只刷新被操作的Item,而且還加入了高大上的動畫效果呢。
2)基本用法:
相信描述了這麼多,你一定對這個神奇的控件迫不及待想嘗試一波了。要用到這個RecyclerView很簡單,首先在Gradle中添加支持包:
1compile 'com.android.support:recyclerview-v7:24.0.0'
下面就先來一個簡單的用法,首先來Activity
1 2 3 4 5 6 7 8 9 10 11 12 13 14 15 16 17 18 19 20 21 22 23 24 25 26 27 28 29 30 31 32 33 34 35 36 37 38 39 40 41 42 43 44 45 46 47 48 49 50 51 52 53 54 55 56 57 58 59 60 61 62 63 64 65package com.example.nanchen.recyclerviewdemo;
import android.os.Bundle;
import android.support.v7.app.AppCompatActivity;
import android.support.v7.widget.DefaultItemAnimator;
import android.support.v7.widget.LinearLayoutManager;
import android.support.v7.widget.RecyclerView;
import android.view.View;
import android.widget.Toast;
import java.util.ArrayList;
import java.util.List;
import java.util.Locale;
public class MainActivity extends AppCompatActivity implements MyAdapter.OnRecyclerItemClickListener {
private MyAdapter adapter;
@Override
protected void onCreate(Bundle savedInstanceState) {
super.onCreate(savedInstanceState);
setContentView(R.layout.activity_main);
RecyclerView recyclerView = (RecyclerView) findViewById(R.id.main_recycler);
List<String> list = new ArrayList<>();
for (int i = 0; i < 100; i++) {
// list.add(String.format(Locale.CHINA, "第%03d條數據%s", i, i % 2 == 0 ? "" : "-----------------------"));
list.add(String.format(Locale.CHINA, "第%03d條數據", i));
}
adapter = new MyAdapter(this, list);
adapter.setOnRecyclerItemClickListener(this);
recyclerView.setAdapter(adapter);
DefaultItemAnimator animator = new DefaultItemAnimator();
animator.setRemoveDuration(1000);
recyclerView.setItemAnimator(animator);
//recyclerView.addItemDecoration(new MyDividerItemDecoration(this,MyDividerItemDecoration.VERTICAL_LIST));
//最後一個參數是反轉布局一定是false,為true的時候為逆向顯示,在聊天記錄中可能會有使用
//這個東西在顯示後才會加載,不會像ScollView一樣一次性加載導致內存溢出
LinearLayoutManager layoutManager = new LinearLayoutManager(this, LinearLayoutManager.VERTICAL, false);
recyclerView.setLayoutManager(layoutManager);
// GridLayoutManager gridLayoutManager = new GridLayoutManager(this, 3);
// gridLayoutManager.setSpanSizeLookup(new GridLayoutManager.SpanSizeLookup() {
// @Override
// public int getSpanSize(int position) {
// if (position == 0){
// return 3;
// }
// return 1;
// }
// });
// recyclerView.setLayoutManager(gridLayoutManager);
// StaggeredGridLayoutManager staggeredGridLayoutManager = new StaggeredGridLayoutManager(3, StaggeredGridLayoutManager.VERTICAL);
// recyclerView.setLayoutManager(staggeredGridLayoutManager);
}
@Override
public void OnRecyclerItemClick(RecyclerView parent, View view, int position, String data) {
Toast.makeText(this, data, Toast.LENGTH_SHORT).show();
adapter.remove(position);
}
}
在上面的Activity代碼中,可見,我們需要自己指定LayoutManager,代碼中用的是LinearLayoutMagener,你可以試試其他的。
再看看Adapter,有一個對大多數人來說很悲催的是,我們的ListView中一定會有的點擊事件,而RecyclerView並沒有提供這樣的方法,這些點擊事件都是需要我們自己學的,我這裡Adapter就簡單的實現了下,點擊就會刪除該Item。
1 2 3 4 5 6 7 8 9 10 11 12 13 14 15 16 17 18 19 20 21 22 23 24 25 26 27 28 29 30 31 32 33 34 35 36 37 38 39 40 41 42 43 44 45 46 47 48 49 50 51 52 53 54 55 56 57 58 59 60 61 62 63 64 65 66 67 68 69 70 71 72 73 74 75 76 77 78 79 80 81 82 83 84 85 86 87 88 89 90 91 92 93 94 95 96 97 98 99 100 101 102 103 104 105 106 107 108 109 110package com.example.nanchen.recyclerviewdemo;
import android.content.Context;
import android.support.v7.widget.RecyclerView;
import android.view.LayoutInflater;
import android.view.View;
import android.view.ViewGroup;
import android.widget.TextView;
import java.util.List;
/**
* 自定義RecyclerView的Adapter
* Created by 南塵 on 16-7-15.
*/
public class MyAdapter extends RecyclerView.Adapter<MyAdapter.ViewHolder> implements View.OnClickListener {
private Context context;
private List<String> list;
private OnRecyclerItemClickListener listener;
private RecyclerView recyclerView;
public void setOnRecyclerItemClickListener(OnRecyclerItemClickListener listener) {
this.listener = listener;
}
public MyAdapter(Context context, List<String> list) {
this.context = context;
this.list = list;
}
//在為RecyclerView提供數據的時候調用
@Override
public void onAttachedToRecyclerView(RecyclerView recyclerView) {
super.onAttachedToRecyclerView(recyclerView);
this.recyclerView = recyclerView;
}
@Override
public void onDetachedFromRecyclerView(RecyclerView recyclerView) {
super.onDetachedFromRecyclerView(recyclerView);
this.recyclerView = null;
}
@Override
public ViewHolder onCreateViewHolder(ViewGroup parent, int viewType) {
View view = LayoutInflater.from(context).inflate(R.layout.item,parent,false);
view.setOnClickListener(this);
return new ViewHolder(view);
}
@Override
public void onBindViewHolder(ViewHolder holder, int position) {
holder.text.setText(list.get(position));
}
@Override
public int getItemCount() {
return list.size();
}
@Override
public void onClick(View v) {
if (recyclerView != null && listener != null){
int position = recyclerView.getChildAdapterPosition(v);
listener.OnRecyclerItemClick(recyclerView,v,position,list.get(position));
}
}
/**
* 刪除指定數據
* @param position 數據位置
*/
public void remove(int position){
list.remove(position);
// notifyDataSetChanged();
notifyItemRemoved(position);//這樣就只會刪除這一條數據,而不會一直刷
}
/**
* 插入數據
* @param position 插入位置
* @param data 插入的數據
*/
public void insert(int position,String data){
list.add(position,data);
notifyItemInserted(position);
}
public static class ViewHolder extends RecyclerView.ViewHolder{
private final TextView text;
public ViewHolder(View itemView) {
super(itemView);
text = (TextView) itemView.findViewById(R.id.item_text);
}
}
/**
* 自定義RecyclerView的點擊事件
*/
interface OnRecyclerItemClickListener{
void OnRecyclerItemClick(RecyclerView parent,View view,int position,String data);
}
}
繼承這個Adapter需要指定一個ViewHolder的泛型,當然這個ViewHolder通常是由我們作為一個靜態類自己寫的。其他這個就像我們之前ListView中的BaseAdapter一樣。
自己還可以實現其他的點擊事件。
下面看下Xml,第一個是主布局,第二個是每一個項的布局,我這裡就簡單只實現一個TextView了。
1 2 3 4 5 6 7 8 9 10 11 12 13 14 15<?xml version="1.0" encoding="utf-8"?>
<RelativeLayout
xmlns:android="http://schemas.android.com/apk/res/android"
xmlns:tools="http://schemas.android.com/tools"
xmlns:app="http://schemas.android.com/apk/res-auto"
android:layout_width="match_parent"
android:layout_height="match_parent"
tools:context="com.example.nanchen.recyclerviewdemo.MainActivity">
<android.support.v7.widget.RecyclerView
android:layout_width="match_parent"
android:layout_height="match_parent"
android:id="@+id/main_recycler"/>
</RelativeLayout>
1 2 3 4 5 6 7 8 9 10 11 12
<?xml version="1.0" encoding="utf-8"?>
<LinearLayout xmlns:android="http://schemas.android.com/apk/res/android"
android:layout_width="match_parent"
android:layout_height="wrap_content"
android:orientation="vertical">
<TextView
android:id="@+id/item_text"
android:textSize="30sp"
android:layout_width="match_parent"
android:layout_height="match_parent"/>
</LinearLayout>
這樣運行出來你估計就會看到沒有分割線,那麼分割線怎麼弄呢,看下文檔,需要我們自己去寫,這個網上有很多。
上一個我看到過很多次的。
1 2 3 4 5 6 7 8 9 10 11 12 13 14 15 16 17 18 19 20 21 22 23 24 25 26 27 28 29 30 31 32 33 34 35 36 37 38 39 40 41 42 43 44 45 46 47 48 49 50 51 52 53 54 55 56 57 58 59 60 61 62 63 64 65 66 67 68 69 70 71 72 73 74 75 76 77 78 79 80 81 82 83 84 85 86 87 88 89 90 91 92 93package com.example.nanchen.recyclerviewdemo;
import android.content.Context;
import android.content.res.TypedArray;
import android.graphics.Canvas;
import android.graphics.Rect;
import android.graphics.drawable.Drawable;
import android.support.v7.widget.LinearLayoutManager;
import android.support.v7.widget.RecyclerView;
import android.view.View;
/**
* Created by 南塵 on 16-7-15.
*/
public class MyDividerItemDecoration extends RecyclerView.ItemDecoration {
private static final int[] ATTRS = new int[]{
android.R.attr. listDivider
};
public static final int HORIZONTAL_LIST = LinearLayoutManager.HORIZONTAL;
public static final int VERTICAL_LIST = LinearLayoutManager.VERTICAL;
private Drawable mDivider;
private int mOrientation;
public MyDividerItemDecoration(Context context, int orientation) {
final TypedArray a = context.obtainStyledAttributes(ATTRS );
mDivider = a.getDrawable(0);
a.recycle();
setOrientation(orientation);
}
public void setOrientation( int orientation) {
if (orientation != HORIZONTAL_LIST && orientation != VERTICAL_LIST) {
throw new IllegalArgumentException( "invalid orientation");
}
mOrientation = orientation;
}
@Override
public void onDraw(Canvas c, RecyclerView parent, RecyclerView.State state) {
if (mOrientation == VERTICAL_LIST) {
drawVertical(c, parent);
} else {
drawHorizontal(c, parent);
}
}
public void drawVertical(Canvas c, RecyclerView parent) {
final int left = parent.getPaddingLeft();
final int right = parent.getWidth() - parent.getPaddingRight();
final int childCount = parent.getChildCount();
for (int i = 0; i < childCount; i++) {
final View child = parent.getChildAt(i);
final RecyclerView.LayoutParams params = (RecyclerView.LayoutParams) child
.getLayoutParams();
final int top = child.getBottom() + params.bottomMargin;
final int bottom = top + mDivider.getIntrinsicHeight();
mDivider.setBounds(left, top, right, bottom);
mDivider.draw(c);
}
}
public void drawHorizontal(Canvas c, RecyclerView parent) {
final int top = parent.getPaddingTop();
final int bottom = parent.getHeight() - parent.getPaddingBottom();
final int childCount = parent.getChildCount();
for (int i = 0; i < childCount; i++) {
final View child = parent.getChildAt(i);
final RecyclerView.LayoutParams params = (RecyclerView.LayoutParams) child
.getLayoutParams();
final int left = child.getRight() + params.rightMargin;
final int right = left + mDivider.getIntrinsicHeight();
mDivider.setBounds(left, top, right, bottom);
mDivider.draw(c);
}
}
@Override
public void getItemOffsets(Rect outRect, View view, RecyclerView parent, RecyclerView.State state) {
super.getItemOffsets(outRect, view, parent, state);
if (mOrientation == VERTICAL_LIST) {
outRect.set(0, 0, 0, mDivider.getIntrinsicHeight());
}else{
outRect.set(0, 0, mDivider.getIntrinsicWidth(), 0);
}
}
}
這樣使用的是系統的分割線。
這樣在Style中可以自己更改。
1 2 3 4 5 6 7 8 9 10 11 12 13 14<resources>
<!-- Base application theme. -->
<style name="AppTheme" parent="Theme.AppCompat.Light.DarkActionBar">
<!-- Customize your theme here. -->
<item name="colorPrimary">@color/colorPrimary</item>
<item name="colorPrimaryDark">@color/colorPrimaryDark</item>
<item name="colorAccent">@color/colorAccent</item>
<item name="android:listDivider">@drawable/divider_bg</item>
</style>
</resources>
自定義一個Drawble
1 2 3 4 5 6 7 8 9 10 11 12<?xml version="1.0" encoding="utf-8"?>
<shape xmlns:android="http://schemas.android.com/apk/res/android"
android:shape="rectangle" >
<gradient
android:centerColor="#ff00ff00"
android:endColor="#ff0000ff"
android:startColor="#ffff0000"
android:type="linear" />
<size android:height="4dp"/>
</shape>
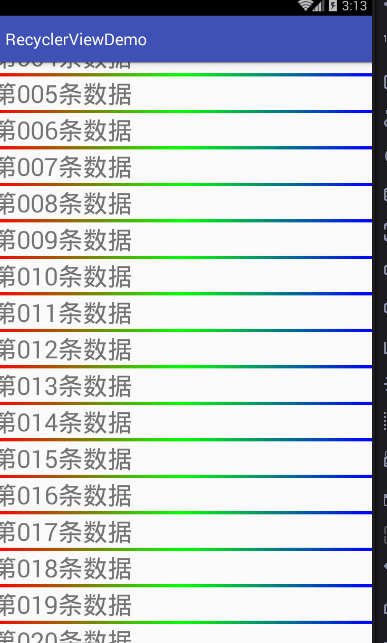
別忘了去把之前我給的MainActivity.java中把分割線那句代碼解去注釋。
1 2//增加分割線
recyclerView.addItemDecoration(new MyDividerItemDecoration(this,MyDividerItemDecoration.VERTICAL_LIST));
最後上一波簡單的運行圖吧。
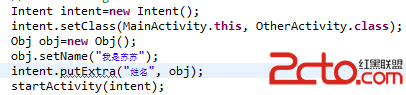 android:Activity數據傳遞之對象(Serializable)
android:Activity數據傳遞之對象(Serializable) Activity數據傳遞之基本數據類型在這篇文章中,我寫了通過putExtra()方法在a
 Android應用安全開發之淺談網頁打開APP
Android應用安全開發之淺談網頁打開APP 一、網頁打開APP簡介 Android有一個特性,可以通過點擊網頁內的某個鏈接打開APP,或者在其他APP
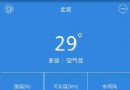 [android] 天氣app布局練習(二),androidapp
[android] 天氣app布局練習(二),androidapp主要練習一下GridView MainActivity.java package com.examp
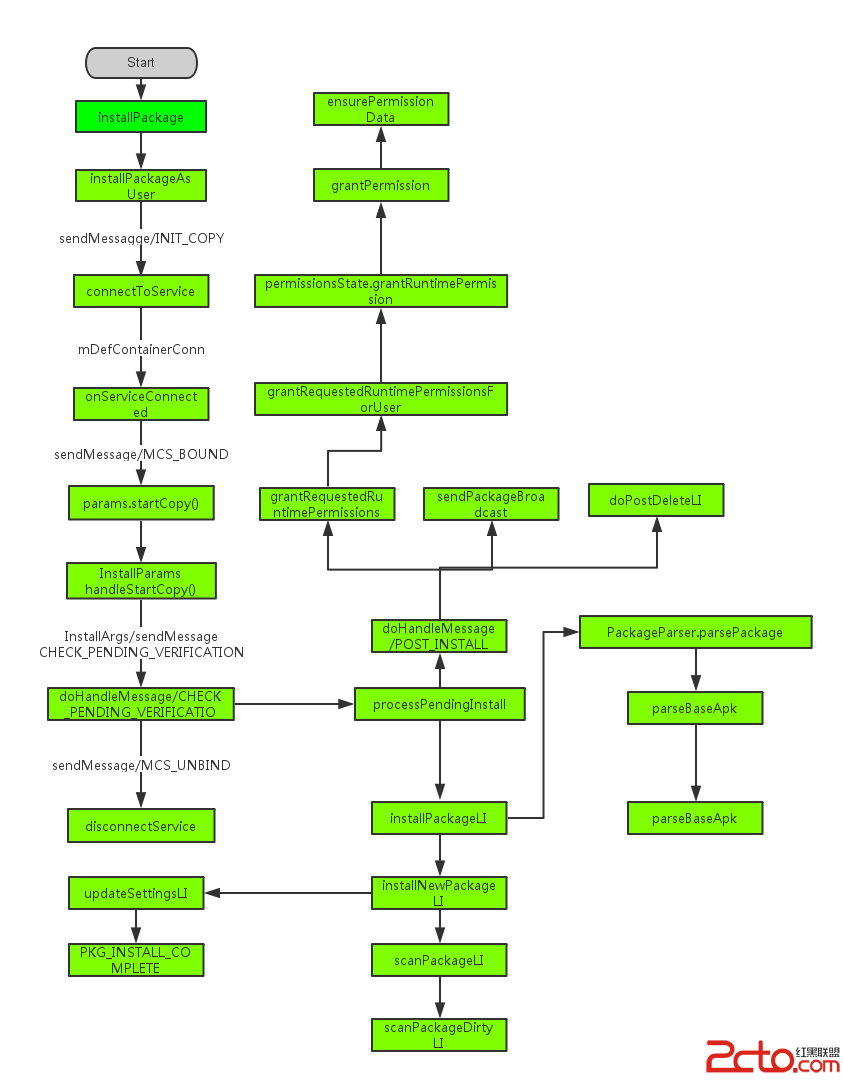 Android應用程序安裝過程淺析
Android應用程序安裝過程淺析 我們知道在android中,安裝應用是由PackageManager來管理的,但是我們發現PackageManager是一個抽象類
 Android Design Support Library——Navigation View,androidnavigation
Android Design Support Library——Navi