編輯:關於android開發
視圖分類就兩類,View和ViewGroup。ViewGroup是View的子類,ViewGroup可以包含所有的View(包括ViewGroup),View只能自我描繪,不能包含其他View。
然而系統定義的ViewGroup畢竟功能有限,不能滿足我們所有的需求,很簡單的道理,別人不可能為你考慮所有的細節。所以我們需要自定義ViewGroup。
一個非常簡單的視圖包含關系:ViewGroup1->ViewGroup2->…->ViewGroupi->…->ViewGroupn->View(->為包含)
其中包含了兩個極為重要的流程:尺寸測量和位置擺放。尺寸測量完後再走位置擺放。
1、尺寸測量
View有一個尺寸測量方法onMeasure(int widthMeasureSpec, int heightMeasureSpec),這個方法負責設置自己的大小,以及發送建議的大小到他的children(如果他有的話)。
2、位置擺放
只有ViewGroup才有位置擺放一說。View有一個擺放方法onLayout(boolean changed, int left, int top, int right, int bottom),此方法負責擺放他的children的位置。
起碼得有一個開頭的ViewGroup,讓其下發建議的大小下去到他的children裡面。查看Activity源代碼可以看到以下一個方法setContentView(View v):
@Override
public void setContentView(View v) {
    ensureSubDecor();
    ViewGroup contentParent = (ViewGroup) mSubDecor.findViewById(android.R.id.content);
    contentParent.removeAllViews();
    contentParent.addView(v);
    mOriginalWindowCallback.onContentChanged();
}
這個方法不要太熟悉,就是我們平時在onCreate中用的設置布局的方法。可以看到用了一個ID為android.R.id.content的視圖contentParent來添加我們傳入的v。contentParent是一個大小固定的ViewGroup,因為屏幕大小和狀態欄的大小是固定的。我們可以把這個contentParent當作一個開頭的ViewGroup。
然後就是如何傳遞建議的大小。
onMeasure(int widthMeasureSpec, int heightMeasureSpec)中的measureSpec(widthMeasureSpec或heightMeasureSpec)包含了兩個信息:測量模式specMode和測量大小specSize。獲取方法:
int specMode = MeasureSpec.getMode(measureSpec);
int specSize = MeasureSpec.getSize(measureSpec);
specMode有三個模式:
1、View.EXACTLY:建議恰好以specSize大小設置
2、View.AT_MOST:建議最多以specSize大小設置
3、View.UNSPECIFIED:沒有建議,任意發揮
比如一個RelativeLayout,其中包括一個View:
1、這個View設置的layout_width為100dp,那麼RelativeLayout就會把View.EXACTLY和100dp組合成一個widthMeasureSpec發送到View的onMeasure方法裡。
2、這個View設置的layout_width為wrap_content,那麼RelativeLayout就會把View.AT_MOST和自身可用寬度組合成一個widthMeasureSpec發送到View的onMeasure方法裡。
3、View.UNSPECIFIED多用於大小不可控的地方,比如ScrollView中的子視圖View,ScrollView會把View.UNSPECIFIED和大小值為0組合成一個heightMeasureSpec發送到View的onMeasure方法裡。
測量模式和測量大小只是建議性,至於children會不會采納就是他們的事情了。
接下來就是如何擺放位置。
onLayout(boolean changed, int left, int top, int right, int bottom)中的left、top、right、bottom是指相對於父視圖的偏移值,我們可以利用這些值來指出它的大小,width=right-left;height=bottom-top。
然後就循環children把他們擺放好。
下面進行實戰
1、簡單的自定義:
<com.besttimer.study.myviewgrouptest.CustomViewGroup
android:layout_width="300dp"
android:layout_height="100dp">
<com.besttimer.study.myviewgrouptest.CustomView
android:layout_width="wrap_content"
android:layout_height="wrap_content"
android:background="#ffff0000" />
<com.besttimer.study.myviewgrouptest.CustomView
android:layout_width="wrap_content"
android:layout_height="wrap_content"
android:background="#ff00ff00" />
<com.besttimer.study.myviewgrouptest.CustomView
android:layout_width="wrap_content"
android:layout_height="wrap_content"
android:background="#ff0000ff" />
</com.besttimer.study.myviewgrouptest.CustomViewGroup>
CustomViewGroup的測量方法為:
@Override
protected void onMeasure(int widthMeasureSpec, int heightMeasureSpec) {

    int measuredWidth = this.getMeasureSize(widthMeasureSpec, 100);
    int measuredHeight = this.getMeasureSize(heightMeasureSpec, 100);

    int childCount = this.getChildCount();
    int childWidth = measuredWidth / childCount;
    int childHeight = measuredHeight;

    for (int index = 0; index < childCount; index++) {
        View childView = this.getChildAt(index);
        //以MeasureSpec.EXACTLY定義測量值
        int widthMeasureSpec_child = MeasureSpec.makeMeasureSpec(childWidth, MeasureSpec.EXACTLY);
        int heightMeasureSpec_child = MeasureSpec.makeMeasureSpec(childHeight, MeasureSpec.EXACTLY);
        //此方法將會調用childView.onMeasure(int widthMeasureSpec, int heightMeasureSpec)
        childView.measure(widthMeasureSpec_child, heightMeasureSpec_child);
    }

    //必須要設置的大小,指定其在父視圖中的大小
    this.setMeasuredDimension(measuredWidth, measuredHeight);

}

/**
 * 獲取測量大小
 *
 * @param measureSpec
 * @param defaultValue 默認大小
 * @return
 */
private int getMeasureSize(int measureSpec, int defaultValue) {

    int result = defaultValue;

    int specMode = MeasureSpec.getMode(measureSpec);//測量模式
    int specSize = MeasureSpec.getSize(measureSpec);//測量大小
    switch (specMode) {
        //如果是無建議的測量模式,則取默認值
        case MeasureSpec.UNSPECIFIED:
            result = defaultValue;
            break;
        //建議最多以specSize大小設置
        case MeasureSpec.AT_MOST:
            //建議恰好以specSize大小設置
        case MeasureSpec.EXACTLY:
            result = specSize;
            break;
    }
    return result;
}
CustomViewGroup的擺放方法為:
@Override
protected void onLayout(boolean changed, int l, int t, int r, int b) {

    int childCount = this.getChildCount();
    int childL = 0;
    int childT = 0;
    for (int index = 0; index < childCount; index++) {
        View childView = this.getChildAt(index);
        //經過onMeasure計算後,在此方法中已經可以獲取大小了
        int childMeasureWidth = childView.getMeasuredWidth();
        int childMeasureHeight = childView.getMeasuredHeight();
        //並排擺放
        childView.layout(childL, childT, childL + childMeasureWidth, childT + childMeasureHeight);
        childL += childMeasureWidth;
    }

}
CustomView的測量方法為:
@Override
protected void onMeasure(int widthMeasureSpec, int heightMeasureSpec) {

    //View中只需要設置自己的大小,畢竟沒有children
    int measuredWidth = this.getMeasureSize(widthMeasureSpec, 0);
    int measuredHeight = this.getMeasureSize(heightMeasureSpec, 0);
    this.setMeasuredDimension(measuredWidth, measuredHeight);

}

/**
 * 獲取測量大小
 *
 * @param measureSpec
 * @param defaultValue 默認大小
 * @return
 */
private int getMeasureSize(int measureSpec, int defaultValue) {

    int result = defaultValue;

    int specMode = MeasureSpec.getMode(measureSpec);//測量模式
    int specSize = MeasureSpec.getSize(measureSpec);//測量大小
    switch (specMode) {
        //如果是無建議的測量模式,則取默認值
        case MeasureSpec.UNSPECIFIED:
            result = defaultValue;
            break;
        //建議最多以specSize大小設置
        case MeasureSpec.AT_MOST:
            //建議恰好以specSize大小設置
        case MeasureSpec.EXACTLY:
            result = specSize;
            break;
    }
    return result;
}
2、添加declare-styleable
像LinearLayout、RelativeLayout這些都有padding這些屬性,我們也可以添加。效果圖:
<?xml version="1.0" encoding="utf-8"?>
<resources>
<declare-styleable name="CustomViewGroup_attrs">
<attr name="padding" format="dimension" />
</declare-styleable>
</resources>
其中format有幾類,現用到尺寸dimension類型。
在CustomViewGroup中增加一個初始化方法:
private int padding = 0;

private void init(Context context, AttributeSet attrs) {
    TypedArray a = context.obtainStyledAttributes(attrs, R.styleable.CustomViewGroup_attrs);
    //獲取padding值
    this.padding = (int) a.getDimension(R.styleable.CustomViewGroup_attrs_padding, 0);
    //記得回收
    a.recycle();
}
修改CustomViewGroup的一些方法:
@Override
protected void onMeasure(int widthMeasureSpec, int heightMeasureSpec) {

    ...

    int childCount = this.getChildCount();
    int childWidth = (measuredWidth - this.padding * 2) / childCount;
    int childHeight = measuredHeight - this.padding * 2;

    ...

}
@Override
protected void onLayout(boolean changed, int l, int t, int r, int b) {

    int childCount = this.getChildCount();
    int childL = this.padding;
    int childT = this.padding;
    ...

}
3、添加LayoutParams
TextView、ImageView這些在RelativeLayout中都有layout_centerVertical垂直居中選項,這是RelativeLayout的LayoutParams裡面的屬性,實際上layout_width、layout_height也是LayoutParams裡面的屬性。
垂直居中效果圖:
<com.besttimer.study.myviewgrouptest.CustomViewGroup
android:layout_width="300dp"
android:layout_height="100dp"
android:background="#ff000000"
app:padding="10dp">
<com.besttimer.study.myviewgrouptest.CustomView
android:layout_width="wrap_content"
android:layout_height="wrap_content"
android:background="#ffff0000" />
<com.besttimer.study.myviewgrouptest.CustomView
android:layout_width="wrap_content"
android:layout_height="50dp"
android:background="#ff00ff00"
app:layout_centerVertical="true" />
<com.besttimer.study.myviewgrouptest.CustomView
android:layout_width="wrap_content"
android:layout_height="wrap_content"
android:background="#ff0000ff" />
</com.besttimer.study.myviewgrouptest.CustomViewGroup>
修改xxx.xml文件
<?xml version="1.0" encoding="utf-8"?>
<resources>
    <declare-styleable name="CustomViewGroup_attrs">
        <attr name="padding" format="dimension" />
        <attr name="layout_centerVertical" format="boolean" />
    </declare-styleable>
</resources>
為CustomViewGroup添加自定義LayoutParams
public static class LayoutParams extends ViewGroup.LayoutParams {

    public LayoutParams(Context c, AttributeSet attrs) {
        super(c, attrs);
        this.init(c, attrs);
    }

    private boolean layout_centerVertical = false;//是否垂直居中

    private void init(Context c, AttributeSet attrs) {
        TypedArray a = c.obtainStyledAttributes(attrs, R.styleable.CustomViewGroup_attrs);
        //獲取layout_centerInParent值
        this.layout_centerVertical = a.getBoolean(R.styleable.CustomViewGroup_attrs_layout_centerVertical, false);
        //記得回收
        a.recycle();
    }

}

@Override
public LayoutParams generateLayoutParams(AttributeSet attrs) {
    return new LayoutParams(this.getContext(), attrs);
}
修改測量和擺放方法
@Override
protected void onMeasure(int widthMeasureSpec, int heightMeasureSpec) {

    ...

    for (int index = 0; index < childCount; index++) {
        View childView = this.getChildAt(index);
        //以MeasureSpec.EXACTLY定義測量值
        int childNewHeight = childHeight;
        CustomViewGroup.LayoutParams layoutParams = (LayoutParams) childView.getLayoutParams();
        //如果大於0說明傳了一個具體的數值
        if (layoutParams.height > 0) {
            childNewHeight = layoutParams.height;
        }
        int widthMeasureSpec_child = MeasureSpec.makeMeasureSpec(childWidth, MeasureSpec.EXACTLY);
        int heightMeasureSpec_child = MeasureSpec.makeMeasureSpec(childNewHeight, MeasureSpec.EXACTLY);
        //此方法將會調用childView.onMeasure(int widthMeasureSpec, int heightMeasureSpec)
        childView.measure(widthMeasureSpec_child, heightMeasureSpec_child);
    }

    ...

}
@Override
protected void onLayout(boolean changed, int l, int t, int r, int b) {

    ...
    for (int index = 0; index < childCount; index++) {
        View childView = this.getChildAt(index);
        //經過onMeasure計算後,在此方法中已經可以獲取大小了
        int childMeasureWidth = childView.getMeasuredWidth();
        int childMeasureHeight = childView.getMeasuredHeight();
        //並排擺放
        CustomViewGroup.LayoutParams layoutParams = (LayoutParams) childView.getLayoutParams();
        int childNewT = childT;
        if (layoutParams.layout_centerVertical) {
            childNewT += (b - t - this.padding * 2 - childMeasureHeight) / 2;
        }
        childView.layout(childL, childNewT, childL + childMeasureWidth, childNewT + childMeasureHeight);
        childL += childMeasureWidth;
    }

}
其中layout_width和layout_height是ViewGroup.LayoutParams的屬性,已經實現好了獲取邏輯,直接用就是了。
源代碼地址:http://files.cnblogs.com/files/linyibiao/AndroidProject.zip
 圓形背景的TextView,圓形背景TextView
圓形背景的TextView,圓形背景TextView【應用場景】: 【需要的xml】:shape_circle.xml <?xml version=1.0 enc
 Android學習指南之八:詳解Intent及其應用實例
Android的幾個主要組件可以相互協調工作,共同組成一個完整的Android
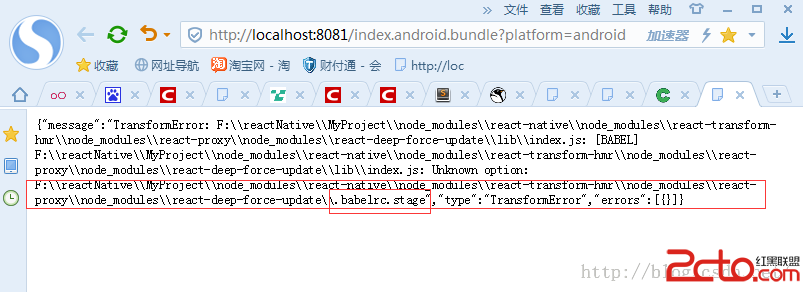 在Windows下快速搭建React Native Android開發環境
在Windows下快速搭建React Native Android開發環境 搭建JAVA開發環境 根據操作系統分為x86或x64位的,下載jdk1.8以上的版本, 本
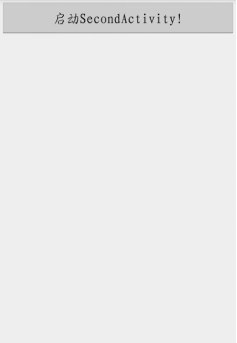 Activity啟動模式之SingleInstance,singleinstance模式
Activity啟動模式之SingleInstance,singleinstance模式 終於到了最後一種啟動模式了,指定為singleInstance模式的活動會啟用