編輯:Android編程入門
Android建議我們不要在UI線程中執行耗時操作,因為這很容易導致ANR異常(在Android源碼中我們可以看到,UI如果對用戶的操作超過5秒無響應,就會報ANR異常)。因此,一些耗時操作都會在子線程中完成。當我們在子線程中獲取了數據,要將其顯示到UI中,如果沒有Handler,這將很難完成。因此,Android之所以提供Handler,就是為了解決子線程訪問UI的問題。
為什麼Android不允許在子線程中訪問UI呢?顯然這樣做不安全,多線程訪問UI是不安全的(學過操作系統的盆友應該都了解線程互斥,這裡我就不詳細介紹了)。有人就會說了,可以通過設置信號量來解決啊。這中方法不是不可以,因為這種方法會使訪問UI的邏輯變得復雜;其次這會降低UI的訪問效率。而使用Handler就比較簡單高效。Handler是同個Message來通訊的。
使用Handler時,需要重寫handleMessage方法,在handleMessage中接受新線程發來的Message,並做相應的處理。在新線程中則是通過Message來傳遞消息,Message中往往也攜帶著需要傳遞的數據以及消息的類型。還要強調一點,如果當前線程有Looper就不需要執行Looper.prepare(),如果沒有,就需要在新線程內執行Looper.prepare(),否則會報錯。具體使用代碼如下:
 public class MainActivity extends AppCompatActivity {
     private Handler mHandler=new Handler(){
         @Override
         public void handleMessage(Message msg) {
             switch (msg.what)
             {
                 case 1:
                     //執行需要修改的UI操作
                     break;
                 default:
                     break;
             }
         }
     };

     @Override
     protected void onCreate(Bundle savedInstanceState) {
         super.onCreate(savedInstanceState);
         setContentView(R.layout.activity_main);

         new Thread(new Runnable() {
             @Override
             public void run() {//在新線程中執行耗時操作

                 //如果當前線程有Looper就不需要執行Looper.prepare();
                 Looper.prepare();
                 try {
                     Thread.sleep(1000);//睡眠1秒
                 } catch (InterruptedException e) {
                     e.printStackTrace();
                 }

                 //操作完成之後通過發送Message,來通知Handler進行UI操作

                 Message msg=new Message();
                 msg.what=1;

                 /*這部分是偽代碼,value 是想通過Message傳遞的值
                 Bundle data=new Bundle();
                 data.putSerializable("key",value);
                 msg.setData(data);

                 */

                 //設置好數據後,發送消息
                 mHandler.sendMessage(msg);
             }
         }).start();
     }

 }
Handler創建時會采用Looper來建立消息循環。所以,當前線程必須要有Looper。當Handler創建完成後,其內部的Looper以及MessageQueue既可以和Handler一起協同工作了。Handler通過sendMessage將消息發送給內部的MessageQueue,而MessageQueue會調用queue.enqueueMessage(msg, uptimeMillis)方法,它的源碼如下:
 boolean enqueueMessage(Message msg, long when) {
         if (msg.target == null) {
             throw new IllegalArgumentException("Message must have a target.");
         }
         if (msg.isInUse()) {
             throw new IllegalStateException(msg + " This message is already in use.");
         }

         synchronized (this) {
             if (mQuitting) {
                 IllegalStateException e = new IllegalStateException(
                         msg.target + " sending message to a Handler on a dead thread");
                 Log.w(TAG, e.getMessage(), e);
                 msg.recycle();
                 return false;
             }

             msg.markInUse();
             msg.when = when;
             Message p = mMessages;
             boolean needWake;
             if (p == null || when == 0 || when < p.when) {
                 // New head, wake up the event queue if blocked.
                 msg.next = p;
                 mMessages = msg;
                 needWake = mBlocked;
             } else {
                 // Inserted within the middle of the queue.  Usually we don't have to wake
                 // up the event queue unless there is a barrier at the head of the queue
                 // and the message is the earliest asynchronous message in the queue.
                 needWake = mBlocked && p.target == null && msg.isAsynchronous();
                 Message prev;
                 for (;;) {
                     prev = p;
                     p = p.next;
                     if (p == null || when < p.when) {
                         break;
                     }
                     if (needWake && p.isAsynchronous()) {
                         needWake = false;
                     }
                 }
                 msg.next = p; // invariant: p == prev.next
                 prev.next = msg;
             }

             // We can assume mPtr != 0 because mQuitting is false.
             if (needWake) {
                 nativeWake(mPtr);
             }
         }
         return true;
     }
通過源碼,我們發現,queue.enqueueMessage(msg, uptimeMillis)將消息放入了MessageQueue裡。Looper則會一直處理MessageQueue中的消息。
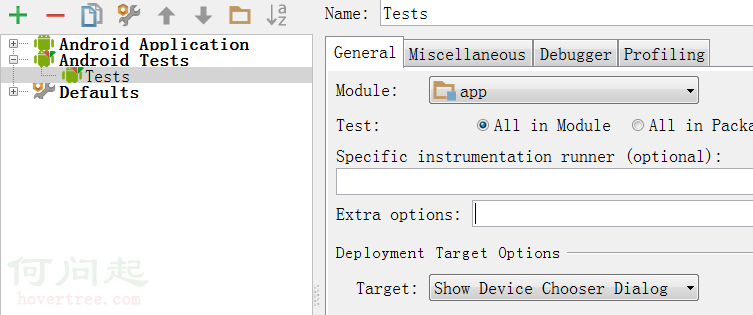 在Android Studio中進行單元測試
寫單元測試類1.創建單元測試文件夾,即新建一個用於單元測試的包,存放單元測試的類。2.創建一個類如 ExampleTest,注意要繼承自InstrumentationTe
 Android—自定義控件實現ListView下拉刷新
這篇博客為大家介紹一個android常見的功能——ListView下拉刷新(參考自他人博客,網址忘記了,閱讀他的代碼自己理解注釋的,希望能幫助到大
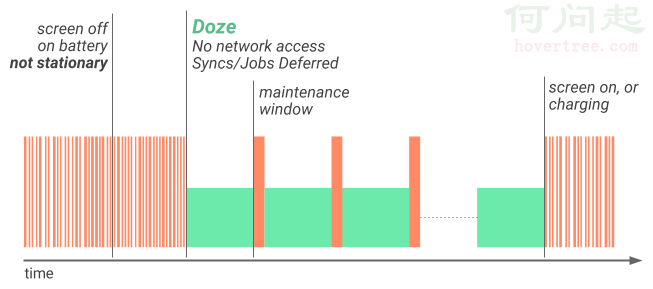 android 7.0 學習筆記(一)
導讀增強的Doze模式後台優化Data Saver 一.增強的Doze模式Android N對Android M引進的Doze模式進行了進一步的增強,變化體現在
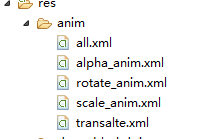 補間動畫TweenAnimation
animation_translate = AnimationUtils.loadAnimation(MainActivity.this, R.anim.transalt