編輯:關於Android編程
在Android中經常要使用Dialog來實現一些提示以及一些特殊的效果,而且樣式也不一樣,每次都得查一大堆資料,還不一定能解決,這裡總結一些常用的Dialog的實踐。
普通的Dialog
//普通的AlertDialog對話框
findViewById(R.id.btn_common).setOnClickListener(new View.OnClickListener() {
 @Override
 public void onClick(View v) {
 AlertDialog.Builder builder = new AlertDialog.Builder(MainActivity.this);
 builder.setTitle("普通的對話框的標題");
 builder.setMessage("這是一個普通的對話框的內容");
 builder.setNegativeButton("取消", new DialogInterface.OnClickListener() {
  @Override
  public void onClick(DialogInterface dialog, int which) {
  toast("取消");
  }
 });
 builder.setPositiveButton("確定", new DialogInterface.OnClickListener() {
  @Override
  public void onClick(DialogInterface dialog, int which) {
  toast("確定");
  }
 });
 AlertDialog dialog = builder.create();
 dialog.show();
 }
});
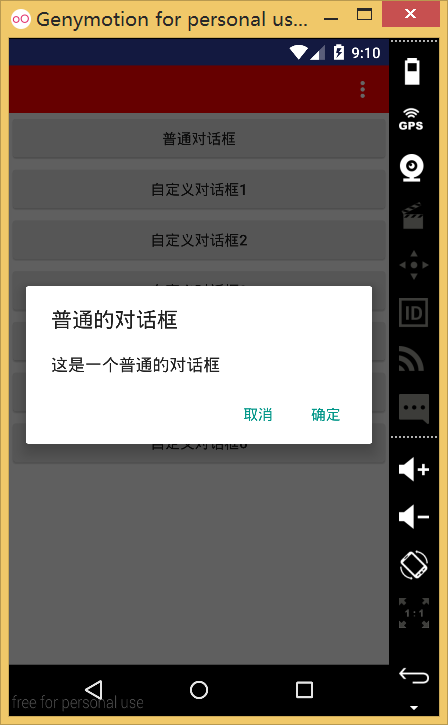
這裡使用AlertDialog來顯示一個系統的提示對話框,效果如下:
修改普通對話框的位置、大小、透明度
主要是在普通的dialog.show() 下面加上如下代碼
//放在show()之後,不然有些屬性是沒有效果的,比如height和width
Window dialogWindow = dialog.getWindow();
WindowManager m = getWindowManager();
Display d = m.getDefaultDisplay(); // 獲取屏幕寬、高用
WindowManager.LayoutParams p = dialogWindow.getAttributes(); // 獲取對話框當前的參數值
//設置高度和寬度
p.height = (int) (d.getHeight() * 0.4); // 高度設置為屏幕的0.6
p.width = (int) (d.getWidth() * 0.6); // 寬度設置為屏幕的0.65
//設置位置
p.gravity = Gravity.BOTTOM;
//設置透明度
p.alpha = 0.5f;
dialogWindow.setAttributes(p);
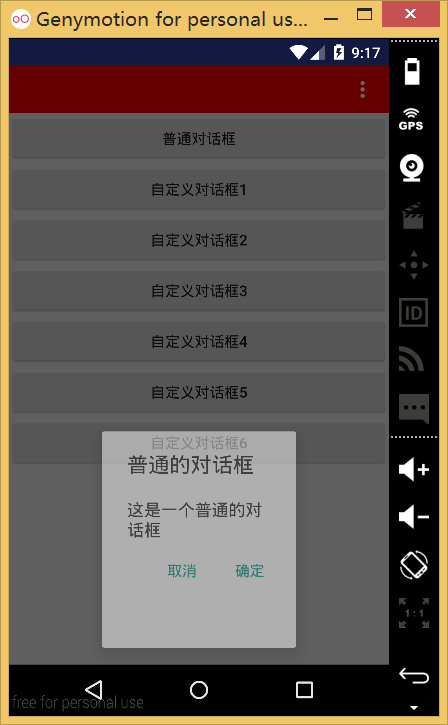
在這裡,設置dialog的高為屏幕的高度的4/10,寬為屏幕寬帶的6/10,同事位置為底部,透明度為半透明。當然還有很多其他屬性,這裡暫不介紹,你們可以自己試一試。效果如下:
使用普通的dialog來添加自定義布局
我們需自定義一個布局,如下:
<?xml version="1.0" encoding="utf-8"?>
<LinearLayout
 xmlns:android="http://schemas.android.com/apk/res/android"
 android:layout_width="100dp"
 android:layout_height="100dp"
 android:background="#00ff00">

 <TextView
 android:layout_width="match_parent"
 android:layout_height="match_parent"
 android:gravity="center"
 android:textColor="#ff0000"
 android:text="你好"/>
</LinearLayout>
我們這裡新建了一個布局設置高度和寬度為100dp,線性布局裡面包裹了一個TextView,布局很簡單,當然也可以自定義一個復雜的布局,這裡就不介紹了。來看看Java代碼的實現。
// 使用普通的dialog來添加自定義布局
findViewById(R.id.btn_custom2).setOnClickListener(new View.OnClickListener() {
 @Override
 public void onClick(View v) {
 AlertDialog.Builder builder = new AlertDialog.Builder(MainActivity.this);
 builder.setView(R.layout.dialog_custom1);
 AlertDialog dialog = builder.create();
 dialog.show();
 }
});
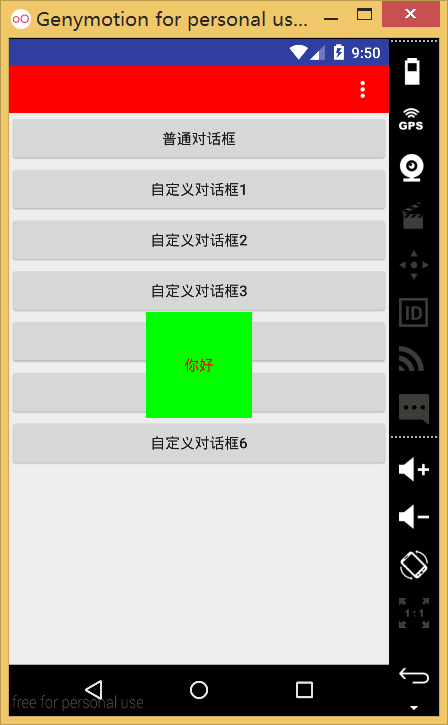
我們直接把我們的布局通過builder設置進去,看看效果:

這裡的Dialog非常丑,這是與AlertDialog的默認主題有關,下面我們通過自定義主題來改變對話框的樣式來使對話框變得漂亮。
在values/styles.xml自定義樣式繼承Android:Theme.Dialog來實現自己的樣式
<style name="MyCommonDialog" parent="android:Theme.Dialog">
 <!-- 背景顏色及透明程度 -->
 <item name="android:windowBackground">@android:color/transparent</item>
 <!-- 是否半透明 -->
 <item name="android:windowIsTranslucent">false</item>
 <!-- 是否沒有標題 -->
 <item name="android:windowNoTitle">true</item>
 <!-- 是否浮現在activity之上 -->
 <item name="android:windowIsFloating">true</item>
 <!-- 是否背景模糊 -->
 <item name="android:backgroundDimEnabled">false</item>
 <!-- 設置背景模糊的透明度-->
 <item name="android:backgroundDimAmount">0.5</item>
</style>
這裡樣式的屬性都有注釋,沒種樣式不是必須的,你可以自己試著改變一些值來查看效果以便達到自己的最佳效果。
在創建dialog的時候將樣式傳過去
AlertDialog.Builder builder = new AlertDialog.Builder(MainActivity.this,R.style.MyCommonDialog);
現在的效果如下:

可以看的我們的布局的高度和寬帶還是沒效果,我們知道子空間的布局一般由布局來測量的於是我想到給這個布局的最外層套一個布局,看能不能達到我們的效果。
修改dialog_custom1.xml布局如下:
<?xml version="1.0" encoding="utf-8"?>
<RelativeLayout
 xmlns:android="http://schemas.android.com/apk/res/android"
 android:layout_width="match_parent"
 android:layout_height="match_parent">

 <LinearLayout
 android:layout_width="100dp"
 android:layout_height="100dp"
 android:layout_centerInParent="true"
 android:background="#00ff00">

 <TextView
  android:layout_width="match_parent"
  android:layout_height="match_parent"
  android:gravity="center"
  android:text="你好"
  android:textColor="#ff0000"/>
 </LinearLayout>
</RelativeLayout>
再次運行如下:
達到我們想要的效果了,這樣你就可以引入樣式和自定義布局實現各種對話框的效果了。
繼承Dialog來實現Dialog
通過繼承Dialog來實現自定義的Dialog,這樣我們就可以在任何地方直接new我們的Dialog就可以實現特定的對話框了。
1.在values/styles.xml新建一個樣式MyDialog
<style name="MyDialog" parent="android:Theme.Dialog">
 <!-- 背景顏色及透明程度 -->
 <item name="android:windowBackground">@android:color/transparent</item>
 <!-- 是否半透明 -->
 <item name="android:windowIsTranslucent">false</item>
 <!-- 是否沒有標題 -->
 <item name="android:windowNoTitle">true</item>
 <!-- 是否浮現在activity之上 -->
 <item name="android:windowIsFloating">true</item>
 <!-- 是否背景模糊 -->
 <item name="android:backgroundDimEnabled">false</item>
 <!-- 設置背景模糊的透明度-->
 <item name="android:backgroundDimAmount">0.5</item>
</style>
2.新建一個MyDialog繼承Dialog
public class MyDialog extends Dialog {
 //在構造方法裡預加載我們的樣式,這樣就不用每次創建都指定樣式了
 public MyDialog(Context context) {
 this(context, R.style.MyDialog);
 }

 public MyDialog(Context context, int themeResId) {
 super(context, themeResId);
 }

 @Override
 protected void onCreate(Bundle savedInstanceState) {
 super.onCreate(savedInstanceState);
 // 預先設置Dialog的一些屬性
 Window dialogWindow = getWindow();
 WindowManager.LayoutParams p = dialogWindow.getAttributes();
 p.x = 0;
 p.y = 100;
 p.gravity = Gravity.LEFT | Gravity.TOP;
 dialogWindow.setAttributes(p);
 }
}
/*
* lp.x與lp.y表示相對於原始位置的偏移.
* 當參數值包含Gravity.LEFT時,對話框出現在左邊,所以lp.x就表示相對左邊的偏移,負值忽略.
* 當參數值包含Gravity.RIGHT時,對話框出現在右邊,所以lp.x就表示相對右邊的偏移,負值忽略.
* 當參數值包含Gravity.TOP時,對話框出現在上邊,所以lp.y就表示相對上邊的偏移,負值忽略.
* 當參數值包含Gravity.BOTTOM時,對話框出現在下邊,所以lp.y就表示相對下邊的偏移,負值忽略.
* 當參數值包含Gravity.CENTER_HORIZONTAL時,對話框水平居中,所以lp.x就表示在水平居中的位置移動
* lp.x像素,正值向右移動,負值向左移動.
* 當參數值包含Gravity.CENTER_VERTICAL時,對話框垂直居中,所以lp.y就表示在垂直居中的位置移動lp.y像
* 素,正值向右移動,負值向左移動.
* gravity的默認值為Gravity.CENTER,即Gravity.CENTER_HORIZONTAL | Gravity.CENTER_VERTICAL
*/
這裡對window的一些參數進行了解釋,我把對話框設置的離左上角離頂部100px的位置。
3.使用MyDialog
自定義布局dialog_custom2.xml
<?xml version="1.0" encoding="utf-8"?>
<RelativeLayout xmlns:android="http://schemas.android.com/apk/res/android"
  android:layout_width="match_parent"
  android:layout_height="match_parent"
  android:orientation="vertical">

 <LinearLayout
 android:layout_width="match_parent"
 android:layout_height="match_parent"
 android:layout_centerInParent="true"
 android:background="#ffffff"
 android:orientation="vertical"
 android:padding="10dp">

 <TextView
  android:layout_width="match_parent"
  android:layout_height="wrap_content"
  android:layout_margin="2dp"
  android:background="#00ff00"
  android:gravity="center"
  android:padding="10dp"
  android:text="你好"
  android:textColor="#000000"/>

 <TextView
  android:layout_width="match_parent"
  android:layout_height="wrap_content"
  android:layout_margin="2dp"
  android:background="#00ff00"
  android:gravity="center"
  android:padding="10dp"
  android:text="你好"
  android:textColor="#000000"/>

 <TextView
  android:layout_width="match_parent"
  android:layout_height="wrap_content"
  android:layout_margin="2dp"
  android:background="#00ff00"
  android:gravity="center"
  android:padding="10dp"
  android:text="你好"
  android:textColor="#000000"/>
 </LinearLayout>
</RelativeLayout>
Java代碼
//繼承Dialog來實現Dialog
findViewById(R.id.btn_custom3).setOnClickListener(new View.OnClickListener() {
 @Override
 public void onClick(View v) {
 MyDialog dialog = new MyDialog(MainActivity.this);
 dialog.setContentView(R.layout.dialog_custom2);
 dialog.show();
 }
});
4.查看效果:
給Dialog設置動畫
1.新建動畫文件
進入動畫dialog_enter.xml
<?xml version="1.0" encoding="utf-8"?>
<set xmlns:android="http://schemas.android.com/apk/res/android">
<translate
 android:duration="200"
 android:fillAfter="true"
 android:fromYDelta="100%p"
 android:toYDelta="0%"/>
</set>
退出動畫dialog_exit.xml
<?xml version="1.0" encoding="utf-8"?>
<set xmlns:android="http://schemas.android.com/apk/res/android">
 <translate
 android:duration="200"
 android:fillAfter="true"
 android:fromYDelta="0%"
 android:toYDelta="100%p"/>
</set>
2.在values/styles.xml中新建樣式
<style name="MyAnimDialog" parent="android:Theme.Dialog">
 <!-- 背景顏色及透明程度 -->
 <item name="android:windowBackground">@android:color/transparent</item>
 <!-- 是否半透明 -->
 <item name="android:windowIsTranslucent">false</item>
 <!-- 是否沒有標題 -->
 <item name="android:windowNoTitle">true</item>
 <!-- 是否浮現在activity之上 -->
 <item name="android:windowIsFloating">true</item>
 <!-- 是否背景模糊 -->
 <item name="android:backgroundDimEnabled">true</item>
 <!-- 設置背景模糊的透明度-->
 <item name="android:backgroundDimAmount">0.5</item>
 <!-- 動畫 -->
 <item name="android:windowAnimationStyle">@style/dialog_animation</item>
</style>

<!-- 對話框顯示和退出動畫 -->
<style name="dialog_animation">
 <item name="android:windowEnterAnimation">@anim/dialog_enter</item>
 <item name="android:windowExitAnimation">@anim/dialog_exit</item>
</style>
主要是給android:windowAnimationStyle指定我們新建的動畫即可,引用和前面一樣,這裡就給出了,
3.查看效果
繼承Dialog來實現底部彈出Dialog
自定義MyBottomDialog
public class MyBottomDialog extends Dialog {
 public MyBottomDialog(Context context) {
 this(context, R.style.MyAnimDialog);
 }

 public MyBottomDialog(Context context, int themeResId) {
 super(context, themeResId);
 //加載布局並給布局的控件設置點擊事件
 View contentView = getLayoutInflater().inflate(R.layout.dialog_custom3, null);
 contentView.findViewById(R.id.tv_1).setOnClickListener(new View.OnClickListener() {
  @Override
  public void onClick(View v) {
  Toast.makeText(getContext(), "你好", Toast.LENGTH_SHORT).show();
  }
 });
 super.setContentView(contentView);
 }

 @Override
 protected void onCreate(Bundle savedInstanceState) {
 super.onCreate(savedInstanceState);
 // 預先設置Dialog的一些屬性
 Window dialogWindow = getWindow();
 WindowManager.LayoutParams p = dialogWindow.getAttributes();
 WindowManager m = getWindow().getWindowManager();
 Display d = m.getDefaultDisplay();
 getWindow().setAttributes(p);
 p.height = (int) (d.getHeight() * 0.6);
 p.width = d.getWidth();
 p.gravity = Gravity.LEFT | Gravity.BOTTOM;
 dialogWindow.setAttributes(p);
 }
}
在onCreate方法裡指定的Dialog的高度和寬度
布局dialog_custom3.xml
<?xml version="1.0" encoding="utf-8"?>
<RelativeLayout xmlns:android="http://schemas.android.com/apk/res/android"
  android:layout_width="match_parent"
  android:layout_height="match_parent"
  android:orientation="vertical">

 <LinearLayout
 android:layout_width="match_parent"
 android:layout_height="match_parent"
 android:layout_centerInParent="true"
 android:background="#ffffff"
 android:orientation="vertical"
 android:padding="10dp">

 <TextView
  android:id="@+id/tv_1"
  android:layout_width="match_parent"
  android:layout_height="wrap_content"
  android:layout_margin="2dp"
  android:background="#00ff00"
  android:gravity="center"
  android:padding="10dp"
  android:text="你好"
  android:textColor="#000000"/>

 <TextView
  android:layout_width="match_parent"
  android:layout_height="wrap_content"
  android:layout_margin="2dp"
  android:background="#00ff00"
  android:gravity="center"
  android:padding="10dp"
  android:text="你好"
  android:textColor="#000000"/>

 <TextView
  android:layout_width="match_parent"
  android:layout_height="wrap_content"
  android:layout_margin="2dp"
  android:background="#00ff00"
  android:gravity="center"
  android:padding="10dp"
  android:text="你好"
  android:textColor="#000000"/>
 </LinearLayout>
</RelativeLayout>
使用是方法是一樣的
//繼承Dialog來實現底部彈出Dialog
findViewById(R.id.btn_custom5).setOnClickListener(new View.OnClickListener() {
 @Override
 public void onClick(View v) {
 MyBottomDialog dialog = new MyBottomDialog(MainActivity.this);
 dialog.show();
 }
});
這裡就不用設置布局了,因為我們在MyBottomDialog的構造方法裡已經預加載了布局並設置了點擊事件
查看效果:
自定義仿Meun的彈出Dialog
MyMenuDialog的代碼
public class MyMenuDialog extends Dialog {
 public MyMenuDialog(Context context) {
 this(context, R.style.MyDialog);
 }

 public MyMenuDialog(Context context, int themeResId) {
 super(context, themeResId);
 }

 @Override
 protected void onCreate(Bundle savedInstanceState) {
 super.onCreate(savedInstanceState);
 // 預先設置Dialog的一些屬性
 Window dialogWindow = getWindow();
 WindowManager.LayoutParams p = dialogWindow.getAttributes(); // 獲取對話框當前的參數值
 //獲取屏幕的高度和寬帶
 WindowManager m = getWindow().getWindowManager();
 Display d = m.getDefaultDisplay();
 DisplayMetrics outMetrics = new DisplayMetrics();
 d.getMetrics(outMetrics);
 //設置WindowManager.LayoutParams
// p.height = (int) (outMetrics.heightPixels * 0.6);
// p.width = (int) (outMetrics.widthPixels * 0.4);
 //根據s隨意來的高度來設置x軸偏移量
 p.x = (int) (15 * outMetrics.density);
 //根據Title的高度來設置y軸偏移量
 p.y = (int) (45 * outMetrics.density);
 p.gravity = Gravity.RIGHT | Gravity.TOP;
 dialogWindow.setAttributes(p);
 }
}
使用就不介紹了,這裡主要是利用WindowManager.LayoutParams的x、y、gravity來實現的,當然可以自定義Dialog的彈出動畫就可以實現一個菜單對話框了。
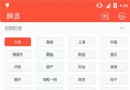
效果如下:

基本上Dialog的實現了這些效果應該能滿足大部分項目的需求,至於以下復雜的,想帶有ListView、GridView的Dialog等等都可以通過自定義Dialog來繼承Dialog來實現,都是依葫蘆畫瓢就可以了,以後遇到什麼再來補充。
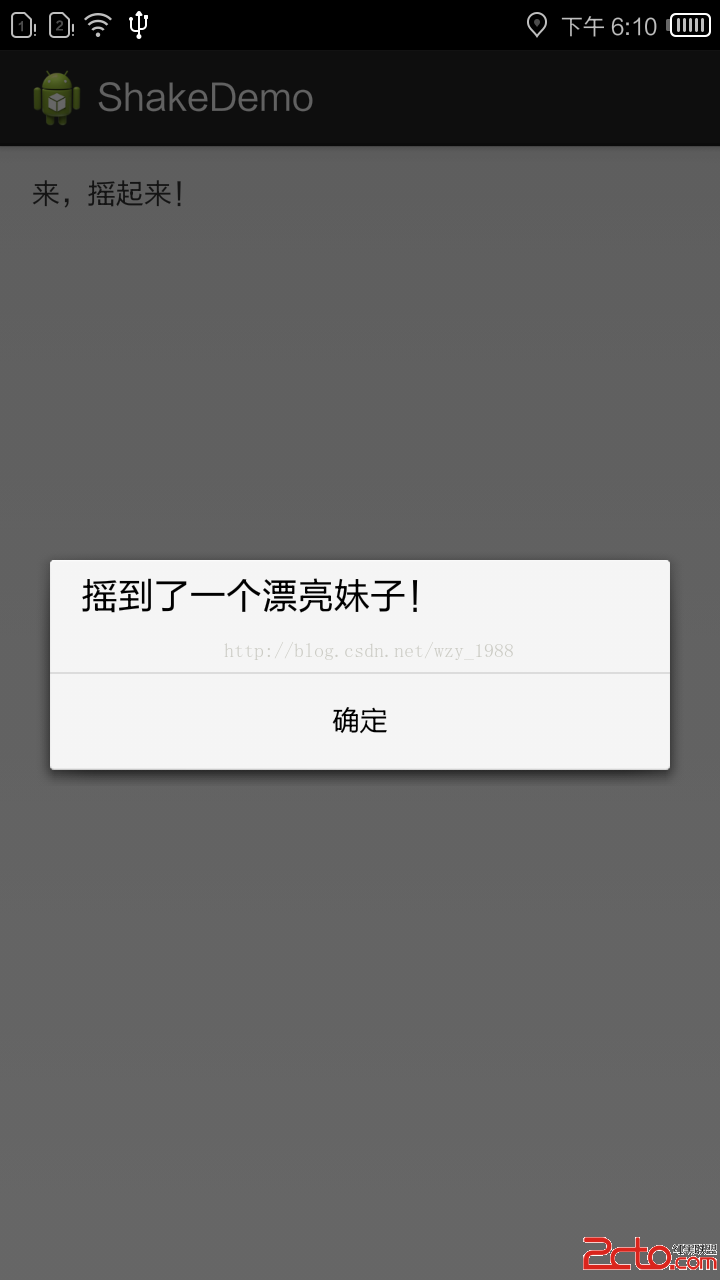 Android搖一搖振動效果Demo
前言 在微信剛流行的時候,在搖一搖還能用來那啥的時候,我也曾深更半夜的拿著手機晃一晃。當時想的最多的就是,我靠,為神馬搖一下需要用這麼大的力度,當時我想可能騰訊覺
 安卓手機重置便攜式熱點密碼方法
安卓手機重置便攜式熱點密碼方法如何?小編就來演示一下。 開啟手機,進入手機設置界面; 選擇“無線和網絡”; 選擇&
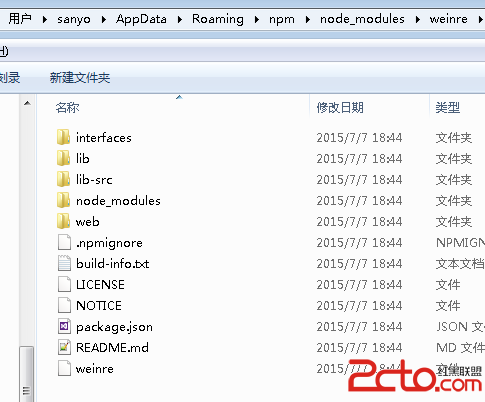 Android開發系列10 Cordova架構學習 Weinre遠程調試技術
手機上的頁面不像桌面開發這麼方便調試。可以使用Weinre進行遠程調試以方便開發。本文介紹windows下的安裝與使用。安裝使用npm安裝,可以運行: npm insta
 Android實現一款不錯Banner界面廣告圖片循環輪播
Demo實現的效果圖如下:工程目錄如下圖:一個Application,一個實體類,一個Activity,另一個是自定義的AutoPlayingViewPager繼承Fra