編輯:關於Android編程
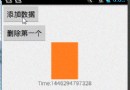
先給大家展示下效果圖,具體效果圖如下所示:
具體代碼如下所示:
1.index.js
//index.js
//獲取應用實例
var app = getApp()
Page({
 data: {
 isPopping: false,//是否已經彈出
 animationPlus: {},//旋轉動畫
 animationcollect: {},//item位移,透明度
 animationTranspond: {},//item位移,透明度
 animationInput: {},//item位移,透明度
 //我的博客:http://blog.csdn.net/qq_31383345
 //CSDN微信小程序開發專欄:http://blog.csdn.net/column/details/13721.html
 },
 onLoad: function () {
 },
 //點擊彈出
 plus: function () {
 if (this.data.isPopping) {
  //縮回動畫
  popp.call(this);
  this.setData({
  isPopping: false
  })
 } else {
  //彈出動畫
  takeback.call(this);
  this.setData({
  isPopping: true
  })
 }
 },
 input: function () {
 console.log("input")
 },
 transpond: function () {
 console.log("transpond")
 },
 collect: function () {
 console.log("collect")
 }
})
//彈出動畫
function popp() {
 //plus順時針旋轉
 var animationPlus = wx.createAnimation({
 duration: 500,
 timingFunction: 'ease-out'
 })
 var animationcollect = wx.createAnimation({
 duration: 500,
 timingFunction: 'ease-out'
 })
 var animationTranspond = wx.createAnimation({
 duration: 500,
 timingFunction: 'ease-out'
 })
 var animationInput = wx.createAnimation({
 duration: 500,
 timingFunction: 'ease-out'
 })
 animationPlus.rotateZ(180).step();
 animationcollect.translate(-100, -100).rotateZ(180).opacity(1).step();
 animationTranspond.translate(-140, 0).rotateZ(180).opacity(1).step();
 animationInput.translate(-100, 100).rotateZ(180).opacity(1).step();
 this.setData({
 animationPlus: animationPlus.export(),
 animationcollect: animationcollect.export(),
 animationTranspond: animationTranspond.export(),
 animationInput: animationInput.export(),
 })
}
//收回動畫
function takeback() {
 //plus逆時針旋轉
 var animationPlus = wx.createAnimation({
 duration: 500,
 timingFunction: 'ease-out'
 })
 var animationcollect = wx.createAnimation({
 duration: 500,
 timingFunction: 'ease-out'
 })
 var animationTranspond = wx.createAnimation({
 duration: 500,
 timingFunction: 'ease-out'
 })
 var animationInput = wx.createAnimation({
 duration: 500,
 timingFunction: 'ease-out'
 })
 animationPlus.rotateZ(0).step();
 animationcollect.translate(0, 0).rotateZ(0).opacity(0).step();
 animationTranspond.translate(0, 0).rotateZ(0).opacity(0).step();
 animationInput.translate(0, 0).rotateZ(0).opacity(0).step();
 this.setData({
 animationPlus: animationPlus.export(),
 animationcollect: animationcollect.export(),
 animationTranspond: animationTranspond.export(),
 animationInput: animationInput.export(),
 })
}
2.index.wxml
<!--index.wxml-->
<image src="../../images/collect.png" animation="{{animationcollect}}" class="image-style" bindtap="collect"></image>
<image src="../../images/transpond.png" animation="{{animationTranspond}}" class="image-style" bindtap="transpond"></image>
<image src="../../images/input.png" animation="{{animationInput}}" class="image-style" bindtap="input"></image>
<image src="../../images/plus.png" animation="{{animationPlus}}" class="image-plus-style" bindtap="plus"></image>
3.index.wxss
/**index.wxss**/
.image-style {
 height: 150rpx;
 width: 150rpx;
 position: absolute;
 bottom: 250rpx;
 right: 100rpx;
 opacity: 0;
}
.image-plus-style {
 height: 150rpx;
 width: 150rpx;
 position: absolute;
 bottom: 250rpx;
 right: 100rpx;
 z-index: 100;
}
demo代碼下載
以上所述是小編給大家介紹的Android中微信小程序開發之彈出菜單,希望對大家有所幫助,如果大家有任何疑問請給我留言,小編會及時回復大家的。在此也非常感謝大家對本站網站的支持!
 Android 滑動導航菜單的快速構建(一)
滑動導航菜單一直都是移動App中比較流行的UI設計,隨著Material Design的盛行Android也越來越多采用這種設計,當然這種滑動菜單樣式也是各種各樣五花八門
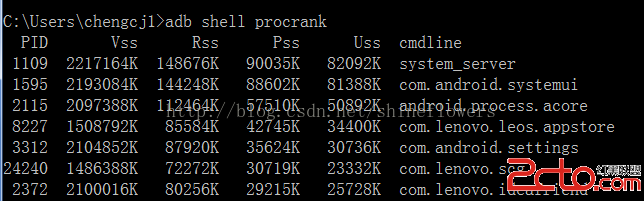 Android procrank查看內存使用情況
使用adb shell procrank手機中的sh是經過精簡過的,有些手機可能沒有 procrank 命令,可以使用genymotion模擬器,或是自己安裝procra
 Android中Service實時向Activity傳遞數據實例分析
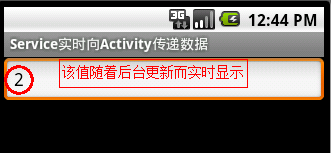
本文實例講述了Android中Service實時向Activity傳遞數據的方法。分享給大家供大家參考。具體如下:這裡演示一個案例,需求如下:在Service組件中創建一
 Android基礎入門教程——8.4.4 Android動畫合集之屬性動畫-又見
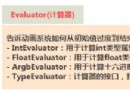
1.Evaluator自定義1)Evaluator介紹 上一節中的ValueAnimator的簡單實用,使用動畫的第一步都是: 調用ValueAn