編輯:關於Android編程
本篇博客要分享的一個UI效果——實現底部切換標簽,想必大家在一些應用上面遇到過這種效果了,最典型的就是微信了,可以左右滑動切換頁面,也可以點擊標簽頁滑動頁面,它們是如何實現的呢,本篇博客為了簡單只介紹如何實現點擊底部切換標簽頁。
先來看看我們想實現的效果圖:

這樣的頁面實現起來其實很簡單的,首先我們從布局入手:
分為三部分
第一部分:頂部導航欄布局
第二部分:中部顯示內容布局
第三部分:底部標簽布局
/BottomTabDemo/res/layout/activity_main.xml
<FrameLayout xmlns:android="http://schemas.android.com/apk/res/android"
 android:layout_width="match_parent"
 android:layout_height="match_parent" >

 <RelativeLayout
  android:id="@+id/rl_main"
  android:layout_width="match_parent"
  android:layout_height="match_parent" >

  <!-- 頂部 -->

  <RelativeLayout
   android:id="@+id/top_tab"
   android:layout_width="match_parent"
   android:layout_height="50dip"
   android:background="@color/topbar_bg" >

   <ImageView
    android:id="@+id/iv_logo"
    android:layout_width="wrap_content"
    android:layout_height="wrap_content"
    android:layout_centerInParent="true"
    android:focusable="false"
    android:src="@drawable/zhidao_logo"
    android:contentDescription="@null" />

  </RelativeLayout>

  <!-- 底部tab -->

  <LinearLayout
   android:id="@+id/ll_bottom_tab"
   android:layout_width="match_parent"
   android:layout_height="54dp"
   android:layout_alignParentBottom="true"
   android:gravity="center_vertical"
   android:orientation="horizontal"
   android:baselineAligned="true">

   <RelativeLayout
    android:id="@+id/rl_know"
    android:layout_width="0dp"
    android:layout_height="wrap_content"
    android:layout_weight="1.0" >

    <ImageView
     android:id="@+id/iv_know"
     android:layout_width="wrap_content"
     android:layout_height="wrap_content"
     android:layout_centerHorizontal="true"
     android:src="@drawable/btn_know_nor"
     android:contentDescription="@null"/>

    <TextView
     android:id="@+id/tv_know"
     android:layout_width="wrap_content"
     android:layout_height="wrap_content"
     android:layout_below="@id/iv_know"
     android:layout_centerHorizontal="true"
     android:text="@string/bottom_tab_know"
     android:textColor="@color/bottomtab_normal"
     android:textSize="12sp" />
   </RelativeLayout>

   <RelativeLayout
    android:id="@+id/rl_want_know"
    android:layout_width="0dp"
    android:layout_height="wrap_content"
    android:layout_weight="1.0" >

    <ImageView
     android:id="@+id/iv_i_want_know"
     android:layout_width="wrap_content"
     android:layout_height="wrap_content"
     android:layout_centerHorizontal="true"
     android:src="@drawable/btn_wantknow_nor"
     android:contentDescription="@null" />

    <TextView
     android:id="@+id/tv_i_want_know"
     android:layout_width="wrap_content"
     android:layout_height="wrap_content"
     android:layout_below="@+id/iv_i_want_know"
     android:layout_centerHorizontal="true"
     android:text="@string/bottom_tab_wantknow"
     android:textColor="@color/bottomtab_normal"
     android:textSize="12sp" />
   </RelativeLayout>

   <RelativeLayout
    android:id="@+id/rl_me"
    android:layout_width="0dp"
    android:layout_height="wrap_content"
    android:layout_weight="1.0" >

    <ImageView
     android:id="@+id/iv_me"
     android:layout_width="wrap_content"
     android:layout_height="wrap_content"
     android:layout_centerHorizontal="true"
     android:src="@drawable/btn_my_nor"
     android:contentDescription="@null" />


    <TextView
     android:id="@+id/tv_me"
     android:layout_width="wrap_content"
     android:layout_height="wrap_content"
     android:layout_below="@+id/iv_me"
     android:layout_centerHorizontal="true"
     android:text="@string/bottom_tab_my"
     android:textColor="@color/bottomtab_normal"
     android:textSize="12sp" />
   </RelativeLayout>
  </LinearLayout>

  <!-- 內容部分, fragment切換 -->

  <LinearLayout
   android:id="@+id/content_layout"
   android:layout_width="match_parent"
   android:layout_height="match_parent"
   android:layout_above="@+id/line"
   android:layout_below="@+id/top_tab"
   android:orientation="vertical" >
  </LinearLayout>

  <View
   android:id="@+id/line"
   android:layout_width="match_parent"
   android:layout_height="1dp"
   android:layout_above="@id/ll_bottom_tab"
   android:background="@color/line" />
 </RelativeLayout>

</FrameLayout>
以上是布局代碼,下面就介紹如何通過點擊標簽切換Fragment:
我們會發現,初始的時候是選中第一個標簽頁,圖片和字體的顏色區別於另外兩個標簽頁,所以我們要做的就是切換標簽的時候,就改變標簽的狀態
主要改兩個內容:
然後我們切換標簽顯示的是不同的Fragment,這裡我們有三個Fragment,所以我們定義三個不同的Fragment界面:
/BottomTabDemo/src/com/xiaowu/bottomtab/demo/ZhidaoFragment.java
/BottomTabDemo/src/com/xiaowu/bottomtab/demo/IWantKnowFragment.java
/BottomTabDemo/src/com/xiaowu/bottomtab/demo/MeFragment.java
每個Fragment對應不同的布局文件:
/BottomTabDemo/res/layout/main_tab1_fragment.xml
/BottomTabDemo/res/layout/main_tab2_fragment.xml
/BottomTabDemo/res/layout/main_tab3_fragment.xml
ok,這些定義好之後,我們就在主界面上編寫切換的代碼了,如何對Fragment進行切換呢,定義以下方法:
/**
  * 添加或者顯示碎片
  *
  * @param transaction
  * @param fragment
  */
 private void addOrShowFragment(FragmentTransaction transaction,
   Fragment fragment) {
  if (currentFragment == fragment)
   return;

  if (!fragment.isAdded()) { // 如果當前fragment未被添加,則添加到Fragment管理器中
   transaction.hide(currentFragment)
     .add(R.id.content_layout, fragment).commit();
  } else {
   transaction.hide(currentFragment).show(fragment).commit();
  }

  currentFragment = fragment;
 }
完整代碼如下:
/BottomTabDemo/src/com/xiaowu/bottomtab/demo/MainActivity.java
package com.xiaowu.bottomtab.demo;


import android.os.Bundle;
import android.support.v4.app.Fragment;
import android.support.v4.app.FragmentActivity;
import android.support.v4.app.FragmentTransaction;
import android.view.View;
import android.view.View.OnClickListener;
import android.widget.ImageView;
import android.widget.RelativeLayout;
import android.widget.TextView;

/**
 * 主Activity
 *
 * @author wwj_748
 *
 */
public class MainActivity extends FragmentActivity implements OnClickListener {

 // 三個tab布局
 private RelativeLayout knowLayout, iWantKnowLayout, meLayout;

 // 底部標簽切換的Fragment
 private Fragment knowFragment, iWantKnowFragment, meFragment,
   currentFragment;
 // 底部標簽圖片
 private ImageView knowImg, iWantKnowImg, meImg;
 // 底部標簽的文本
 private TextView knowTv, iWantKnowTv, meTv;

 @Override
 protected void onCreate(Bundle savedInstanceState) {
  super.onCreate(savedInstanceState);
  setContentView(R.layout.activity_main);

  initUI();
  initTab();
 }

 /**
  * 初始化UI
  */
 private void initUI() {
  knowLayout = (RelativeLayout) findViewById(R.id.rl_know);
  iWantKnowLayout = (RelativeLayout) findViewById(R.id.rl_want_know);
  meLayout = (RelativeLayout) findViewById(R.id.rl_me);
  knowLayout.setOnClickListener(this);
  iWantKnowLayout.setOnClickListener(this);
  meLayout.setOnClickListener(this);

  knowImg = (ImageView) findViewById(R.id.iv_know);
  iWantKnowImg = (ImageView) findViewById(R.id.iv_i_want_know);
  meImg = (ImageView) findViewById(R.id.iv_me);
  knowTv = (TextView) findViewById(R.id.tv_know);
  iWantKnowTv = (TextView) findViewById(R.id.tv_i_want_know);
  meTv = (TextView) findViewById(R.id.tv_me);

 }

 /**
  * 初始化底部標簽
  */
 private void initTab() {
  if (knowFragment == null) {
   knowFragment = new ZhidaoFragment();
  }

  if (!knowFragment.isAdded()) {
   // 提交事務
   getSupportFragmentManager().beginTransaction()
     .add(R.id.content_layout, knowFragment).commit();

   // 記錄當前Fragment
   currentFragment = knowFragment;
   // 設置圖片文本的變化
   knowImg.setImageResource(R.drawable.btn_know_pre);
   knowTv.setTextColor(getResources()
     .getColor(R.color.bottomtab_press));
   iWantKnowImg.setImageResource(R.drawable.btn_wantknow_nor);
   iWantKnowTv.setTextColor(getResources().getColor(
     R.color.bottomtab_normal));
   meImg.setImageResource(R.drawable.btn_my_nor);
   meTv.setTextColor(getResources().getColor(R.color.bottomtab_normal));

  }

 }

 @Override
 public void onClick(View view) {
  switch (view.getId()) {
  case R.id.rl_know: // 知道
   clickTab1Layout();
   break;
  case R.id.rl_want_know: // 我想知道
   clickTab2Layout();
   break;
  case R.id.rl_me: // 我的
   clickTab3Layout();
   break;
  default:
   break;
  }
 }

 /**
  * 點擊第一個tab
  */
 private void clickTab1Layout() {
  if (knowFragment == null) {
   knowFragment = new ZhidaoFragment();
  }
  addOrShowFragment(getSupportFragmentManager().beginTransaction(), knowFragment);

  // 設置底部tab變化
  knowImg.setImageResource(R.drawable.btn_know_pre);
  knowTv.setTextColor(getResources().getColor(R.color.bottomtab_press));
  iWantKnowImg.setImageResource(R.drawable.btn_wantknow_nor);
  iWantKnowTv.setTextColor(getResources().getColor(
    R.color.bottomtab_normal));
  meImg.setImageResource(R.drawable.btn_my_nor);
  meTv.setTextColor(getResources().getColor(R.color.bottomtab_normal));
 }

 /**
  * 點擊第二個tab
  */
 private void clickTab2Layout() {
  if (iWantKnowFragment == null) {
   iWantKnowFragment = new IWantKnowFragment();
  }
  addOrShowFragment(getSupportFragmentManager().beginTransaction(), iWantKnowFragment);

  knowImg.setImageResource(R.drawable.btn_know_nor);
  knowTv.setTextColor(getResources().getColor(R.color.bottomtab_normal));
  iWantKnowImg.setImageResource(R.drawable.btn_wantknow_pre);
  iWantKnowTv.setTextColor(getResources().getColor(
    R.color.bottomtab_press));
  meImg.setImageResource(R.drawable.btn_my_nor);
  meTv.setTextColor(getResources().getColor(R.color.bottomtab_normal));

 }

 /**
  * 點擊第三個tab
  */
 private void clickTab3Layout() {
  if (meFragment == null) {
   meFragment = new MeFragment();
  }

  addOrShowFragment(getSupportFragmentManager().beginTransaction(), meFragment);
  knowImg.setImageResource(R.drawable.btn_know_nor);
  knowTv.setTextColor(getResources().getColor(R.color.bottomtab_normal));
  iWantKnowImg.setImageResource(R.drawable.btn_wantknow_nor);
  iWantKnowTv.setTextColor(getResources().getColor(
    R.color.bottomtab_normal));
  meImg.setImageResource(R.drawable.btn_my_pre);
  meTv.setTextColor(getResources().getColor(R.color.bottomtab_press));

 }

 /**
  * 添加或者顯示碎片
  *
  * @param transaction
  * @param fragment
  */
 private void addOrShowFragment(FragmentTransaction transaction,
   Fragment fragment) {
  if (currentFragment == fragment)
   return;

  if (!fragment.isAdded()) { // 如果當前fragment未被添加,則添加到Fragment管理器中
   transaction.hide(currentFragment)
     .add(R.id.content_layout, fragment).commit();
  } else {
   transaction.hide(currentFragment).show(fragment).commit();
  }

  currentFragment = fragment;
 }

}
源碼下載:http://xiazai.jb51.net/201612/yuanma/AndroidBottomTab(jb51.net).rar
以上就是本文的全部內容,希望對大家的學習有所幫助,也希望大家多多支持本站。
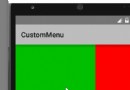 Android 開發第三彈:自定義左右菜單(滑動動畫+蒙版效果)
下面的截圖……哎,因為1080P在Windows 10上雖然適配了,但大部分軟件並沒有跟上,比如某個錄制GIF的軟件,所以這裡有一定的偏移導致
 Android官方開發文檔Training系列課程中文版:多樣屏幕之支持不同的屏幕尺寸
原文地址:http://android.xsoftlab.net/training/multiscreen/index.html引言Android運行於數以百計不同尺寸的
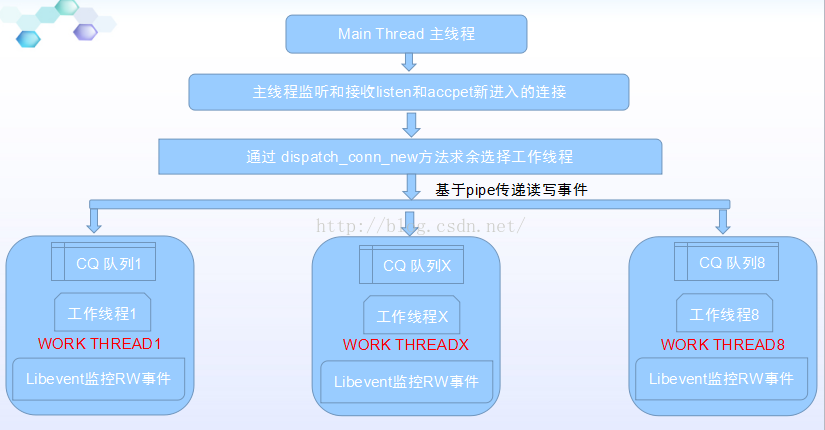 Memcached 源碼分析--網絡模型流程分析
一、功能介紹Memcached 是一個高性能的分布式內存對象緩存系統,用於動態Web應用以減輕數據庫負載。它通過在內存中緩存數據和對象來減少讀取數據庫的次數,從而提高動態
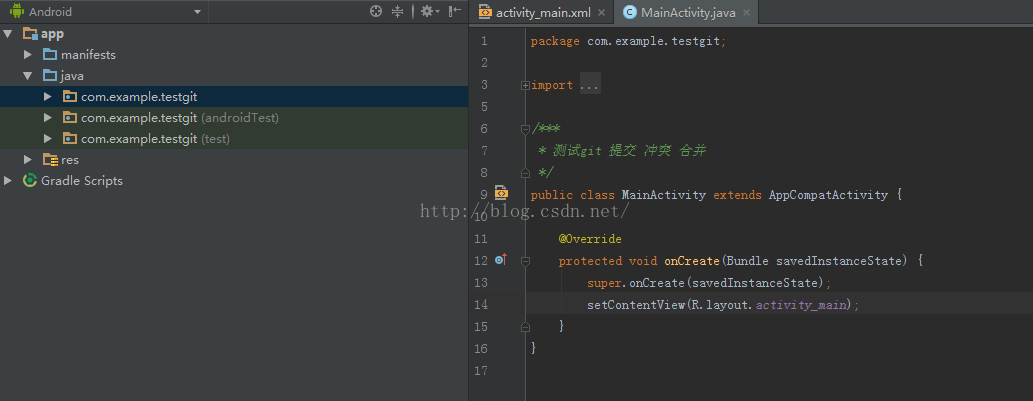 AndroidStudio Git的使用(主要是解決文件沖突)
開始:1.使用github 來測試。首先准備一個GitHub賬號吧2.在androidStudio 裡面新建一個項目 這裡我取名TestGit 然後