編輯:關於Android編程
本文實例為大家分享了Android Glide圖片加載的具體代碼,供大家參考,具體內容如下
1.普通用法
Glide.with(context)
.load(url)
.into(view);
with中可以放context、activity、fragment。。;當放activity、fragment時glide會根據生命周期來加載圖片。推薦使用activity。
2.設置加載中和加載失敗的圖片
Glide.with(context)
.load(url)
.placeholder(R.drawable.loading) //占位符 也就是加載中的圖片,可放個gif
.error(R.drawable.failed) //失敗圖片
.into(view);
3.添加圖片淡入加載的效果
.crossFade()
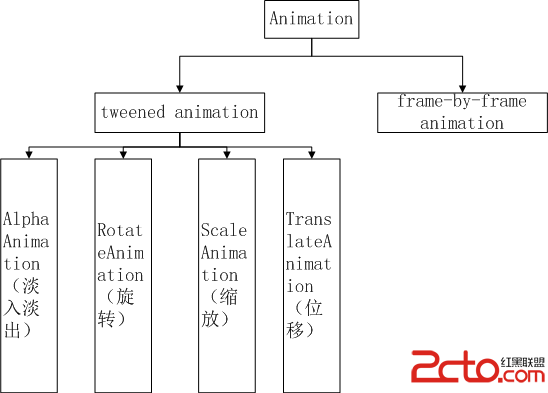
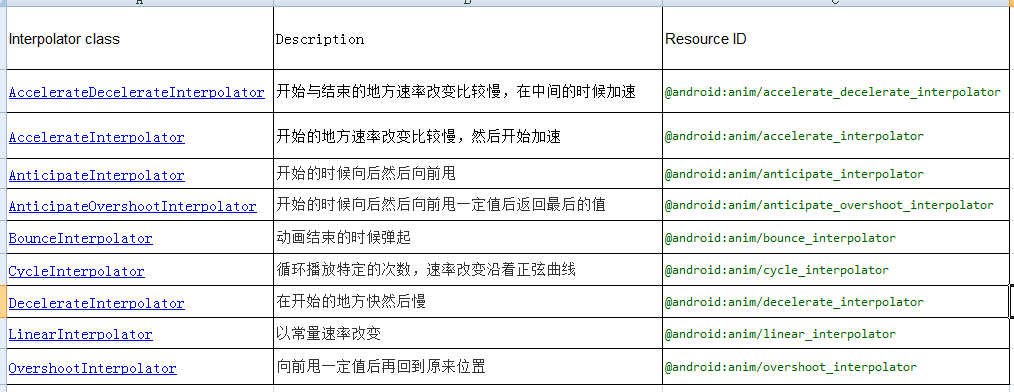
4.用 animate() 自定義動畫
從資源中的動畫:
回到代碼,第一個選項是傳一個 Android 資源 id,即動畫的資源。一個簡單的例子是每個 Android 系統都提供的:slide-in-left(從左滑入)動畫, android.R.anim.slide_in_left 。下面這段代碼是這個動畫的 XML 描述:
<?xml version="1.0" encoding="utf-8"?>
<set xmlns:android="http://schemas.android.com/apk/res/android">
  <translate android:fromXDelta="-50%p" android:toXDelta="0"
      android:duration="@android:integer/config_mediumAnimTime"/>
  <alpha android:fromAlpha="0.0" android:toAlpha="1.0"
      android:duration="@android:integer/config_mediumAnimTime" />
</set>
當然你可以創建你自己的 XML 動畫。比如一個小的縮放動畫,圖片剛開始小的,然後逐漸增大到原尺寸。
<?xml version="1.0" encoding="utf-8"?>
<set xmlns:android="http://schemas.android.com/apk/res/android"
   android:fillAfter="true">

  <scale
    android:duration="@android:integer/config_longAnimTime"
    android:fromXScale="0.1"
    android:fromYScale="0.1"
    android:pivotX="50%"
    android:pivotY="50%"
    android:toXScale="1"
    android:toYScale="1"/>
</set>
這兩個動畫都可以用到 Glide 建造者中:
Glide
  .with( context )
  .load( eatFoodyImages[0] )
  .animate( android.R.anim.slide_in_left ) // or R.anim.zoom_in
  .into( imageView1 );
在圖片從網絡加載完並准備好之後將從左邊滑入。
通過自定義類實現動畫
這個很簡單,你只需實現 void animate(View view) 方法。這個視圖對象是整個 target 視圖。如果它是一個自定義的視圖,你要找到你的視圖的子元素,並且做些必要的動畫。
來看個簡單的例子。假設你想要實現一個漸現動畫,你得需要創建這樣的動畫對象:
ViewPropertyAnimation.Animator animationObject = new ViewPropertyAnimation.Animator() {
  @Override
  public void animate(View view) {
    // if it's a custom view class, cast it here
    // then find subviews and do the animations
    // here, we just use the entire view for the fade animation
    view.setAlpha( 0f );

    ObjectAnimator fadeAnim = ObjectAnimator.ofFloat( view, "alpha", 0f, 1f );
    fadeAnim.setDuration( 2500 );
    fadeAnim.start();
  }
};
接下來,你需要在 Glide 請求中去設置這個動畫:
Glide
  .with( context )
  .load( eatFoodyImages[1] )
  .animate( animationObject )
  .into( imageView2 );
當然,在 animate(View view) 中你的動畫對象方法中, 你可以做任何你想要對視圖做的事情。自由的用你的動畫創建吧。
如果你要在你的自定義視圖中實現,你只需要創建這個視圖對象,然後在你的自定義視圖中創建你的自定義方法。
5.添加加載完成監聽
Glide.with(ShowImgActivity.this)
   .load(urlString)
   .centerCrop()
   .error(R.drawable.failed)
   .crossFade()
   .into(new GlideDrawableImageViewTarget(imageView) {
 @Override
   public void onResourceReady(GlideDrawable drawable, GlideAnimation anim) {
   super.onResourceReady(drawable, anim);
   //在這裡添加一些圖片加載完成的操作
  }
)};
6.圖片緩存機制
Glide緩存策略
Glide默認開啟磁盤緩存和內存緩存,當然也可以對單張圖片進行設置特定的緩存策略。
設置圖片不加入到內存緩存
Glide
  .with( context )
  .load( eatFoodyImages[0] )
  .skipMemoryCache( true )
  .into( imageViewInternet );
設置圖片不加入到磁盤緩存
Glide
  .with( context )
  .load( eatFoodyImages[0] )
  .diskCacheStrategy( DiskCacheStrategy.NONE )
  .into( imageViewInternet );
Glide支持多種磁盤緩存策略:
DiskCacheStrategy.NONE :不緩存圖片
DiskCacheStrategy.SOURCE :緩存圖片源文件
DiskCacheStrategy.RESULT:緩存修改過的圖片
DiskCacheStrategy.ALL:緩存所有的圖片,默認
圖片加載優先級
Glide支持為圖片加載設置優先級,優先級高的先加載,優先級低的後加載:
private void loadImageWithHighPriority() {
  Glide
    .with( context )
    .load( UsageExampleListViewAdapter.eatFoodyImages[0] )
    .priority( Priority.HIGH )
    .into( imageViewHero );
}

private void loadImagesWithLowPriority() {
  Glide
    .with( context )
    .load( UsageExampleListViewAdapter.eatFoodyImages[1] )
    .priority( Priority.LOW )
    .into( imageViewLowPrioLeft );

  Glide
    .with( context )
    .load( UsageExampleListViewAdapter.eatFoodyImages[2] )
    .priority( Priority.LOW )
    .into( imageViewLowPrioRight );
}
7.加載圓角圖片
/**
 * 圓形圖
 *
 * Created by <lzh> on 2016/7/29.
 */
public class GlideCircleTransform extends BitmapTransformation {
  public GlideCircleTransform(Context context) {
    super(context);
  }

  @Override
  protected Bitmap transform(BitmapPool pool, Bitmap toTransform, int outWidth, int outHeight) {
    return circleCrop(pool, toTransform);
  }

  private static Bitmap circleCrop(BitmapPool pool, Bitmap source) {
    if (source == null) return null;
    int size = Math.min(source.getWidth(), source.getHeight());
    int x = (source.getWidth() - size) / 2;
    int y = (source.getHeight() - size) / 2;
    // TODO this could be acquired from the pool too
    Bitmap squared = Bitmap.createBitmap(source, x, y, size, size);
    Bitmap result = pool.get(size, size, Bitmap.Config.ARGB_8888);
    if (result == null) {
      result = Bitmap.createBitmap(size, size, Bitmap.Config.ARGB_8888);
    }
    Canvas canvas = new Canvas(result);
    Paint paint = new Paint();
    paint.setShader(new BitmapShader(squared, BitmapShader.TileMode.CLAMP, BitmapShader.TileMode.CLAMP));
    paint.setAntiAlias(true);
    float r = size / 2f;
    canvas.drawCircle(r, r, r, paint);
    return result;
  }

  @Override
  public String getId() {
    return getClass().getName();
  }
}
**然後使用的時候只要加上這句話就行了
.transform(new GlideCircleTransform(context))**
Glide.with(mContext)
        .load(imageUrl)
        .transform(new GlideCircleTransform(mContext))
        .into(holder.imageView);
注意事項:
不能直接給要使用glide的imageview設置tag;
因為glide在加載圖片的時候用到了tag,會造成沖突,並報錯;
當要用到tag寫邏輯代碼的時候,可以這樣
.setTag(R.string.xxx,xxx);並.getTag(R.string.xxx);
以上就是本文的全部內容,希望對大家的學習有所幫助,也希望大家多多支持本站。
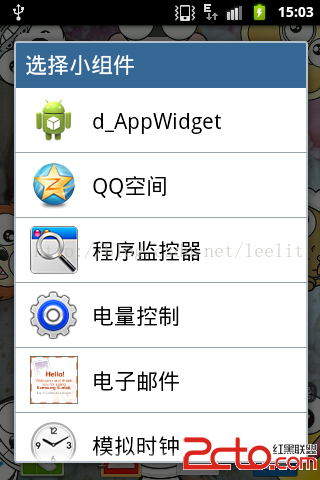 Android:AppWidget之桌面小電筒
安卓開發中很多控件都是Widget類的,但是我們常說的Widget指的是AppWidget,即一些可以放置在桌面的小部件。 下面用兩個實例來說一下這個AppWid
 Android動畫TimeInterpolator(插值器)和TypeEvaluator(估值器)分析
這篇文章繼續分析Android動畫的TimeInterpolator(插值器)和TypeEvaluator(估值器)的簡單實現,以及分別去自定義插值器和估值器。一,Tim
 Android逆向分析案例——某地圖的定位請求分析
微信裡面有個“附近的人”,相信大家都知道,大概的原理就是調用騰訊地圖的sdk進行定位,然後把個人的定位信息發到微信服務器上進行處理,再把一定范圍內
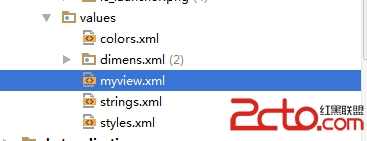 android圖像圖像處理——自定義組件的屬性
自定義組件的屬性步驟如下【1】在Values資源文件下新建myview.xml 自定義兩個屬性背景圖、畫筆筆觸大小;【2】在