編輯:關於Android編程
跟選擇銀行卡界面類似,也是用一個PopupWindow,不過輸入密碼界面是一個自定義view,當輸入六位密碼完成後用回調在Activity中獲取到輸入的密碼並以Toast顯示密碼。效果圖如下:

自定義view布局效果圖及代碼如下:

<?xml version="1.0" encoding="utf-8"?>
<RelativeLayout
xmlns:android="http://schemas.android.com/apk/res/android"
android:layout_width="match_parent"
android:layout_height="wrap_content"
android:background="@drawable/bg_pop_window"
android:orientation="vertical">
<LinearLayout
android:id="@+id/ll_main_password"
android:layout_width="match_parent"
android:layout_height="wrap_content"
android:layout_alignParentBottom="true"
android:background="#fff"
android:orientation="vertical">
<RelativeLayout
android:layout_width="match_parent"
android:layout_height="50dp">
<ImageView
android:id="@+id/iv_pay_back"
android:layout_width="wrap_content"
android:layout_height="wrap_content"
android:layout_centerVertical="true"
android:layout_marginLeft="10dp"
android:background="@drawable/back_white"/>
<TextView
android:id="@+id/tv_pay_title"
android:layout_width="wrap_content"
android:layout_height="wrap_content"
android:layout_centerHorizontal="true"
android:layout_marginLeft="15dp"
android:layout_marginTop="15dp"
android:text="標題"
android:textColor="#333"
android:textSize="18dp"/>
</RelativeLayout>
<View
android:layout_width="match_parent"
android:layout_height="0.5dp"
android:background="#e5e5e5"/>
<!-- 6位密碼框布局,需要一個圓角邊框的shape作為layout的背景 -->
<LinearLayout
android:layout_width="match_parent"
android:layout_height="wrap_content"
android:layout_marginLeft="20dp"
android:layout_marginRight="20dp"
android:layout_marginTop="20dp"
android:background="@drawable/shape_input_area"
android:orientation="horizontal">
<!-- inputType設置隱藏密碼明文
textSize設置大一點,否則“點”太小了,不美觀 -->
<TextView
android:id="@+id/tv_pass1"
android:layout_width="0dp"
android:layout_height="wrap_content"
android:layout_weight="1"
android:gravity="center"
android:inputType="numberPassword"
android:paddingBottom="5dp"
android:paddingTop="5dp"
android:textSize="32sp"/>
<View
android:layout_width="1dp"
android:layout_height="match_parent"
android:background="#e5e5e5"/>
<TextView
android:id="@+id/tv_pass2"
android:layout_width="0dp"
android:layout_height="wrap_content"
android:layout_weight="1"
android:gravity="center"
android:inputType="numberPassword"
android:paddingBottom="5dp"
android:paddingTop="5dp"
android:textSize="32sp"/>
<View
android:layout_width="1dp"
android:layout_height="match_parent"
android:background="#e5e5e5"/>
<TextView
android:id="@+id/tv_pass3"
android:layout_width="0dp"
android:layout_height="wrap_content"
android:layout_weight="1"
android:gravity="center"
android:inputType="numberPassword"
android:paddingBottom="5dp"
android:paddingTop="5dp"
android:textSize="32sp"/>
<View
android:layout_width="1dp"
android:layout_height="match_parent"
android:background="#e5e5e5"/>
<TextView
android:id="@+id/tv_pass4"
android:layout_width="0dp"
android:layout_height="wrap_content"
android:layout_weight="1"
android:gravity="center"
android:inputType="numberPassword"
android:paddingBottom="5dp"
android:paddingTop="5dp"
android:textSize="32sp"/>
<View
android:layout_width="1dp"
android:layout_height="match_parent"
android:background="#e5e5e5"/>
<TextView
android:id="@+id/tv_pass5"
android:layout_width="0dp"
android:layout_height="wrap_content"
android:layout_weight="1"
android:gravity="center"
android:inputType="numberPassword"
android:paddingBottom="5dp"
android:paddingTop="5dp"
android:textSize="32sp"/>
<View
android:layout_width="1dp"
android:layout_height="match_parent"
android:background="#e5e5e5"/>
<TextView
android:id="@+id/tv_pass6"
android:layout_width="0dp"
android:layout_height="wrap_content"
android:layout_weight="1"
android:gravity="center"
android:inputType="numberPassword"
android:paddingBottom="5dp"
android:paddingTop="5dp"
android:textSize="32sp"/>
</LinearLayout>
<TextView
android:id="@+id/tv_pay_forgetPwd"
android:layout_width="wrap_content"
android:layout_height="wrap_content"
android:layout_gravity="right"
android:layout_margin="15dp"
android:text="忘記密碼?"
android:textColor="#354EEF"/>
<!-- 輸入鍵盤 -->
<GridView
android:id="@+id/gv_keybord"
android:layout_width="match_parent"
android:layout_height="wrap_content"
android:layout_below="@id/ll_main_password"
android:layout_marginTop="30dp"
android:horizontalSpacing="0.5dp"
android:background="#8E8E8E"
android:numColumns="3"
android:verticalSpacing="0.5dp"/>
</LinearLayout>
</RelativeLayout>
java代碼
/**
* Created by zhpan on 2016/9/25.
*/
public class PayView extends RelativeLayout{
private MainActivity mContext;
private String mStringPassword; //輸入的密碼
private TextView[] mTextViewPsw; // 用數組保存6個TextView
private GridView mGridView; //支付鍵盤布局
private ArrayList<Map<String, String>> valueList;
private ImageView mImageViewCancel;
private TextView mTextViewForgetPsw;
private int currentIndex = -1;// 用於記錄當前輸入密碼格位置
private View mView;
private TextView mTextViewTitle;
private TextView mTextViewDel;
public PayView(Context context) {
super(context, null);
}
public PayView(Context context, AttributeSet attrs) {
super(context, attrs);
mContext = (MainActivity) context;
mView = View.inflate(context, R.layout.pay_view, null);
valueList = new ArrayList<>();
mTextViewPsw = new TextView[6];
mImageViewCancel = (ImageView) mView.findViewById(R.id.iv_pay_back);
mTextViewPsw[0] = (TextView) mView.findViewById(R.id.tv_pass1);
mTextViewPsw[1] = (TextView) mView.findViewById(R.id.tv_pass2);
mTextViewPsw[2] = (TextView) mView.findViewById(R.id.tv_pass3);
mTextViewPsw[3] = (TextView) mView.findViewById(R.id.tv_pass4);
mTextViewPsw[4] = (TextView) mView.findViewById(R.id.tv_pass5);
mTextViewPsw[5] = (TextView) mView.findViewById(R.id.tv_pass6);
mGridView = (GridView) mView.findViewById(R.id.gv_keybord);
mTextViewTitle = (TextView) mView.findViewById(R.id.tv_pay_title);
mTextViewForgetPsw = (TextView) mView.findViewById(R.id.tv_pay_forgetPwd);
setView();
addView(mView); //必須要,不然不顯示控件
}
// 初始化按鈕上應該顯示的數字
private void setView() {
for (int i = 1; i < 13; i++) {
Map<String, String> map = new HashMap<>();
if (i < 10) {
map.put("name", String.valueOf(i));
} else if (i == 10) {
map.put("name", "");
} else if (i == 11) {
map.put("name", String.valueOf(0));
} else if (i == 12) {
map.put("name", "<-");
}
valueList.add(map);
}
mGridView.setAdapter(adapter);
}
/**
* 設置監聽方法,在第6位輸入完後觸發
*/
public void setOnFinishInput(final OnPasswordInputFinish pass) {
mTextViewPsw[5].addTextChangedListener(new TextWatcher() {
@Override
public void beforeTextChanged(CharSequence s, int start, int count, int after) {
}
@Override
public void onTextChanged(CharSequence s, int start, int before, int count) {
}
@Override
public void afterTextChanged(Editable s) {
if (s.toString().length() == 1) {
mStringPassword = ""; //每次觸發都要將mStringPassword置空再重新獲取,避免由於輸入刪除再輸入造成混亂
for (int i = 0; i < 6; i++) {
mStringPassword += mTextViewPsw[i].getText().toString().trim();
}
pass.inputFinish();//接口中要實現的方法,完成密碼輸入完成後的響應邏輯
}
}
});
}
/**
* 獲取輸入的密碼
*/
public String getPassword() {
return mStringPassword;
}
/**
* 返回取消支付的ImageView
*/
public ImageView getCancel() {
return mImageViewCancel;
}
/**
* 返回忘記密碼的TextView
*/
public TextView getForgetPsw() {
return mTextViewForgetPsw;
}
/**
* 返回標題的TextView
*/
public TextView getTitle() {
return mTextViewTitle;
}
// GridView的適配器
BaseAdapter adapter = new BaseAdapter() {
@Override
public int getCount() {
return valueList.size();
}
@Override
public Object getItem(int position) {
return valueList.get(position);
}
@Override
public long getItemId(int position) {
return position;
}
@Override
public View getView(final int position, View convertView, ViewGroup parent) {
ViewHolder holder;
if (convertView == null) {
convertView = View.inflate(mContext, R.layout.item_pay_gride, null);
holder = new ViewHolder();
holder.btnKey = (TextView) convertView.findViewById(R.id.btn_keys);
convertView.setTag(holder);
} else {
holder = (ViewHolder) convertView.getTag();
}
holder.btnKey.setText(valueList.get(position).get("name"));
if (position == 9) {
holder.btnKey.setBackgroundResource(R.drawable.selector_key_del);
}
if (position == 11) {
mTextViewDel = holder.btnKey;
holder.btnKey.setBackgroundResource(R.drawable.selector_key_del);
}
holder.btnKey.setOnClickListener(new OnClickListener() {
@Override
public void onClick(View v) {
if (position < 11 && currentIndex != 9&&position!=9) { //點擊0-9按鈕
if (currentIndex >= -1 && currentIndex < 5) { //判斷輸入位置
mTextViewPsw[++currentIndex].setText(valueList.get(position).get("name"));
}
} else {
if (position == 11) { //點擊退格鍵
if (currentIndex - 1 >= -1) { // 判斷是否刪除完畢
mTextViewPsw[currentIndex--].setText("");
}
}
if(position==9){
}
}
}
});
return convertView;
}
};
static class ViewHolder {
public TextView btnKey;
}
}
PopupWindow中直接使用該控件
<?xml version="1.0" encoding="utf-8"?>
<LinearLayout xmlns:android="http://schemas.android.com/apk/res/android"
android:layout_width="match_parent"
android:layout_height="match_parent">
<com.example.zhpan.mypayui.PayView
android:id="@+id/pv_pop_win"
android:layout_width="match_parent"
android:layout_height="match_parent"/>
</LinearLayout>
MainActivity中顯示PupupWindow
public class MainActivity extends AppCompatActivity implements View.OnClickListener {
private TextView mTextView;
private PopupWindow mPopupWindow;
private View popView;
private PayView mPayView;
@Override
protected void onCreate(Bundle savedInstanceState) {
super.onCreate(savedInstanceState);
setContentView(R.layout.activity_main);
initView();
setListener();
}
private void initView() {
mTextView = (TextView) findViewById(R.id.tv_main_pay);
}
private void setListener() {
mTextView.setOnClickListener(this);
}
// 顯示彈窗
public void showPopupWindow() {
// 初始化彈窗
popView = View.inflate(this, R.layout.pop_window, null);
mPopupWindow = new PopupWindow(popView, ViewGroup.LayoutParams.MATCH_PARENT,
ViewGroup.LayoutParams.MATCH_PARENT);
mPayView = (PayView) popView.findViewById(R.id.pv_pop_win);
mPayView.getTitle().setText("選擇到賬銀行卡");
// 設置動畫
mPopupWindow.setAnimationStyle(R.style.popwin_anim_style);
mPopupWindow.showAsDropDown(findViewById(R.id.ll_main), 0, 0);
mPopupWindow.setOutsideTouchable(true);
mPayView.setOnFinishInput(new OnPasswordInputFinish() {
@Override
public void inputFinish() {
Toast.makeText(MainActivity.this, mPayView.getPassword(), Toast.LENGTH_SHORT).show();
}
});
mPayView.getCancel().setOnClickListener(this);
mPayView.getForgetPsw().setOnClickListener(this);
}
@Override
public void onClick(View v) {
switch (v.getId()) {
case R.id.tv_main_pay:
showPopupWindow();
break;
case R.id.iv_pay_back:
mPopupWindow.dismiss();
break;
case R.id.tv_pay_forgetPwd:
Toast.makeText(MainActivity.this,"忘記密碼",Toast.LENGTH_SHORT).show();
break;
}
}
}
以上所述是小編給大家介紹的Android自定義View仿支付寶輸入六位密碼功能,希望對大家有所幫助,如果大家有任何疑問請給我留言,小編會及時回復大家的。在此也非常感謝大家對本站網站的支持!
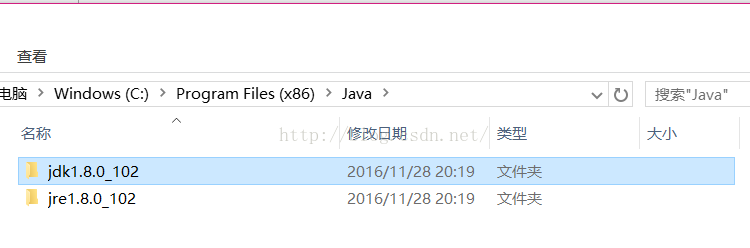 Android Studio學習筆記(4)----Win10系統下配JDK環境變量問題
Win10系統下配JDK環境變量問題電腦系統win10jdk版本jdk1.8.0_102Jdk安裝在了c盤下 配的環境變量為JAVA_HOME CLA
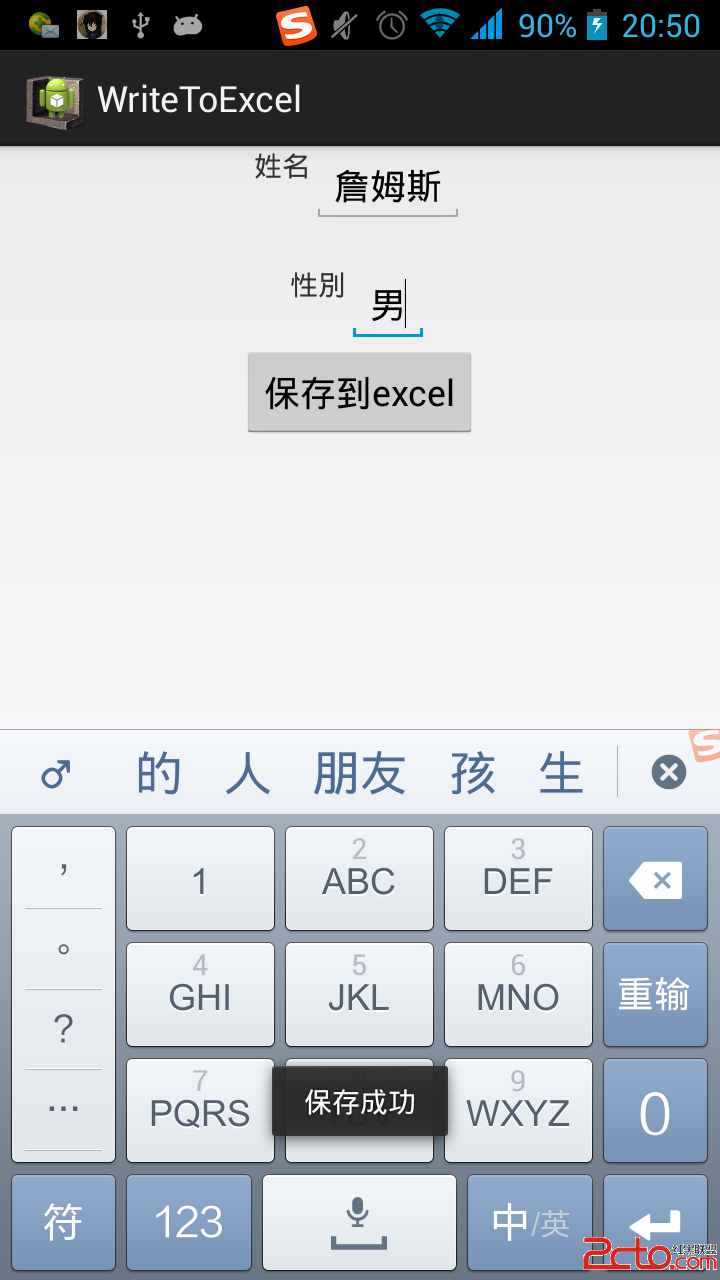 Android 添加數據到本地Excel表中
由於項目需要,今天學習了一下如何將程序裡的數據添加到本地的Excel表中。下面為學習筆記:先上效果圖:首先,需要導入jxl.jar包到libs文件夾內。然後創建Excel
 android paint cap join 理解 圖示
網上查了很多資料,對paint的裡面的枚舉類cap join講的不是很透徹。在這裡自己做一個比較深入的研究。 首先說Cap,比較形象的解釋就是 用來控制我們
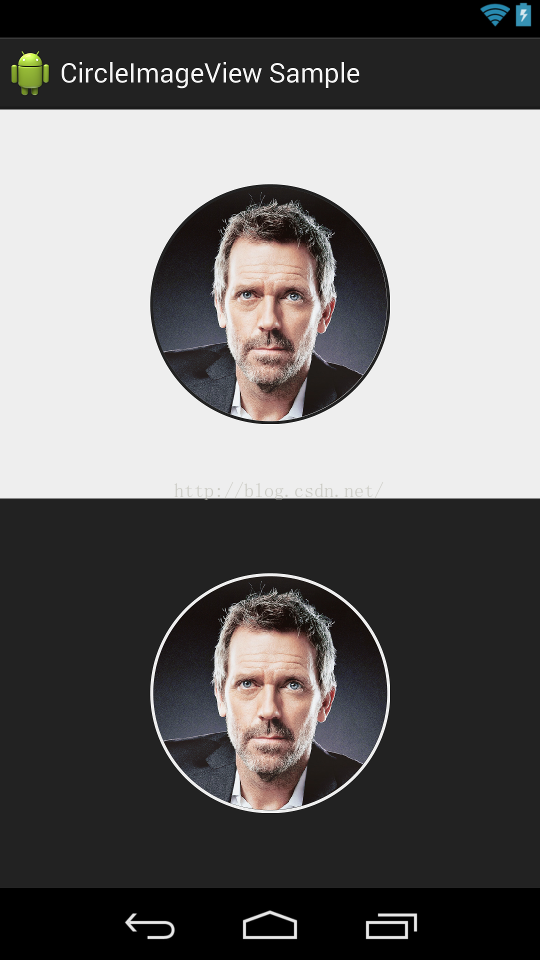 Android CircleImageView圓形ImageView
CircleImageView是github上一個第三方開源的實現圓形ImageView的項目。其在github上的項目主頁是:https://github.com/hd