編輯:關於Android編程
一個讓人賞心悅目的界面對軟件來說非常重要,因此圖形圖像資源也顯得非常重要。本講就要談一談Android中處理圖形圖像的最重要的一個類Drawable。Drawable就是一個可以畫的對象的抽象(有點別扭,你湊合看吧),下面是它的繼承關系,可以看到BitmapDrawable,AnimationDrawable等對象都是它的子類。

最簡單的使用Drawable資源的方法是,把圖片放入Android工程的res\drawable目錄下,編程環境會自動在R類裡為此資源創建一個引用。你可以使用此引用訪問該資源對象。譬如對應用程序的圖標,在Java代碼中可以用R.drawable.icon引用到它,在XML中可以用@drawable/icon引用到它。
那麼如果圖片資源不在項目中而是在SDCard中時如何使用呢,我們看一下下面的例子學習一下Drawable的使用,並且順便學習一下Bitmap和BitmapFactory的使用。
1、創建項目 Lesson23_Drawable,主Acitivity的名字是 MainDrawable.java,拷貝a.jpg和b.jpg兩個文件到sdcard中

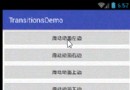
2、res\main.xml的內容如下:
<?xml version="1.0" encoding="utf-8"?>
<linearlayout xmlns:android="http://schemas.android.com/apk/res/android" android:orientation="vertical" android:layout_width="fill_parent" android:layout_height="fill_parent">
<textview android:layout_width="fill_parent" android:layout_height="wrap_content" android:textsize="20sp" android:text="Drawable的使用-設置壁紙">
<button android:layout_width="wrap_content" android:layout_height="wrap_content" android:textsize="20sp" android:text="查看圖片A" android:id="@+id/Button01">
</button>
<button android:layout_width="wrap_content" android:layout_height="wrap_content" android:textsize="20sp" android:text="查看圖片B" android:id="@+id/Button02">
</button>
<button android:layout_width="wrap_content" android:layout_height="wrap_content" android:textsize="20sp" android:text="設置圖片A為壁紙" android:id="@+id/Button03">
</button>
<button android:layout_width="wrap_content" android:layout_height="wrap_content" android:textsize="20sp" android:text="設置圖片B為壁紙" android:id="@+id/Button04">
</button>
<button android:layout_width="wrap_content" android:layout_height="wrap_content" android:textsize="20sp" android:text="恢復默認壁紙" android:id="@+id/Button05">
</button>
<imageview android:layout_width="wrap_content" android:layout_height="wrap_content" android:id="@+id/ImageView01">
</imageview>
</textview></linearlayout>
3、MainDrawable.java的內容如下:
package android.basic.lesson23;

import java.io.IOException;

import android.app.Activity;
import android.graphics.BitmapFactory;
import android.graphics.drawable.Drawable;
import android.os.Bundle;
import android.view.View;
import android.view.View.OnClickListener;
import android.widget.Button;
import android.widget.ImageView;

public class MainDrawable extends Activity {
    /** Called when the activity is first created. */
    @Override
    public void onCreate(Bundle savedInstanceState) {
        super.onCreate(savedInstanceState);
        setContentView(R.layout.main);

        //定義UI組件
        Button b1 = (Button) findViewById(R.id.Button01);
        Button b2 = (Button) findViewById(R.id.Button02);
        Button b3 = (Button) findViewById(R.id.Button03);
        Button b4 = (Button) findViewById(R.id.Button04);
        Button b5 = (Button) findViewById(R.id.Button05);
        final ImageView iv= (ImageView)findViewById(R.id.ImageView01);

        //定義按鈕點擊監聽器
        OnClickListener ocl = new OnClickListener() {

            @Override
            public void onClick(View v) {

                switch (v.getId()) {
                case R.id.Button01:
                    //給ImageView設置圖片,從存儲卡中獲取圖片為Drawable,然後把Drawable設置為ImageView的背景
                    iv.setBackgroundDrawable(Drawable.createFromPath("/sdcard/a.jpg"));
                    break;
                case R.id.Button02:
                    iv.setBackgroundDrawable(Drawable.createFromPath("/sdcard/b.jpg"));
                    break;
                case R.id.Button03:
                    try {
                        //Activity的父類ContextWrapper有這個setWallpaper方法,當然使用此方法需要有android.permission.SET_WALLPAPER權限
                        setWallpaper(BitmapFactory.decodeFile("/sdcard/a.jpg"));
                    } catch (IOException e1) {
                        e1.printStackTrace();
                    }
                    break;
                case R.id.Button04:
                    try {
                        setWallpaper(BitmapFactory.decodeFile("/sdcard/b.jpg"));
                    } catch (IOException e1) {
                        e1.printStackTrace();
                    }
                    break;
                case R.id.Button05:
                    try {
                        //Activity的父類ContextWrapper有這個clearWallpaper方法,作用是恢復默認壁紙,當然使用此方法需要有android.permission.SET_WALLPAPER權限
                        clearWallpaper();
                    } catch (IOException e) {
                        e.printStackTrace();
                    }
                    break;
                }

            }

        };

        //給按鈕們綁定點擊監聽器
        b1.setOnClickListener(ocl);
        b2.setOnClickListener(ocl);
        b3.setOnClickListener(ocl);
        b4.setOnClickListener(ocl);
        b5.setOnClickListener(ocl);
    }

}
4、AndroidManifest.xml的內容如下(設置權限)
<?xml version="1.0" encoding="utf-8"?>
<manifest xmlns:android="http://schemas.android.com/apk/res/android" package="android.basic.lesson23" android:versioncode="1" android:versionname="1.0">
  <application android:icon="@drawable/icon" android:label="@string/app_name">
    <activity android:label="@string/app_name" android:name=".MainDrawable">
      <intent -filter="">
        <action android:name="android.intent.action.MAIN">
        <category android:name="android.intent.category.LAUNCHER">
      </category></action></intent>
    </activity>

  </application>
  <uses -sdk="" android:minsdkversion="8">

<uses -permission="" android:name="android.permission.SET_WALLPAPER"></uses>
</uses></manifest>
5、運行程序,查看結果:

點擊“查看圖片A”按鈕,ImageView載入圖片A並顯示出來

點擊”設置圖片B為壁紙”按鈕,可以看到圖片B已經成為桌面壁紙。 好了本講就到這裡。
以上就是對Android Drawable 的資料整理,後續繼續補充,謝謝大家的支持!
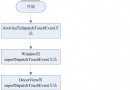 Android中的事件分發機制——ViewGroup的事件分發
綜述Android中的事件分發機制也就是View與ViewGroup的對事件的分發與處理。在ViewGroup的內部包含了許多View,而ViewGroup繼承自View
 Android 橫向ScrollView照片浏覽器實現(致敬郭神)
因為項目中需要用到所以實現的一個橫向的照片浏覽器,使用橫向SrollView實現。實現效果如下:實現思路:在開始做之前呢,本著有輪子就用輪子的精神,也還是去百度找了很久,
 android 軟鍵盤的顯示與隱藏問題的研究
在android中,經常會和輸入法的軟件鍵盤交互。在Manifest文件裡,系統給activity的一個屬性-windowSoftInputMode來控制輸入法的顯示方式
 OpenCV4Android開發 人臉識別篇
最近在android上用opencv搞人臉識別的 現在簡單展示下代碼。環境搭建我前面有寫,不會的自己看可以。 這個事用java api直接調用的更簡單了就,搭建都不需要直