編輯:關於Android編程
最近做一個項目,其中涉及到文件的上傳和下載功能,大家都知道,這個功能實現其實已經爛大街了,遂、直接從網上蕩了一堆代碼用,結果,發現網上的代碼真是良莠不齊,不是寫的不全面,就是有問題,於是自己重新整理了一番,把它們發出來,希望更多人能受用。
文件上傳
通過org.apache.commons.httpclient.HttpClient來實現文件上傳,該jar包可以直接從網上所搜、下載。
  /**
   * @param mContext 上下文
   * @param targetUrl 文件上傳地址
   * @param filePath 文件路徑
   */
  public void uploadFile(final Activity mContext, String targetUrl, final String filePath) {

    System.out.println("targetUrl: " + targetUrl + " filePath: " + filePath);

    if (TextUtils.isEmpty(filePath)) {
      Toast.makeText(mContext, "文件不存在", Toast.LENGTH_SHORT).show();
      return;
    }

    final PostMethod filePost = new PostMethod(targetUrl) {//這個用來中文亂碼
      public String getRequestCharSet() {
        return "UTF-8";
      }
    };

    try {

      final HttpClient client = new HttpClient();

      File file = new File(filePath);

      if (file.exists() && file.isFile()) {

        long fileSize = file.length();

        if (fileSize >= 5 * 1024 * 1024) {
          Toast.makeText(mContext, "文件不得大於5M", Toast.LENGTH_SHORT).show();
          return;
        }

      } else {
        Toast.makeText(mContext, "文件不存在", Toast.LENGTH_SHORT).show();

        return;
      }

      // 上傳文件和參數
      Part[] parts = new Part[]{new CustomFilePart(file.getName(), file),
          new StringPart("filename", file.getName(), "UTF-8")};
      filePost.setRequestEntity(new MultipartRequestEntity(parts, filePost.getParams()));

      new Thread(new Runnable() {

        @Override
        public void run() {

          int statuscode = 0;

          try {
            statuscode = client.executeMethod(filePost);
          } catch (IOException e) {
            e.printStackTrace();
          }

          final int finalStatuscode = statuscode;

          mContext.runOnUiThread(new Runnable() {

            @Override
            public void run() {
              if (finalStatuscode == HttpStatus.SC_OK) {
                Toast.makeText(mContext, "上傳成功", Toast.LENGTH_SHORT).show();
              } else {
                Toast.makeText(mContext, "上傳失敗", Toast.LENGTH_SHORT).show();
              }
            }
          });
        }

      }).start();

    } catch (Exception ex) {
      ex.printStackTrace();
    }
  }
HttpClient的使用,常常會遇到亂碼問題,我們主要在兩個地方解決亂碼問題:
•復寫PostMethod 的getRequestCharSet,指定請求編碼
 final PostMethod filePost = new PostMethod(targetUrl) {//這個用來中文亂碼
      public String getRequestCharSet() {
        return "UTF-8";
      }
    };
•自定義FilePart,指定請求參數編碼
 /**
 * 解決中文文件名亂碼
 */
public class CustomFilePart extends FilePart {
  public CustomFilePart(String filename, File file)
      throws FileNotFoundException {
    super(filename, file);
  }

  protected void sendDispositionHeader(OutputStream out) throws IOException {
    super.sendDispositionHeader(out);
    String filename = getSource().getFileName();
    if (filename != null) {
      out.write(EncodingUtil.getAsciiBytes(FILE_NAME));
      out.write(QUOTE_BYTES);
      out.write(EncodingUtil.getBytes(filename, "UTF-8"));
      out.write(QUOTE_BYTES);
    }
  }
}
使用CustomFilePart添加參數:
Part[] parts = new Part[]{new CustomFilePart(file.getName(), file),
          new StringPart("filename", file.getName(), "UTF-8")};
filePost.setRequestEntity(new MultipartRequestEntity(parts, filePost.getParams()));
文件下載
通過HttpURLConnection下載文件。
  /**
   * @param urlStr  文件地址
   * @param path   文件保存路徑
   * @param fileName 文件名
   * @return 文件的絕對路徑
   */
  public String downFile(String urlStr, String path, String fileName) {

    InputStream inputStream = null;
    String filePath = null;

    try {
      FileUtils fileUtils = new FileUtils();
      //判斷文件是否存在
      if (fileUtils.isFileExist(path + fileName)) {
        System.out.println("exits");
        filePath = SDPATH + path + fileName;
      } else {
        //得到io流
        inputStream = getInputStreamFromURL(urlStr);
        //從input流中將文件寫入SD卡中
        File resultFile = fileUtils.write2SDFromInput(path, fileName, inputStream);
        if (resultFile != null) {

          filePath = resultFile.getPath();
        }
      }
    } catch (Exception e) {
      e.printStackTrace();
    } finally {
      try {
        if (inputStream != null)
          inputStream.close();
      } catch (IOException e) {
        e.printStackTrace();
      }
    }
    return filePath;
  }

  /**
   * 根據URL得到輸入流
   *
   * @param urlStr
   * @return
   */
  public InputStream getInputStreamFromURL(String urlStr) {

    HttpURLConnection urlConn;
    InputStream inputStream = null;
    try {
      url = new URL(urlStr);
      urlConn = (HttpURLConnection) url.openConnection();
      inputStream = urlConn.getInputStream();

    } catch (Exception e) {
      e.printStackTrace();
    }

    return inputStream;
  }
文件下載其實很簡單,說白了,就是通過HTTP獲取InputStream ,然後通過解析InputStream 並寫入到文件即可。
讀取Inputstream並寫入到SDCard。
/**
   * 將一個InputStream裡面的數據寫入到SD卡中
   *
   * @param path 文件保存路徑
   * @param fileName 文件保存的名字
   * @param input 文件輸入流
   * @return 文件
   */
  public File write2SDFromInput(String path, String fileName,
                 InputStream input) {
    File file = null;
    OutputStream output = null;
    try {
      // 創建文件夾
      createSDDir(path);
      // 創建文件
      file = createSDFile(path + fileName);

      // 開啟輸出流,准備寫入文件
      output = new FileOutputStream(file);
      // 緩沖區
      byte[] buffer = new byte[FILESIZE];
      int count;
      while ((count = input.read(buffer)) != -1) {
        // 這裡,請一定按該方式寫入文件,不然時而會出現文件寫入錯誤,數據丟失問題
        output.write(buffer, 0, count);
      }
      output.flush();
    } catch (Exception e) {
      e.printStackTrace();
    } finally {
      try {
        output.close();
        input.close();
      } catch (IOException e) {
        e.printStackTrace();
      }
    }
    return file;
  }
Inputstream寫入到sdcard卡中,有個很重要的地方,先看下OutputStream 的write方法:
我推薦使用第二個方法write(byte[] b, int off, int len) ,目的是為了避免數據丟失。所以寫文件代碼如下:
 while ((count = input.read(buffer)) != -1) {
 // 這裡,請一定按該方式寫入文件,不然時而會出現文件寫入錯誤,數據丟失問題
 output.write(buffer, 0, count);
}
源碼地址:https://github.com/zuiwuyuan/Http_Uploader_Downloader
以上便是我整理的Android Http實現文件的上傳和下載方法,希望對更多的人有所幫助。
 android:SpannableString的應用,TextView中某些文字的點擊事件
各種的Span就是通過SpannableString來封裝樣式的,設置完Span之後需要將Span放入到SpannableString類中,然後SpannableStri
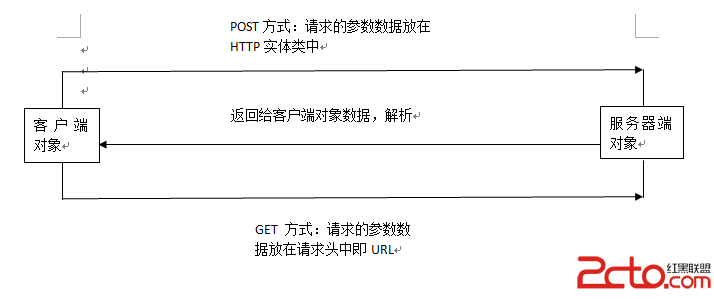 Android客戶端請求服務器端的詳細解釋
Android客戶端請求服務器端的詳細解釋1. Android客戶端與服務器端通信方式:Android與服務器通信通常采用HTTP通信方式和Socket通信方式,而HTT
 android開發游記:RecycleView 實現復雜首頁布局三種方式
做過電商類應用的朋友可能都會遇到一個比較頭疼的問題:復雜的首頁布局如何實現。參考百度糯米,美團,bilibili等應用,都會發現其首頁的布局相對復雜,例如下圖bilibi
 Android應用中使用SharedPreferences類存儲數據的方法
在Android系統中提供了多種存儲技術.通過這些存儲技術可以將數據存儲在各種存儲介質上.比如sharedpreferences可以將數據保存著應用軟件的私有存儲區,這些