編輯:關於Android編程
先來看一張預覽圖:

廢話不多說,直接上代碼:
<RelativeLayout xmlns:android="http://schemas.android.com/apk/res/android"
 android:layout_width="match_parent"
 android:layout_height="match_parent"
 android:clipChildren="false">

 <ImageView
  android:layout_width="match_parent"
  android:layout_height="match_parent"
  android:layout_marginBottom="60dp"
  android:background="@mipmap/www" />


 <LinearLayout
  android:id="@+id/ll_bottom"
  android:layout_width="match_parent"
  android:layout_height="60dp"
  android:layout_alignParentBottom="true"
  android:background="#F8549D"
  android:elevation="10dp"
  android:orientation="horizontal">

  <RelativeLayout
   android:layout_width="0dp"
   android:layout_height="match_parent"
   android:layout_gravity="bottom"
   android:layout_weight="1">

   <ImageView
    android:layout_width="wrap_content"
    android:layout_height="wrap_content"
    android:layout_centerInParent="true"
    android:src="@mipmap/ic_launcher" />

  </RelativeLayout>

  <RelativeLayout
   android:layout_width="70dp"
   android:layout_height="70dp"
   android:layout_gravity="bottom"
   android:background="@drawable/bottom_bg_shape">

   <ImageView
    android:layout_width="30dp"
    android:layout_height="30dp"
    android:layout_centerInParent="true"
    android:src="@mipmap/icon_go" />

  </RelativeLayout>


  <RelativeLayout
   android:layout_width="0dp"
   android:layout_height="match_parent"
   android:layout_gravity="bottom"
   android:layout_weight="1">

   <ImageView
    android:layout_width="wrap_content"
    android:layout_height="wrap_content"
    android:layout_centerInParent="true"
    android:src="@mipmap/ic_launcher" />

  </RelativeLayout>

  <RelativeLayout
   android:layout_width="0dp"
   android:layout_height="match_parent"
   android:layout_gravity="bottom"
   android:layout_weight="1">

   <ImageView
    android:layout_width="wrap_content"
    android:layout_height="wrap_content"
    android:layout_centerInParent="true"
    android:src="@mipmap/ic_launcher" />

  </RelativeLayout>
 </LinearLayout>

</RelativeLayout>
這張圖呢是我剛剛做的,效果是參考了酷狗音樂播放器來完成的,我想說明重點在底部的導航欄:如圖

再來一張反效果預覽圖:

如何使得藍色圓形的播放鍵的顯示越過粉色的范圍。當然經過合理的布局是可以達到這樣的效果的,但是卻有更簡單的方法。也就是在根布局的屬性中加入一個來自Android自身提供的屬性:
android:clipChildren="false"
屬性解釋和說明:
1、android:clipChildren的意思:是否限制子View在其范圍內
2、可以通過android:layout_gravity控制超出的部分如何顯示。
3、只需在根節點設置android:clipChildren為false即可,默認為true
總結
以上就是如何讓安卓(Android)子控件超出父控件的范圍顯示出來的全部內容,大家學會了嗎?希望本文可以幫助到各位。
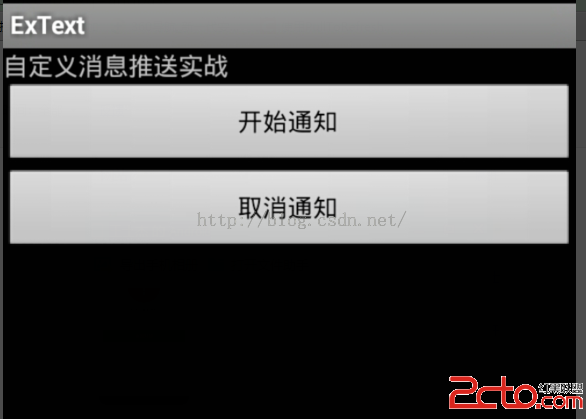 Android自定義消息推送
啥也不說看圖: 點擊後效果: 代碼:主方法: package com.text.ac; import java.util.Calend
 Tomcat+MySQL為自己的APP打造服務器(2-2)Servlet的使用
在上一篇我們只是簡單的對 Servlet 要做的任務、在服務器中的地位有了一個大概的了解,完成了在一個全新的 WorkSpace 中創建第一個 Dynamic Web P
 google官方架構MVP解析與實戰-(從零開始搭建android框架系列(3))
1 前言當然對於MVP的解說也是使用也是層出不窮,我也網絡上也能看到各種版本的解說,之前博客也有文章的更新,裡面有MVP的詳細說明和項目代碼—>Andr
 高仿知乎項目制作流程詳解---第一解:自定義組件的使用
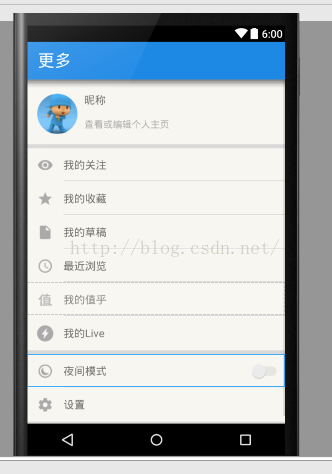
首先來看一下我實現的效果圖: 從”我的關注”開始,每一個條目都是一個自定義組合控件.下面,我來講解一下具體實現步驟: 一.根據