編輯:關於Android編程
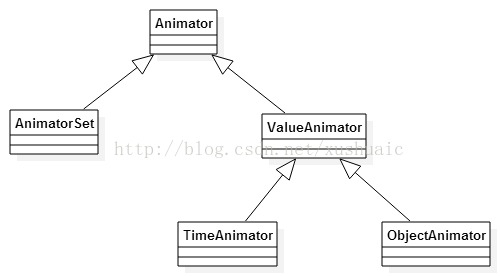
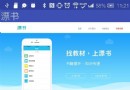
接觸了這麼久的View,總不能一直停留在View裡,現在開始呢,就要學習一個新的知識點:SurfaceView,實際上SurfaceView與View的原理都差不多,只是效率和渲染方式上,SurfaceView要優於View,這也是我們寫這個的原因。今天就看看這個SurfaceView,好了,下面就是今天要說的效果。

界面很簡單,就是一個按鈕以及一個畫板,先看看界面的代碼吧
<LinearLayout xmlns:android="http://schemas.android.com/apk/res/android"
 xmlns:tools="http://schemas.android.com/tools"
 android:layout_width="match_parent"
 android:layout_height="match_parent"
  android:orientation="vertical"
 tools:context="com.example.xinxindemo.MainActivity" >

 <com.example.xinxindemo.view.SecondSurfaceView
  android:id="@+id/surfaceview"
  android:layout_width="match_parent"
  android:layout_height="match_parent"
  android:layout_weight="20"
   />

 <LinearLayout
  android:layout_width="match_parent"
  android:layout_height="55dip"
  android:orientation="horizontal"
  android:padding="5dip" >

  <Button
   android:onClick="onClick"
   android:layout_width="wrap_content"
   android:layout_height="match_parent"
   android:text="clean" />
</LinearLayout>

</LinearLayout>
對吧,界面不是很復雜,下面再看看這個SecondSurfaceView是怎麼實現的;
/**
 * 2016年7月26日17:20:13
 * @author 小瓶蓋 blog
 *
 */
public class SecondSurfaceView extends SurfaceView implements SurfaceHolder.Callback,Runnable{

 /**
  * 是否處於繪制狀態
  */
 private boolean mIsDrawing;
 /**
  * 幫助類
  */
 private SurfaceHolder mHolder;
 /**
  * 畫布
  */
 private Canvas mCanvas;
 /**
  * 路徑
  */
 private Path mPath;
 /**
  * 畫筆
  */
 private Paint mPaint;

 public SecondSurfaceView(Context context, AttributeSet attrs, int defStyle) {
  super(context, attrs, defStyle);
  initView();
 }

 public SecondSurfaceView(Context context, AttributeSet attrs) {
  super(context, attrs);
  initView();
 }

 public SecondSurfaceView(Context context) {
  super(context);
  initView();
 }
 @Override
 public boolean onTouchEvent(MotionEvent event) {

  int x=(int) event.getX();
  int y=(int) event.getY();
  switch (event.getAction()) {
  case MotionEvent.ACTION_DOWN:
   mPath.moveTo(x, y);
   break;
  case MotionEvent.ACTION_MOVE:
   mPath.lineTo(x, y);
   break;
  case MotionEvent.ACTION_UP:

   break;
  default:
   break;
  }

  return true;
 }

 private void initView() {
  mHolder=getHolder();
  mHolder.addCallback(this);
  setFocusable(true);
  setFocusableInTouchMode(true);
  this.setKeepScreenOn(true);

  mPath=new Path();

  mPaint=new Paint();
  mPaint.setAntiAlias(true);
  mPaint.setColor(Color.BLACK);
  mPaint.setStyle(Style.STROKE);
  mPaint.setStrokeWidth(15);
 }

 @Override
 public void run() {
  long start =System.currentTimeMillis();
  while(mIsDrawing){
   draw();
  }
  long end =System.currentTimeMillis();
  if (end-start<100) {
   try {
    Thread.sleep(100-(end-start));
   } catch (Exception e) {
    e.printStackTrace();
   }
  }
 }

 @Override
 public void surfaceChanged(SurfaceHolder arg0, int arg1, int arg2, int arg3) {


 }

 @Override
 public void surfaceCreated(SurfaceHolder arg0) {
  mIsDrawing=true;
  new Thread(this).start();
 }

 @Override
 public void surfaceDestroyed(SurfaceHolder arg0) {
  mIsDrawing=false;

 }
 private void draw(){
  try {
   mCanvas=mHolder.lockCanvas();
   mCanvas.drawColor(Color.WHITE);
   mCanvas.drawPath(mPath, mPaint);
  } catch (Exception e) {
   e.printStackTrace();
  }finally{
   if (mCanvas!=null) {
    mHolder.unlockCanvasAndPost(mCanvas);
   }
  }
 }
 /**
  * 清除內容
  */
 public void clean(){
  initView();
 }
}
然後就是MainActivity.java
/**
 * 2016年7月26日17:20:13
 * @author 小瓶蓋 blog *
 */
public class MainActivity extends Activity{
 SecondSurfaceView surfaceView;

 @Override
 protected void onCreate(Bundle savedInstanceState) {

  super.onCreate(savedInstanceState);
  setContentView(R.layout.activity_main);

  surfaceView=(SecondSurfaceView)findViewById(R.id.surfaceview);
 }

 public void onClick(View v){
  surfaceView.clean();
 }

}
源碼下載:http://xiazai.jb51.net/201607/yuanma/SurfaceView(jb51.net).rar
以上就是本文的全部內容,希望對大家的學習有所幫助,也希望大家多多支持本站。
 Android開發中WebView的簡單使用小結
前言WebView(網絡視圖)在Andorid中就是用來顯示網頁的,下面我們來一起看看它是如何使用的。一、基本使用1.聲明權限,WebView不可避免地要用到網絡,我們要
 Android仿微信、QQ附近好友雷達掃描效果
1.概述 最近一直到在帶實習生,因為人比較多,所以很長一段時間沒有更新博客了,今天更新一篇雷達掃描附近好友效果,以後盡量每周更新一篇,先看一下效果: 2.實現 1、效果
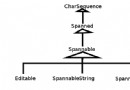 Android----SpannableString
1、背景介紹在開發應用過程中經常會遇到顯示一些不同的字體風格的信息猶如默認的LockScreen上面的時間和充電信息。對於類似的情況,可能第一反應就是用不同的多個Text
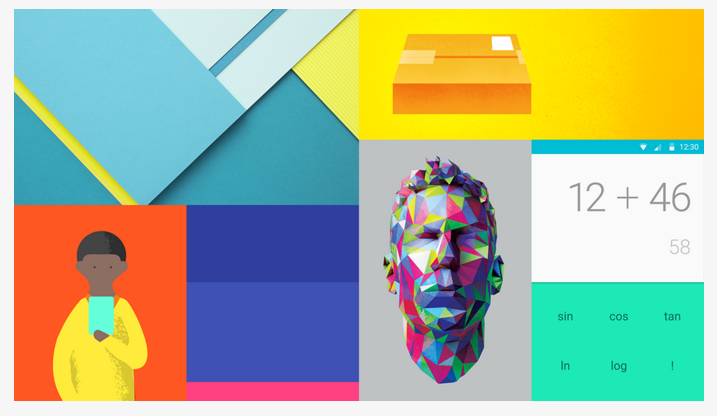
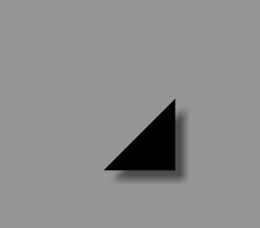 Android矢量圖之VectorDrawable類自由填充色彩
2014年6月26日的I/O 2014開發者大會上谷歌正式推出了Android L,它帶來了全新的設計語言Material Design,新的API也提供了這個類Vect