編輯:關於Android編程
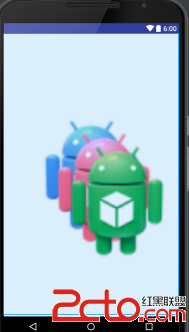
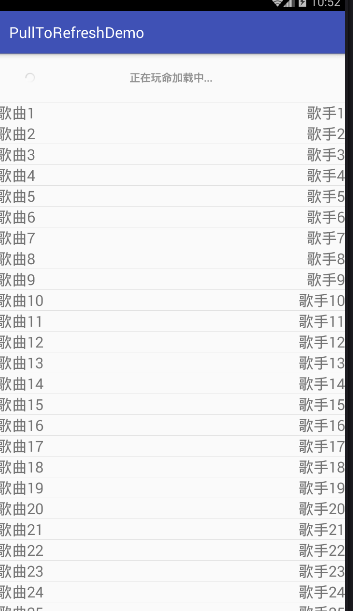
在沒給大家介紹正文之前,先給大家介紹展示下運行圖,如果大家感覺還不錯,請繼續往下閱讀:
相關閱讀:分享Android中pullToRefresh的使用心得
項目已同步至:https://github.com/nanchen2251/pullToRefreshDemo
簡單使用詳情:
1)studio可以直接在app的module設置中直接進行搜索,但是有-的必須添上,而不能用空格代替,為了更加了解這個東西,我還是推薦大家去這裡看看,奉上網址:
https://github.com/chrisbanes/Android-PullToRefresh
所以去git上下載了後通過studio的導入Module功能,導入library,修改library的gradle文件和自己的項目一致
apply plugin: 'com.android.library'
android {
compileSdkVersion 23
buildToolsVersion "24.0.0"
defaultConfig {
minSdkVersion 18
targetSdkVersion 23
}
buildTypes {
release {
minifyEnabled false
proguardFiles getDefaultProguardFile('proguard-android.txt'), 'proguard-rules.txt'
}
}
}
2)然後添加依賴,將app與其進行關聯。
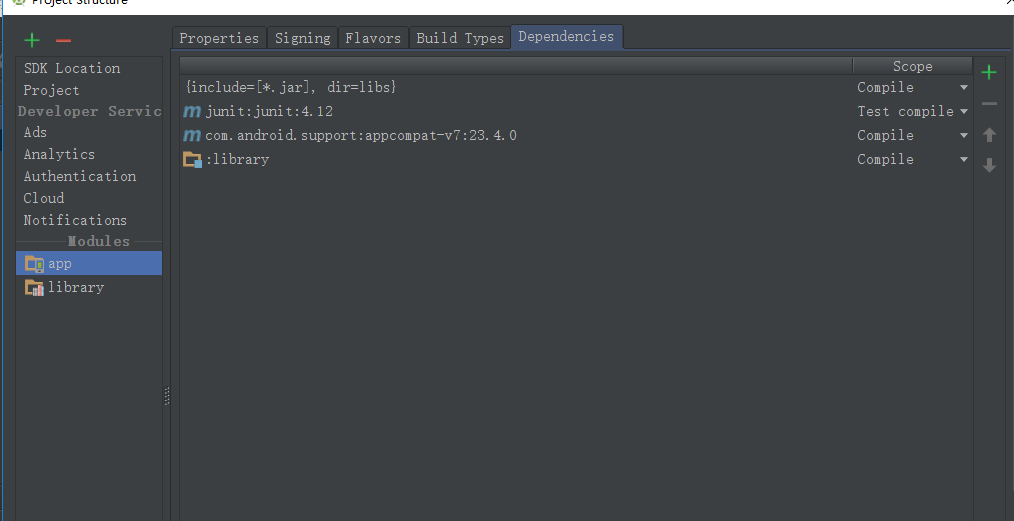
3)下面打開library可以看到很多的東西,這個不僅可以支持ListView,還可以支持GridView和ScollView等等,可謂相當全面,不過是否能和當前火熱的RecyclerView一起使用樓主還沒試過。
4)下面在我們的xml布局中布局,這裡我用了自定義控件的屬性,所以添加了一個xmlns:app=http://schemas.android.com/apk/res-auto
<?xml version="1.0" encoding="utf-8"?>
<RelativeLayout
  xmlns:android="http://schemas.android.com/apk/res/android"
  xmlns:tools="http://schemas.android.com/tools"
  xmlns:app="http://schemas.android.com/apk/res-auto"
  android:layout_width="match_parent"
  android:layout_height="match_parent"
  tools:context="com.example.nanchen.pulltorefreshdemo.MainActivity">
  <com.handmark.pulltorefresh.library.PullToRefreshListView
    android:layout_width="match_parent"
    android:layout_height="match_parent"
    android:id="@+id/main_pull_refresh_lv"
    app:ptrAnimation
    app:ptrHeaderBackground="@android:color/transparent"
    app:ptrHeaderTextColor="#919191"/>
</RelativeLayout>
5)由於我們這裡使用的是它的ListView,所以我們需要一個java Bean 和一個Item的layout進行自定義布局。
package com.example.nanchen.pulltorefreshdemo;
/**
 * Created by 南塵 on 16-7-20.
 */
public class Music {
  private String title;
  private String singer;
  public Music() {
  }
  public Music(String title, String singer) {
    this.title = title;
    this.singer = singer;
  }
  public String getTitle() {
    return title;
  }
  public void setTitle(String title) {
    this.title = title;
  }
  public String getSinger() {
    return singer;
  }
  public void setSinger(String singer) {
    this.singer = singer;
  }
}
還有list_item.xml
<?xml version="1.0" encoding="utf-8"?>
<RelativeLayout xmlns:android="http://schemas.android.com/apk/res/android"
android:layout_width="match_parent"
android:layout_height="match_parent"
android:layout_marginLeft="20dp"
android:layout_marginRight="20dp">
<TextView
android:layout_width="wrap_content"
android:layout_height="wrap_content"
android:id="@+id/item_title"
android:text="歌曲1"
android:textSize="20sp"
android:layout_alignParentLeft="true"/>
<TextView
android:layout_width="wrap_content"
android:layout_height="wrap_content"
android:id="@+id/item_singer"
android:textSize="20sp"
android:text="歌手1"
android:layout_alignParentRight="true"/>
</RelativeLayout>
6)使用非常簡單,在Activity中,代碼注釋已經比較全面了,這裡模擬了異步下載數據任務,並且重寫了Adaper,至於其中為什麼用靜態內部類,這個好處很多,大家可以百度科普。
package com.example.nanchen.pulltorefreshdemo;
import android.content.Context;
import android.os.AsyncTask;
import android.os.Bundle;
import android.support.v7.app.AppCompatActivity;
import android.view.LayoutInflater;
import android.view.View;
import android.view.ViewGroup;
import android.widget.BaseAdapter;
import android.widget.ListView;
import android.widget.TextView;
import com.handmark.pulltorefresh.library.ILoadingLayout;
import com.handmark.pulltorefresh.library.PullToRefreshBase;
import com.handmark.pulltorefresh.library.PullToRefreshListView;
import java.util.ArrayList;
import java.util.List;
public class MainActivity extends AppCompatActivity {
  private PullToRefreshListView refresh_lv;
  private List<Music> list;
  private DataAdapter adapter;
  @Override
  protected void onCreate(Bundle savedInstanceState) {
    super.onCreate(savedInstanceState);
    setContentView(R.layout.activity_main);
    refresh_lv = (PullToRefreshListView) findViewById(R.id.main_pull_refresh_lv);
    list = new ArrayList<>();
    //設置可上拉刷新和下拉刷新
    refresh_lv.setMode(PullToRefreshBase.Mode.BOTH);
    //設置刷新時顯示的文本
    ILoadingLayout startLayout = refresh_lv.getLoadingLayoutProxy(true,false);
    startLayout.setPullLabel("正在下拉刷新...");
    startLayout.setRefreshingLabel("正在玩命加載中...");
    startLayout.setReleaseLabel("放開以刷新");
    ILoadingLayout endLayout = refresh_lv.getLoadingLayoutProxy(false,true);
    endLayout.setPullLabel("正在上拉刷新...");
    endLayout.setRefreshingLabel("正在玩命加載中...");
    endLayout.setReleaseLabel("放開以刷新");
    refresh_lv.setOnRefreshListener(new PullToRefreshBase.OnRefreshListener2<ListView>() {
      @Override
      public void onPullDownToRefresh(PullToRefreshBase<ListView> refreshView) {
        new LoadDataAsyncTask(MainActivity.this).execute();
      }
      @Override
      public void onPullUpToRefresh(PullToRefreshBase<ListView> refreshView) {
        new LoadDataAsyncTask(MainActivity.this).execute();
      }
    });
    loadData();
    adapter = new DataAdapter(this,list);
    refresh_lv.setAdapter(adapter);
  }
  private int count = 1;
  private void loadData(){
    for (int i = 0; i < 10; i++) {
      list.add(new Music("歌曲"+count,"歌手"+count));
      count++;
    }
  }
  /**
   * 異步下載任務
   */
  private static class LoadDataAsyncTask extends AsyncTask<Void,Void,String>{
    private MainActivity mainActivity;
    public LoadDataAsyncTask(MainActivity mainActivity) {
      this.mainActivity = mainActivity;
    }
    @Override
    protected String doInBackground(Void... params) {
      try {
        Thread.sleep(2000);
        mainActivity.loadData();
        return "seccess";
      } catch (InterruptedException e) {
        e.printStackTrace();
      }
      return null;
    }
    /**
     * 完成時的方法
     */
    @Override
    protected void onPostExecute(String s) {
      super.onPostExecute(s);
      if (s.equals("seccess")){
        mainActivity.adapter.notifyDataSetChanged();
        mainActivity.refresh_lv.onRefreshComplete();//刷新完成
      }
    }
  }
  /**
   * 自定義適配器
   */
  private static class DataAdapter extends BaseAdapter{
    private Context context;
    private List<Music> list;
    public DataAdapter(Context context, List<Music> list) {
      this.context = context;
      this.list = list;
    }
    @Override
    public int getCount() {
      if (list != null){
        return list.size();
      }
      return 0;
    }
    @Override
    public Object getItem(int position) {
      return list.get(position);
    }
    @Override
    public long getItemId(int position) {
      return position;
    }
    @Override
    public View getView(int position, View convertView, ViewGroup parent) {
      ViewHolder vh;
      if (convertView == null){
        convertView = LayoutInflater.from(context).inflate(R.layout.list_item,parent,false);
        vh = new ViewHolder();
        vh.tv_title = (TextView) convertView.findViewById(R.id.item_title);
        vh.tv_singer = (TextView) convertView.findViewById(R.id.item_singer);
        convertView.setTag(vh);
      }else{
        vh = (ViewHolder) convertView.getTag();
      }
      Music music = (Music) getItem(position);
      vh.tv_title.setText(music.getTitle());
      vh.tv_singer.setText(music.getSinger());
      return convertView;
    }
    class ViewHolder{
      TextView tv_title;
      TextView tv_singer;
    }
  }
}
以上所述是小編給大家介紹的Android使用PullToRefresh實現上拉加載和下拉刷新效果的代碼,希望對大家有所幫助,如果大家有任何疑問請給我留言,小編會及時回復大家的。在此也非常感謝大家對本站網站的支持!
 Android開發-DesignDemo-AndroidStudio(十)FloatingActionButton(2)
FloatingActionButton和ImageButton的區別:跟上一篇博文對比,這裡左右對調了兩種Button的位置,對實現效果沒有影響,可以自己嘗試換過來,也
 Volley源碼分析
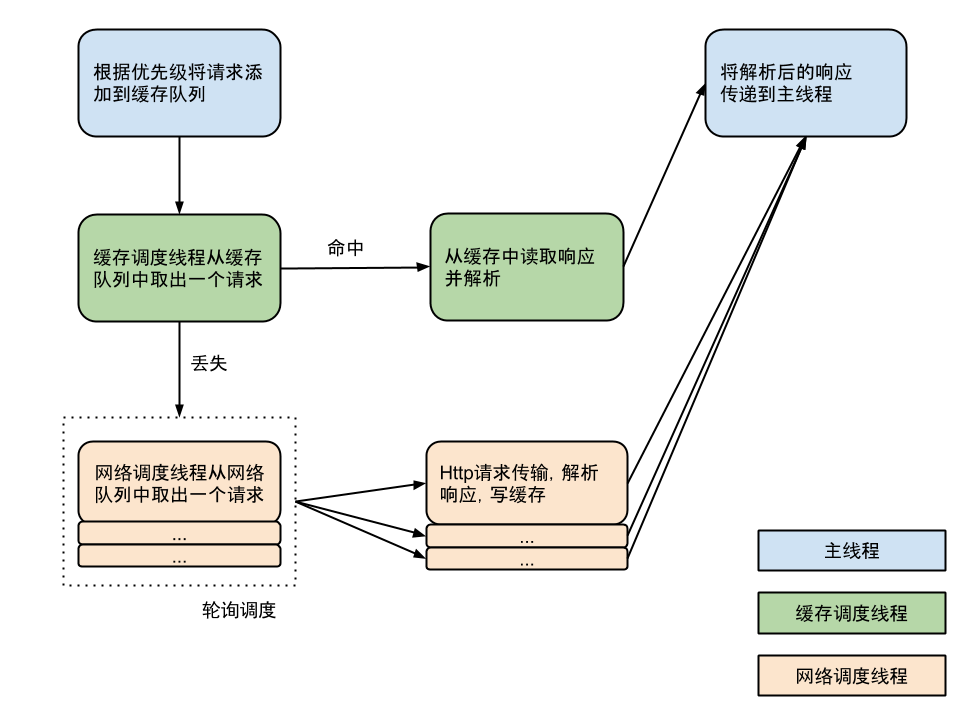
流程圖盜張網上的流程圖源碼分析構建RequestQueueVolley 的調用比較簡單,通過 newRequestQueue(…) 函數新建並啟動一個請求隊
 android Paint setXfermode()方法講解
看過很多開源代碼效果,發現裡面的代碼很多地方都用到這函數,於是想花些時間研究下這個,我現在寫博客一般不可能一下子就寫完,因為我也要查資料,寫代碼去驗證其效果,而且還要找下
 Android AbsoluteLayout和RelativeLayout布局詳解
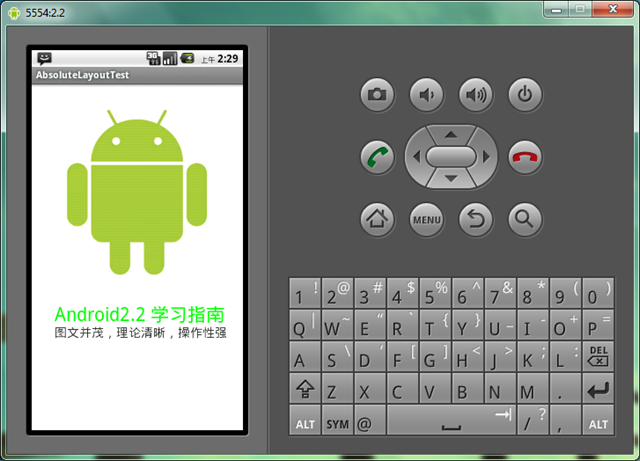
Android 線性布局: AbsoluteLayout布局和RelativeLayout布局。 1、絕對布局 AbsoluteLayout絕對定位Absolu