編輯:關於Android編程
Retrofit介紹:
Retrofit(GitHub主頁https://github.com/square/okhttp)和OkHttp師出同門,也是Square的開源庫,它是一個類型安全的網絡請求庫,Retrofit簡化了網絡請求流程,基於OkHtttp做了封裝,解耦的更徹底:比方說通過注解來配置請求參數,通過工廠來生成CallAdapter,Converter,你可以使用不同的請求適配器(CallAdapter), 比方說RxJava,Java8, Guava。你可以使用不同的反序列化工具(Converter),比方說json, protobuff, xml, moshi等等。
官網 http://square.github.io/retrofit/
github https://github.com/square/retrofit
Retrofit使用:
1.在build.gradle中添加如下配置
compile 'com.squareup.retrofit2:retrofit:2.0.2'
2.初始化Retrofit
   retrofit = new Retrofit.Builder()
        .baseUrl(BASE_URL)
        .addConverterFactory(FastJsonConverterFactory.create())
        .client(mOkHttpClient)
        .build();
3.初始化OkHttpClient
    OkHttpClient.Builder builder = new OkHttpClient().newBuilder()
        .connectTimeout(10, TimeUnit.SECONDS)//設置超時時間
        .readTimeout(10, TimeUnit.SECONDS)//設置讀取超時時間
        .writeTimeout(10, TimeUnit.SECONDS);//設置寫入超時時間
    int cacheSize = 10 * 1024 * 1024; // 10 MiB
    Cache cache = new Cache(App.getContext().getCacheDir(), cacheSize);
    builder.cache(cache);
    builder.addInterceptor(interceptor);
    mOkHttpClient = builder.build();
關於okHttp的攔截器、Cache-Control等這裡就不再做解說了
4.關於ConverterFactory
對於okHttpClient的初始化我們都已經很熟悉了,對ConverterFactory初次接觸多少有點陌生,其實這個就是用來統一解析ResponseBody返回數據的。
常見的ConverterFactory
Gson: com.squareup.retrofit2:converter-gson
Jackson: com.squareup.retrofit2:converter-jackson
Moshi: com.squareup.retrofit2:converter-moshi
Protobuf: com.squareup.retrofit2:converter-protobuf
Wire: com.squareup.retrofit2:converter-wire
Simple XML: com.squareup.retrofit2:converter-simplexml
Scalars (primitives, boxed, and String): com.squareup.retrofit2:converter-scalars
由於項目中使用的是FastJson,所以只能自己自定義ConverterFactory。
5.定義接口 get 請求
(1)get請求 不帶任何參數
public interface IApi {

  @GET("users")//不帶參數get請求
  Call<List<User>> getUsers();

}
(2)get請求 動態路徑 @Path使用
public interface IApi {

  @GET("users/{groupId}")//動態路徑get請求
  Call<List<User>> getUsers(@Path("userId") String userId);

}
public interface IApi {

  @GET("users/{groupId}")
  Call<List<User>> getUsers(@Path("userId") String userId, @Query("age")int age);

}
6.定義接口 post請求
(1)post請求 @body使用
public interface IApi {

  @POST("add")//直接把對象通過ConverterFactory轉化成對應的參數
  Call<List<User>> addUser(@Body User user);

}
(2)post請求 @FormUrlEncoded,@Field使用
public interface IApi {

 @POST("login")
  @FormUrlEncoded//讀參數進行urlEncoded
  Call<User> login(@Field("userId") String username, @Field("password") String password);

}
(3)post請求 @FormUrlEncoded,@FieldMap使用
public interface IApi {

  @POST("login")
  @FormUrlEncoded//讀參數進行urlEncoded
  Call<User> login(@FieldMap HashMap<String, String> paramsMap);

}
(4)post請求 @Multipart,@Part使用
public interface IApi {

  @Multipart
  @POST("login")
  Call<User> login(@Part("userId") String userId, @Part("password") String password);

}
7.Cache-Control緩存控制
public interface IApi {

  @Headers("Cache-Control: max-age=640000")
  @GET("users")//不帶參數get請求
  Call<List<User>> getUsers();

}
  /**
   * 初始化Api
   */
  private void initIApi() {
    iApi = retrofit.create(IApi.class);
  }
  /**
   * 返回Api
   */
  public static IApi api() {

    return api.iApi;
  }
(2)發送請求
  Call<String> call = Api.api().login(userId,password);
  call.enqueue(new Callback<String>() {
  @Override
  public void onResponse(Call<String> call, Response<String> response) {
    Log.e("", "response---->" + response.body());
  }

  @Override
  public void onFailure(Call<String> call, Throwable t) {
    Log.e("", "response----失敗");
  }
  });
9.攔截器配置
攔截器配置要點compile 'com.squareup.retrofit2:retrofit:2.0.0-beta4' compile 'com.squareup.retrofit2:converter-gson:2.0.0-beta4' compile 'com.squareup.retrofit2:adapter-rxjava:2.0.0-beta4' compile 'com.squareup.okhttp3:okhttp:3.0.1' compile 'com.squareup.okhttp3:logging-interceptor:3.0.1'先說 OkHttp 3.0 的配置,3.0 使用層面上的主要改變是,由原本的 okHttp 對象直接各種 set 進行配置改為 Builder 配置模式,所以原本對應的方法應該到 OkHttpClient.Builder 類對象下尋找。我的一些常用配置如下:
HttpLoggingInterceptor interceptor = new HttpLoggingInterceptor();
interceptor.setLevel(HttpLoggingInterceptor.Level.BODY);
OkHttpClient client = new OkHttpClient.Builder()
    .addInterceptor(interceptor)
    .retryOnConnectionFailure(true)
    .connectTimeout(15, TimeUnit.SECONDS)
    .addNetworkInterceptor(mTokenInterceptor)
    .build();
解釋:
(1)HttpLoggingInterceptor 是一個攔截器,用於輸出網絡請求和結果的 Log,可以配置 level 為 BASIC / HEADERS / BODY,都很好理解,對應的是原來 retrofit 的 set log level 方法,現在 retrofit 已經沒有這個方法了,所以只能到 OkHttp 這邊來配置,並且 BODY 對應原來到 FULL.
Interceptor mTokenInterceptor = new Interceptor() {
  @Override public Response intercept(Chain chain) throws IOException {
    Request originalRequest = chain.request();
    if (Your.sToken == null || alreadyHasAuthorizationHeader(originalRequest)) {
      return chain.proceed(originalRequest);
    }
    Request authorised = originalRequest.newBuilder()
      .header("Authorization", Your.sToken)
      .build();
    return chain.proceed(authorised);
  }
};
解釋:
(1)那個 if 判斷意思是,如果你的 token 是空的,就是還沒有請求到 token,比如對於登陸請求,是沒有 token 的,只有等到登陸之後才有 token,這時候就不進行附著上 token。另外,如果你的請求中已經帶有驗證 header 了,比如你手動設置了一個另外的 token,那麼也不需要再附著這一個 token.
Authenticator mAuthenticator = new Authenticator() {
  @Override public Request authenticate(Route route, Response response)
      throws IOException {
    Your.sToken = service.refreshToken();
    return response.request().newBuilder()
            .addHeader("Authorization", newAccessToken)
            .build();
  }
}
然後,對於以上的兩個攔截器,分別使用 OkHttpClient.Builder 對象的 addNetworkInterceptor(mTokenInterceptor) 和 authenticator(mAuthenticator) 即可。
Retrofit:
對於 Retrofit,我的配置是:
Retrofit retrofit = new Retrofit.Builder()
    .baseUrl(AppConfig.BASE_URL)
    .client(client)
    .addCallAdapterFactory(RxJavaCallAdapterFactory.create())
    .addConverterFactory(GsonConverterFactory.create(gson))
    .build();
service = retrofit.create(YourApi.class);
解釋:
(1)baseUrl: 原來的 setEndPoint 方法變成了 baseUrl android手寫筆思路
工作需要,對這方面做了一些了解 一般的手寫對android canvas有點理解的應該都知道,只需要單純的使用drawPath就可以在view上畫畫。
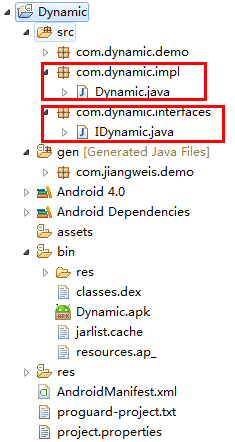 Android中的動態加載機制的學習研究
在目前的軟硬件環境下,Native App與Web App在用戶體驗上有著明顯的優勢,但在實際項目中有些會因為業務的頻繁變更而頻繁的升級客戶端,造成較差的用戶體驗,而這也
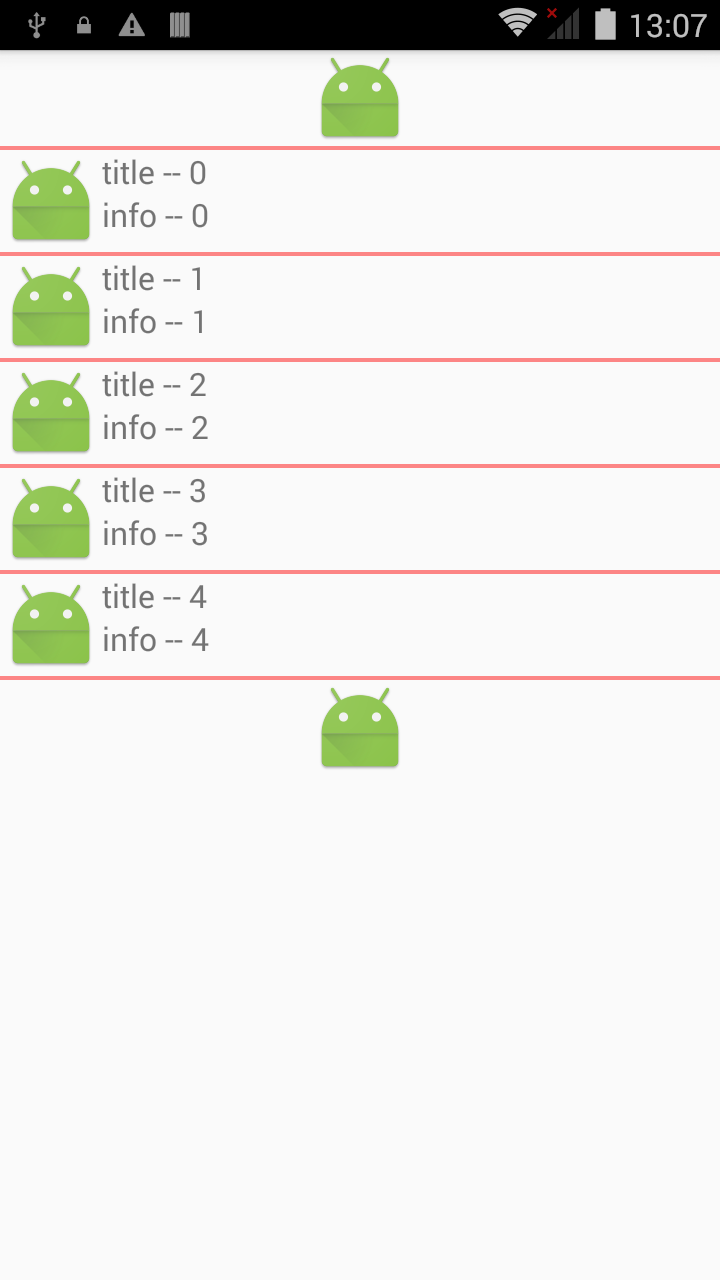 Android UI:ListView - SimpleAdapter實例詳解
Android UI:ListView -- SimpleAdapterSimpleAdapter是擴展性最好的適配器,可以定義各種你想要的布局,而且使用很方便。layo
 Android中使用TextView實現高仿京東淘寶各種倒計時效果
今天給大家帶來的是僅僅使用一個TextView實現一個高仿京東、淘寶、唯品會等各種電商APP的活動倒計時。最近公司一直加班也沒來得及時間去整理,今天難得休息想把這個分享給