編輯:關於Android編程
ImageSwitcher類是ViewSwitcher類的子類,它實現的效果是在完成ImageView的切換並且帶有動畫效果。要使用這個類需要以下兩個步驟:
1)為ImageSwitcher類提供一個ViewFactory,該ViewFactory生成的View組件必須是ImageView。
2)需要切換的時候,只需要嗲用ImageSwitcher的setImageDrawable()、setImageResource()、setImageURL()方法即可實現切換。
activity_main.xml:
<LinearLayout xmlns:android="http://schemas.android.com/apk/res/android"
  xmlns:tools="http://schemas.android.com/tools"
  android:layout_width="match_parent"
  android:layout_height="match_parent"
  android:orientation="vertical"
  tools:context=".MainActivity" >

  <ImageSwitcher
    android:id="@+id/imageswitcher"
    android:layout_width="200dp"
    android:layout_height="200dp"
    android:layout_gravity="center_horizontal" />

  <RelativeLayout
    android:layout_width="match_parent"
    android:layout_height="match_parent"
    android:orientation="horizontal" >

    <Button
      android:id="@+id/back"
      android:layout_width="wrap_content"
      android:layout_height="wrap_content"
      android:layout_alignParentLeft="true"
      android:text="back" />

    <Button
      android:id="@+id/forward"
      android:layout_width="wrap_content"
      android:layout_height="wrap_content"
      android:layout_alignParentRight="true"
      android:text="forward" />
  </RelativeLayout>

</LinearLayout>
Main_activity.java:
package com.example.android_imageswitcher1;

import android.app.Activity;
import android.os.Bundle;
import android.view.View;
import android.view.View.OnClickListener;
import android.widget.Button;
import android.widget.ImageSwitcher;
import android.widget.ImageView;
import android.widget.ViewSwitcher.ViewFactory;

public class MainActivity extends Activity implements ViewFactory,
    OnClickListener {

  ImageSwitcher mImageSwitcher = null;
  Button btn1, btn2;
  int index = 0;
  int[] resId = new int[9];

  @Override
  protected void onCreate(Bundle savedInstanceState) {
    super.onCreate(savedInstanceState);
    setContentView(R.layout.activity_main);
    mImageSwitcher = (ImageSwitcher) this.findViewById(R.id.imageswitcher);
    btn1 = (Button) this.findViewById(R.id.back);
    btn2 = (Button) this.findViewById(R.id.forward);
    btn1.setOnClickListener(this);
    btn2.setOnClickListener(this);
    mImageSwitcher.setFactory(this);
    mImageSwitcher.setInAnimation(this, android.R.anim.slide_in_left);
    mImageSwitcher.setOutAnimation(this, android.R.anim.slide_out_right);
    initResources();
    if (resId.length > 0) {
      mImageSwitcher.setImageResource(resId[0]);
    }
  }

  public void initResources() {
    resId[0] = R.drawable.adobe;
    resId[1] = R.drawable.android;
    resId[2] = R.drawable.circle;
    resId[3] = R.drawable.digg;
    resId[4] = R.drawable.flower;
    resId[5] = R.drawable.gmail;
    resId[6] = R.drawable.imdb;
    resId[7] = R.drawable.photo;
    resId[8] = R.drawable.point;
  }

  @Override
  public View makeView() {
    return new ImageView(MainActivity.this);
  }

  @Override
  public void onClick(View view) {
    int action = view.getId();
    switch (action) {
    case R.id.back:
      index--;
      if (index < 0) {
        index = resId.length - 1;
      }
      mImageSwitcher.setImageResource(resId[index]);
      break;
    case R.id.forward:
      index++;
      if (index > resId.length - 1) {
        index = 0;
      }
      mImageSwitcher.setImageResource(resId[index]);
      break;
    default:
      break;
    }

  }

}
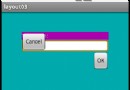
實現的效果如下:

以上就是本文的全部內容,希望對大家學習Android軟件編程有所幫助。
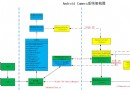 Android4.2.2 CameraService服務啟動和應用端camera初始化記錄
之前的10篇博文主要是記錄了Android4.2.2的SurfaceFlinger的相關內容,為何之前會投入那麼多的時間,原因就在於之前在看camera的架構時,遇到了本
 深入理解Android之AOP
深入理解Android之AOP 一、閒談AOP大家都知道OOP,即ObjectOriented Programming,面向對象編程。而本文要介紹的是AOP。A
 Android下常見終端模擬器和SSH客戶端感受及幾個Tips
之前用Linux Deploy 部署了Kali Linux 。讓我這陣子拿到平板有一半的時間是在用終端模擬器(Terminal Emulator)連接。安卓的終端模擬器,
 淺談Android程序與JavaScript腳本的交互
我們都知道,手機時代的來臨的主要標志是啥?能夠方便的接入互聯網!互聯網展現給我們的方式一般都是網頁,網頁中又必不可少的擁有javascript,所以說,android提供