編輯:關於Android編程
本文實例講述了Android持久化技術之SharedPreferences存儲。分享給大家供大家參考,具體如下:
1、SharedPreferences存儲
在前面一篇文章《Android持久化技術之文件的讀取與寫入實例詳解》中,我們介紹了Android持久化技術的文件的讀取與寫入。在本文中,繼續介紹Android持久化技術另外一個SharedPreferences存儲。
(1)SharedPreferences存儲方式是基於key-value的,通過key可以找到對應的value。
(2)支持多種數據類型存儲,比如字符串、整形、布爾型等,並有對應的存儲與獲取方法。
(3)獲取SharedPreferences對象有多種方式。
使用Context類的getSharedPreferences方法。
使用Activity類的getPreferences方法
使用PreferenceManager類的getDefaultSharedPreferences方法
(4)當存儲時,需要通過SharedPreferences對象獲取SharedPreferences.Editor對象
(5)默認存儲路徑為:/data/data/包名/shared_prefs/目錄
(6)存儲文件類型為xml文件
2、示例
場景:點擊保存按鈕,存儲數據;點擊恢復按鈕,恢復數據。
(1)activity_main.xml
<?xml version="1.0" encoding="utf-8"?>
<TableLayout xmlns:android="http://schemas.android.com/apk/res/android"
  android:layout_width="match_parent"
  android:layout_height="match_parent"
  android:stretchColumns="1"
  >
  <TableRow
    android:id="@+id/tableRow1"
    android:layout_width="wrap_content"
    android:layout_height="wrap_content" >
    <TextView
      android:layout_width="wrap_content"
      android:layout_height="wrap_content"
      android:text="Account:" />
    <EditText
      android:id="@+id/account"
      android:layout_width="wrap_content"
      android:layout_height="wrap_content"
      android:hint="Input your account here"
      android:ems="10" >
    </EditText>
  </TableRow>
  <TableRow
    android:id="@+id/tableRow2"
    android:layout_width="wrap_content"
    android:layout_height="wrap_content" >
    <TextView
      android:layout_width="wrap_content"
      android:layout_height="wrap_content"
      android:text="Password:"
       />
    <EditText
      android:id="@+id/password"
      android:layout_width="wrap_content"
      android:layout_height="wrap_content"
      android:ems="10"
      android:inputType="textPassword"
      >
    </EditText>
  </TableRow>
  <TableRow
    android:id="@+id/tableRow3"
    android:layout_width="wrap_content"
    android:layout_height="wrap_content" >
    <Button
    android:id="@+id/login"
    android:layout_span="2"
    android:layout_height="wrap_content"
    android:text="save data" />
  </TableRow>
  <TextView
    android:layout_width="wrap_content"
    android:layout_height="20dp"
    android:background="#ff0000"
    android:text="我是萬惡的分割線"
    android:textSize="20sp"
    android:gravity="center"
    />
   <TableRow
    android:id="@+id/tableRow4"
    android:layout_width="wrap_content"
    android:layout_height="wrap_content" >
    <TextView
      android:layout_width="wrap_content"
      android:layout_height="wrap_content"
      android:text="Account:" />
    <EditText
      android:id="@+id/account2"
      android:layout_width="wrap_content"
      android:layout_height="wrap_content"
      android:ems="10" >
    </EditText>
  </TableRow>
  <TableRow
    android:id="@+id/tableRow5"
    android:layout_width="wrap_content"
    android:layout_height="wrap_content" >
    <TextView
      android:layout_width="wrap_content"
      android:layout_height="wrap_content"
      android:text="Password:"
       />
    <EditText
      android:id="@+id/password2"
      android:layout_width="wrap_content"
      android:layout_height="wrap_content"
      android:ems="10"
      android:inputType="textPassword"
      >
    </EditText>
  </TableRow>
  <TableRow
    android:id="@+id/tableRow6"
    android:layout_width="wrap_content"
    android:layout_height="wrap_content" >
    <Button
    android:id="@+id/login2"
    android:layout_span="2"
    android:layout_height="wrap_content"
    android:text="restore data" />
  </TableRow>
</TableLayout>
(2)MainActivity.java
package com.example.testsharedpreferences;
import android.app.Activity;
import android.content.SharedPreferences;
import android.os.Bundle;
import android.view.Menu;
import android.view.View;
import android.view.View.OnClickListener;
import android.widget.Button;
import android.widget.EditText;
import android.widget.Toast;
/**
 * Android 持久化技術-----SharedPreferences存儲
 * @author yy
 *
 */
public class MainActivity extends Activity {
  private EditText accountEdit;
  private EditText passwordEdit;
  private Button saveButton;
  private Button restoreButton;
  private SharedPreferences pref;
  private SharedPreferences.Editor editor;
  @Override
  protected void onCreate(Bundle savedInstanceState) {
    super.onCreate(savedInstanceState);
    setContentView(R.layout.activity_main);
    //存儲按鈕
    saveButton = (Button) findViewById(R.id.login);
    //為存儲按鈕添加點擊事件
    saveButton.setOnClickListener(new OnClickListener() {
      @Override
      public void onClick(View arg0) {
        //獲取SharedPreferences對象
        //第一個參數:文件名,沒有則新建。第二個參數:寫入模式-覆蓋
        pref = getSharedPreferences("second", MODE_PRIVATE);
        //獲取SharedPreferences.Editor對象
        editor = pref.edit();
        //獲取輸入的賬號內容
        accountEdit = (EditText) findViewById(R.id.account);
        String account = accountEdit.getText().toString();
        //獲取輸入的密碼內容
        passwordEdit = (EditText) findViewById(R.id.password);
        String password = passwordEdit.getText().toString();
        //存儲用戶名和密碼
        editor.putString("account", account);
        editor.putString("password", password);
        //提交
        editor.commit();
        Toast.makeText(getApplicationContext(), "保存成功", Toast.LENGTH_SHORT).show();
      }
    });
    //獲取恢復按鈕對象
    restoreButton = (Button) findViewById(R.id.login2);
    //添加事件
    restoreButton.setOnClickListener(new OnClickListener() {
      @Override
      public void onClick(View arg0) {
        //獲取SharedPreference對象
        pref = getSharedPreferences("second", MODE_PRIVATE);
        //讀取內容
        String account = pref.getString("account", "this is default value");
        String password = pref.getString("password", "this is default value");
        //設置到響應位置
        EditText editText2 = (EditText)findViewById(R.id.account2);
        editText2.setText(account);
        EditText passwordText2 = (EditText) findViewById(R.id.password2);
        passwordText2.setText(password);
        Toast.makeText(getApplicationContext(), "恢復成功", Toast.LENGTH_SHORT).show();
      }
    });
  }
  @Override
  public boolean onCreateOptionsMenu(Menu menu) {
    // Inflate the menu; this adds items to the action bar if it is present.
    getMenuInflater().inflate(R.menu.main, menu);
    return true;
  }
}
3、結果
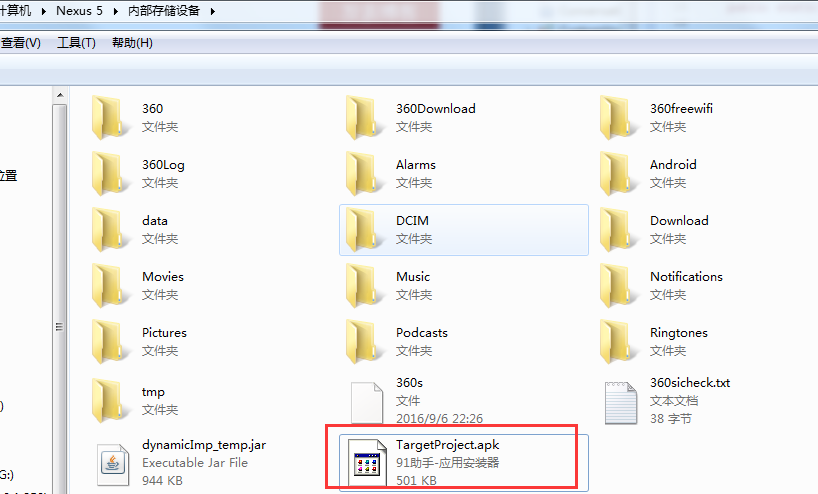
輸入內容後,當點擊“save data”按鈕後,存儲文件為second.xml,如下:

對應內容:

下面是效果圖:


希望本文所述對大家Android程序設計有所幫助。
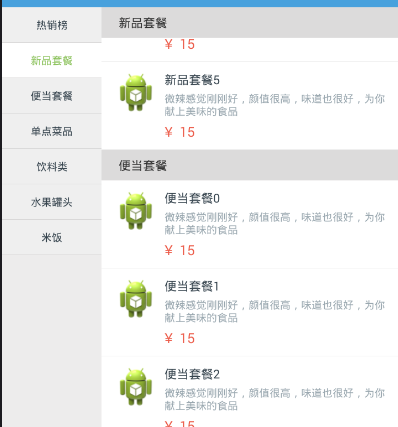 仿餓了嗎點餐界面兩個ListView聯動效果
如圖是效果圖是仿餓了的點餐界面1.點擊左側的ListView,通過在在適配器中設置Item來改變顏色,再通過notifyDataSetInvalidated來刷新並用lv
 Android Fragment 你應該知道的一切
很久以前寫過兩篇Fragment的介紹,主要就是介紹其功能:Android Fragment 真正的完全解析(上)和Android Fragment 真正的
 Android_AsyncTask
一.AsyncTask的簡介在Android中實現異步任務機制有兩種方式,Handler和AsyncTask。Handler模式需要為每一個任務創建一個新的線程,任務完成
 微信朋友圈性格標簽怎麼弄 微信朋友圈性格標簽怎麼生成
打開微信朋友圈,就被一組微信款性格標簽刷爆,在別人眼裡你究竟是一個怎樣的人呢?踏實務實還是傲嬌?這麼好玩的微信朋友圈性格標簽怎麼弄?下面小編就告訴大家微信朋