編輯:關於Android編程
本文實例講述了Android開發實現TextView顯示豐富的文本的方法。分享給大家供大家參考,具體如下:
如圖,顯示html的元素控件,點擊連接實現上網,發email,撥號

實現源碼如下:
MainActivity.java
package com.example.textview2;
import android.os.Bundle;
import android.app.Activity;
import android.text.Html;
import android.text.method.LinkMovementMethod;
import android.view.Menu;
import android.widget.TextView;
public class MainActivity extends Activity {
  private TextView textView1, textView2;
  @Override
  protected void onCreate(Bundle savedInstanceState) {
    super.onCreate(savedInstanceState);
    setContentView(R.layout.activity_main);
    textView1 = (TextView) this.findViewById(R.id.textview1);
    textView2 = (TextView) this.findViewById(R.id.textview2);
    // 添加一段html的標志
    String html = "<font color='red'></font><br><br><br>";
    html += "<font color='#0000ff'><big><i></i></big></font><p>";
    html += "<big><a href='http://www.baidu.com'>百度</a></big><br>";
    CharSequence charSequence = Html.fromHtml(html);
    textView1.setText(charSequence);
    textView1.setMovementMethod(LinkMovementMethod.getInstance());// 點擊的時候產生超鏈接
    String text = "我的URL:http://www.sina.com\n";
    text += "我的email:abcd@126.com\n";
    text += "我的電話:+ 86 010-89487389";
    textView2.setText(text);
    textView2.setMovementMethod(LinkMovementMethod.getInstance());
  }
  @Override
  public boolean onCreateOptionsMenu(Menu menu) {
    // Inflate the menu; this adds items to the action bar if it is present.
    getMenuInflater().inflate(R.menu.main, menu);
    return true;
  }
}
strings.xml
<?xml version="1.0" encoding="utf-8"?>
<resources>
  <string name="action_settings">Settings</string>
  <string name="hello_world">Hello world!</string>
  <string name="app_name">如何顯示html的元素控件</string>
  <color name="green">#00FF00</color>
  <string name="link_text"><a href="tel:13693207964">打電話</a></string>
</resources>
activity_main.xml
<RelativeLayout xmlns:android="http://schemas.android.com/apk/res/android"
  xmlns:tools="http://schemas.android.com/tools"
  android:layout_width="match_parent"
  android:layout_height="match_parent"
  android:paddingBottom="@dimen/activity_vertical_margin"
  android:paddingLeft="@dimen/activity_horizontal_margin"
  android:paddingRight="@dimen/activity_horizontal_margin"
  android:paddingTop="@dimen/activity_vertical_margin"
  tools:context=".MainActivity" >
  <TextView android:layout_width="fill_parent"
    android:layout_height="wrap_content" android:id="@+id/textview1"
    android:padding="20sp" />
  <TextView
    android:id="@+id/textview2"
    android:layout_width="fill_parent"
    android:layout_height="wrap_content"
    android:autoLink="all"
    android:padding="20sp"
    android:text="@string/link_text"
    android:textSize="20sp" />
</RelativeLayout>
希望本文所述對大家Android程序設計有所幫助。
 玩轉Android Camera開發(五):基於Google自帶算法實時檢測人臉並繪制人臉框(網絡首發,附完整demo)
本文主要介紹使用Google自帶的FaceDetectionListener進行人臉檢測,並將檢測到的人臉用矩形框繪制出來。本文代碼基於PlayCameraV1.0.0,
 Android 開發:帶觸控的圖表(基金圖表的實現)
帶觸控的圖表類,後期會把這個功能類,添加到這個框架裡:效果如下public class BaseFundChartView extends View implements
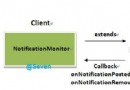 Android 4.4 KitKat NotificationManagerService使用詳解與原理分析(二)__原理分析
前置文章: 《Android 4.4 KitKat NotificationManagerService使用詳解與原理分析(一)__使用詳解》 概況 在上一
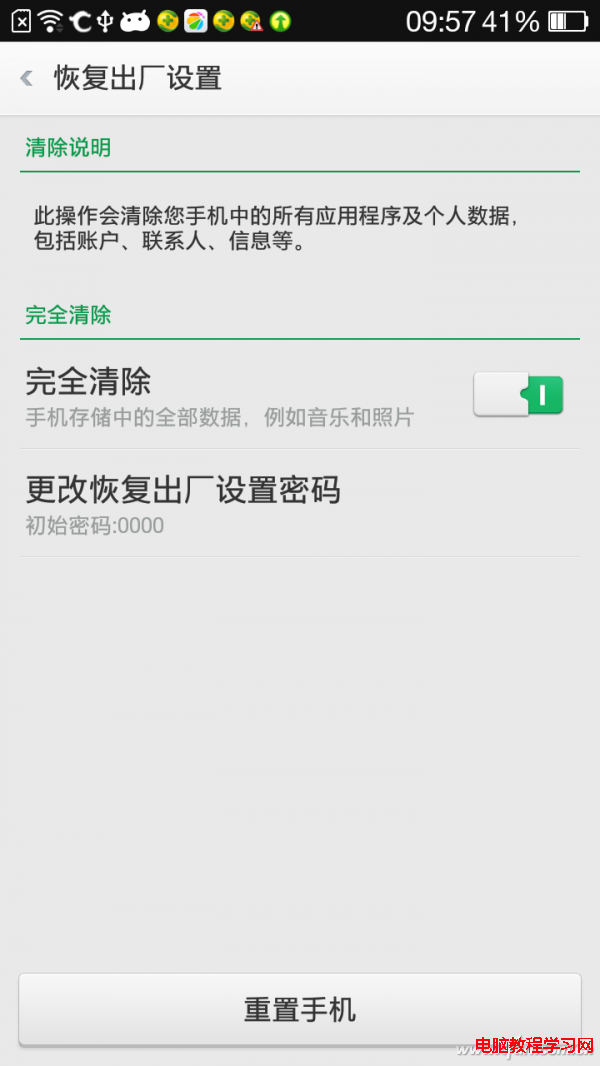 如何徹底清除Android手機的使用痕跡
手機中保存並記錄著很多我們個人數據,比如浏覽器記錄、微信賬號、聊天記錄等,這些信息如果被有心人盯上自然後後患無窮。有時候我們會將手機借給好友,或是購新機後在