編輯:關於Android編程
本文主要介紹使用Google自帶的FaceDetectionListener進行人臉檢測,並將檢測到的人臉用矩形框繪制出來。本文代碼基於PlayCameraV1.0.0,在Camera的open和preview流程上進行了改動。原先是放在單獨線程裡,這次我又把它放到Surfaceview的生命周期裡進行打開和開預覽。
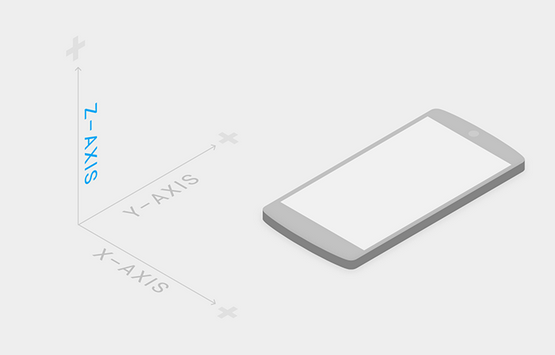
首先要反省下,去年就推出了靜態圖片的人臉檢測demo,當時許諾一周內推出Camera預覽實時檢測並繪制的demo,結果拖到現在才整。哎,屌絲一天又一天,蹉跎啊。在demo制作過程中還是遇到了一些麻煩的,第一個問題是檢測到人臉rect默認是以預覽界面為坐標系,這個坐標系是經過變換的,中心點為(0, 0),左上頂點坐標是(-1000, -1000),右下頂點是(1000, 1000).也就是說不管預覽預覽Surfaceview多大,檢測出來的rect的坐標始終對應的是在這個變換坐標系。而android裡默認的view的坐標系是,左上頂點為(0, 0),橫為x軸,豎為y軸。這就需要把rect坐標變換下。另一個難點是,這個人臉檢測必須在camera開啟後進行start,如果一旦拍照或停預覽,則需要再次激活。激活時需要加個延遲,否則的話就不起作用了。
另外,仍要交代下,在預覽界面實時檢測人臉並繪制(基於Google自帶算法),還是有兩個思路的。一是在PreviewCallback裡的onPreviewFrame裡得到yuv數據後,轉成rgb後再轉成Bitmap,然後利用靜態圖片的人臉檢測流程,即利用FaceDetector類進行檢測。另一個思路是,直接實現FaceDetectionListener接口,這樣在onFaceDetection()裡就得到檢測到的人臉Face[] faces數據了。這裡只需控制何時start,何時stop即可,這都是android標准接口。毫無疑問,這種方法是上選。從Android4.0後android源碼裡的camera app都是用的這個接口進行人臉檢測。下面上源碼:
考慮到下次准備介紹JNI裡用opencv檢測人臉,為此雜家新建了一個包org.yanzi.mode裡面准備放所有的關於圖像的東西。新建文件GoogleFaceDetect.java實現FaceDetectionListener,在構造函數裡傳進來一個Handler,將檢測到的人臉數據發給Activity,經Activity中轉再刷新UI.
package org.yanzi.mode;

import org.yanzi.util.EventUtil;

import android.content.Context;
import android.hardware.Camera;
import android.hardware.Camera.Face;
import android.hardware.Camera.FaceDetectionListener;
import android.os.Handler;
import android.os.Message;
import android.util.Log;

public class GoogleFaceDetect implements FaceDetectionListener {
	private static final String TAG = "YanZi";
	private Context mContext;
	private Handler mHander;
	public GoogleFaceDetect(Context c, Handler handler){
		mContext = c;
		mHander = handler;
	}
	@Override
	public void onFaceDetection(Face[] faces, Camera camera) {
		// TODO Auto-generated method stub

		Log.i(TAG, "onFaceDetection...");
		if(faces != null){

			Message m = mHander.obtainMessage();
			m.what = EventUtil.UPDATE_FACE_RECT;
			m.obj = faces;
			m.sendToTarget();
		}
	}

/*	private Rect getPropUIFaceRect(Rect r){
		Log.i(TAG, "人臉檢測  = " + r.flattenToString());
		Matrix m = new Matrix();
		boolean mirror = false;
		m.setScale(mirror ? -1 : 1, 1);
		Point p = DisplayUtil.getScreenMetrics(mContext);
		int uiWidth = p.x;
		int uiHeight = p.y;
		m.postScale(uiWidth/2000f, uiHeight/2000f);
		int leftNew = (r.left + 1000)*uiWidth/2000;
		int topNew = (r.top + 1000)*uiHeight/2000;
		int rightNew = (r.right + 1000)*uiWidth/2000;
		int bottomNew = (r.bottom + 1000)*uiHeight/2000;

		return new Rect(leftNew, topNew, rightNew, bottomNew);
	}*/

}
package org.yanzi.ui;

import org.yanzi.camera.CameraInterface;
import org.yanzi.playcamera.R;
import org.yanzi.util.Util;

import android.content.Context;
import android.graphics.Canvas;
import android.graphics.Color;
import android.graphics.Matrix;
import android.graphics.Paint;
import android.graphics.Paint.Style;
import android.graphics.RectF;
import android.graphics.drawable.Drawable;
import android.hardware.Camera.CameraInfo;
import android.hardware.Camera.Face;
import android.util.AttributeSet;
import android.widget.ImageView;

public class FaceView extends ImageView {
	private static final String TAG = "YanZi";
	private Context mContext;
	private Paint mLinePaint;
	private Face[] mFaces;
	private Matrix mMatrix = new Matrix();
	private RectF mRect = new RectF();
	private Drawable mFaceIndicator = null;
	public FaceView(Context context, AttributeSet attrs) {
		super(context, attrs);
		// TODO Auto-generated constructor stub
		initPaint();
		mContext = context;
		mFaceIndicator = getResources().getDrawable(R.drawable.ic_face_find_2);
	}


	public void setFaces(Face[] faces){
		this.mFaces = faces;
		invalidate();
	}
	public void clearFaces(){
		mFaces = null;
		invalidate();
	}


	@Override
	protected void onDraw(Canvas canvas) {
		// TODO Auto-generated method stub
		if(mFaces == null || mFaces.length < 1){
			return;
		}
		boolean isMirror = false;
		int Id = CameraInterface.getInstance().getCameraId();
		if(Id == CameraInfo.CAMERA_FACING_BACK){
			isMirror = false; //後置Camera無需mirror
		}else if(Id == CameraInfo.CAMERA_FACING_FRONT){
			isMirror = true;  //前置Camera需要mirror
		}
		Util.prepareMatrix(mMatrix, isMirror, 90, getWidth(), getHeight());
		canvas.save();
		mMatrix.postRotate(0); //Matrix.postRotate默認是順時針
		canvas.rotate(-0);   //Canvas.rotate()默認是逆時針
		for(int i = 0; i< mFaces.length; i++){
			mRect.set(mFaces[i].rect);
			mMatrix.mapRect(mRect);
            mFaceIndicator.setBounds(Math.round(mRect.left), Math.round(mRect.top),
                    Math.round(mRect.right), Math.round(mRect.bottom));
            mFaceIndicator.draw(canvas);
//			canvas.drawRect(mRect, mLinePaint);
		}
		canvas.restore();
		super.onDraw(canvas);
	}

	private void initPaint(){
		mLinePaint = new Paint(Paint.ANTI_ALIAS_FLAG);
//		int color = Color.rgb(0, 150, 255);
		int color = Color.rgb(98, 212, 68);
//		mLinePaint.setColor(Color.RED);
		mLinePaint.setColor(color);
		mLinePaint.setStyle(Style.STROKE);
		mLinePaint.setStrokeWidth(5f);
		mLinePaint.setAlpha(180);
	}
}
注意事項有兩個:1.就是Rect變換問題,通過Util.prepareMatrix(mMatrix, isMirror, 90, getWidth(), getHeight());進行變換,為了解決人臉檢測坐標系和實際繪制坐標系不一致問題。第三個參數90,是因為前手攝像頭都設置了mCamera.setDisplayOrientation(90);
接下來的Matrix和canvas兩個旋轉我傳的都是0,所以此demo只能在手機0、90、180、270四個標准角度下得到的人臉坐標是正確的。其他情況下,需要將OrientationEventListener得到的角度傳過來。為了簡單,我這塊就麼寫,OrientationEventListener的用法參見我的前文,後續將再推出一個demo。
最終是通過mMatrix.mapRect(mRect);來將mRect變換成UI坐標系的人臉Rect.
Util.prepareMatrix()代碼如下:
package org.yanzi.util;

import android.graphics.Matrix;

public class Util {
    public static void prepareMatrix(Matrix matrix, boolean mirror, int displayOrientation,
            int viewWidth, int viewHeight) {
        // Need mirror for front camera.
        matrix.setScale(mirror ? -1 : 1, 1);
        // This is the value for android.hardware.Camera.setDisplayOrientation.
        matrix.postRotate(displayOrientation);
        // Camera driver coordinates range from (-1000, -1000) to (1000, 1000).
        // UI coordinates range from (0, 0) to (width, height).
        matrix.postScale(viewWidth / 2000f, viewHeight / 2000f);
        matrix.postTranslate(viewWidth / 2f, viewHeight / 2f);
    }
}
本次將這兩個流程放到了Surfaceview的兩個生命周期裡,因為之前放在單獨Thread還是會有一些問題。如個別手機上,Surfaceview創建的很慢,這時的SurfaceHolder還沒准備好,結果Camera已經走到開預覽了,導致黑屏問題。
@Override
	public void surfaceCreated(SurfaceHolder holder) {
		// TODO Auto-generated method stub
		Log.i(TAG, "surfaceCreated...");
		CameraInterface.getInstance().doOpenCamera(null, CameraInfo.CAMERA_FACING_BACK);
	}

	@Override
	public void surfaceChanged(SurfaceHolder holder, int format, int width,
			int height) {
		// TODO Auto-generated method stub
		Log.i(TAG, "surfaceChanged...");
		CameraInterface.getInstance().doStartPreview(mSurfaceHolder, 1.333f);
}若要開啟人臉檢測,必須要在Camera已經startPreview完畢之後。本文暫時采用在onCreate裡延遲1.5s開啟人臉檢測,1.5s基本上camera已經開預覽了。後續准備將Handler傳到Surfaceview裡,在開預覽後通過Handler通知Activity已經開啟預覽了。
自定義的MainHandler: private class MainHandler extends Handler{
@Override
public void handleMessage(Message msg) {
// TODO Auto-generated method stub
switch (msg.what){
case EventUtil.UPDATE_FACE_RECT:
Face[] faces = (Face[]) msg.obj;
faceView.setFaces(faces);
break;
case EventUtil.CAMERA_HAS_STARTED_PREVIEW:
startGoogleFaceDetect();
break;
}
super.handleMessage(msg);
}
} protected void onCreate(Bundle savedInstanceState) {
super.onCreate(savedInstanceState);
setContentView(R.layout.activity_camera);
initUI();
initViewParams();
mMainHandler = new MainHandler();
googleFaceDetect = new GoogleFaceDetect(getApplicationContext(), mMainHandler);
shutterBtn.setOnClickListener(new BtnListeners());
switchBtn.setOnClickListener(new BtnListeners());
mMainHandler.sendEmptyMessageDelayed(EventUtil.CAMERA_HAS_STARTED_PREVIEW, 1500);
}這裡寫了兩個重要的方法分別是開始檢測和停止檢測:private void startGoogleFaceDetect(){
Camera.Parameters params = CameraInterface.getInstance().getCameraParams();
if(params.getMaxNumDetectedFaces() > 0){
if(faceView != null){
faceView.clearFaces();
faceView.setVisibility(View.VISIBLE);
}
CameraInterface.getInstance().getCameraDevice().setFaceDetectionListener(googleFaceDetect);
CameraInterface.getInstance().getCameraDevice().startFaceDetection();
}
}
private void stopGoogleFaceDetect(){
Camera.Parameters params = CameraInterface.getInstance().getCameraParams();
if(params.getMaxNumDetectedFaces() > 0){
CameraInterface.getInstance().getCameraDevice().setFaceDetectionListener(null);
CameraInterface.getInstance().getCameraDevice().stopFaceDetection();
faceView.clearFaces();
}
}先來看下官方對startFaceDetection()一段注釋:
    /**
     * Starts the face detection. This should be called after preview is started.
     * The camera will notify {@link FaceDetectionListener} of the detected
     * faces in the preview frame. The detected faces may be the same as the
     * previous ones. Applications should call {@link #stopFaceDetection} to
     * stop the face detection. This method is supported if {@link
     * Parameters#getMaxNumDetectedFaces()} returns a number larger than 0.
     * If the face detection has started, apps should not call this again.
     *
     * When the face detection is running, {@link Parameters#setWhiteBalance(String)},
     * {@link Parameters#setFocusAreas(List)}, and {@link Parameters#setMeteringAreas(List)}
     * have no effect. The camera uses the detected faces to do auto-white balance,
     * auto exposure, and autofocus.
     *
     * If the apps call {@link #autoFocus(AutoFocusCallback)}, the camera
     * will stop sending face callbacks. The last face callback indicates the
     * areas used to do autofocus. After focus completes, face detection will
     * resume sending face callbacks. If the apps call {@link
     * #cancelAutoFocus()}, the face callbacks will also resume.
     *
     * After calling {@link #takePicture(Camera.ShutterCallback, Camera.PictureCallback,
     * Camera.PictureCallback)} or {@link #stopPreview()}, and then resuming
     * preview with {@link #startPreview()}, the apps should call this method
     * again to resume face detection.
     *
     * @throws IllegalArgumentException if the face detection is unsupported.
     * @throws RuntimeException if the method fails or the face detection is
     *         already running.
     * @see FaceDetectionListener
     * @see #stopFaceDetection()
     * @see Parameters#getMaxNumDetectedFaces()
     */
相信大家都能看懂,雜家就不一句一句翻了。關鍵信息是,在調用takePicture和stopPreview時,必須重新start來恢復人臉檢測。而在拍照前是不需要手動stop的。經雜家測試,手動stop反而會壞事。另外就是takePicture之後(實際上camera做了stopPreview和startPreview),不能立即startFaceDetection(),如果立即做是沒有效果的,必須加個延時。 private void takePicture(){
CameraInterface.getInstance().doTakePicture();
mMainHandler.sendEmptyMessageDelayed(EventUtil.CAMERA_HAS_STARTED_PREVIEW, 1500);
} private void switchCamera(){
stopGoogleFaceDetect();
int newId = (CameraInterface.getInstance().getCameraId() + 1)%2;
CameraInterface.getInstance().doStopCamera();
CameraInterface.getInstance().doOpenCamera(null, newId);
CameraInterface.getInstance().doStartPreview(surfaceView.getSurfaceHolder(), previewRate);
startGoogleFaceDetect();
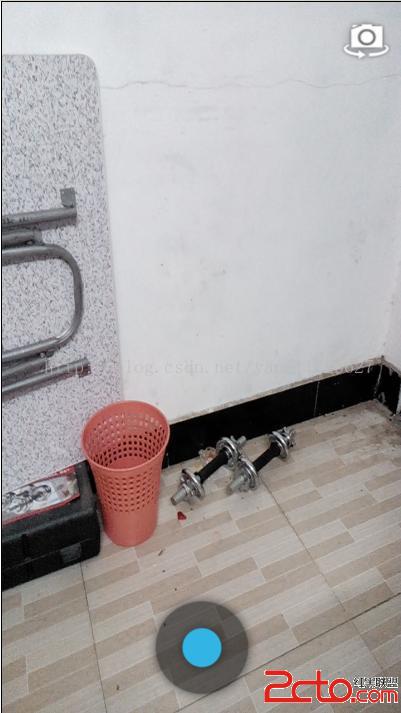
}下圖為預覽界面,拍照圖片和切換圖片直接換成了Android4.4原生的,原來的實在太丑了。
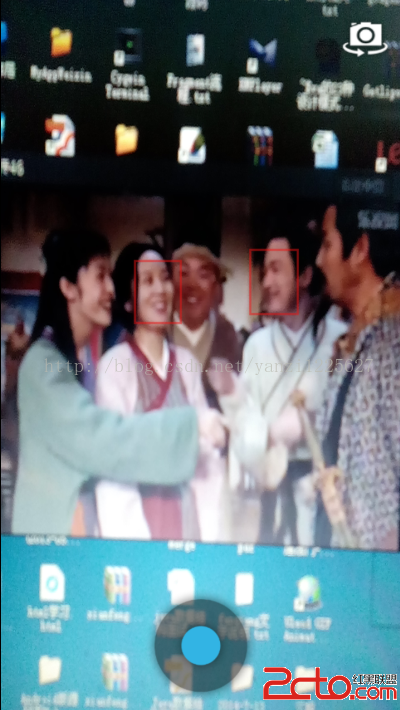 再來一張,對著電腦裡的圖片:
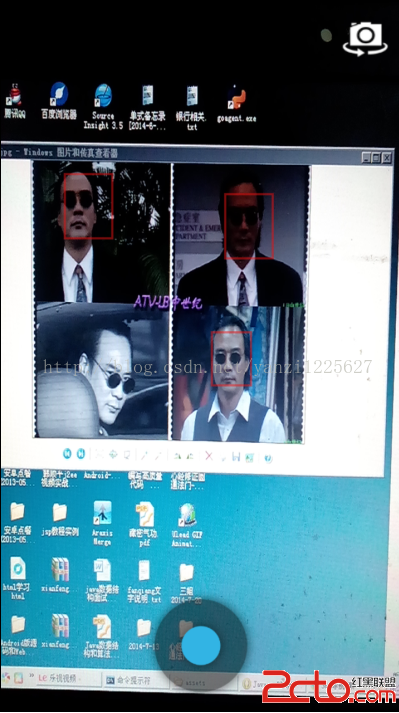
 Android 畫廊效果之ViewPager顯示多個圖片
首先來看下面的效果: 從上面的圖片可以看到,當添加多張圖片的時候,能夠在下方形成一個畫廊的效果,我們左右拉動圖片來看我們添加進去的圖片,效果是不是好了很多呢?下面來看
 android筆記4——Fragment的使用
說明第一下:按照前面的方式我們創建了項目,如果使用的是最新的ADT,Minimum Android SDK選的是android2.*或1.*,此時會默認創建一個兼容的項目
 Android TextView顯示文字對齊
有時候利用android的TextView顯示中文跟數字的組合會對不齊,如下面截圖,文字還沒有到達屏幕右邊就開始換行了為了解決這個文字,自己子定義了一個TextView的
 框架模式MVC與MVP在Android中的應用
很多人在開發Android項目時沒有考慮過架構模式的問題,以至於隨著項目的增大,Activty或者Fragment中代碼也會越來越多,導致項目的維護變的越來越復雜。然而在