編輯:關於Android編程
本文為大家分享Android登陸界面實現清除輸入框內容和震動效果的全部代碼,具體內容如下:
效果圖:

主要代碼如下
自定義的一個EditText,用於實現有文字的時候顯示可以清楚的按鈕:
import android.content.Context;
import android.graphics.drawable.Drawable;
import android.text.Editable;
import android.text.TextWatcher;
import android.util.AttributeSet;
import android.view.MotionEvent;
import android.view.View;
import android.view.animation.Animation;
import android.view.animation.CycleInterpolator;
import android.view.animation.TranslateAnimation;
import android.widget.EditText;

public class ClearEditText extends EditText implements View.OnFocusChangeListener,TextWatcher{

   //刪除按鈕的引用
  private Drawable mClearDrawable;

  //控件是否有焦點
  private boolean hasFoucs;

  public ClearEditText(Context context) {
    this(context, null);
  }

  public ClearEditText(Context context, AttributeSet attrs) {
    // 這裡構造方法也很重要,不加這個很多屬性不能再XML裡面定義
    this(context, attrs, android.R.attr.editTextStyle);
  }

  public ClearEditText(Context context, AttributeSet attrs, int defStyle) {
    super(context, attrs, defStyle);
    init();
  }

   private void init() {
      //獲取EditText的DrawableRight,假如沒有設置我們就使用默認的圖片
      mClearDrawable = getCompoundDrawables()[2];
      if (mClearDrawable == null) {
        // throw new NullPointerException("You can add drawableRight attribute in XML");
        mClearDrawable = getResources().getDrawable(R.drawable.selector_ic_delete);
      }

      //getIntrinsicWidth()取得的是Drawable在手機上的寬度,所以不同分辨率下獲取到的值是不同的,關鍵所在處
      mClearDrawable.setBounds(0, 0, mClearDrawable.getIntrinsicWidth(), mClearDrawable.getIntrinsicHeight());

      //默認設置隱藏圖標
      setClearIconVisible(false);
      //設置焦點改變的監聽
      setOnFocusChangeListener(this);
      //設置輸入框裡面內容發生改變的監聽
      addTextChangedListener(this);
    }

    /**
     * 因為我們不能直接給EditText設置點擊事件,所以我們用記住我們按下的位置來模擬點擊事件
     * 當我們按下的位置 在 EditText的寬度 - 圖標到控件右邊的間距 - 圖標的寬度 和
     * EditText的寬度 - 圖標到控件右邊的間距之間我們就算點擊了圖標,豎直方向就沒有考慮
     */
    @Override
    public boolean onTouchEvent(MotionEvent event) {
      if (event.getAction() == MotionEvent.ACTION_UP) {
        if (getCompoundDrawables()[2] != null) {

          boolean touchable = event.getX() > (getWidth() - getTotalPaddingRight())
              && (event.getX() < ((getWidth() - getPaddingRight())));

          if (touchable) {
            this.setText("");
          }
        }
      }

      return super.onTouchEvent(event);
    }

    /**
     * 當ClearEditText焦點發生變化的時候,判斷裡面字符串長度設置清除圖標的顯示與隱藏
     */
    @Override
    public void onFocusChange(View v, boolean hasFocus) {
      this.hasFoucs = hasFocus;
      if (hasFocus) {
        setClearIconVisible(getText().length() > 0);
      } else {
        setClearIconVisible(false);
      }
    }


    /**
     * 設置清除圖標的顯示與隱藏,調用setCompoundDrawables為EditText繪制上去
     * @param visible
     */
    protected void setClearIconVisible(boolean visible) {
      Drawable right = visible ? mClearDrawable : null;
      setCompoundDrawables(getCompoundDrawables()[0],
          getCompoundDrawables()[1], right, getCompoundDrawables()[3]);
    }


    /**
     * 當輸入框裡面內容發生變化的時候回調的方法
     */
    @Override
    public void onTextChanged(CharSequence s, int start, int count,int after) {
      if(hasFoucs){
        setClearIconVisible(s.length() > 0);
      }
    }

    @Override
    public void beforeTextChanged(CharSequence s, int start, int count,int after) {

    }

    @Override
    public void afterTextChanged(Editable s) {

    }


    /**
     * 設置晃動動畫
     */
    public void setShakeAnimation(){
      this.setAnimation(shakeAnimation(5));
    }

    /**
     * 晃動動畫
     * @param counts 1秒鐘晃動多少下
     * @return
     */
    public static Animation shakeAnimation(int counts){
      Animation translateAnimation = new TranslateAnimation(0, 10, 0, 0);
      translateAnimation.setInterpolator(new CycleInterpolator(counts));
      translateAnimation.setDuration(1000);
      return translateAnimation;
    }
}
MainActivity.java 主要是彈出一句話表示按鈕的點擊事件
import android.os.Bundle;
import android.view.View;
import android.widget.Button;
import android.widget.Toast;
import android.app.Activity;

public class MainActivity extends Activity {

  private Button btnLogin;

  @Override
  protected void onCreate(Bundle savedInstanceState) {
    super.onCreate(savedInstanceState);
    setContentView(R.layout.activity_login);
    btnLogin = (Button) this.findViewById(R.id.btnLogin);
  }

  public void login(View view) {
    Toast.makeText(this, "登陸", Toast.LENGTH_LONG).show();

  }
}
布局文件如下:
<?xml version="1.0" encoding="utf-8"?>
<LinearLayout xmlns:android="http://schemas.android.com/apk/res/android"
  android:layout_width="fill_parent"
  android:layout_height="fill_parent"
  android:background="#ffffffff"
  android:orientation="vertical"
  android:padding="4.0dip" >

  <com.xuliugen.clearedittext.ClearEditText
    android:id="@+id/etxtEmail"

    android:layout_width="fill_parent"
    android:layout_height="wrap_content"
    android:layout_marginTop="30.0dip"
    android:drawableLeft="@drawable/icon_reg_name"
    android:drawablePadding="10.0dip"
    android:hint="使用郵箱登陸" />

  <com.xuliugen.clearedittext.ClearEditText
    android:id="@+id/etxtPwd"

    android:layout_width="fill_parent"
    android:layout_height="wrap_content"
    android:layout_marginTop="20.0dip"
    android:drawableLeft="@drawable/icon_reg_password"
    android:drawablePadding="10.0dip"
    android:hint="輸入登陸密碼"
    android:inputType="textPassword" />

  <Button
    android:id="@+id/btnLogin"

    android:layout_width="fill_parent"
    android:layout_height="wrap_content"
    android:layout_marginTop="20.0dip"
    android:onClick="login"
    android:text="登陸" />

</LinearLayout>
另外還有一些selector文件,圖片資源等:
bg_btn_style_green.xml
<?xml version="1.0" encoding="utf-8"?>
<selector xmlns:android="http://schemas.android.com/apk/res/android">

  <item android:state_enabled="false"><shape android:shape="rectangle">
      <corners android:radius="2.0dip" />

      <solid android:color="@color/green_btn_color_disable" />
    </shape></item>
  <item android:state_pressed="true"><shape android:shape="rectangle">
      <corners android:radius="2.0dip" />

      <solid android:color="@color/green_btn_color_pressed" />
    </shape></item>
  <item><shape android:shape="rectangle">
      <corners android:radius="2.0dip" />

      <solid android:color="@color/green_btn_color_normal" />
    </shape></item>

</selector>
bg_edittext_selector.xml
<?xml version="1.0" encoding="utf-8"?>
<selector xmlns:android="http://schemas.android.com/apk/res/android">

  <item android:drawable="@drawable/input_bar_bg_active" android:state_focused="true"/>
  <item android:drawable="@drawable/input_bar_bg_normal"/>

</selector>
以上就是本文的全部內容,希望對大家學習Android軟件編程有所幫助。
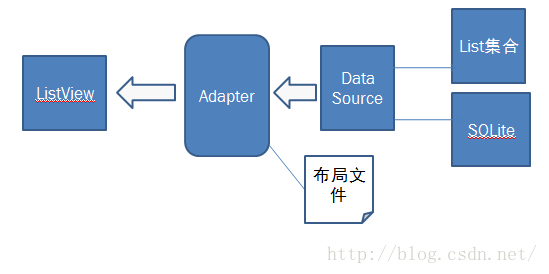
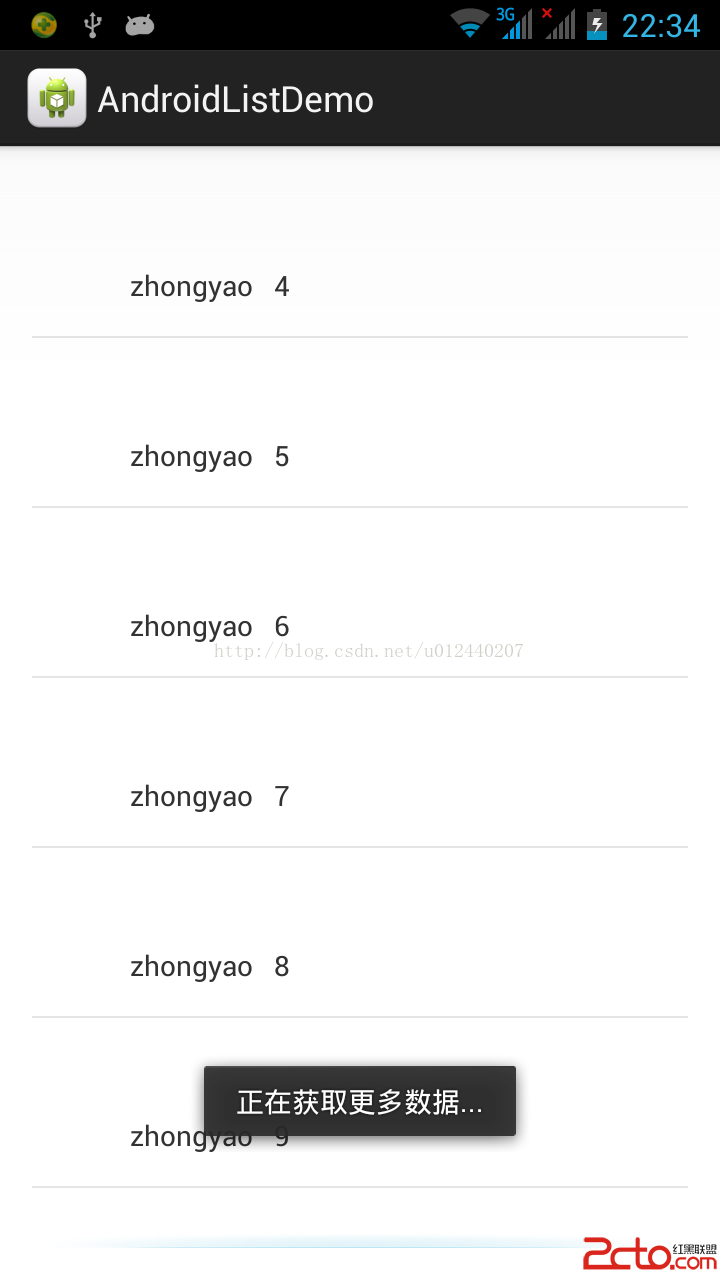 Android listView的上拉刷新(加載更多)
以前也實現過,ListView的上拉刷新,不過用的是開源代碼,由於本人比較懶吧,源碼也沒怎麼研究,所以現在寫出來還不是那麼流利。還好本人發現了自己的這些特點,所以寫出來個
 ObjectAnimator詳解(測試用,承接Android動畫操作中的測試)
廢話不多說直接看代碼需要注意的是ObjectAnimator.ofFloat(xiaoming, “age”, 0f,100f)傳入的是float
 布局與控件(八)-ListView知多少(下)ChoiceMode詳解
9.4 ListView的Choice ModeListView本身帶有單選和多選功能,也就是說在單選模式下,它能夠記住當前選中的唯一的列表項;在多選模式下,它能夠記住目
 Android編程四大組件分別是什麼
Android開發四大組件分別是:活動(Activity):用於表現功能。服務(Service):後台運行服務,不提供界面呈現。廣播接收器(BroadcastReceiv