編輯:關於Android編程
Android平台有三種網絡接口可以使用,他們分別是:java.net.*(標准Java接口)、Org.apache接口和Android.net.*(Android網絡接口)。下面分別介紹這些接口的功能和作用。
1.標准Java接口
java.net.*提供與聯網有關的類,包括流、數據包套接字(socket)、Internet協議、常見Http處理等。比如:創建URL,以及URLConnection/HttpURLConnection對象、設置鏈接參數、鏈接到服務器、向服務器寫數據、從服務器讀取數據等通信。這些在Java網絡編程中均有涉及,我們看一個簡單的socket編程,實現服務器回發客戶端信息。
下面用個例子來說明:
A、客戶端:
新建Android項目工程:SocketForAndroid(這個隨意起名字了吧,我是以這個建立的!)
下面是main_activity.xml的代碼:
<?xml version="1.0" encoding="utf-8"?>
<LinearLayout xmlns:android="http://schemas.android.com/apk/res/android"
 android:layout_width="fill_parent"
 android:layout_height="fill_parent"
 android:orientation="vertical">
 <TextView
  android:layout_width="fill_parent"
  android:layout_height="wrap_content"
  android:text="@string/hello" />
 <EditText
  android:id="@+id/message"
  android:layout_width="match_parent"
  android:layout_height="wrap_content"
  android:hint="@string/hint" />
 <Button
  android:id="@+id/send"
  android:layout_width="fill_parent"
  android:layout_height="wrap_content"
  android:text="@string/send" />
</LinearLayout>
MainActivity.java的代碼入下:
package com.yaowen.socketforandroid;
import android.os.Bundle;
import android.support.v7.app.AppCompatActivity;
import android.view.View;
import android.widget.Button;
import android.widget.EditText;
import java.io.BufferedReader;
import java.io.BufferedWriter;
import java.io.IOException;
import java.io.InputStreamReader;
import java.io.OutputStreamWriter;
import java.io.PrintWriter;
import java.net.Socket;
public class MainActivity extends AppCompatActivity {
 private EditText message;
 private Button send;
 @Override
 protected void onCreate(Bundle savedInstanceState) {
  super.onCreate(savedInstanceState);
  setContentView(R.layout.activity_main);
  //初始化兩個UI控件
  message = (EditText) findViewById(R.id.message);
  send = (Button) findViewById(R.id.send);
  //設置發送按鈕的點擊事件響應
  send.setOnClickListener(new View.OnClickListener() {
   @Override
   public void onClick(View v) {
    Socket socket = null;
    //獲取message輸入框裡的輸入的內容
    String msg = message.getText().toString() + "\r\n";
    try {
     //這裡必須是192.168.3.200,不可以是localhost或者127.0.0.1
     socket = new Socket("192.168.3.200", 18888);
     PrintWriter out = new PrintWriter(
       new BufferedWriter(
         new OutputStreamWriter(
           socket.getOutputStream()
         )
       ), true);
     //發送消息
     out.println(msg);
     //接收數據
     BufferedReader in = new BufferedReader(
      new InputStreamReader(
       socket.getInputStream()
      )
     );
     //讀取接收的數據
     String msg_in = in.readLine();
     if (null != msg_in) {
      message.setText(msg_in);
      System.out.println(msg_in);
     } else {
      message.setText("接收的數據有誤!");
     }
     //關閉各種流
     out.close();
     in.close();
    } catch (IOException e) {
     e.printStackTrace();
    } finally {
     try {
      if (null != socket) {
       //socket不為空時,最後記得要把socket關閉
       socket.close();
      }
     } catch (IOException e) {
      e.printStackTrace();
     }
    }
   }
  });
 }
}
最後別忘記添加訪問網絡權限:
<uses-permission android:name="android.permission.INTERNET" />
B、服務端:
package service;
import java.io.BufferedReader;
import java.io.BufferedWriter;
import java.io.IOException;
import java.io.InputStreamReader;
import java.io.OutputStreamWriter;
import java.io.PrintWriter;
import java.net.ServerSocket;
import java.net.Socket;
public class ServerAndroid implements Runnable {
 @Override
 public void run() {
 Socket socket = null;
 try {
 ServerSocket server = new ServerSocket(18888);
 // 循環監聽客戶端鏈接請求
 while (true) {
 System.out.println("start...");
 // 接收請求
 socket = server.accept();
 System.out.println("accept...");
 // 接收客戶端消息
 BufferedReader in = new BufferedReader(new InputStreamReader(socket.getInputStream()));
 String message = in.readLine();
 System.out.println(message);
 // 發送消息,向客戶端
 PrintWriter out = new PrintWriter(new BufferedWriter(new OutputStreamWriter(socket.getOutputStream())),
  true);
 out.println("Server:" + message);
 // 關閉流
 in.close();
 out.close();
 }
 } catch (IOException e) {
 e.printStackTrace();
 } finally {
 if (null != socket) {
 try {
  socket.close();
 } catch (IOException e) {
  e.printStackTrace();
 }
 }
 }
 }
 // 啟動服務器
 public static void main(String[] args) {
 Thread server = new Thread(new ServerAndroid());
 server.start();
 }
}
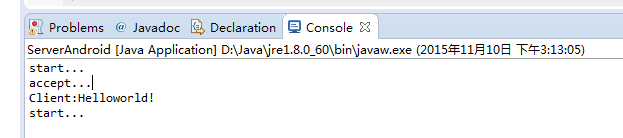
C、啟動服務器,控制台會打印出“start...”字符串!
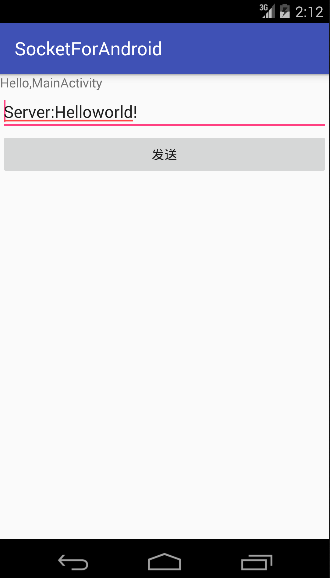
D、運行Android項目文件,如下圖:
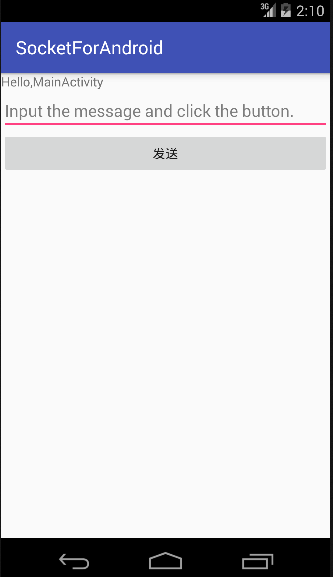
在輸入框裡輸入如下字符串,點發送按鈕:
服務器收到客戶端發來的消息並打印到控制台:
2、Apache接口
對於大部分應用程序而言JDK本身提供的網絡功能已遠遠不夠,這時就需要Android提供的Apache HttpClient了。它是一個開源項目,功能更加完善,為客戶端的Http編程提供高效、最新、功能豐富的工具包支持。
下面我們以一個簡單例子來看看如何使用HttpClient在Android客戶端訪問Web。
首先,要在你的機器上搭建一個web應用test,有兩個很簡單的PHP文件:hello_get.php和hello_post.php!
內容如下:
hello_get.php的代碼如下:
<html>
 <body>
 Welcome <?php echo $_GET["name"]; ?><br>
 You connected this page on : <?php echo $_GET["get"]; ?>
 </body>
</html>
hello_post.php的代碼如下:
<html>
<body>
Welcome <?php echo $_POST["name"]; ?><br>
You connected this page on : <?php echo $_POST["post"]; ?>
</body>
</html>
在原來的Android項目裡新建一個Apache活動類:Apache.java,代碼如下:
package com.yaowen.socketforandroid;
import android.os.Bundle;
import android.support.v7.app.AppCompatActivity;
import android.view.View;
import android.widget.Button;
import android.widget.TextView;
import org.apache.http.HttpEntity;
import org.apache.http.HttpResponse;
import org.apache.http.NameValuePair;
import org.apache.http.client.ClientProtocolException;
import org.apache.http.client.HttpClient;
import org.apache.http.client.entity.UrlEncodedFormEntity;
import org.apache.http.client.methods.HttpGet;
import org.apache.http.client.methods.HttpPost;
import org.apache.http.impl.client.DefaultHttpClient;
import org.apache.http.message.BasicNameValuePair;
import java.io.BufferedReader;
import java.io.IOException;
import java.io.InputStreamReader;
import java.io.UnsupportedEncodingException;
import java.util.ArrayList;
import java.util.List;
/**
 * Created by YAOWEN on 2015/11/10.
 */
public class ApacheActivity extends AppCompatActivity implements View.OnClickListener {
 private TextView textView;
 private Button get1, post1;
 @Override
 protected void onCreate(Bundle savedInstanceState) {
  super.onCreate(savedInstanceState);
  setContentView(R.layout.apache);
  textView = (TextView) findViewById(R.id.textView);
  get1 = (Button) findViewById(R.id.get);
  post1 = (Button) findViewById(R.id.post);
  get1.setOnClickListener(this);
  post1.setOnClickListener(this);
 }
 @Override
 public void onClick(View v) {
  if (v.getId() == R.id.get) {
   //注意:此處ip不能用127.0.0.1或localhost,Android模擬器已將它自己作為了localhost
   String url = "http://192.168.3.200/test/hello_get.php?name=yaowen&get=GET";
   textView.setText(get(url));
  }
  if (v.getId() == R.id.post) {
   String url="http://192.168.3.200/test/hello_post.php";
   textView.setText(post(url));
  }
 }
 /**
  * 以post方式發送請求,訪問web
  *
  * @param url web地址
  * @return 響應數據
  */
 private String post(String url) {
  BufferedReader reader = null;
  StringBuffer sb = null;
  String result = "";
  HttpClient client = new DefaultHttpClient();
  HttpPost requset = new HttpPost(url);
  //保存要傳遞的參數
  List<NameValuePair> params = new ArrayList<NameValuePair>();
  //添加參數
  params.add(new BasicNameValuePair("name", "yaowen"));
  params.add(new BasicNameValuePair("post","POST"));
  try {
   HttpEntity entity = new UrlEncodedFormEntity(params, "utf-8");
   requset.setEntity(entity);
   HttpResponse response = client.execute(requset);
   if (response.getStatusLine().getStatusCode() == 200) {
    System.out.println("post success");
    reader = new BufferedReader(new InputStreamReader(response.getEntity().getContent()));
    sb = new StringBuffer();
    String line = "";
    String NL = System.getProperty("line.separator");
    while ((line = reader.readLine()) != null) {
     sb.append(line);
    }
   }
  } catch (UnsupportedEncodingException e) {
   e.printStackTrace();
  } catch (ClientProtocolException e) {
   e.printStackTrace();
  } catch (IOException e) {
   e.printStackTrace();
  } finally {
   if (null != reader) {
    try {
     reader.close();
    } catch (IOException e) {
     e.printStackTrace();
    }
   }
   if (null != sb) {
    result = sb.toString();
   }
  }
  return result;
 }
 /**
  * 以get方式發送請求,訪問web
  *
  * @param url web地址
  * @return 響應數據
  */
 private static String get(String url) {
  BufferedReader bufferedReader = null;
  StringBuffer sb = null;
  String result = "";
  HttpClient client = new DefaultHttpClient();
  HttpGet request = new HttpGet(url);
  //發送請求,得到響應
  try {
   HttpResponse response = client.execute(request);
   //請求成功
   if (response.getStatusLine().getStatusCode() == 200) {
    bufferedReader = new BufferedReader(
      new InputStreamReader(
        response.getEntity()
          .getContent()
      )
    );
    sb = new StringBuffer();
    String line = "";
    String NL = System.getProperty("line.separator");
    while ((line = bufferedReader.readLine()) != null) {
     sb.append(line);
    }
   }
  } catch (IOException e) {
   e.printStackTrace();
  } finally {
   if (null != bufferedReader) {
    try {
     bufferedReader.close();
     //bufferedReader=null;
    } catch (IOException e) {
     e.printStackTrace();
    }
   }
   if (null != sb) {
    result = sb.toString();
   }
  }
  return result;
 }
}
新建一個apache.XML文件,如下:
<?xml version="1.0" encoding="utf-8"?>
<LinearLayout xmlns:android="http://schemas.android.com/apk/res/android"
 android:layout_width="fill_parent"
 android:layout_height="fill_parent"
 android:orientation="vertical">
 <TextView
  android:id="@+id/textView"
  android:layout_width="fill_parent"
  android:layout_height="wrap_content"
  android:gravity="center"
  android:text="通過按鈕選擇不同方式訪問網頁" />
 <Button
  android:id="@+id/get"
  android:layout_width="match_parent"
  android:layout_height="wrap_content"
  android:text="get" />
 <Button
  android:id="@+id/post"
  android:layout_width="match_parent"
  android:layout_height="wrap_content"
  android:text="post" />
</LinearLayout>
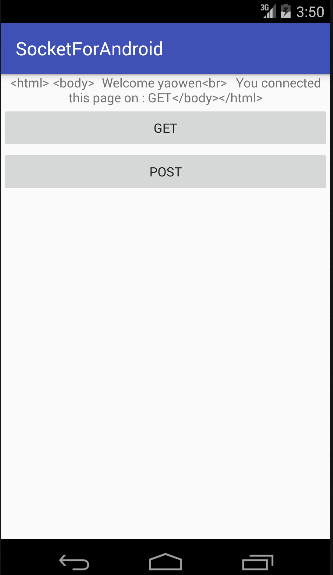
結果運行如下:
3.android.net編程:
常常使用此包下的類進行Android特有的網絡編程,如:訪問WiFi,訪問Android聯網信息,郵件等功能。
這裡就不詳細做例子了,因為這個接觸比較多~~~。
下面給大家介紹Android的網絡通訊
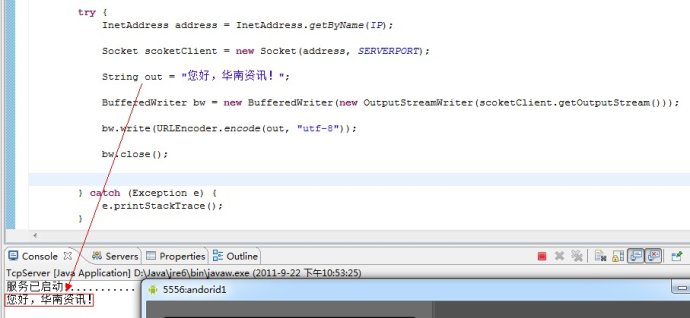
我們知道,Java提供的Socket可以完成了兩台PC機的通信。TCPServer需要客戶端和服務器,服務器用SocketServer和Socket完成,客戶端使用Socket完成......這些我們都很熟悉。此章主要是通過TCPServer完成Android 與PC機的通信,
首先來看我們熟悉的服務器程序:
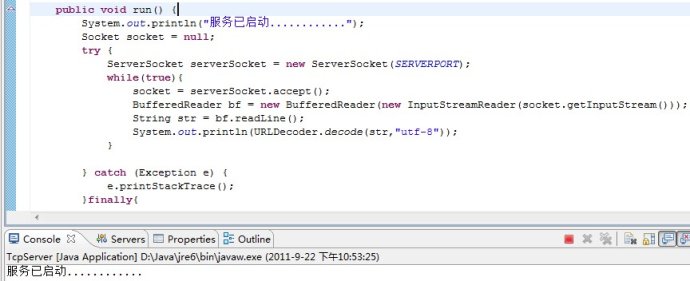
上圖用主方法main其他一個Thread,然後在run方法裡面無限監聽發送過來的內容,如果有內容則輸出。利用的是Java的API,很經典。
接下來就是在Android端發送數據給PC端,其代碼如下:
這樣就完成了Android與PC機間的通信。
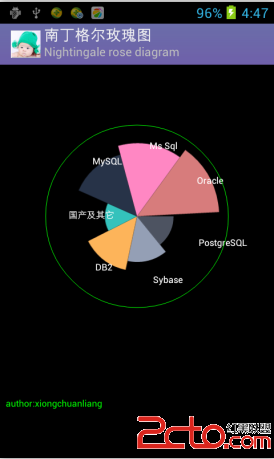 Android Canvas練習(10)自已繪南丁格爾玫瑰圖(Nightingale rose diagram)
南丁格爾玫瑰圖 在常規圖表中實在很驚艷,但我初看沒看懂,一查原來南丁格爾這麼偉大,確實值得尊敬。 再仔細研究了下這種圖的構成,發
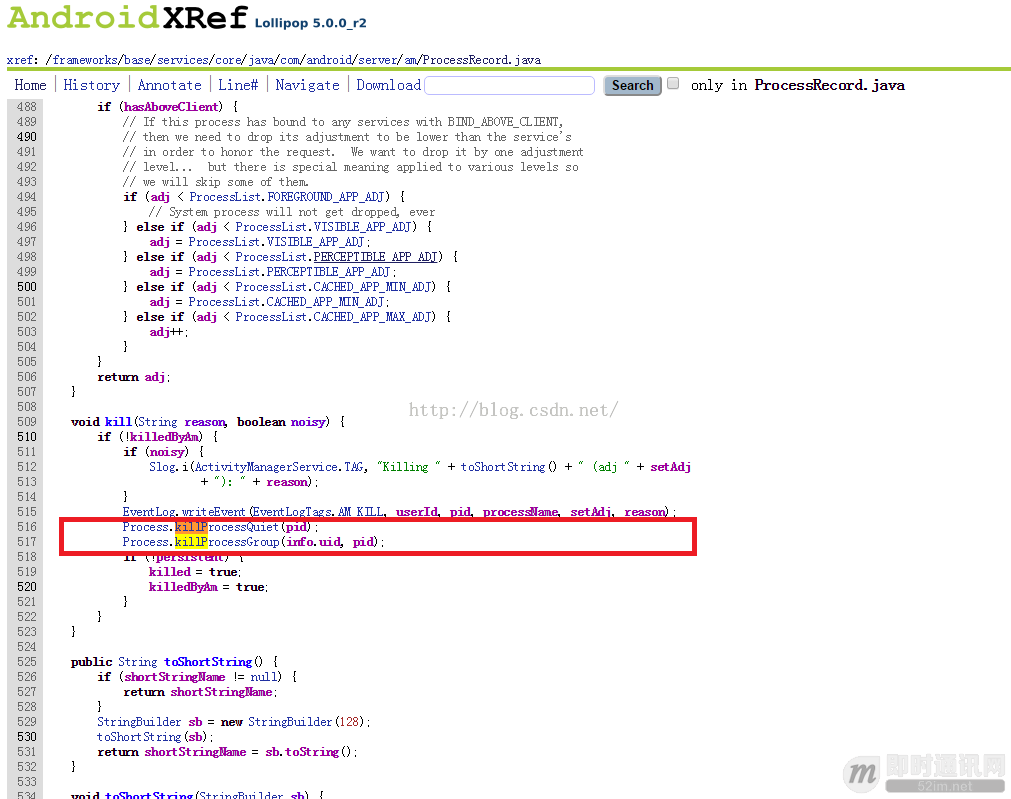 Android後台保活實踐總結:即時通訊應用無法根治的“頑疾”
前言Android進程和Service的保活,是困擾Android開發人員的一大頑疾。因涉及到省電和內存管理策略,各廠商基於自家的理解,在自已ROOM發布於都對標准And
 android 4.4.3上面,聯系人的頭像默認顯示首字母,但是不支持中文字符,修改支持中文
在android 4.4.3上面,聯系人的頭像默認顯示首字母,但是不支持中文字符,如下圖: 如果聯系人名字的第一位是英文字符(a-z | A-Z),則默認頭像將顯
 Android開發中RecyclerView模仿探探左右滑動布局功能
我在此基礎上優化了部分代碼, 添加了滑動回調, 可自定義性更強. 並且添加了點擊按鈕左右滑動的功能.據說無圖都不敢發文章了.看圖:1:這種功能, 首先需要自己管理布局繼承