編輯:關於Android編程
   Notification notification = new Notification();
        notification.icon = R.drawable.ic_launcher;
        //通知時在狀態欄顯示的內容
        notification.tickerText = "hello_world";
        //設置通知的顯示時間
        notification.when = System.currentTimeMills();
        //意指點擊這個Notification後,立刻取消自身
        notification.flags = Notification.FLAG_AUTO_CANCEL;

        //通知的默認參數 DEFAULT_SOUND, DEFAULT_VIBRATE, DEFAULT_LIGHTS.
        //如果要全部采用默認值, 用 DEFAULT_ALL.
        //此處采用默認聲音
        notification.defaults = Notification.DEFAULT_SOUND ;

        Intengt inetent =new Intent( MainActivity.this , TestActivity.class);
        PendingIntent pendingIntent = PendingIntent.getActivity( MainActivity.this , 0 ,intent , PendingIntent.FLAG_UPDATE_CURRENT);
        notification.setLatestEventInfo( MainActivity.this , "TestTitle","TestMessage", pendingIntent);
PendingIntent.FLAG_UPDATE_CURRENT會更新之前PendingIntent的消息,比如,你推送了消息1,並在其中的Intent中putExtra了一個值“ABC”,在未點擊該消息前,繼續推送第二條消息,並在其中的Intent中putExtra了一個值“CBA”,好了,這時候,如果你單擊消息1或者消息2,你會發現,他倆個的Intent中讀取過來的信息都是“CBA”,就是說,第二個替換了第一個的內容
上面的代碼,我們就創建了一個通知,之後,我們是用如下代碼:
nm.notify( 1 , notification);
就可以彈出一個通知了,這個通知的ID 是1,我們可以通過ID 來找到這個通知,實現更新這個通知的信息,也可以取消這條通知。
2.更新Notification
上面我們創建了一條ID為1 的通知,現在我們需要更新這通知,那麼我們就采用如下:
 notification.setLatestEventInfo( MainActivity.this , "TestTitle2","TestMessage",pengdingIntent);
            nm.notify( 1 , notification );
這樣就能更新通知的內容,如果我們把上面的1,換成2,那麼就會顯示2條通知,因為ID不一樣,而我們如果不用之前的notification而是新建了一個Notification的對象,只要ID一樣 也是實現更新的效果。
3.刪除Notification
刪除Notification很簡單,只需要調用NotificationManager的cancel 方法,傳入ID就可以了
4.Notification其他的設置
(1)聲音:聲音可以通過使用如下代碼采用系統默認的聲音:
notification.defaults = Notification.DEFAULT_SOUND;
如果要使用默認的,那麼就要使用到notification的sound屬性了,
也可以使用自定義鈴聲,就需要使用自定義的Uri了
比如使用SD卡的鈴聲如下:
notification.defaults = Uri.parse("file:///sdcard/notification/ringer.mp3");
使用raw目錄的鈴聲如下:
notification.defaults = Uri.parse("android.resource://"+getPackageName()+"/"+R.raw.cat);
使用assets目錄下:
notification.defaults = Uri.parse("file:///android_asset/RELATIVEPATH");
比如使用系統的鈴聲如下:
notification.sound = Uri.withAppendedPath(Audio.Media.INTERNAL_CONTENT_URI, "6");
如果default和sound同時出現,那麼sound設置的會無效。
默認情況下,通知的聲音播放一遍就結束,如果需要聲音循環播放,就要在flag上添加參數FLAG_INSISTENT 。這樣生意你回到用戶響應以後才停止,比如下拉狀態欄
notification.flags != notification.FLAG_INSISTENT;
(2)震動:震動
如果是使用默認的震動方式,那麼也可以使用default
notification.defaults |= Notification.DEFAULT_VIBRATE;
當然也可以自己定義震動形式,這個就需要使用Long數組,
long[] vibrate = {0,100,200,300};
notification.vibrate = vibrate;
在上面的Long型數組中,第一個參數是開始振動前的等待時間,第二個是第一次震動的時間,第三個是第二次震動的時間,以此類推,不過沒辦法做到重復震動。
同樣,如果有default 那麼就會采用default。
使用振動器之前我們需要在清單文件裡面聲明權限:
(4)閃光 同樣的閃光也是有默認的, notification.defaults |= Notification.DEFAULT_LIGHTS; 自定義: notification.ledARGB = 0xff00ff00; notification.ledOnMS = 300; notification.ledOffMS = 1000; notification.flags |= Notification.FLAG_SHOW_LIGHTS; 其中ledARGB 表示燈光顏色、 ledOnMS 亮持續時間、ledOffMS 暗的時間。 注意:這邊的顏色跟設備有關,不是所有的顏色都可以,要看具體設備。 4.使用自定義樣式的通知欄 使用自定義的通知,我們首先要提供一個布局文件,然後使用RemoteViews來加載這個布局文件就可以改變通知的樣式,代碼如下:
      Notification notification = new Notification();
            notification.icon = R.drawable.ic_launcher;
            notification.tickerText = "Test Ticker";
            notification.when = System.currentTimeMillis();
            notification.flags = Notification.FLAG_AUTO_CANCEL;
            Intent intent = new Intent( this , TestActivity.class);
            PendingIntent pengdingIntent = PendingIntent.getActivity( this , 0, intent , PendingIntent.FLAG_UPDATE_CURRENT );
            RemoteViews remoteViews = new RemoteViews( getPackageName(), R.layout.layout_notification);
            remoteViews.setTextViewText( R.id.tvTitle,"testTitle");
            remoteView.setImageViewResource( R.id.ivNotifyIcon,R.drawable.icon1);
            PendingIntent pd  = PendingIntent.getActivity( this , 0 , new Intent( this , TestActivity2.class),PendingIntent.FLAG_UPDATE_CURRENT);
            remoteViews.setOnClickPendingIntent( R.id.btnShowNotify, pd);
            notification.contentView = remoteVIews;
            notification.contentIntent = pengdingIntent;
            NotificationManager nm = ( NotificationManager) getSystemService( Context.NOTIFICATION_SERVICE );
            manager.notify( 2 , notification);
上面就是使用RemoteViews的代碼。RemoteViews提供了多種構造函數,在這邊,我們采用的是使用包名和布局ID來創建一個RemoteViews。
從上面的代碼,可以看到,我們在訪問RemoteViews的方法時候,和正常的訪問不一樣,我們並不是通過使用對象的引用來更新RemoteViews中的內容,而是RemoteViews提供了一些封裝過的方法,我們來更新。而如果我們需要在控件上添加點擊事件,可以在setOnClickPendingIntent使用PengdingIntent 實現,而且,RemoteViews也提供了反射機制,使得我們可以通過methodName和一些參數來調用指定ID上的方法(對參數還是有一些限制的)。
5. 其他有用的設置:
flags:
Notification.FLAG_INSISTENT; //讓聲音、振動無限循環,直到用戶響應
Notification.FLAG_AUTO_CANCEL; //通知被點擊後,自動消失
Notification.FLAG_NO_CLEAR; //點擊'Clear'時,不清楚該通知(QQ的通知無法清除,就是用的這個)
上面就是RemoteView在Notification上的應用了,我們也回顧了Notification,下面開始學習RemoteViews在桌面小部件上的應用
1.2 RemoteViews在桌面小部件上的應用
AppWidgetProvider是Android中提供的用於實現桌面小部件的類,它的本質是一個廣播,也就是BrocastReceiver。所以說,AppWidgetProvider可以直接當成一個BrocastReceiver來使用。下面開始學習桌面小部件的開發步驟。
1.2.1 定義小部件界面
首先,我們在res/layout目錄下新建一個布局文件layout_custom_appwidget.xml:
1.2.2 定義小部件配置信息
在res/xml下新建custom_appwidget_provider_info.xml
  public class MyAppWidgetProvider extends AppWidgetProvider {

    public static final String TAG = "MyAppWidgetProvider";
    public static final String CLICK_ACTION = "com.zhenfei.MyAppWidgetProvider.action";


    public static final int NOTIFY_ID = 80001;

    public MyAppWidgetProvider()
    {
        super();
    }

    @SuppressLint("NewApi")
    @Override
    public void onReceive(Context context, Intent intent) {
        super.onReceive(context, intent);
        Log.e(TAG,   "onReceive: action=" + intent.getAction() );

        if( CLICK_ACTION.endsWith( intent.getAction()))
        {
            NotificationManager notificationManager =(NotificationManager) context.getSystemService(Context.NOTIFICATION_SERVICE);
            Notification.Builder builder = new Notification.Builder(context);
            builder.setTicker( context.getResources().getString(R.string.notify_titker_text));
            builder.setWhen( System.currentTimeMillis() + 1000 );
            builder.setVibrate( new long [] { 0 , 200 , 400 , 600 , 800 } );
            builder.setDefaults( Notification.DEFAULT_SOUND );
            builder.setSmallIcon( R.drawable.ic_field );
            builder.setAutoCancel(true);

            Intent mIntent = new Intent(context ,MainActivity2.class );
             mIntent.setFlags( Intent.FLAG_ACTIVITY_NEW_TASK);
             mIntent.setFlags( Intent.FLAG_ACTIVITY_BROUGHT_TO_FRONT);
            Log.e(TAG, "getPackageName:" + context.getPackageName() );

             PendingIntent pendingIntent = PendingIntent.getActivity(context, 0, mIntent, 0);
            builder.setContentIntent(pendingIntent);

            RemoteViews remoteViews = new RemoteViews( context.getPackageName(),  R.layout.layout_custom_notification);
            remoteViews.setTextViewText(R.id.tvTitle , "有新的信息到了");
            remoteViews.setTextViewText( R.id.tvContent, "你到家了嗎");

            builder.setContent(remoteViews);
            Notification notification = builder.build();
            notificationManager.notify(NOTIFY_ID, notification);
        }


    }

    @Override
    public void onDeleted(Context context, int[] appWidgetIds) {
        // TODO Auto-generated method stub
        super.onDeleted(context, appWidgetIds);
    }

    @Override
    public void onDisabled(Context context) {
        // TODO Auto-generated method stub
        super.onDisabled(context);
    }

    @SuppressLint("NewApi")
    @Override
    public void onUpdate(Context context, AppWidgetManager appWidgetManager,
            int[] appWidgetIds) {

        Intent intent = new Intent();
        intent.setAction(CLICK_ACTION);
        PendingIntent pendingIntent = PendingIntent.getBroadcast(context, 0    , intent, 0 );

        RemoteViews remoteViews = new RemoteViews(context.getPackageName(), R.layout.layout_custom_appwidget);
        remoteViews.setOnClickPendingIntent(R.id.ivWidgetImg, pendingIntent);

        appWidgetManager.updateAppWidget(appWidgetIds, remoteViews);

    }

}

在AndroidManifest.xml中聲明如下:
聲明這個部件類接受兩個廣播,一個是桌面部件更新廣播UPDATE,一個是自定義的按鈕事件廣播。AppWiget主要有:onEnable,onDisabled,onDeleted 和 onReceive這些方法:
 Android自定義控件之開關按鈕學習筆記分享
今天來講講自定義單個控件,就拿開關按鈕來講講,相信大家見了非常多這樣的了,先看看效果:我們可以看到一個很常見的開關按鈕,那就來分析分析。首先:這是由兩張圖片構成:①一張為
 專為Android加載圖片Fresco:詳細圖解SimpleDraweeView加載圖片基礎
Fresco簡單的使用—SimpleDraweeView 百學須先立志—學前須知: &n
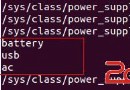 關於Android電池管理系統(一)Linux驅動部分
一、概述android系統電池部分的驅動程序,繼承了傳統linux系統下的Power Supply驅動程序架構,Battery驅動程序通過Power Supply驅動程序
 Android NDK開發的環境搭建與簡單示例
一、NDK與JNI簡介NDK全稱為native development kit本地語言(C&C++)開發包。而對應的是經常接觸的Android-SDK,(software