編輯:關於Android編程
經常看一些大神的博客,大多數大神開篇都輕談一些國內比較專注的事和一些身邊瑣事,以表自己心情感悟。像我這種菜雞就直接步入正題吧。畢竟這東西就這麼簡單。
Android動畫效果有位移、縮放。旋轉。透明度等。Animation和Animator都都能實現動畫效果。下面就和說下這2個不同之處吧
1、傳統動畫:Animaton系統不斷的調用onDraw方法去重繪界面來實現一個動畫的效果
public void move(View view){
        TranslateAnimation animation = new TranslateAnimation(0,200,0,0);
        animation.setDuration(1000);
        animation.setFillAfter(true);
        imageView.startAnimation(animation);
}
2、屬性動畫(谷歌3.0之後出來的):Animator,顧名思義,就是操作一個屬性的get、set方法去真實的改變一個屬性。
一些常用的API:alpha 透明度, rotation z軸旋轉, rotationX x軸旋轉,rotationY y軸旋轉,translationX x水平偏移
        //第一種
        ObjectAnimator.ofFloat(imageView,"translationY",0F,200F).setDuration(1000).start();
        ObjectAnimator.ofFloat(imageView,"translationX",0F,200F).setDuration(1000).start();
        ObjectAnimator.ofFloat(imageView,"rotation",0F,360F).setDuration(1000).start();
        //第二種
        PropertyValuesHolder p1 =   PropertyValuesHolder.ofFloat("translationY",0F,200F);
        PropertyValuesHolder p2 =   PropertyValuesHolder.ofFloat("translationX",0F,200F);
        PropertyValuesHolder p3 =   PropertyValuesHolder.ofFloat("rotation",0F,360F);
        ObjectAnimator.ofPropertyValuesHolder(imageView,p1,p2,p3);
上面是二種方面實現了圖片的動畫效果,是什麼效果可以自己去敲下,畢竟這麼簡單。
還有一種就是通過AnimatorSet集合去實現動畫的執行順序
        ObjectAnimator animator1 = ObjectAnimator.ofFloat(imageView, "translationY", 0F, 150F);
        ObjectAnimator animator2 = ObjectAnimator.ofFloat(imageView,"translationX",0F,150F);
        ObjectAnimator animator3 = ObjectAnimator.ofFloat(imageView,"rotation",0F,180F);
        ObjectAnimator animator4 = ObjectAnimator.ofFloat(imageView,"X",0F,1F);
        AnimatorSet set = new AnimatorSet();
 //       set.playTogether(animator1,animator2,animator3);同事執行
  //      set.playSequentially(animator1,animator2,animator3);案順序執行
        //先同時執行1和2,然後在執行3
        set.play(animator1).with(animator2);
        set.play(animator3).after(animator2);
        set.play(animator4).after(animator3);
        set.setDuration(1000);
        set.start();
3、如何給一個動畫設置監聽事件呢?非常簡單:
    public void alphaClick(View view){
        ObjectAnimator animator = ObjectAnimator.ofFloat(view,"alpha",0F,1F);

        animator.setDuration(1000);
        animator.addListener(new AnimatorListenerAdapter() {
            @Override
            public void onAnimationEnd(Animator animation) {
                super.onAnimationEnd(animation);
                Toast.makeText(MainActivity.this,"anmi end",Toast.LENGTH_SHORT).show();
            }
        });
        animator.start();
    }
點擊控件,透明度在1秒的變化,1秒後,打印吐司。
4、接下來我們來實現一個小例子吧,
XML文件:很簡單,就是就是放了7張圖片,疊在一起
<framelayout android:layout_height="match_parent" android:layout_width="match_parent" xmlns:android="http://schemas.android.com/apk/res/android">


</framelayout>
下面是Java代碼:也很簡單,在onCreat中初始化imageView,並添加到list中,然後設置監聽。
package com.dragon.httpdeom.httpdemo;

import android.animation.ObjectAnimator;
import android.app.Activity;
import android.os.Bundle;
import android.view.View;
import android.view.animation.BounceInterpolator;
import android.widget.ImageView;
import android.widget.Toast;
import java.util.ArrayList;
import java.util.List;
/**
 * Created by Administrator on 2016/8/26 0026.
 */
public class myActivity extends Activity implements View.OnClickListener {
    private int[] res = {R.id.image_a,R.id.image_b,R.id.image_c,R.id.image_d,R.id.image_e,R.id.image_f,R.id.image_g};
    private List<imageview> imageViewList = new ArrayList<>();
    private boolean flag = true;
    @Override
    protected void onCreate(Bundle savedInstanceState) {
        super.onCreate(savedInstanceState);
        setContentView(R.layout.activit_my);
        for (int i = 0; i <res.length animator="ObjectAnimator.ofFloat(imageViewList.get(i),"translationY",i" case="" default:="" else="" flag="true;" for="" i="" if="" imageview="" int="" new="" objectanimator="" override="" pre="" private="" public="" r.id.image_a:="" res.length="" switch="" view="" void="">
上面實現的是小球直線效果,直線的效果自己去實現下,這裡我貼下扇形的效果圖也可以實現小球的扇形效果,如下代碼:
        float angle;
        final int r = 380;
        angle = (float) Math.PI / (2 * (res.length - 2));
        for (int i = 1; i < res.length; i++) {
            float xLength = (float) (r * Math.sin((i - 1) * angle));
            float yLength = (float) (r * Math.cos((i - 1) * angle));
            ObjectAnimator animator1 = ObjectAnimator.ofFloat(imageViewList.get(i),
                    "translationX", 0F, -xLength);
            ObjectAnimator animator2 = ObjectAnimator.ofFloat(imageViewList.get(i),
                    "translationY", 0F, -yLength);
            AnimatorSet set = new AnimatorSet();
            set.playTogether(animator1, animator2);
            set.setDuration(500);
            set.setInterpolator(new BounceInterpolator());
            set.setStartDelay(i * 200);
            set.start();
            flag = true;
效果圖:
4、ValueAnimator:是ObjetAnimator的父類,ValueAnimator本身並不會作用任何一個屬性也不會提供任何一種動畫,是一個數值發生器(產生你想要的任何數值)。有了這個值就可以作用控件,比如x值不斷增加,形成一個動畫,看個例子就明白了:點擊button,上面的文本就0增加到100;
  public void ValueClick(View view){
        final Button button = (Button) view;
        ValueAnimator animator = ValueAnimator.ofInt(0,100);
        animator.setDuration(5000);
        animator.addUpdateListener(new ValueAnimator.AnimatorUpdateListener() {
            @Override
            public void onAnimationUpdate(ValueAnimator animation) {
                Integer value = (Integer) animation.getAnimatedValue();
                button.setText(""+value);
            }
        });
其中也可以自定義數值,代碼如下。
ValueAnimator animator1 = ValueAnimator.ofObject(new TypeEvaluator效果圖:() { @Override public PointF evaluate(float fraction, PointF startValue, PointF endValue) { float x=(endValue.x-startValue.x)*fraction; float y=(endValue.y-startValue.x)*fraction; button.setX(x); button.setY(y); return null; } },new PointF(1, 1),new PointF(300,300)); animator1.setDuration(3000); animator1.start();
 好了,完事!!喜歡交友的朋友可以留言!
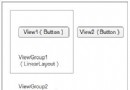
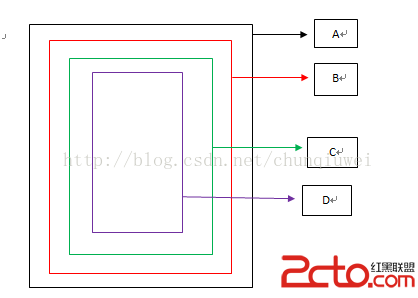 android事件攔截處理機制詳解
前段時間剛接觸過android手機開發,對它的事件傳播機制不是很了解,雖然網上也查了相關的資料,但是總覺得理解模模糊糊,似是而非,於是自己就寫個小demo測試了一下。總算
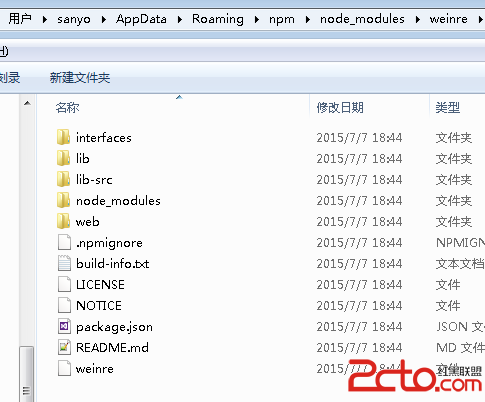 Android開發系列10 Cordova架構學習 Weinre遠程調試技術
手機上的頁面不像桌面開發這麼方便調試。可以使用Weinre進行遠程調試以方便開發。本文介紹windows下的安裝與使用。安裝使用npm安裝,可以運行: npm insta
 AsyncTask 流程解析
為什麼要使用異步任務?Android 單線程模型,多線程的操作系統耗時操作放在非主線程中運行AsyncTask 為何而生?子線程中更新UI封裝簡化異步操作構建AsyncT
 Android中Intent機制詳解及示例總結(總結篇)
最近在進行android開發過程中,在將 Intent傳遞給調用的組件並完成組件的調用時遇到點困難,並且之前對Intent的學習也是一知半解,最近特意為此拿出一些時間,對