編輯:關於Android編程
今天有點累,我就直接把代碼粘上了,不過我在裡面加了注釋,方便大家理解。
Activity:
public class IntentActivity extends AppCompatActivity implements View.OnClickListener {
    private View popView;
    private GridView gv1;
    private Button popCancel;
    private PopupWindow pw;
    RoundImageView riv ;
    @Override
    protected void onCreate(Bundle savedInstanceState) {
        super.onCreate(savedInstanceState);
        setContentView(R.layout.activity_intent);
        Button bt1 = (Button) findViewById(R.id.bt1);
        bt1.setOnClickListener(this);
        Button bt2 = (Button) findViewById(R.id.bt2);
        bt2.setOnClickListener(this);
        Button bt3 = (Button) findViewById(R.id.bt3);
        bt3.setOnClickListener(this);
        Button bt4 = (Button) findViewById(R.id.bt4);
        bt4.setOnClickListener(this);
        Button bt5 = (Button) findViewById(R.id.bt5);
        bt5.setOnClickListener(this);
        Button bt6 = (Button) findViewById(R.id.bt6);
        bt6.setOnClickListener(this);
        Button bt7 = (Button) findViewById(R.id.bt7);
        bt7.setOnClickListener(this);
        riv = (RoundImageView) findViewById(R.id.riv);
        riv.setOnClickListener(this);
        //加載popWindow的布局
        popView = getLayoutInflater().inflate(R.layout.popwindow_layout,null);
//        gv1 = (GridView) popView.findViewById(R.id.gv1);
        //從popWindow布局中取得控件
        popCancel = (Button) popView.findViewById(R.id.popCancle);
        popCancel.setOnClickListener(this);
        popView.findViewById(R.id.camera).setOnClickListener(this);
        popView.findViewById(R.id.photo).setOnClickListener(this);
//        List list = new ArrayList();
//        Map map = new HashMap();
//        map.put("img",R.mipmap.picture04);
//        map.put("name","拍照");
//        list.add(map);
//        map = new HashMap();
//        map.put("img",R.mipmap.picture01);
//        map.put("name","從手機相冊選擇");
//        list.add(map);
//        map = new HashMap();
//        map.put("img",R.mipmap.picture08);
//        map.put("name","嘿嘿嘿~");
//        list.add(map);
//        SimpleAdapter sa = new SimpleAdapter(this,list,R.layout.gridview_layout,
//                new String[]{"img","name"},new int[]{R.id.iv,R.id.tv});
//        gv1.setAdapter(sa);
        //顯示Intent,明確的指明它要跳轉到哪個Activity
//        Intent intent = new Intent(IntentActivity.this,IntentActivity.class);
//        startActivity(intent);
        //隱示Intent,由Android系統幫助匹配
        //匹配規則:清單文件中的Intent-filter 標簽中的 action
//        Uri uri = Uri.parse("tel:1008611");
//        Intent intent = new Intent(Intent.ACTION_DIAL,uri);
//        startActivity(intent);
    }

    @Override
    public void onClick(View view) {
        int id = view.getId();
        switch (id) {
            case R.id.bt1:
                Uri uri1 = Uri.parse("tel:18865557601");
                Intent intent1 = new Intent(Intent.ACTION_CALL, uri1);
                if (ActivityCompat.checkSelfPermission(this, Manifest.permission.CALL_PHONE) != PackageManager.PERMISSION_GRANTED) {
                    // TODO: Consider calling
                    //    ActivityCompat#requestPermissions
                    // here to request the missing permissions, and then overriding
                    //   public void onRequestPermissionsResult(int requestCode, String[] permissions,
                    //                                          int[] grantResults)
                    // to handle the case where the user grants the permission. See the documentation
                    // for ActivityCompat#requestPermissions for more details.
                    return;
                }
                startActivity(intent1);
                break;
            case R.id.bt2:
                Intent intent2 = new Intent(Intent.ACTION_VIEW);
                intent2.putExtra("sms_body","發送短信");
                intent2.setType("vnd.android-dir/mms-sms");
                startActivity(intent2);
                break;
            case R.id.bt3:
                Uri uri2 = Uri.parse("http://www.baidu.com");
                Intent intent3 = new Intent(Intent.ACTION_VIEW,uri2);
                startActivity(intent3);
                break;
            case R.id.bt4:
                Intent intent4 = new Intent(Intent.ACTION_VIEW);
                File file1 = new File("/storage/sdcard1/2015.8.22酷派/酷派8297數據/1989/01 Welcome To New York.m4a");
                intent4.setDataAndType(Uri.fromFile(file1),"audio/*");
                startActivity(intent4);
                break;
            case R.id.bt5:
                Intent intent5 = new Intent(Intent.ACTION_VIEW);
                File file2 = new File("/storage/sdcard1/video/蟲子.jpeg");
                intent5.setDataAndType(Uri.fromFile(file2),"image/*");
                startActivity(intent5);
                break;
            case R.id.bt6:
                Intent intent6 = new Intent(Intent.ACTION_VIEW);
                intent6.setDataAndType(Uri.parse("file:///storage/sdcard1/video/Beytagh最佳.apk"),
                        "application/vnd.android.package-archive");
                startActivity(intent6);
                break;
            case R.id.bt7:
                notification();
                break;
            case R.id.riv:
                pw = getPopWindow(popView);
                break;
            case R.id.popCancle:
                pw.dismiss();
                break;
            case R.id.camera:
                tackPhoto();
                break;
            case R.id.photo:
                phonePhoto();
                break;

        }
    }

    /*
    調用圖庫
     */
    public void phonePhoto(){
        Intent intent = new Intent(Intent.ACTION_PICK,
                MediaStore.Images.Media.EXTERNAL_CONTENT_URI);
        startActivityForResult(intent,2);
    }

    /*
    調用相機
     */
    private String capturePath ="";
    public void tackPhoto(){
        Intent camera = new Intent(MediaStore.ACTION_IMAGE_CAPTURE);
        File parent = FileUitlity.getInstance(getApplicationContext())
                .makeDir("head_img");
        //給拍完的照片起名字
        capturePath = parent.getPath()
                +File.separatorChar
                +System.currentTimeMillis()
                +".jpg";
        camera.putExtra(MediaStore.EXTRA_OUTPUT,
                Uri.fromFile(new File(capturePath)));
        camera.putExtra(MediaStore.EXTRA_VIDEO_QUALITY,1);
        //該方法的值會返回到onActivityResult裡
        startActivityForResult(camera,1);
    }

    @Override
    protected void onActivityResult(int requestCode, int resultCode, Intent data) {
        super.onActivityResult(requestCode, resultCode, data);
        if(resultCode != Activity.RESULT_OK){
            Toast.makeText(this,"系統異常",Toast.LENGTH_SHORT).show();
            return;
        }
        //相機返回結果,再去調用系統裁剪
        if(requestCode==1){
            startPicZoom(Uri.fromFile(new File(capturePath)));
        }//相冊返回結果,再去調用系統裁剪
        else if(requestCode==2){
            //Cursor相當於一個指針,是一個結果集,一個游標
            Cursor cursor = getContentResolver().query(data.getData(),
                    new String[]{MediaStore.Images.Media.DATA},null,null,null);
            cursor.moveToFirst();
            String capturePath = cursor.getString(cursor.getColumnIndex(MediaStore.Images.Media.DATA));
            cursor.close();
            startPicZoom(Uri.fromFile(new File(capturePath)));
        }else if(requestCode==3){
            Bundle bundle = data.getExtras();
            if(bundle!=null){
                Bitmap bitmap = bundle.getParcelable("data");
                riv.setImageBitmap(bitmap);
            }
            pw.dismiss();

        }
    }

    //消息欄通知
    public void notification(){
        //先定義一個Intent
        Intent intent = new Intent(this,SecondActivity.class);
        //使用PendingIntent 封裝 Intent
        /*PendingIntent第四個參數(常量)的種類及說明:
        FLAG_CANCEL_CURRENT:如果要創建的PendingIntent已經存在了,
        那麼在創建新的PendingIntent之前,原先已經存在的PendingIntent中的intent將不能使用

        FLAG_NO_CREATE:如果要創建的PendingIntent尚未存在,則不創建新的PendingIntent,直接返回null

        FLAG_ONE_SHOT:相同的PendingIntent只能使用一次,且遇到相同的PendingIntent時不會
        去更新PendingIntent中封裝的Intent的extra部分的內容

        FLAG_UPDATE_CURRENT:如果要創建的PendingIntent已經存在了,那麼在保留原
        先PendingIntent的同時,將原先PendingIntent封裝的Intent中的extra部分替換為現
        在新創建的PendingIntent的intent中extra的內容
        */
        PendingIntent pi = PendingIntent.getActivities(this,0,new Intent[]{intent},
                PendingIntent.FLAG_UPDATE_CURRENT);
        //獲取通知服務
        NotificationManager nm = (NotificationManager)
                getSystemService(Activity.NOTIFICATION_SERVICE);
        //設置各個屬性
        Notification notification = new NotificationCompat.Builder(this)
                .setSmallIcon(R.mipmap.ic_launcher)
                .setTicker("A")
                .setContentInfo("我是通知欄信息")
                .setContentTitle("奧運會")
                .setContentText("PendingIntent使用演示")
                .setAutoCancel(true)
                .setDefaults(Notification.DEFAULT_ALL)
                .setContentIntent(pi)
                .build();
        //通過通知服務顯示通知欄,這個0是Id,如果再設置一個通知,而ID不變的話,那麼會覆蓋掉該通知
        nm.notify(0,notification);
    }

    //設置PopWindow背景透明度的方法
    public void backgroundAlpha(float bgAlpha){
        WindowManager.LayoutParams lp = getWindow().getAttributes();
        lp.alpha= bgAlpha;
        getWindow().setAttributes(lp);
    }

    //構建一個popwindow
    //方法PopWindow
    public PopupWindow getPopWindow(View view){
        PopupWindow popupWindow = new PopupWindow(view, LinearLayout.LayoutParams.MATCH_PARENT,
                LinearLayout.LayoutParams.WRAP_CONTENT,false);
        popupWindow.setAnimationStyle(R.style.pop1);
        //設置背景透明度
        backgroundAlpha(0.6f);
        //-------------
        //獲取光標
        popupWindow.setOutsideTouchable(true);
        popupWindow.setBackgroundDrawable(new ColorDrawable());
        //顯示的位置,第一個參數為參照物,隨便找一個就行
        popupWindow.showAtLocation(riv, Gravity.BOTTOM,0,0);
        popupWindow.setOnDismissListener(new PopupWindow.OnDismissListener() {
            @Override
            public void onDismiss() {
                backgroundAlpha(1f);
            }
        });
        return popupWindow;
    }

    /*
    調用系統的裁剪功能
     */
    public void startPicZoom(Uri uri){
        Intent intent = new Intent("com.android.camera.action.CROP");
        intent.setDataAndType(uri,"image/*");
        //允許裁剪
        intent.putExtra("crop","true");
        //設置裁剪比例
        intent.putExtra("aspectX",1);
        intent.putExtra("aspectY",1);
        //設置圖片的高度和寬度
        intent.putExtra("outputX",150);
        intent.putExtra("outputY",150);
        //是否返回數據
        intent.putExtra("return-data",true);
        startActivityForResult(intent,3);
    }
}
Layout:
RoundImageView讓圖片變圓的工具類(直接復制即可):
public class RoundImageView extends ImageView { public RoundImageView(Context context) { super(context); // TODO Auto-generated constructor stub } public RoundImageView(Context context, AttributeSet attrs) { super(context, attrs); // TODO Auto-generated constructor stub } public RoundImageView(Context context, AttributeSet attrs, int defStyle) { super(context, attrs, defStyle); // TODO Auto-generated constructor stub } @Override protected void onDraw(Canvas canvas) { Drawable drawable = getDrawable(); if (drawable == null) { return; } if (getWidth() == 0 || getHeight() == 0) { return; } Bitmap b = null; if(drawable instanceof BitmapDrawable){ b = ((BitmapDrawable) drawable).getBitmap(); }else if(drawable instanceof Drawable){ b = Bitmap.createBitmap( getWidth(), getHeight(), drawable.getOpacity() != PixelFormat.OPAQUE ? Bitmap.Config.ARGB_8888 : Bitmap.Config.RGB_565); Canvas canvas1 = new Canvas(b); // canvas.setBitmap(bitmap); drawable.setBounds(0, 0, getWidth(), getHeight()); drawable.draw(canvas1); } if (null == b) { return; } Bitmap bitmap = b.copy(Bitmap.Config.ARGB_8888, true); int w = getWidth(), h = getHeight(); Bitmap roundBitmap = getCroppedBitmap(bitmap, w); canvas.drawBitmap(roundBitmap, 0, 0, null); } public static Bitmap getCroppedBitmap(Bitmap bmp, int radius) { Bitmap sbmp; if (bmp.getWidth() != radius || bmp.getHeight() != radius) sbmp = Bitmap.createScaledBitmap(bmp, radius, radius, false); else sbmp = bmp; Bitmap output = Bitmap.createBitmap(sbmp.getWidth(), sbmp.getHeight(), Bitmap.Config.ARGB_8888); Canvas canvas = new Canvas(output); final int color = 0xffa19774; final Paint paint = new Paint(); final Rect rect = new Rect(0, 0, sbmp.getWidth(), sbmp.getHeight()); paint.setAntiAlias(true); paint.setFilterBitmap(true); paint.setDither(true); canvas.drawARGB(0, 0, 0, 0); paint.setColor(Color.parseColor("#BAB399")); canvas.drawCircle(sbmp.getWidth() / 2 + 0.7f, sbmp.getHeight() / 2 + 0.7f, sbmp.getWidth() / 2 + 0.1f, paint); paint.setXfermode(new PorterDuffXfermode(PorterDuff.Mode.SRC_IN)); canvas.drawBitmap(sbmp, rect, rect, paint); return output; } }
FileUitlity給相機拍照的照片設置存放文件夾的工具類(可直接復制)
public class FileUitlity { public final static String USER_HAED="head"; private static String ROOT_CACHE; public static String ROOT_DIR="yt_xyt"; private static FileUitlity instance = null; private FileUitlity() { } public static FileUitlity getInstance(Context context) { if (instance == null) { if (Environment.getExternalStorageState().equals( Environment.MEDIA_MOUNTED)) { ROOT_CACHE = (Environment.getExternalStorageDirectory() + "/" + ROOT_DIR + "/"); } else { ROOT_CACHE = (context.getFilesDir().getAbsolutePath() + "/"+ROOT_DIR+"/"); } File dir = new File(ROOT_CACHE); if (!dir.exists()) { dir.mkdirs(); } instance = new FileUitlity(); } return instance; } public File makeDir(String dir) { File fileDir = new File(ROOT_CACHE + dir); if (fileDir.exists()) { return fileDir; } else { fileDir.mkdirs(); return fileDir; } } }
pop_enter1
pop_exit1
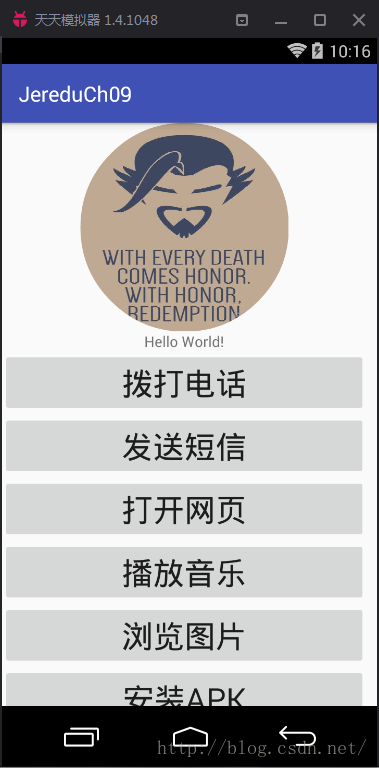
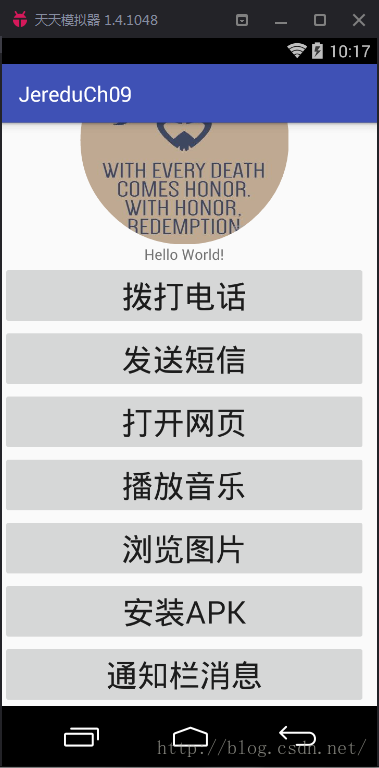
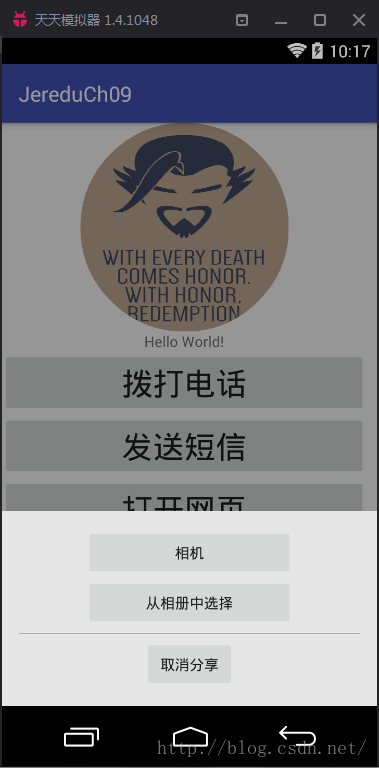
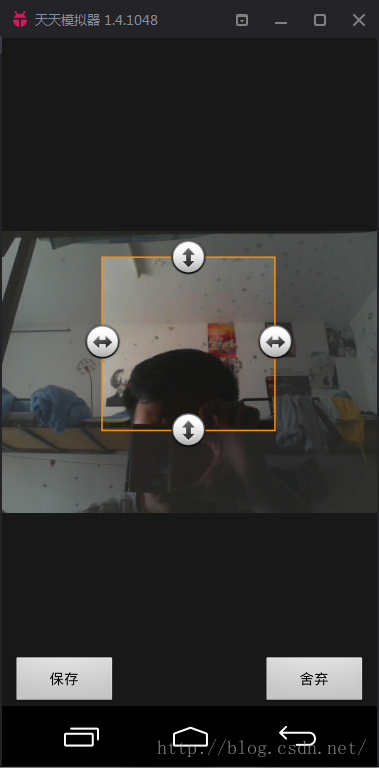
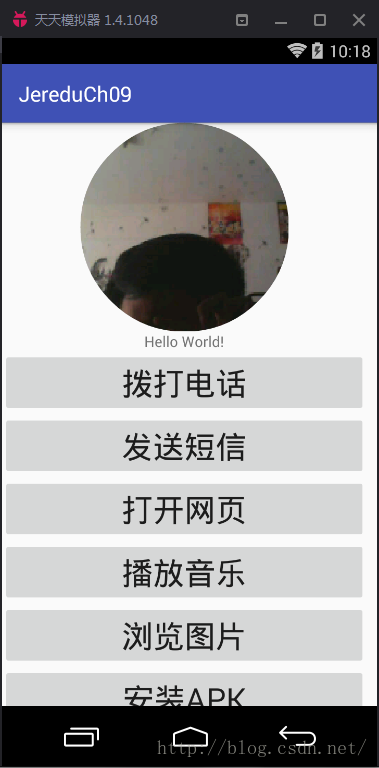
OK,效果圖如下:
 Android動畫之插值器(三)
本文從源碼的角度,來展開對動畫的深入解析,關於動畫基本用法,可查看Android動畫之入門篇(一),Android動畫之入門篇(二)。關於動畫有兩個非常重要
 Android應用開發之所有動畫使用詳解
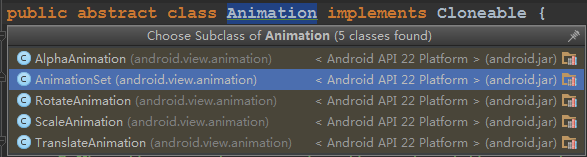
1 背景Android系統提供了很多豐富的API去實現UI的2D與3D動畫,最主要的劃分可以分為如下幾類:View Animation: 視圖動畫在古老的Android版
 Android Studio 2.2之布局編輯器
通過布局編輯器創建UI在你Android Studio的布局編輯器中,你可以快速地通過將控件拖入視覺編輯器來代替手寫XML來快速地創建布局。編輯器可以預覽布局在不同版本和
 Android打包利器Gradle之三板斧
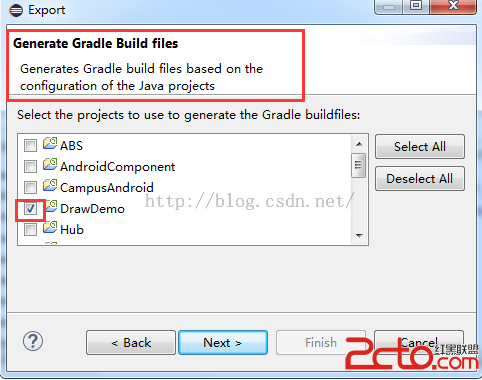
當傳統的手工打包方式遇上同一應用,多渠道/多包名及多種引導頁/icon等等差異時,就變成了苦不堪言的純體力活了。 但有了Gradle這一切不再是問題了,Gradle使得這