編輯:關於Android編程
Zygote進程是Android和Java世界的開創者。在Android系統中,所有的應用進程和SystemServer進程都是由Zygote進程fork而來。其重要性自然不言而喻。雖然Zygote進程相當於Android系統的根進程,但是事實上它也是由Linux系統的init進程啟動的。各個進程的先後順序為:
init進程 –-> Zygote進程 –> SystemServer進程 –>應用進程
其中Zygote進程由init進程啟動,SystemServer進程和應用進程由Zygote進程啟動。本文依據6.0源碼,主要分析Zygote進程的啟動流程。init進程在啟動Zygote進程時會調用ZygoteInit#main()。以此為切入點,一步步分析。
源碼位置:frameworks/base/core/java/com/android/internal/os/ZygoteInit.java
ZygoteInit#main();
public static void main(String argv[]) {
    try {
        // 設置DDMS可用
        RuntimeInit.enableDdms();
        // 初始化啟動參數
        boolean startSystemServer = false;
        String socketName = "zygote";
        String abiList = null;
        for (int i = 1; i < argv.length; i++) {
            if ("start-system-server".equals(argv[i])) {
                startSystemServer = true;
            } else if (argv[i].startsWith(ABI_LIST_ARG)) {
                abiList = argv[i].substring(ABI_LIST_ARG.length());
            } else if (argv[i].startsWith(SOCKET_NAME_ARG)) {
                socketName = argv[i].substring(SOCKET_NAME_ARG.length());
            } else {
                throw new RuntimeException("Unknown command line argument: " + argv[i]);
            }
        }
        // 注冊socket
        registerZygoteSocket(socketName);
        // 預加載各種資源
        preload();
        ...
        if (startSystemServer) {
            startSystemServer(abiList, socketName);
        }
        // 監聽socket,啟動新的應用進程。--後文會講
        runSelectLoop(abiList);
        closeServerSocket();
    } catch (MethodAndArgsCaller caller) {
        // 通過反射調用SystemServer#main()--後文會講
        caller.run();
    } catch (RuntimeException ex) {
        closeServerSocket();
        throw ex;
    }
}
上面是個大概流程,下面會依據源碼一步步解釋。設置DDMS可用之後初始化各種參數,在此之後注冊為Zygote進程注冊Socket,預加載各種資源,但這些都不是重點!同學們,重點在於startSystemServer(abiList, socketName)(手敲黑板狀)!下面簡單貼下registerZygoteSocket(socketName)和preload()源碼,不感興趣的同學可直接略過下面兩段代碼。
ZygoteInit#registerZygoteSocket()
private static void registerZygoteSocket(String socketName) {
    if (sServerSocket == null) {
        int fileDesc;
        final String fullSocketName = ANDROID_SOCKET_PREFIX + socketName;
        ...
        FileDescriptor fd = new FileDescriptor();
        fd.setInt$(fileDesc);
        sServerSocket = new LocalServerSocket(fd);
        ...
    }
}
ZygoteInit#registerZygoteSocket()
static void preload() {
    preloadClasses(); // 加載所需的各種class文件
    preloadResources(); // 加載資源文件
    preloadOpenGL(); // 初始化OpenGL
    preloadSharedLibraries(); // 加載系統Libraries
    preloadTextResources(); //加載文字資源
    WebViewFactory.prepareWebViewInZygote(); // 初始化WebView
}
跟進startSystemServer()
private static boolean startSystemServer(String abiList, String socketName) throws MethodAndArgsCaller, RuntimeException {
    long capabilities = posixCapabilitiesAsBits(
        OsConstants.CAP_BLOCK_SUSPEND,
        OsConstants.CAP_KILL,
        ...
    );
    /* Hardcoded command line to start the system server */
    String args[] = {
        "--setuid=1000",
        "--setgid=1000",
        "--setgroups=1001,1002,1003,1004,1005,1006,1007,1008,1009,1010,1018,1021,1032,3001,3002,3003,3006,3007",
        "--capabilities=" + capabilities + "," + capabilities,
        "--nice-name=system_server",
        "--runtime-args",
        "com.android.server.SystemServer",
    };
    ZygoteConnection.Arguments parsedArgs = null;

    int pid;

    try {
        parsedArgs = new ZygoteConnection.Arguments(args);
        // 打開系統調試屬性
        ZygoteConnection.applyDebuggerSystemProperty(parsedArgs);
        ZygoteConnection.applyInvokeWithSystemProperty(parsedArgs);

        // 請求fork SystemServer進程
        pid = Zygote.forkSystemServer(
                parsedArgs.uid, parsedArgs.gid,
                parsedArgs.gids,
                parsedArgs.debugFlags,
                null,
                parsedArgs.permittedCapabilities,
                parsedArgs.effectiveCapabilities);
    } catch (IllegalArgumentException ex) {
        throw new RuntimeException(ex);
    }

    // pid為0表示子進程,即SystemServer進程,從此SystemServer進程與Zygote進程分道揚镳
    if (pid == 0) {
        if (hasSecondZygote(abiList)) {
            waitForSecondaryZygote(socketName);
        }

        handleSystemServerProcess(parsedArgs);
    }

    return true;
}
前面一大段都在構造參數,直接進到try中的代碼塊。首先根據args數組構造了一個ZygoteConnection.Arguments,然後根據parsedArgs對象的各種參數調用Zygote#forkSyatemServer()方法fork出第一個子進程,也就是SystemServer進程。最後通過執行handleSystemServerProcess反射調用SystemServer#main()。可以看到,這段代碼最主要的作用就是fork出SystemServer進程。這裡還看不出反射調用的具體細節,下文會一一分析。
首先看下構造ZygoteConnection.Arguments對象時,具體都做了哪些工作,尤其關注Zygote#forkSystemServer()中幾個參數的值。
源碼位置:frameworks/base/core/java/com/android/internal/os/ZygoteConnection$Arguments.java
    Arguments(String args[]) throws IllegalArgumentException {
        parseArgs(args);
    }

    private void parseArgs(String args[]) throws IllegalArgumentException {
        int curArg = 0;
        boolean seenRuntimeArgs = false;

        for ( /* curArg */ ; curArg < args.length; curArg++) {
            String arg = args[curArg];

            if (arg.equals("--")) {
                curArg++;
                break;
            } else if (arg.startsWith("--setuid=")) {
                if (uidSpecified) {
                    throw new IllegalArgumentException("Duplicate arg specified");
                }
                uidSpecified = true;
                uid = Integer.parseInt(arg.substring(arg.indexOf('=') + 1));
            } else if (arg.startsWith("--setgid=")) {
                if (gidSpecified) {
                gidSpecified = true;
                gid = Integer.parseInt(arg.substring(arg.indexOf('=') + 1));
            } else if (arg.startsWith("--target-sdk-version=")) {
                targetSdkVersionSpecified = true;
                targetSdkVersion = Integer.parseInt(arg.substring(arg.indexOf('=') + 1));
            }
            ...
              else if (arg.equals("--runtime-args")) {
                seenRuntimeArgs = true;
            } else if (arg.startsWith("--capabilities=")) {
                capabilitiesSpecified = true;
                String capString = arg.substring(arg.indexOf('=')+1);
                String[] capStrings = capString.split(",", 2);
                if (capStrings.length == 1) {
                    effectiveCapabilities = Long.decode(capStrings[0]);
                    permittedCapabilities = effectiveCapabilities;
                } else {
                    permittedCapabilities = Long.decode(capStrings[0]);
                    effectiveCapabilities = Long.decode(capStrings[1]);
                }
            } else if (arg.startsWith("--setgroups=")) {
                String[] params = arg.substring(arg.indexOf('=') + 1).split(",");
                gids = new int[params.length];
                for (int i = params.length - 1; i >= 0 ; i--) {
                    gids[i] = Integer.parseInt(params[i]);
                }
            } else if (arg.startsWith("--nice-name=")) {
                niceName = arg.substring(arg.indexOf('=') + 1);
            } else {
                break;
            }
        }

        // 保存沒有被解析的參數
        remainingArgs = new String[args.length - curArg];
        System.arraycopy(args, curArg, remainingArgs, 0, remainingArgs.length);
    }
對比傳入的args數組,可以發現:parsedArgs.uid=1000、parsedArgs.gid=1000、parsedArgs.gids={"1001","1002",..."3007"}、parsedArgs.gid=1000、parsedArgs.niceName=system_server、parsedArgs.seenRuntimeArgs=true。如果中途結束,保存未解析的參數至remainingArgs數組。
獲得Arguments對象之後,就開始請求創建SystemServer進程。
源碼位置:frameworks/base/core/java/com/android/internal/os/ZygoteInit.java
ZygoteInit#handleSystemServerProcess()
  private static void handleSystemServerProcess(
        ZygoteConnection.Arguments parsedArgs)
        throws ZygoteInit.MethodAndArgsCaller {

    closeServerSocket();

    if (parsedArgs.niceName != null) {
        Process.setArgV0(parsedArgs.niceName);
    }
    ...
    // 默認為null
    if (parsedArgs.invokeWith != null) {
        ...
    } else {
        ...
        RuntimeInit.zygoteInit(parsedArgs.targetSdkVersion, parsedArgs.remainingArgs, cl);
    }

    /* should never reach here */
}
由Zygote創建的子進程默認擁有Zygote進程的Socket對象,而子進程又用不上,所以先調用closeServerSocket()關閉它。上一段參數解析時寫道:parsedArgs.niceName=system_server,在這裡調用Process.setArgV0()設置進程名為:system_server。由於parsedArgs.invokeWith屬性默認為null,最後調用RuntimeInit.zygoteInit(parsedArgs.targetSdkVersion, parsedArgs.remainingArgs, cl)來進一步啟動SystemServer,這裡的參數parsedArgs.remainingArgs就是上文中保存沒有被解析對象的數組。
源碼位置:frameworks/base/core/java/com/android/internal/os/RuntimeInit.java
RuntimeInit#zygoteInit()
public static final void zygoteInit(int targetSdkVersion, String[] argv, ClassLoader classLoader) throws ZygoteInit.MethodAndArgsCaller {
    // 重定向Log輸出
    redirectLogStreams();
    //初始化運行環境
    commonInit();
    //啟動Binder線程池
    nativeZygoteInit();
    //調用程序入口函數
    applicationInit(targetSdkVersion, argv, classLoader);
}
RuntimeInit#applicationInit()
private static void applicationInit(int targetSdkVersion, String[] argv, ClassLoader classLoader)
        throws ZygoteInit.MethodAndArgsCaller {
    // 初始化虛擬機環境
    VMRuntime.getRuntime().setTargetHeapUtilization(0.75f);
    VMRuntime.getRuntime().setTargetSdkVersion(targetSdkVersion);
    final Arguments args;
    try {
        args = new Arguments(argv);
    } catch (IllegalArgumentException ex) {
        return;
    }

    // Remaining arguments are passed to the start class's static main
    invokeStaticMain(args.startClass, args.startArgs, classLoader);
}
RuntimeInit#invokeStaticMain()
private static void invokeStaticMain(String className, String[] argv, ClassLoader classLoader)
        throws ZygoteInit.MethodAndArgsCaller {
    Class cl;

    try {
        cl = Class.forName(className, true, classLoader);
    } catch (ClassNotFoundException ex) {
        throw new RuntimeException("Missing class when invoking static main " +    className, ex);
    }

    Method m;
    try {
        // 獲取main方法
        m = cl.getMethod("main", new Class[] { String[].class });
    } catch (NoSuchMethodException ex) {
        throw new RuntimeException("Missing static main on " + className, ex);
    } catch (SecurityException ex) {
        throw new RuntimeException("Problem getting static main on " + className, ex);
    }
    // 判斷修飾符
    int modifiers = m.getModifiers();
    if (! (Modifier.isStatic(modifiers) && Modifier.isPublic(modifiers))) {
        throw new RuntimeException("Main method is not public and static on " + className);
    }

    throw new ZygoteInit.MethodAndArgsCaller(m, argv);
}
這裡傳入的className就是com.android.server.SystemServer,然後獲取main方法,接著判斷修飾符,必須是static而且必須是public類型。最有意思的莫過於做完這一切之後,拋出了個MethodAndArgsCaller異常。辛苦辛苦各種初始化,各種變著法兒的調用,最後你居然給我拋個異常!!先別急,這個異常在Zygote#main()方法中捕獲。這麼做的作用是清除應用程序進程創建過程的調用棧。
 public static void main(String argv[]) {
    try {
        ...
        startSystemServer(abiList, socketName);
        ...
    } catch (MethodAndArgsCaller caller) {
        caller.run();
    }
}
跟進MethodAndArgsCaller#run(),感覺要出大事情!!
  public void run() {
        try {
            mMethod.invoke(null, new Object[] { mArgs });
        } catch (IllegalAccessException ex) {
            throw new RuntimeException(ex);
        } catch (InvocationTargetException ex) {
            Throwable cause = ex.getCause();
            if (cause instanceof RuntimeException) {
                throw (RuntimeException) cause;
            } else if (cause instanceof Error) {
                throw (Error) cause;
            }
            throw new RuntimeException(ex);
        }
    }
我就說要出大事情!我就說要出大事情!!我就說要出大事情!!!可以看到在這裡通過反射調用了com.android.server.SystemServer#main(String[] args)。至此,Zygote進程for出SystemServer進程,並成功調用SystemServer#main()。
現在SystemServer進程也創建了,main方法也調用了。Zygote進程的使命就此完結了嗎?上文我們說道:所有的應用進程和SystemServer進程都是由Zygote進程fork而來。現在有關SystemServer進程的已經告一段落,那有關應用進程呢?
讓我們再次回到ZygoteInit#main()
public static void main(String argv[]) {
      ...
      startSystemServer(abiList, socketName);
      runSelectLoop(abiList);
      closeServerSocket();
}
main方法中前面所有的代碼好像都和應用進程沒有關系,最後一行又是關閉socket,看來和應用進程相關的設置都在runSelectLoop()中,跟進。
ZygoteInit#runSelectLoop()、ZygoteInit#acceptCommandPeer()
private static void runSelectLoop(String abiList) throws MethodAndArgsCaller {
    ArrayList fds = new ArrayList();
    ArrayList peers = new ArrayList();
    FileDescriptor[] fdArray = new FileDescriptor[4];
    fds.add(sServerSocket.getFileDescriptor());
    peers.add(null);
    int loopCount = GC_LOOP_COUNT;
    while (true) {
        int index;
        if (loopCount <= 0) {
            gc();
            loopCount = GC_LOOP_COUNT;
        } else {
            loopCount--;
        }

        try {
            fdArray = fds.toArray(fdArray);
            index = selectReadable(fdArray);
        } catch (IOException ex) {
            throw new RuntimeException("Error in select()", ex);
        }

        if (index < 0) {
            throw new RuntimeException("Error in select()");
        } else if (index == 0) {
            ZygoteConnection newPeer = acceptCommandPeer(abiList);
            peers.add(newPeer);
            fds.add(newPeer.getFileDescriptor());
        } else {
            boolean done;
            done = peers.get(index).runOnce();

            if (done) {
                peers.remove(index);
                fds.remove(index);
            }
        }
    }
}

private static ZygoteConnection acceptCommandPeer(String abiList) {
    try {
        return new ZygoteConnection(sServerSocket.accept(), abiList);
    } catch (IOException ex) {
        throw new RuntimeException("IOException during accept()", ex);
    }
}
這裡有個死循環,一直監聽socket端口,然後調用ZygoteConnection#runOnce(),從函數名runOnce上感覺真相就要呼之欲出了,跟進。
源碼位置:frameworks/base/core/java/com/android/internal/os/ZygoteConnection.java
ZygoteConnection#runOnce()
boolean runOnce() throws ZygoteInit.MethodAndArgsCaller {
    String args[];
    args = readArgumentList();
    parsedArgs = new Arguments(args);
     try {
        ...
        pid = Zygote.forkAndSpecialize(parsedArgs.uid, parsedArgs.gid, parsedArgs.gids,
                parsedArgs.debugFlags, rlimits, parsedArgs.mountExternal, parsedArgs.seInfo,
                parsedArgs.niceName, fdsToClose, parsedArgs.instructionSet,
                parsedArgs.appDataDir);
    } catch (ErrnoException ex) {
        logAndPrintError(newStderr, "Exception creating pipe", ex);
    } catch (IllegalArgumentException ex) {
        logAndPrintError(newStderr, "Invalid zygote arguments", ex);
    } catch (ZygoteSecurityException ex) {
        logAndPrintError(newStderr,
                "Zygote security policy prevents request: ", ex);
    }

    try {
        if (pid == 0) {
            // in child
            IoUtils.closeQuietly(serverPipeFd);
            serverPipeFd = null;
            handleChildProc(parsedArgs, descriptors, childPipeFd, newStderr);

            // should never get here, the child is expected to either
            // throw ZygoteInit.MethodAndArgsCaller or exec().
            return true;
        } else {
            // in parent...pid of < 0 means failure
            IoUtils.closeQuietly(childPipeFd);
            childPipeFd = null;
            return handleParentProc(pid, descriptors, serverPipeFd, parsedArgs);
        }
    } finally {
        IoUtils.closeQuietly(childPipeFd);
        IoUtils.closeQuietly(serverPipeFd);
    }
}
和啟動SystemServer進程類似。這裡調用Zygote#forkAndSpecialize()創建應用進程,而參數parsedArgs是通過socket一行行讀出來的。詳見ZygoteConnection#readArgumentList()
private String[] readArgumentList() throws IOException {
    int argc;
    try {
        String s = mSocketReader.readLine();
        if (s == null) {
            return null;
        }
        argc = Integer.parseInt(s);
    } catch (NumberFormatException ex) {
        throw new IOException("invalid wire format");
    }
    if (argc > MAX_ZYGOTE_ARGC) {
        throw new IOException("max arg count exceeded");
    }
    String[] result = new String[argc];
    for (int i = 0; i < argc; i++) {
        result[i] = mSocketReader.readLine();
        if (result[i] == null) {
            // We got an unexpected EOF.
            throw new IOException("truncated request");
        }
    }
    return result;
}
因為還沒有看發送Socket消息的源碼,這裡斗膽猜測:應該是uid、gid、niceName等參數。
通過Socket讀取完各種參數之後,調用ZygoteConnection#handleChildProc(),創建完應用程序進程之後就該調用應用程序的入口方法了。跟進。
private void handleChildProc(Arguments parsedArgs, FileDescriptor[] descriptors, FileDescriptor pipeFd, PrintStream newStderr)
        throws ZygoteInit.MethodAndArgsCaller {
    // 關閉從Zygote進程復制過來的Socket連接
    closeSocket();
    ZygoteInit.closeServerSocket();
    if (parsedArgs.niceName != null) {
        Process.setArgV0(parsedArgs.niceName);
    }
    ...
    RuntimeInit.zygoteInit(parsedArgs.targetSdkVersion, parsedArgs.remainingArgs, null /* classLoader */);
}
最後調用RuntimeInit#zygoteInit(),後面的就和SystemServer啟動流程類似。感興趣的同學自行查看。
初始化DDMS
注冊Zygote進程的Socket
加載class、resource、OpenGL、WebView等各種資源
fork出SystemServer進程
啟動SystemServer進程
調用runSelectLoop()一直監聽Socket信息
收到創建應用程序Socket消息,調用ZygoteConnection#runOnce()。在runOnce()中調用Zygote#forkAndSpecialize()創建應用進程
啟動應用進程
 新浪微博如何解綁手機 新浪微博會員怎麼解綁手機 新浪微博會員手
當我們為新浪微博的登陸設置了賬號保護、手機綁定之後,便將新浪微博賬號的安全與我們的手機號聯系起來了。由於換號或者其它原因,我們需要解除綁定的時候該怎麼辦呢?
 布局與控件(四)-Button的響應與背景
第4節 Button按鈕是需要與用戶進行互動的控件。Button繼承自TextView,凡是TextView有的特定,它都有。public class Button ex
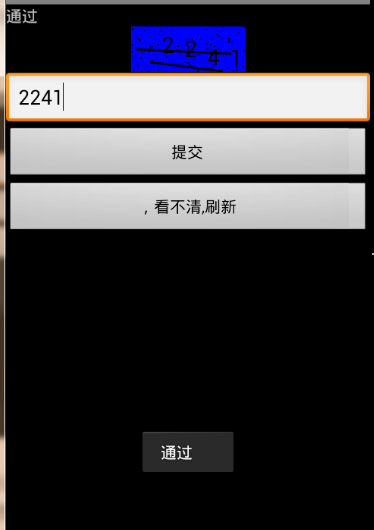 Android通過自定義View實現隨機驗證碼
很多的Android入門程序猿來說對於Android自定義View,可能都是比較恐懼的,但是這又是高手進階的必經之路,所有准備在自定義View上面花一些功夫,多寫一些文章
 Android程序報錯程序包org.apache.http不存在問題的解決方法
Android Studio 2.1中使用 Android SDK 6.0(API 23),加載融雲Demo時,報錯:解決辦法:Android 6.0(api 23)已經