編輯:關於Android編程
差不多半年沒有寫博客了,一是因為工作比較忙,二是覺得沒有什麼內容值得寫,三是因為自己越來越懶了吧,不過最近我對Android中View的繪制機制有了一些新的認識,所以想記錄下來並分享給大家。在之後的幾篇博客中,我會給大家分享如下的內容:
1、View中measure(),layout(),draw()函數執行過程分析,帶領大家詳細分析View的尺寸測量過程,位置計算,並最終繪制到UI上的過程
2、以LinearLayout為例講解ViewGroup尺寸計算,位置計算,以及繪制過程
3、更深層次的理解LayoutParams的意義
4、LayoutInflater創建View的過程分析,詳細分析inflate(int resource, ViewGroup root, boolean attachToRoot)方法中各個參數的意義
掌握上面幾個知識點對於自定義View有非常重要的意義的,而且據我所知自定義View在面試過程中是必問知識點。
以上內容都是Android中View系統比較重要的一些內容,View系統的功能主要包括用戶輸入消息到消息處理的整個過程,以及UI的繪制,用戶輸入消息以及消息處理的部分我之前也有寫過幾篇文章,如果讀者用興趣可以去了解下:
Android 系統Touch事件傳遞機制 上:http://blog.csdn.net/yuanzeyao/article/details/37961997
Android 系統Touch事件傳遞機制 下:http://blog.csdn.net/yuanzeyao/article/details/38025165
Android 系統Key事件傳遞機制 上:http://blog.csdn.net/yuanzeyao/article/details/13630909
Android 系統Key事件傳遞機制 下:http://blog.csdn.net/yuanzeyao/article/details/13631139
由於涉及的內容比較多,所以我打算使用 多篇文章來講解上述內容,敬請期待。
那麼現在就開始學習View的measure過程吧,measure過程主要作用就是計算一個View的大小,這個其實很好理解,因為任何一個View在繪制到UI上時,必須事先知道這個View的大小,不然是無法繪制的。
平時我們在指定一個view的大小時,通常就是在xml文件中設置layout_width和layout_hegiht屬性,這裡我要提出一個問題:為什麼View的寬度和高度對應的屬性名前面有layout而不是直接叫width和height?先記住這個問題吧,等你看完本文的內容相信你就明白了。其實measuer過程就將layout_width和layout_height這些屬性變為具體的數字大小。
當我們想要將一個xml文件顯示到UI上時,通常就是將該xml文件的id傳入到Activity的setContentView中去,其實最終就會調用到ViewRoot的performTraversals方法,此方法承擔了Android的View的繪制工作,這個方法代碼非常多,但是邏輯非常簡單,主要包含了三個階段:
第一個階段就是我們今天要學習的measure,第二個階段就是layout,第三個階段就是draw,measure階段就是得到每個View的大小,layout階段就是計算每個View在UI上的坐標,draw階段就是根據前面兩個階段的數據進行UI繪制。
首先我們看看ViewRoot的performTraversals方法的部分代碼(使用的2.3代碼,選擇2.3代碼的原因是因為2.3的版本邏輯比4.x版本簡單,而且主要邏輯還是一樣的)
    private void performTraversals() {
        // Section one mView就是DecorView,
        final View host = mView;


		//Section two
        int desiredWindowWidth;
        int desiredWindowHeight;
        int childWidthMeasureSpec;
        int childHeightMeasureSpec;

        ...


        Rect frame = mWinFrame;
        if (mFirst) {
            fullRedrawNeeded = true;
            mLayoutRequested = true;

            DisplayMetrics packageMetrics =
                mView.getContext().getResources().getDisplayMetrics();
			//Section three
            desiredWindowWidth = packageMetrics.widthPixels;
            desiredWindowHeight = packageMetrics.heightPixels;

            // For the very first time, tell the view hierarchy that it
            // is attached to the window.  Note that at this point the surface
            // object is not initialized to its backing store, but soon it
            // will be (assuming the window is visible).
           ...

        } else {
			//Section four
            desiredWindowWidth = frame.width();
            desiredWindowHeight = frame.height();
            if (desiredWindowWidth != mWidth || desiredWindowHeight != mHeight) {
                if (DEBUG_ORIENTATION) Log.v(ViewRoot,
                        View  + host +  resized to:  + frame);
                fullRedrawNeeded = true;
                mLayoutRequested = true;
                windowResizesToFitContent = true;
            }
        }


        boolean insetsChanged = false;

        if (mLayoutRequested) {
            // Execute enqueued actions on every layout in case a view that was detached
            // enqueued an action after being detached
            getRunQueue().executeActions(attachInfo.mHandler);


			...
			//Section five
            childWidthMeasureSpec = getRootMeasureSpec(desiredWindowWidth, lp.width);
            childHeightMeasureSpec = getRootMeasureSpec(desiredWindowHeight, lp.height);

            // Ask host how big it wants to be
            if (DEBUG_ORIENTATION || DEBUG_LAYOUT) Log.v(ViewRoot,
                    Measuring  + host +  in display  + desiredWindowWidth
                    + x + desiredWindowHeight + ...);
			//Section six
            host.measure(childWidthMeasureSpec, childHeightMeasureSpec);

            if (DBG) {
                System.out.println(======================================);
                System.out.println(performTraversals -- after measure);
                host.debug();
            }
        }

        ....
    }
上面的代碼就是第一階段的主要代碼,請看代碼中的Section one部分,這裡定義了一個View 類型的變量host,它被賦值mView,這裡我想說的僅僅是mView就是一個界面的DecorView,如果你還不熟悉DecorView可以看看我的另外一篇文章:
《窗口的創建過程》,Section two分別定義了4個int 類型的變量,前面兩個變量在Section three部分或者Section four部分賦值,通常第一次進來是在Section three裡面進行賦值,也就是說desiredWindowWidth和disireWindowHeight分別是手機屏幕的寬和高(當然並不總是這樣的,這裡我們只用考慮簡單的一種情況),在Section five部分分別對childWidthMeasureSpec和childHeightMeasureSpec進行賦值,這裡調用了一個getRootMeasureSpec的方法,我們後面再分析它。在Setion six部分調用host.measure來計算View的大小,到這裡performTraversals中mersure的調用過程就算結束了,但是getRootMeasureSpec和host的measure方法我們還不清楚它們到底做了什麼,下面就來分析這兩個方法吧:
先看看getRootMeasureSpec方法吧。
    private int getRootMeasureSpec(int windowSize, int rootDimension) {
        int measureSpec;
        switch (rootDimension) {

        case ViewGroup.LayoutParams.MATCH_PARENT:
            // Window can't resize. Force root view to be windowSize.
            measureSpec = MeasureSpec.makeMeasureSpec(windowSize, MeasureSpec.EXACTLY);
            break;
        case ViewGroup.LayoutParams.WRAP_CONTENT:
            // Window can resize. Set max size for root view.
            measureSpec = MeasureSpec.makeMeasureSpec(windowSize, MeasureSpec.AT_MOST);
            break;
        default:
            // Window wants to be an exact size. Force root view to be that size.
            measureSpec = MeasureSpec.makeMeasureSpec(rootDimension, MeasureSpec.EXACTLY);
            break;
        }
        return measureSpec;
    }
看了實現之後,你是不是覺得這個方法實現超簡單,以getRootMeasureSpec(desiredWindowWidth,lp.width)為例,我們知道第一個參數就是屏幕的寬度,第二個參數是一個View的LayoutParams中的width屬性,其實這個參數是在Activity的
 void makeVisible() {
        if (!mWindowAdded) {
            ViewManager wm = getWindowManager();
            wm.addView(mDecor, getWindow().getAttributes());
            mWindowAdded = true;
        }
        mDecor.setVisibility(View.VISIBLE);
    }
  // The current window attributes.
    private final WindowManager.LayoutParams mWindowAttributes =
        new WindowManager.LayoutParams();
        public LayoutParams() {
            super(LayoutParams.MATCH_PARENT, LayoutParams.MATCH_PARENT);
            type = TYPE_APPLICATION;
            format = PixelFormat.OPAQUE;
        }
這裡出現了一個MeasureSpec的陌生類,先看看MeasureSpec是何方聖神。MeasureSpec是定義在View中的一個內部類,這個類裡面有幾個比較重要的常量:
       private static final int MODE_SHIFT = 30;
        private static final int MODE_MASK  = 0x3 << MODE_SHIFT;

        /**
         * Measure specification mode: The parent has not imposed any constraint
         * on the child. It can be whatever size it wants.
         */
        public static final int UNSPECIFIED = 0 << MODE_SHIFT;

        /**
         * Measure specification mode: The parent has determined an exact size
         * for the child. The child is going to be given those bounds regardless
         * of how big it wants to be.
         */
        public static final int EXACTLY     = 1 << MODE_SHIFT;

        /**
         * Measure specification mode: The child can be as large as it wants up
         * to the specified size.
         */
        public static final int AT_MOST     = 2 << MODE_SHIFT;
我們知道java中的int類型占用32位,隨意這幾個變量在內存中的表現形式如下:
MODE_MASK: 11000000 00000000 00000000 00000000
UNSPECIFIED: 000000000 00000000 00000000 00000000
EXACTLY: 01000000 00000000 00000000 00000000
AT_MOST: 10000000 00000000 00000000 00000000
也就是說每個高2位表示的model,第30位才真正表示尺寸的大小
有了上面的基礎之後,相信理解下面三個方法就不難了
/**
         * Creates a measure specification based on the supplied size and mode.
         *
         * The mode must always be one of the following:
         *
看明白了這裡,我們就回到getRootMeasureSpec吧,我們知道lp.width屬性通常有三種:match_parent(fill_parent),wrap_content,具體一個大小(如100dip),而這裡通過我們上面的分析,知道寬和高均是match_parent。通過代碼我們知道這三種情況對應的mode分別是:
EXACTLY,AT_MOST,EXACTLY,也就是說math_parent和具體的大小(100dip)對應的都是EXACTLY。最後根據得到的mode和屏幕的寬度調用makeMeasureSpec方法得到一個int類型的值賦值給childWidthMeasureSpec,同理得到了childHeightMeasureSpec,並將這兩個值傳入measure中。下面我們就看看measure做了什麼
由於這裡調用的是host的measure,而host其實是一個FrameLayout,所以我不打算繼續使用這個例子將View的測量過程了,但是ViewGroup是沒有改寫measure的,所以其實調用的還是View的measure方法,measure方法的源碼如下:
    public final void measure(int widthMeasureSpec, int heightMeasureSpec) {
        if ((mPrivateFlags & FORCE_LAYOUT) == FORCE_LAYOUT ||
                widthMeasureSpec != mOldWidthMeasureSpec ||
                heightMeasureSpec != mOldHeightMeasureSpec) {

            // first clears the measured dimension flag
            mPrivateFlags &= ~MEASURED_DIMENSION_SET;

            if (ViewDebug.TRACE_HIERARCHY) {
                ViewDebug.trace(this, ViewDebug.HierarchyTraceType.ON_MEASURE);
            }

            // measure ourselves, this should set the measured dimension flag back
            onMeasure(widthMeasureSpec, heightMeasureSpec);

            // flag not set, setMeasuredDimension() was not invoked, we raise
            // an exception to warn the developer
            if ((mPrivateFlags & MEASURED_DIMENSION_SET) != MEASURED_DIMENSION_SET) {
                throw new IllegalStateException(onMeasure() did not set the
                        +  measured dimension by calling
                        +  setMeasuredDimension());
            }

            mPrivateFlags |= LAYOUT_REQUIRED;
        }

        mOldWidthMeasureSpec = widthMeasureSpec;
        mOldHeightMeasureSpec = heightMeasureSpec;
    }
我們看到measure方法其實是final的,所以ViewGroup是無法改寫此方法的。通常一個具體的ViewGroup都是改寫onMeasure方法,這點你可以去看看LinearLayout和FrameLayout,他們在onMeasure方法裡面都間接調用了ViewGroup的measureChildWithMargins方法,今天我們就以measureChildWithMargins這個方法為入口分析View的測量過程。measureChildWithMargins方法的源碼如下:
    protected void measureChildWithMargins(View child,
            int parentWidthMeasureSpec, int widthUsed,
            int parentHeightMeasureSpec, int heightUsed) {
        final MarginLayoutParams lp = (MarginLayoutParams) child.getLayoutParams();

        final int childWidthMeasureSpec = getChildMeasureSpec(parentWidthMeasureSpec,
                mPaddingLeft + mPaddingRight + lp.leftMargin + lp.rightMargin
                        + widthUsed, lp.width);
        final int childHeightMeasureSpec = getChildMeasureSpec(parentHeightMeasureSpec,
                mPaddingTop + mPaddingBottom + lp.topMargin + lp.bottomMargin
                        + heightUsed, lp.height);

        child.measure(childWidthMeasureSpec, childHeightMeasureSpec);
    }
這裡我們簡化下情況,我們假設ViewGroup裡面所有的孩子都是View,沒有ViewGroup。
下面我們分三步來分析measureChildWithMargins方法:
1、獲取孩子的LayoutParams
2、調用getChildMeasureSpec方法得到孩子的measureSpec(包括widthSpec和heightSpec)
我們看看getChildMeasureSpec做了什麼,先看看它的幾個參數,以獲取孩子的widthSpec為例 ,第一個參數是ViewGroup的widthSpec,第二個參數是ViewGroup已經被使用的width,第三個是lp.width,接下來看看源碼:
   */
    public static int getChildMeasureSpec(int spec, int padding, int childDimension) {
        int specMode = MeasureSpec.getMode(spec);
        int specSize = MeasureSpec.getSize(spec);

        int size = Math.max(0, specSize - padding);

        int resultSize = 0;
        int resultMode = 0;

        switch (specMode) {
        // Parent has imposed an exact size on us
        case MeasureSpec.EXACTLY:
            if (childDimension >= 0) {
                resultSize = childDimension;
                resultMode = MeasureSpec.EXACTLY;
            } else if (childDimension == LayoutParams.MATCH_PARENT) {
                // Child wants to be our size. So be it.
                resultSize = size;
                resultMode = MeasureSpec.EXACTLY;
            } else if (childDimension == LayoutParams.WRAP_CONTENT) {
                // Child wants to determine its own size. It can't be
                // bigger than us.
                resultSize = size;
                resultMode = MeasureSpec.AT_MOST;
            }
            break;

        // Parent has imposed a maximum size on us
        case MeasureSpec.AT_MOST:
            if (childDimension >= 0) {
                // Child wants a specific size... so be it
                resultSize = childDimension;
                resultMode = MeasureSpec.EXACTLY;
            } else if (childDimension == LayoutParams.MATCH_PARENT) {
                // Child wants to be our size, but our size is not fixed.
                // Constrain child to not be bigger than us.
                resultSize = size;
                resultMode = MeasureSpec.AT_MOST;
            } else if (childDimension == LayoutParams.WRAP_CONTENT) {
                // Child wants to determine its own size. It can't be
                // bigger than us.
                resultSize = size;
                resultMode = MeasureSpec.AT_MOST;
            }
            break;

        // Parent asked to see how big we want to be
        case MeasureSpec.UNSPECIFIED:
            if (childDimension >= 0) {
                // Child wants a specific size... let him have it
                resultSize = childDimension;
                resultMode = MeasureSpec.EXACTLY;
            } else if (childDimension == LayoutParams.MATCH_PARENT) {
                // Child wants to be our size... find out how big it should
                // be
                resultSize = 0;
                resultMode = MeasureSpec.UNSPECIFIED;
            } else if (childDimension == LayoutParams.WRAP_CONTENT) {
                // Child wants to determine its own size.... find out how
                // big it should be
                resultSize = 0;
                resultMode = MeasureSpec.UNSPECIFIED;
            }
            break;
        }
        return MeasureSpec.makeMeasureSpec(resultSize, resultMode);
    }
回到measureChildWithMargins 看第三步:調用了child.measure。並且參數就是第二步中得到的,另外注意這個child就是一個普通的View(因為我們已經假設ViewGroup裡面沒有ViewGroup,只有View)
由於是View調用measure,所以measure中調用onMeasure也是View中的,我們看看View的onMeasuere方法吧
    protected void onMeasure(int widthMeasureSpec, int heightMeasureSpec) {
        setMeasuredDimension(getDefaultSize(getSuggestedMinimumWidth(), widthMeasureSpec),
                getDefaultSize(getSuggestedMinimumHeight(), heightMeasureSpec));
    }
這裡出現了一個重要的方法getDefaultSize,其代碼如下:
    public static int getDefaultSize(int size, int measureSpec) {
        int result = size;
        int specMode = MeasureSpec.getMode(measureSpec);
        int specSize =  MeasureSpec.getSize(measureSpec);

        switch (specMode) {
        case MeasureSpec.UNSPECIFIED:
            result = size;
            break;
        case MeasureSpec.AT_MOST:
        case MeasureSpec.EXACTLY:
            result = specSize;
            break;
        }
        return result;
    }
代碼如下:
  protected final void setMeasuredDimension(int measuredWidth, int measuredHeight) {
        mMeasuredWidth = measuredWidth;
        mMeasuredHeight = measuredHeight;

        mPrivateFlags |= MEASURED_DIMENSION_SET;
    }
 Android自定義button點擊效果的兩種方式
我們在界面上經常會用到button按鈕,但通常button點擊後看不到點擊的效果,如果用戶連續點擊了兩次,就會報NAR錯誤,這樣交互性就比較差了。如果我們自定義了butt
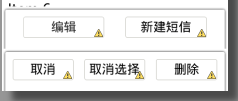 Android 智能短信第一天(下午)
ConversationFragment的布局:首先我們找到我們要寫的Fragment布局文件。 然後添加一個Listview用來顯示短
 Android Design新控件之TabLaout(二),仿微信實現App底部Tab布局
TabLayout的兩種常見設計布局:頂部標簽頁(如今日頭條,知乎) 底部菜單欄(如微信主界面)接著接著舉例使用TabLayout+ViewPager來簡單實現一個類似於
 記一次失敗的面試經歷
以下開始介紹這次的面試經過:慣例:首先是HR人員上場,填寫標准制式的表格,填寫完成後,一般都是自我介紹下,這裡不再累述,干過幾個公司,為什麼離職,對本公司的了解,然後就是