編輯:關於Android編程
今天了解了一下android客戶端與服務端是怎樣交互的,發現其實跟web有點類似吧,然後網上找了大神的登陸示例,是基於IntentService的
1.後台使用簡單的servlet,支持GET或POST。這個servlet最終返回給前台一個字符串flag,值是true或false,表示登錄是否成功。
servlet使用之前需要配置,主義servlet的servlet-name要和servlet-mapping的servlet-name一致,否則找不到路徑
我是在myEclipse上創建的一個web service 項目,然後部署到tomcat服務器上以便android客戶端訪問
		helloWorld
		com.zhongzhong.wap.action.HelloServlet


		helloWorld
		/queryOrder
import java.io.IOException;
import java.io.PrintWriter;

import javax.servlet.ServletException;
import javax.servlet.http.HttpServlet;
import javax.servlet.http.HttpServletRequest;
import javax.servlet.http.HttpServletResponse;
import javax.servlet.http.HttpSession;

import com.zhongzhong.wap.bean.UserBean;

public class HelloServlet extends HttpServlet {

	@Override
	protected void doGet(HttpServletRequest req, HttpServletResponse resp)
			throws ServletException, IOException {
		doPost(req, resp);
	}

	@Override
	protected void doPost(HttpServletRequest req, HttpServletResponse resp)
			throws ServletException, IOException {

		 resp.setContentType(text/html);
	        PrintWriter out = resp.getWriter();
	        Boolean flag = false;
	        String userName = req.getParameter(un);
	        String password = req.getParameter(pw);
	        if(userName.equals(htp)&&password.equals(123))
	        {
	        	flag = true;
	        }

	        else flag = false;
	        System.out.println(userName:+userName+ password:+password);
	        out.print(flag);
	        out.flush();
	        out.close();
	}

}
3.HTTP的訪問公共類,用於處理GET和POST請求
package com.example.logindemo;

import java.util.ArrayList;
import java.util.List;
import java.util.Map;

import org.apache.http.HttpResponse;
import org.apache.http.NameValuePair;
import org.apache.http.client.HttpClient;
import org.apache.http.client.entity.UrlEncodedFormEntity;
import org.apache.http.client.methods.HttpGet;
import org.apache.http.client.methods.HttpPost;
import org.apache.http.impl.client.DefaultHttpClient;
import org.apache.http.message.BasicNameValuePair;
import org.apache.http.util.EntityUtils;

import android.content.Entity;
import android.util.Log;

public class HttpUtil {
	// 創建HttpClient對象
	public static HttpClient httpClient = new DefaultHttpClient();
	public static final String BASE_URL = http://192.168.3.14:8090/HelloWord/;

	/**
	 *
	 * @param url
	 *            發送請求的URL
	 * @return 服務器響應字符串
	 * @throws Exception
	 */
	public static String getRequest(String url) throws Exception {
		// 創建HttpGet對象。
		HttpGet get = new HttpGet(url);
		// 發送GET請求
		HttpResponse httpResponse = httpClient.execute(get);
		// 如果服務器成功地返回響應
		if (httpResponse.getStatusLine().getStatusCode() == 200) {
			// 獲取服務器響應字符串
			String result = EntityUtils.toString(httpResponse.getEntity());
			return result;
		} else {
			Log.d(服務器響應代碼, (new Integer(httpResponse.getStatusLine()
					.getStatusCode())).toString());
			return null;
		}
	}

	/**
	 *
	 * @param url
	 *            發送請求的URL
	 * @param params
	 *            請求參數
	 * @return 服務器響應字符串
	 * @throws Exception
	 */
	public static String postRequest(String url, Map rawParams)
			throws Exception {
		// 創建HttpPost對象。
		HttpPost post = new HttpPost(url);
		// 如果傳遞參數個數比較多的話可以對傳遞的參數進行封裝
		List params = new ArrayList();
		for (String key : rawParams.keySet()) {
			// 封裝請求參數
			params.add(new BasicNameValuePair(key, rawParams.get(key)));
		}
		// 設置請求參數
		post.setEntity(new UrlEncodedFormEntity(params, UTF-8));
		// 發送POST請求
		HttpResponse httpResponse = httpClient.execute(post);
		// 如果服務器成功地返回響應
		if (httpResponse.getStatusLine().getStatusCode() == 200) {
			// 獲取服務器響應字符串
			String result = EntityUtils.toString(httpResponse.getEntity());
			return result;
		}
		return null;
	}
}
package com.example.logindemo;

import java.util.HashMap;

import android.app.IntentService;
import android.content.Intent;
import android.util.Log;

public class ConnectService extends IntentService {
	private static final String ACTION_RECV_MSG = com.example.logindemo.action.RECEIVE_MESSAGE;

	public ConnectService() {
		super(TestIntentService);
		// TODO Auto-generated constructor stub
	}

	@Override
	protected void onHandleIntent(Intent intent) {
		// TODO Auto-generated method stub
		/**
         * 經測試,IntentService裡面是可以進行耗時的操作的
         * IntentService使用隊列的方式將請求的Intent加入隊列,
         * 然後開啟一個worker thread(線程)來處理隊列中的Intent
         * 對於異步的startService請求,IntentService會處理完成一個之後再處理第二個
         */
        Boolean flag = false;
        //通過intent獲取主線程傳來的用戶名和密碼字符串
        String username = intent.getStringExtra(username);
        String password = intent.getStringExtra(password);
        flag = doLogin(username, password);
        Log.d(登錄結果, flag.toString());

        Intent broadcastIntent = new Intent();
        broadcastIntent.setAction(ACTION_RECV_MSG);
        broadcastIntent.addCategory(Intent.CATEGORY_DEFAULT);
        broadcastIntent.putExtra(result, flag.toString());
        sendBroadcast(broadcastIntent);

	}

	 // 定義發送請求的方法
    private Boolean doLogin(String username, String password)
    {
        String strFlag = ;
        // 使用Map封裝請求參數
        HashMap map = new HashMap();
        map.put(un, username);
        map.put(pw, password);
        // 定義發送請求的URL
      String url = HttpUtil.BASE_URL + queryOrder?un= + username + &pw= + password;  //GET方式
       // String url = HttpUtil.BASE_URL + LoginServlet; //POST方式
        Log.d(url, url);
        Log.d(username, username);
        Log.d(password, password);
        try {
            // 發送請求
            strFlag = HttpUtil.postRequest(url, map);  //POST方式
//          strFlag = HttpUtil.getRequest(url);  //GET方式
            Log.d(服務器返回值, strFlag);
        } catch (Exception e) {
            // TODO Auto-generated catch block
            e.printStackTrace();
        }

        if(strFlag.trim().equals(true)){
            return true;
        }else{
            return false;
        }

    }
}
package com.example.logindemo;

import android.os.Bundle;
import android.app.Activity;
import android.content.BroadcastReceiver;
import android.content.Context;
import android.content.Intent;
import android.content.IntentFilter;
import android.util.Log;
import android.view.Menu;
import android.view.View;
import android.view.View.OnClickListener;
import android.widget.Button;
import android.widget.EditText;
import android.widget.Toast;

public class MainActivity extends Activity {
	 private static final String ACTION_RECV_MSG = com.example.logindemo.action.RECEIVE_MESSAGE;
	private Button loginBtn;
	private EditText et_username;
	private EditText et_password;
	private String userName;
	private String passWord;
	private MessageReceiver receiver ;
	@Override
	protected void onCreate(Bundle savedInstanceState) {
		super.onCreate(savedInstanceState);
		setContentView(R.layout.activity_main);
		initView();
		//動態注冊receiver
        IntentFilter filter = new IntentFilter(ACTION_RECV_MSG);
        filter.addCategory(Intent.CATEGORY_DEFAULT);
        receiver = new MessageReceiver();
        registerReceiver(receiver, filter);
	}

	private void initView() {
		// TODO Auto-generated method stub
		et_username = (EditText)findViewById(R.id.et_user);
		et_password =( EditText)findViewById(R.id.et_psw);
		loginBtn = (Button)findViewById(R.id.btn_login);
		loginBtn.setOnClickListener(new OnClickListener() {

			@Override
			public void onClick(View v) {
				// TODO Auto-generated method stub
				if(matchLoginMsg())
				{
					// 如果校驗成功
                    Intent msgIntent = new Intent(MainActivity.this, ConnectService.class);
                    msgIntent.putExtra(username, et_username.getText().toString().trim());
                    msgIntent.putExtra(password, et_password.getText().toString().trim());
                    startService(msgIntent);
				}

			}
		});
	}

	protected boolean matchLoginMsg() {
		// TODO Auto-generated method stub
		userName = et_username.getText().toString().trim();
		passWord = et_password.getText().toString().trim();
		if(userName.equals())
		{
			Toast.makeText(MainActivity.this, 賬號不能為空,Toast.LENGTH_SHORT).show();
			return false;
		}
		if(passWord.equals())
		{
			Toast.makeText(MainActivity.this, 密碼不能為空,Toast.LENGTH_SHORT).show();
			return false;
		}
		return true;
	}
	//接收廣播類
    public class MessageReceiver extends BroadcastReceiver {
        @Override
        public void onReceive(Context context, Intent intent) {
           String message = intent.getStringExtra(result);
           Log.i(MessageReceiver, message);
        // 如果登錄成功
            if (message.equals(true)){
                // 啟動Main Activity
                Intent nextIntent = new Intent(MainActivity.this, NaviActivity.class);
                startActivity(nextIntent);
                // 結束該Activity
                finish();
                //注銷廣播接收器
                context.unregisterReceiver(this);
            }else{
            	Toast.makeText(MainActivity.this, 用戶名或密碼錯誤,請重新輸入!,Toast.LENGTH_SHORT).show();
            }

        }
    }
	@Override
	public boolean onCreateOptionsMenu(Menu menu) {
		// Inflate the menu; this adds items to the action bar if it is present.
		getMenuInflater().inflate(R.menu.main, menu);
		return true;
	}

}
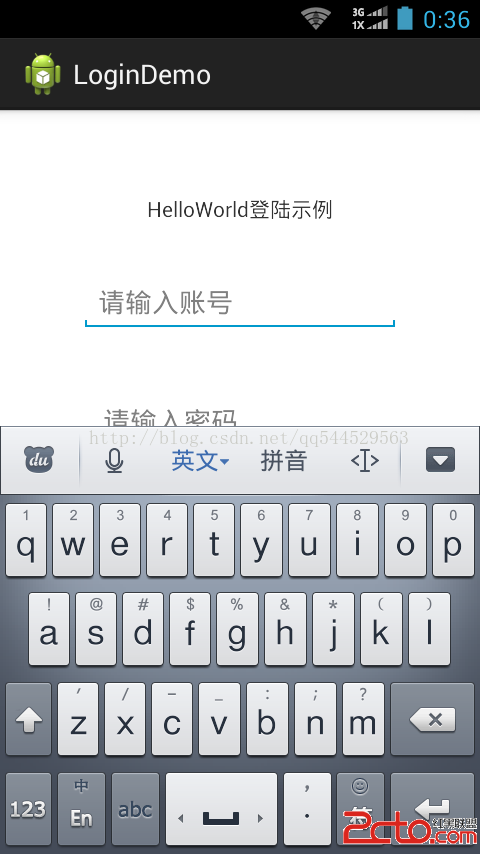
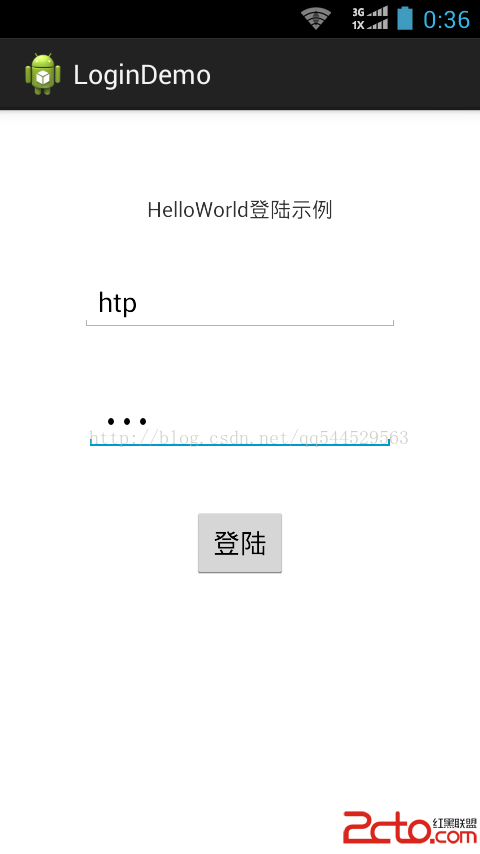
運行截圖:
 Android 筆記-Fragment 與 Activity之間傳遞數據
Fragment 與 Activity之間傳遞數據有兩種方法,一種是使用setArgument,一種是使用接口回調。下面先學習第一種方法。 (1)使用setArgum
 Android實現Service獲取當前位置(GPS+基站)的方法
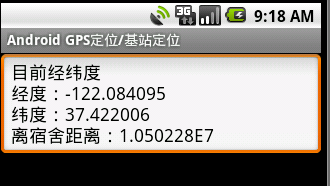
本文實例講述了Android實現Service獲取當前位置(GPS+基站)的方法。分享給大家供大家參考。具體如下:需求詳情:1)、Service中每隔1秒執行一次定位操作
 Android自定義ViewGroup實現標簽流容器FlowLayout
本篇文章講的是Android 自定義ViewGroup之實現標簽流式布局-FlowLayout,開發中我們會經常需要實現類似於熱門標簽等自動換行的流式布局的功能,網上也有
 Android開發BroadcastReceiver詳解
Android 內置了很多系統級別的廣播。廣播的注冊方式有兩種,一種是代碼注冊,另一種是在AndroidManifest.xml 中注冊。當然,前者稱為動態注冊,後者稱為